서론
최근에 Front-End를 공부하던 도중 Flutter를 알게 됐다.
그래서 현재 공부를 하면서 Front-End와 인공지능 모델의 연동을 구현해보려고 한다.
본론
Flutter 란?
모바일 앱과 웹 앱, 데스크톱 앱을 단일 코드 베이스로 개발할 수 이도록 Google이 개발한 프레임워크.
언어
Flutter 사용 언어 : dart
알면 좋은 언어,정보 : html, javascript
내가 알고 있는 언어 : python
Front-End 스케치

구현 진행 루트: Back-End -> MQTT -> Front-End
구현 과정
다행히도 내가 만드려던 어플의 기본적인 틀은 Flutter 사이트의 예제로 구현이 되어있었다.
내가 틀로 사용할 매터리얼 위젯은 BottomNavigationBar class.
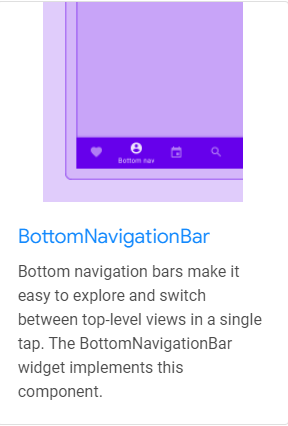
https://api.flutter.dev/flutter/material/BottomNavigationBar-class.html
import 'package:flutter/material.dart';

void main() => runApp(const MyApp());

class MyApp extends StatelessWidget {
  const MyApp({Key? key}) : super(key: key);

  static const String _title = 'Flutter Code Sample';

  @override
  Widget build(BuildContext context) {
    return const MaterialApp(
      title: _title,
      home: MyStatefulWidget(),
    );
  }
}

class MyStatefulWidget extends StatefulWidget {
  const MyStatefulWidget({Key? key}) : super(key: key);

  @override
  State<MyStatefulWidget> createState() => _MyStatefulWidgetState();
}

class _MyStatefulWidgetState extends State<MyStatefulWidget> {
  int _selectedIndex = 0;
  static const TextStyle optionStyle =
      TextStyle(fontSize: 30, fontWeight: FontWeight.bold);
  static const List<Widget> _widgetOptions = <Widget>[
    Text(
      'Index 0: Home',
      style: optionStyle,
    ),
    Text(
      'Index 1: Business',
      style: optionStyle,
    ),
    Text(
      'Index 2: School',
      style: optionStyle,
    ),
    Text(
      'Index 3: Settings',
      style: optionStyle,
    ),
  ];

  void _onItemTapped(int index) {
    setState(() {
      _selectedIndex = index;
    });
  }

  @override
  Widget build(BuildContext context) {
    return Scaffold(
      appBar: AppBar(
        title: const Text('BottomNavigationBar Sample'),
      ),
      body: Center(
        child: _widgetOptions.elementAt(_selectedIndex),
      ),
      bottomNavigationBar: BottomNavigationBar(
        items: const <BottomNavigationBarItem>[
          BottomNavigationBarItem(
            icon: Icon(Icons.home),
            label: 'Home',
            backgroundColor: Colors.red,
          ),
          BottomNavigationBarItem(
            icon: Icon(Icons.business),
            label: 'Business',
            backgroundColor: Colors.green,
          ),
          BottomNavigationBarItem(
            icon: Icon(Icons.school),
            label: 'School',
            backgroundColor: Colors.purple,
          ),
          BottomNavigationBarItem(
            icon: Icon(Icons.settings),
            label: 'Settings',
            backgroundColor: Colors.pink,
          ),
        ],
        currentIndex: _selectedIndex,
        selectedItemColor: Colors.amber[800],
        onTap: _onItemTapped,
      ),
    );
  }
}
쭉 훑어보면 딱히 어려운 부분은 없다.
맨 처음 Android Studio에서 Flutter Project를 만들면 나오는 main.dart 파일에 Bar Index 별 기본 Text widget을 붙여주고, 이후에 Bottom Navigation Bar를 구현한 것.
 (구동되는 모습은 사이트에 나와있다.)
이제 이것을 지지고 볶아서 기획한 대로 한 번 구현해보자.
가장 먼저 하려고 했던 것은 기상 탭 부분.
다른 탭들은 api를 받아와 값들을 각각 분배하고 위치를 지정하는 등 세부 조정을 해야하지만, Weather은 저 형태의 api만 받아와 화면에 뿌려주기만 하면 될거라고 생각했기 때문이다.
여기서 가장 먼저 한 것은 구글링.
처음에는 저런 식의 api가 있을 것이라 생각해 이리저리 찾아보았다.
한국에서도 그렇고, 외국에서도 그렇고, weather api를 쳤을 때 가장 먼저 나오는 사이트는 open weather map.

(open weather map : https://openweathermap.org/)
여기는 위도, 경도 등 위치값을 이용한 해당 지역의 기상 정보나 각 도시, 국가별 기상 정보를 알 수 있는 api를 무료/유료로 사용할 수 있게 해주고 있다.
일단 api가 어떻게 구성되어있는지 확인.

open weather map api 세부 구성 내용
coord
ㄴ 위도
ㄴ 경도
weather
ㄴ 날씨 상태 id
ㄴ 날씨 파라미터의 그룹(비, 눈, 강풍 등)
ㄴ 그룹 내의 날씨 상태
ㄴ icon id
main
ㄴ 현재 온도(temp)
ㄴ 최고 온도(temp_max)
ㄴ 최저 온도(temp_min)
ㄴ 기압(pressure)
ㄴ 습기(humidity)
wind
ㄴ 풍속(wind speed)
ㄴ 풍향(Wind directin
ㄴ 바람 세기(wind gust)
여기서 쓸 것은 이게 전부.
이것을 화면에 구현해보면
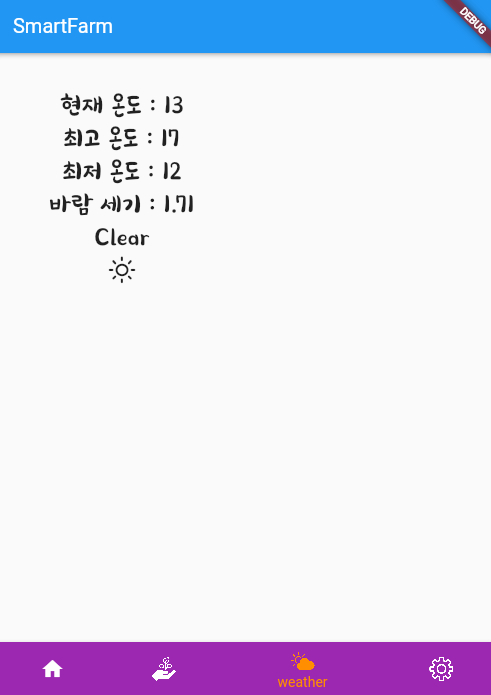
이렇게 나온다.(font나 icon은 따로 적용시켰다.)
현재, 최고, 최저, 바람 세기 등 나오는건 좋은데, 기획했던 대로 뽑아내질 못한다.
혹시 다른 사이트에는 기상 화면대로 나오지 않을까 생각해서 여러 사이트를 찾아 해봤지만, 역시 나오는 건 데이터 뿐.
기획대로 하려면 api로는 안될 것 같아 다른 방법을 강구.
이번에 찾은 방법은 Urllauncher를 이용한 방법.
UrlLauncher
앱 화면에 Browser를 오픈할 수 있도록 도와주는 패키지.
기본 구조:
import 'package:flutter/material.dart';
import 'package:url_launcher/url_launcher.dart';

const String _url = 'https://flutter.dev';

void main() => runApp(
      const MaterialApp(
        home: Material(
          child: Center(
            child: RaisedButton(
              onPressed: _launchURL,
              child: Text('Show Flutter homepage'),
            ),
          ),
        ),
      ),
    );

void _launchURL() async {
  if (!await launch(_url)) throw 'Could not launch $_url';
}
주소를 _url로 지정하고 그 주소를 화면에 실행시켜주는 방법.
적용 결과 :
새창으로 뜬다.
내가 원하는 것은 새창이 아닌 현재 탭 안에 가득 차게 노출되는 건데.
그렇다면 이것도 제외.
혹여나 다른 방법이 있지 않을까 생각해 좀 더 찾아보니 하나가 더 있었다.
바로 Webview 패키지.
webview_flutter
앱 화면에 그대로 쏴주는 flutter 패키지
적용 결과 : 
내가 원하는 대로 사이트가 나온다.(naver와 구글은 막아놨는지 안나와서 게임회사 nexon으로 대체)
이제 남은 것은 해당 화면을 뿌려주고 있는 사이트를 찾는 것.
찾다보니 얼마 지나지 않아 운좋게도 빨리 발견할 수 있었다.
전 세계 기상 정보를 지도 상에 구현해놓은 사이트.
곧바로 적용.
적용 결과:
드디어 원하는 대로 결과를 구현할 수 있었다.
결론
글로 보면 짧지만 이걸 찾고 구현하는데 근 1주~2주 정도 시간이 걸렸다.
하지만, 아직 홈부터 시작해 그로우에 세팅까지...
할일은 태산.
열심히 진행하자.