📌 서버리스 컴퓨팅
https://aws.amazon.com/ko/what-is/serverless-computing/
서버리스 컴퓨팅은 서드 파티 관리 서버 인프라에서 애플리케이션을 구축하고 배포할 수 있는 애플리케이션 개발 모델
모든 애플리케이션은 실행하려면 서버가 필요하지만 서버리스 모델에서는 클라우드 제공업체가 일상적인 작업을 관리하고 기본 인프라를 프로비저닝하고 크기 조정하며 유지·관리
클라우드 제공업체는 운영 체제 관리, 보안 패치, 파일 시스템 및 용량 관리, 로드 밸런싱, 모니터링, 로깅과 같은 여러 작업 처리
→ 따라서 개발자는 애플리케이션 설계에 집중하면서도 비용 효율적이고 대규모로 확장 가능한 서버 인프라의 이점을 누릴 수 있음
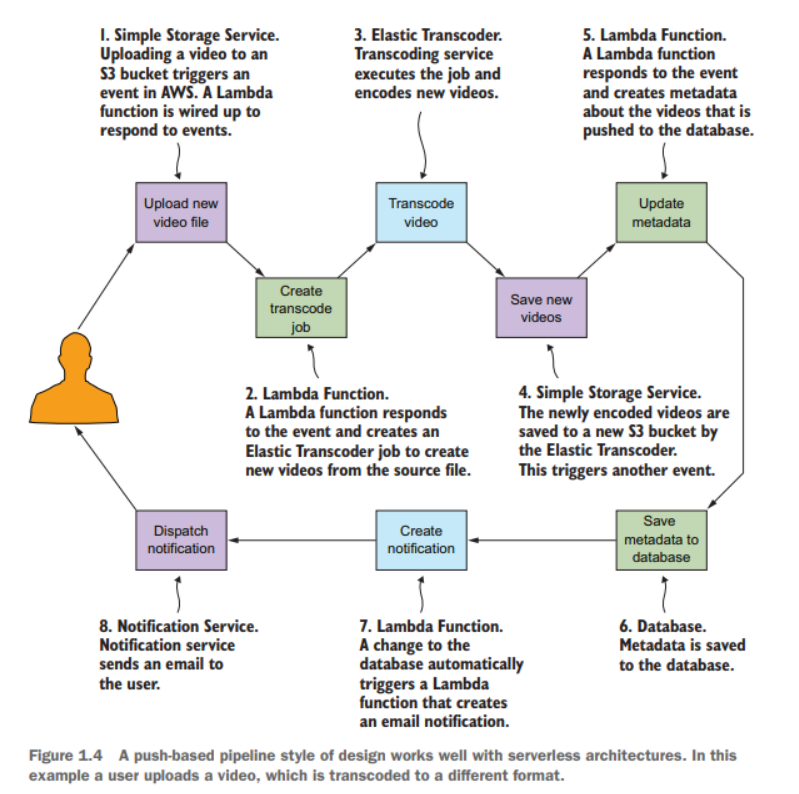
📌 AWS Lambda
Node 런타임을 사용하는 람다 함수 생성

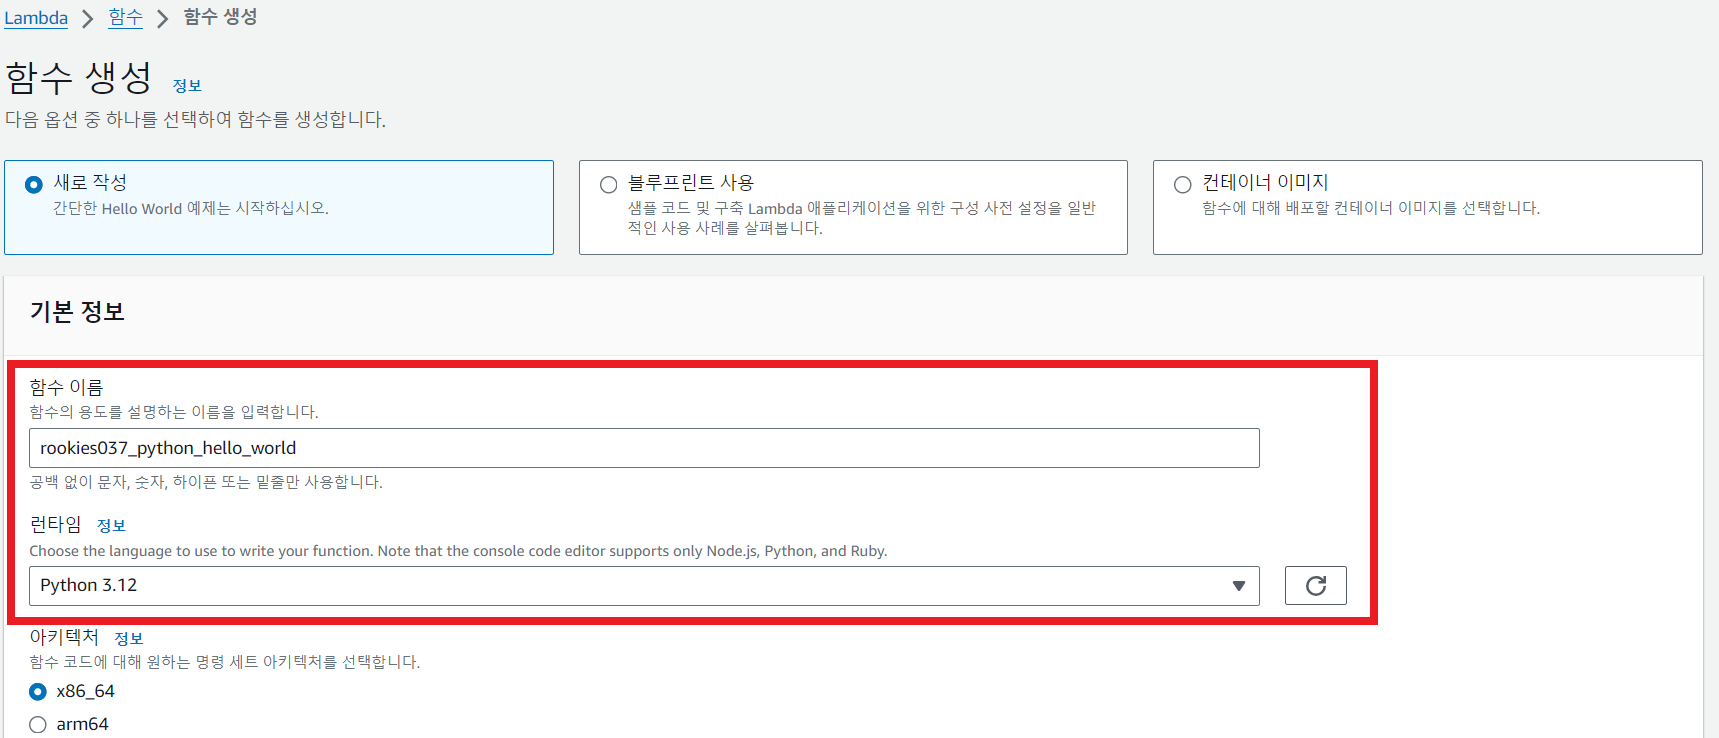
Python 런타임을 사용하는 람다 함수 생성
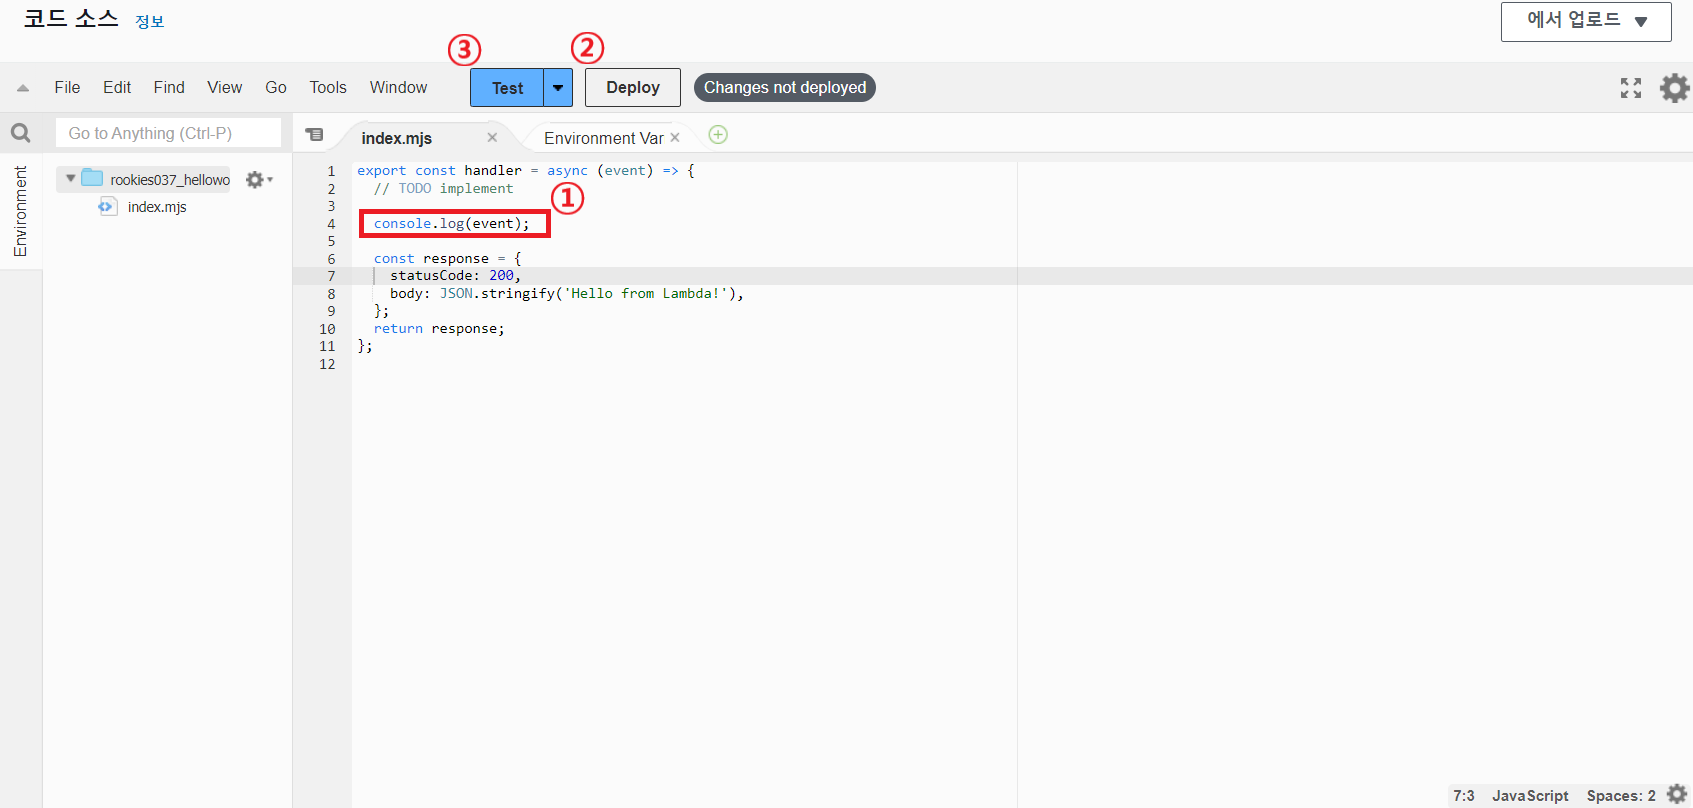
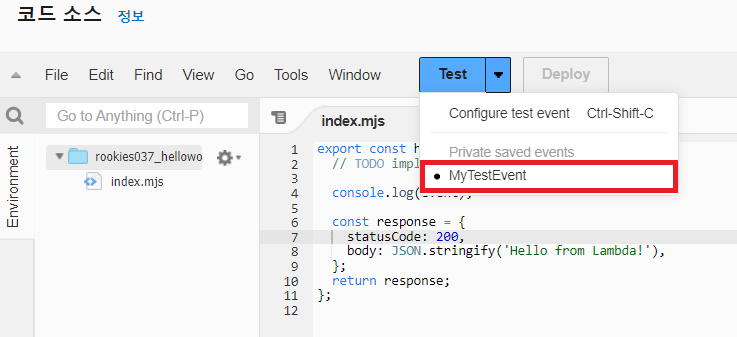
소스 코드 수정 후 테스트 → 소스 코드 수정 → Deploy → 테스트 이벤트 생성(또는 선택) → Test
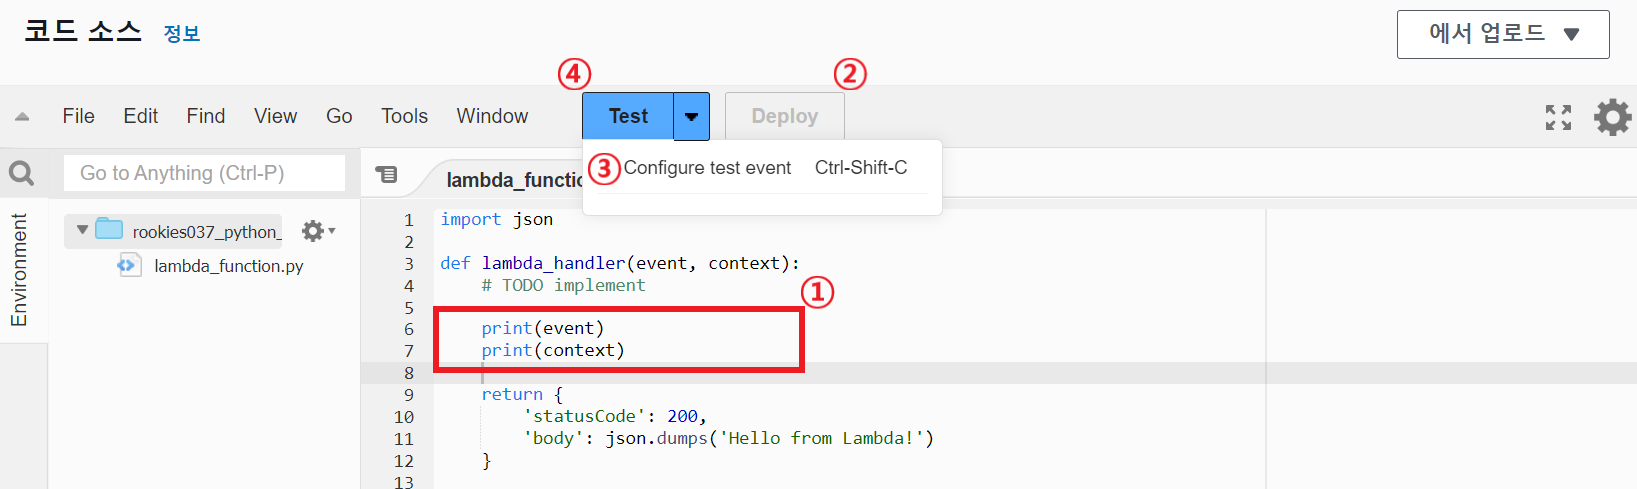

핸들러 확인
~~~~~~
람다 함수의 시작점

파이썬 런타임 	⇒ lambda_function.lambda_handler
   				   ~~~~~~~~~~~~~~~ ~~~~~~~~~~~~~~
  		  		   파일명(모듈명)    함수명
Node.js 런타임	⇒ index.handler
		   		   ~~~~~ ~~~~~~~
    	     파일명(모듈명) 함수명
이미지 썸네일을 자동으로 생성하는 람다 함수 작성

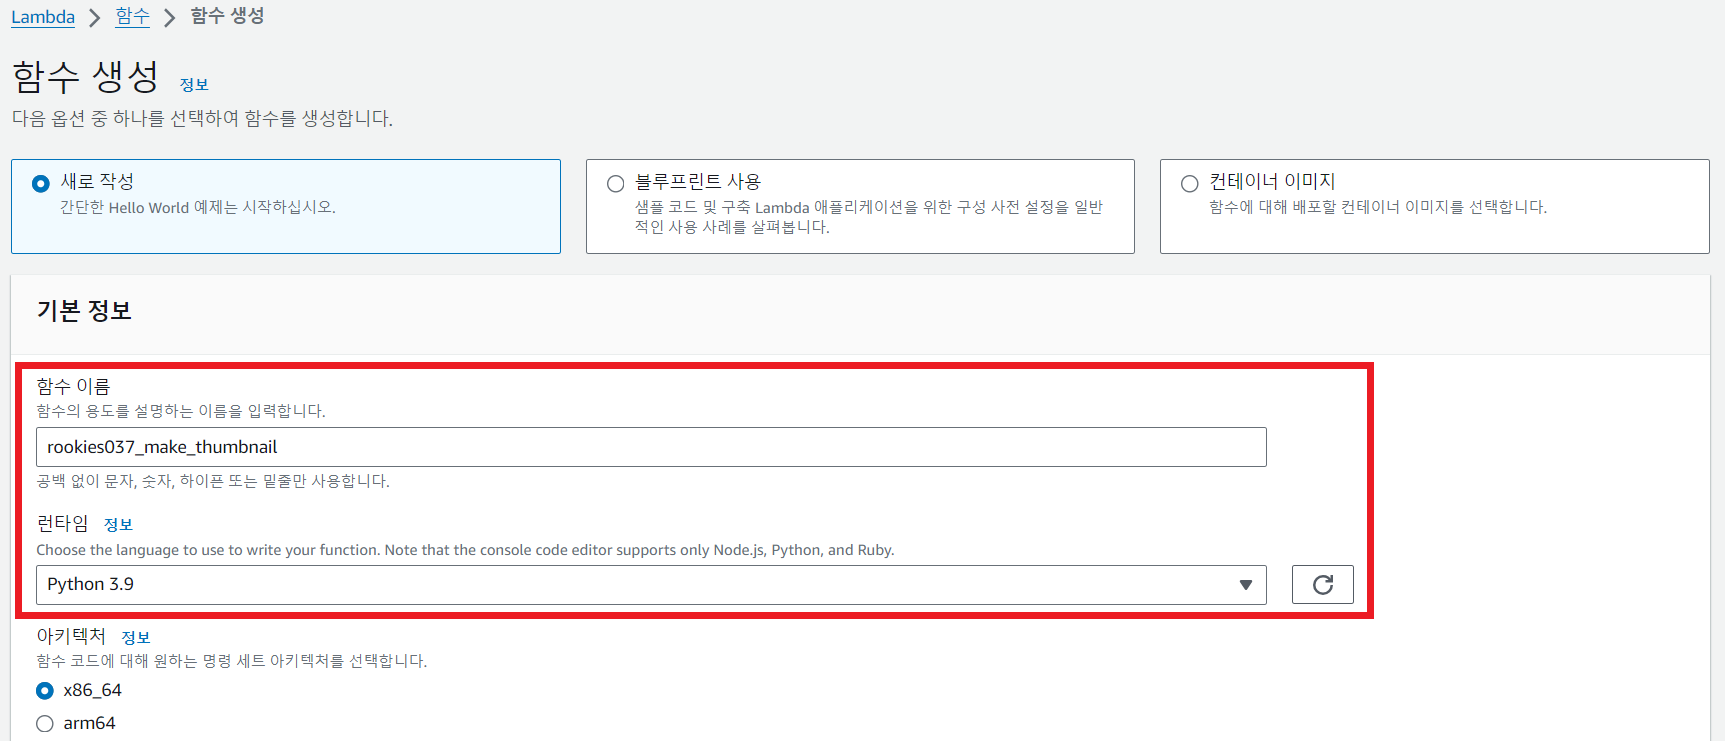
함수 생성
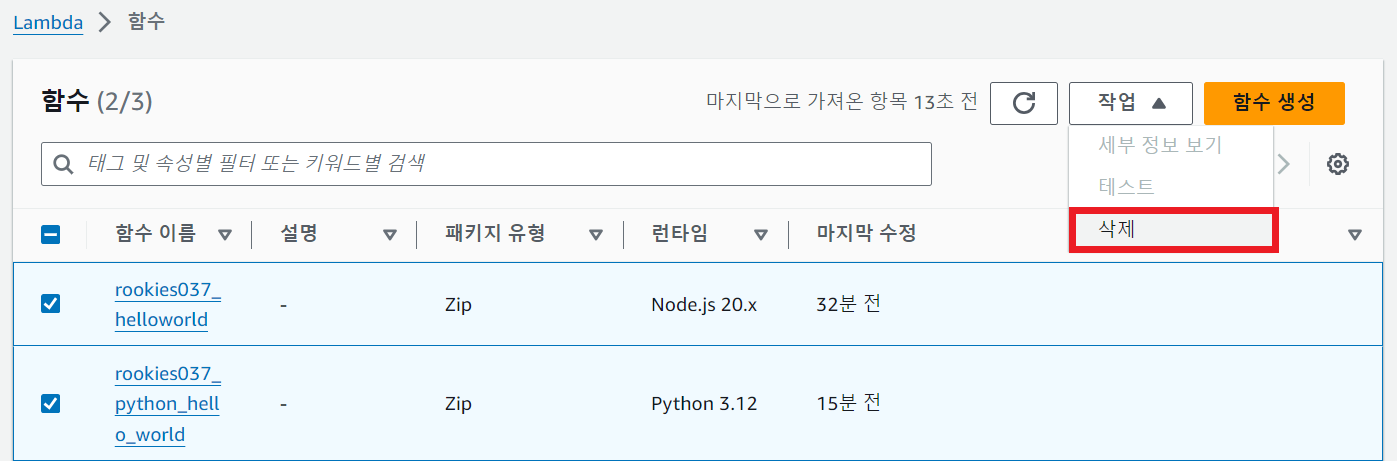
기존에 생성했던 함수는 모두 삭제하고, 파이썬 런타임의 함수 생성
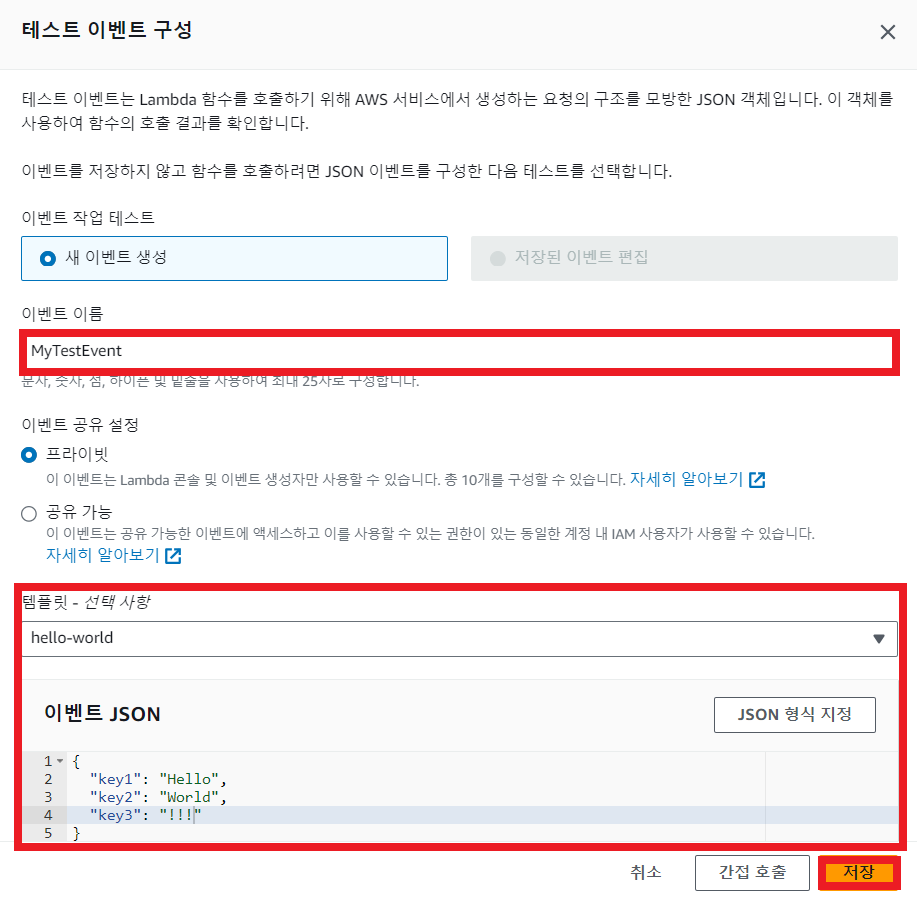
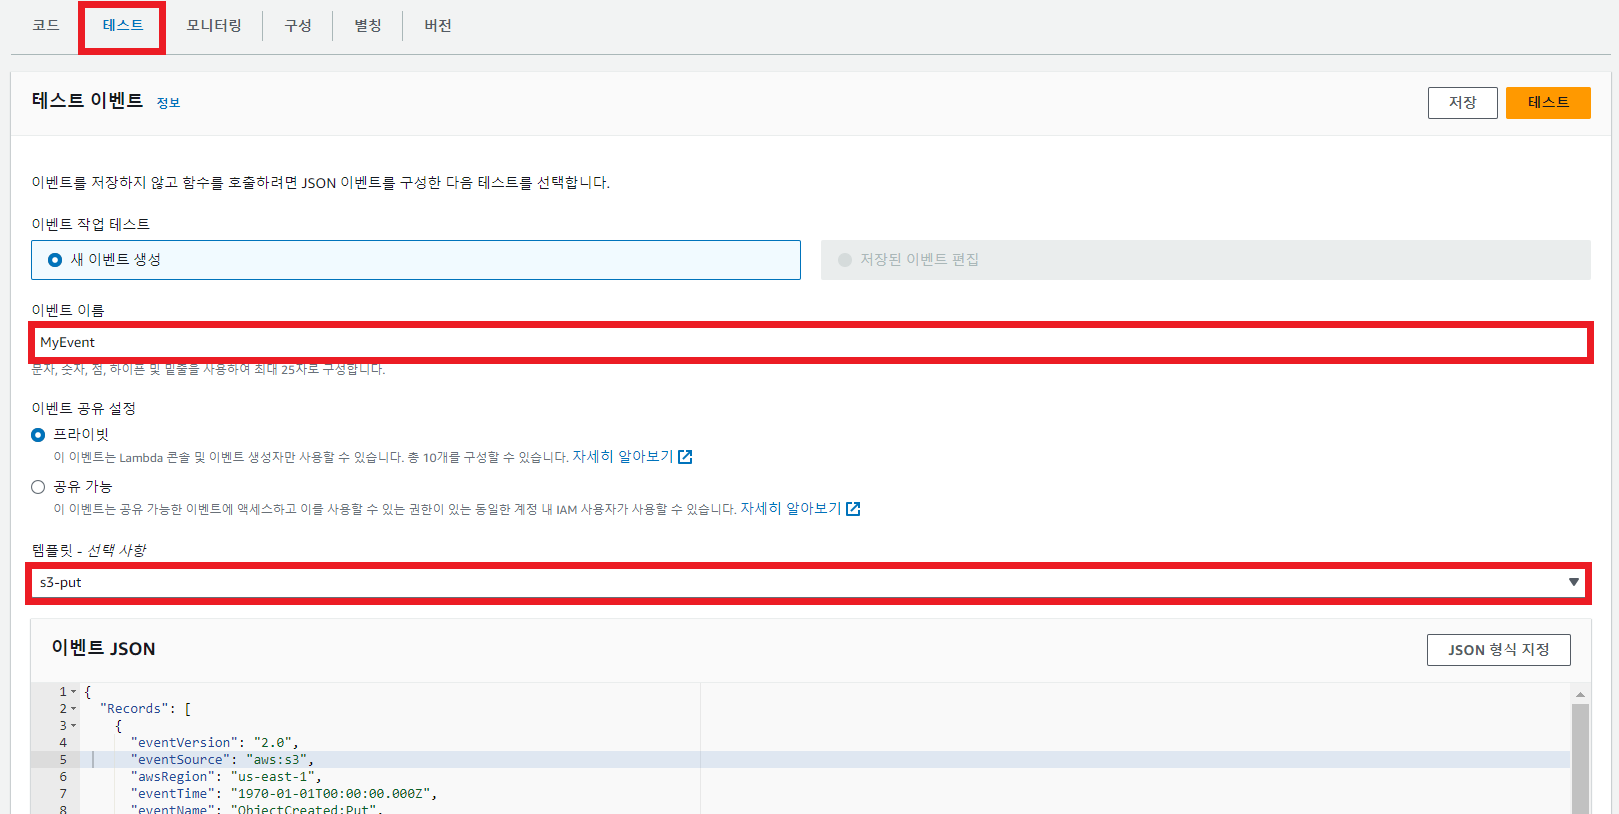
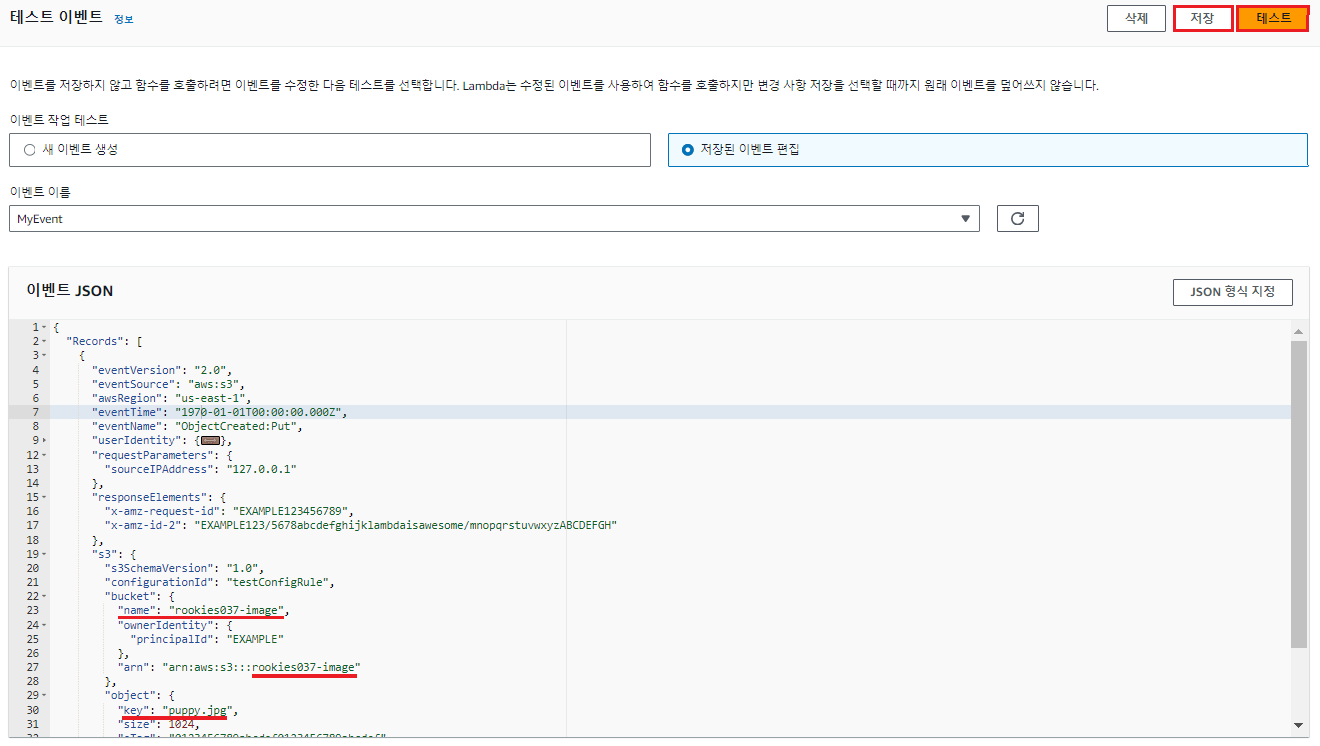
테스트 이벤트 구성에서 S3 버킷에 파일(객체)이 추가되었을 때 발생하는 이벤트 확인
버킷에 저장된 이미지를 가져올 때 필요한 정보 → 이미지가 저장된 버킷의 이름과 객체 키(파일 이름)
{
  "Records": [
    {
      "eventVersion": "2.0",
      "eventSource": "aws:s3",
      "awsRegion": "us-east-1",
      "eventTime": "1970-01-01T00:00:00.000Z",
      "eventName": "ObjectCreated:Put",
      "userIdentity": {
        "principalId": "EXAMPLE"
      },
      "requestParameters": {
        "sourceIPAddress": "127.0.0.1"
      },
      "responseElements": {
        "x-amz-request-id": "EXAMPLE123456789",
        "x-amz-id-2": "EXAMPLE123/5678abcdefghijklambdaisawesome/mnopqrstuvwxyzABCDEFGH"
      },
      "s3": {
        "s3SchemaVersion": "1.0",
        "configurationId": "testConfigRule",
        "bucket": {
          "name": "example-bucket",			→ 버킷 이름
          "ownerIdentity": {
            "principalId": "EXAMPLE"
          },
          "arn": "arn:aws:s3:::example-bucket"
        },
        "object": {
          "key": "test%2Fkey",				→ 파일 이름 (객체 키)
          "size": 1024,
          "eTag": "0123456789abcdef0123456789abcdef",
          "sequencer": "0A1B2C3D4E5F678901"
        }
      }
    }
  ]
}
소스 코드 작성 (VSCode에서 작성한 후 붙여넣기)
c:\aws> pip install pillow
c:\aws> code make_thumbnail.py
# Python 용 AWS SDK
# https://aws.amazon.com/ko/sdk-for-python/
import boto3
import os
import sys
import uuid
from urllib.parse import unquote_plus
# https://pypi.org/project/pillow/
from PIL import Image
import PIL.Image
# https://boto3.amazonaws.com/v1/documentation/api/latest/reference/services/s3.html
client = boto3.client('s3')
# original_image_path의 1/2 크기의 이미지를 만들어서 thumbnail_image_path에 저장
def make_thumbnail(original_image_path, thumbnail_image_path):
with Image.open(original_image_path) as image:
image.thumbnail(tuple(n/2 for n in image.size))
image.save(thumbnail_image_path)
# 람다 핸들러 함수
def lambda_handler(event, context):
for record in event['Records']:
# 버킷 이름과 객체 키를 추출
bucket = record['s3']['bucket']['name']
key = record['s3']['object']['key']
# S3 버킷으로부터 파일을 가져와서 저장할 경로와 (S3 버킷으로 전달할) 썸네일 이미지를 저장할 경로를 지정
download_path = f'/tmp/{key}-{uuid.uuid1()}'
upload_path = f'/tmp/{key}-thumbnail'
# S3 버킷으로 부터 파일을 다운로드
# https://boto3.amazonaws.com/v1/documentation/api/latest/reference/services/s3/client/download_file.html
client.download_file(bucket, key, download_path)
# 섬네일 생성
make_thumbnail(download_path, upload_path)
# S3 버킷에 파일을 업로드
# https://boto3.amazonaws.com/v1/documentation/api/latest/reference/services/s3/client/upload_file.html
client.upload_file(upload_path, f'{bucket}-thumbnail', key)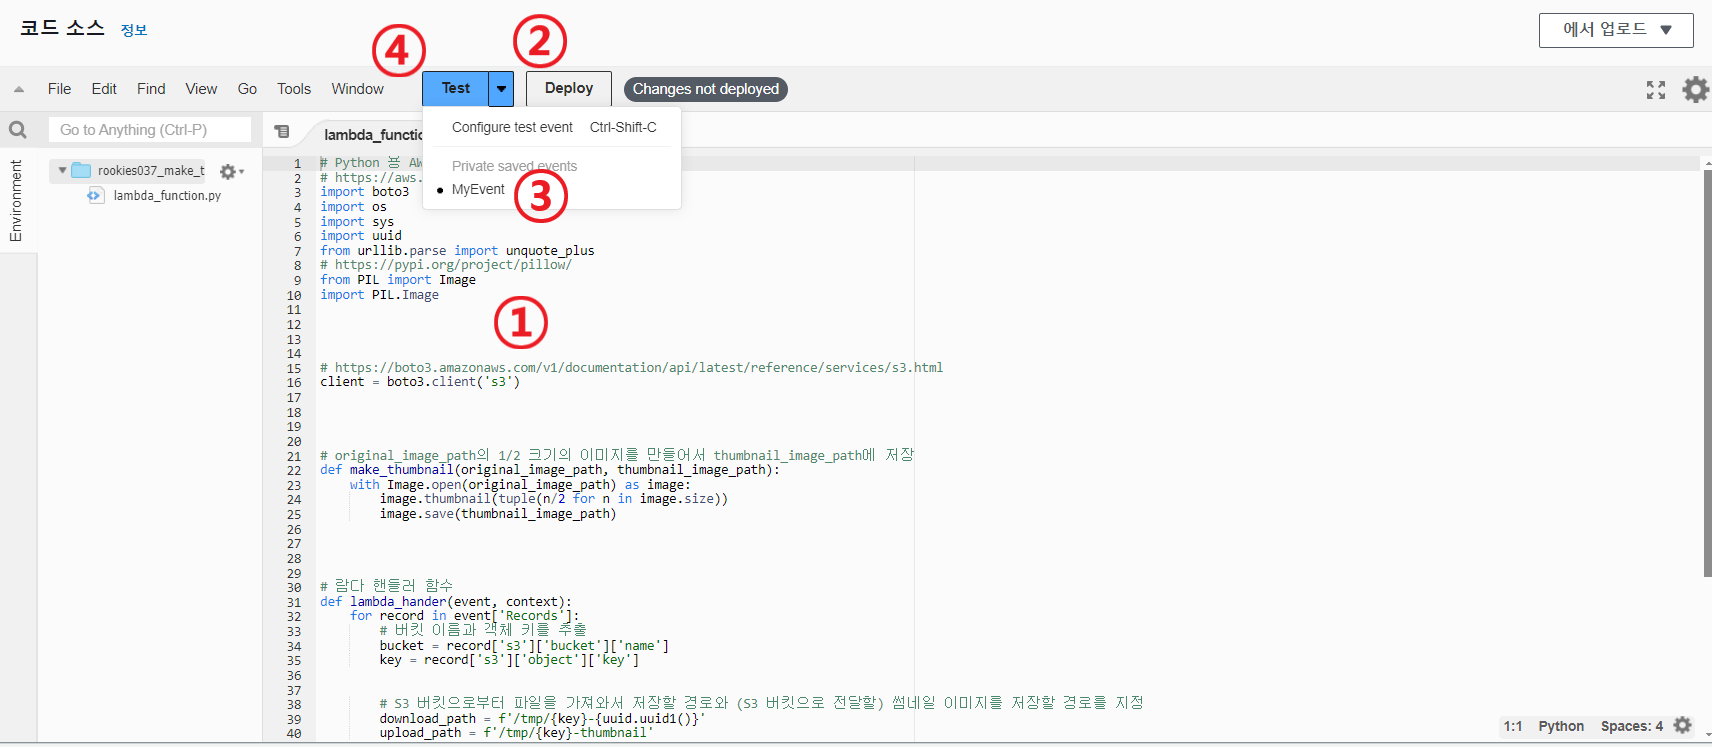
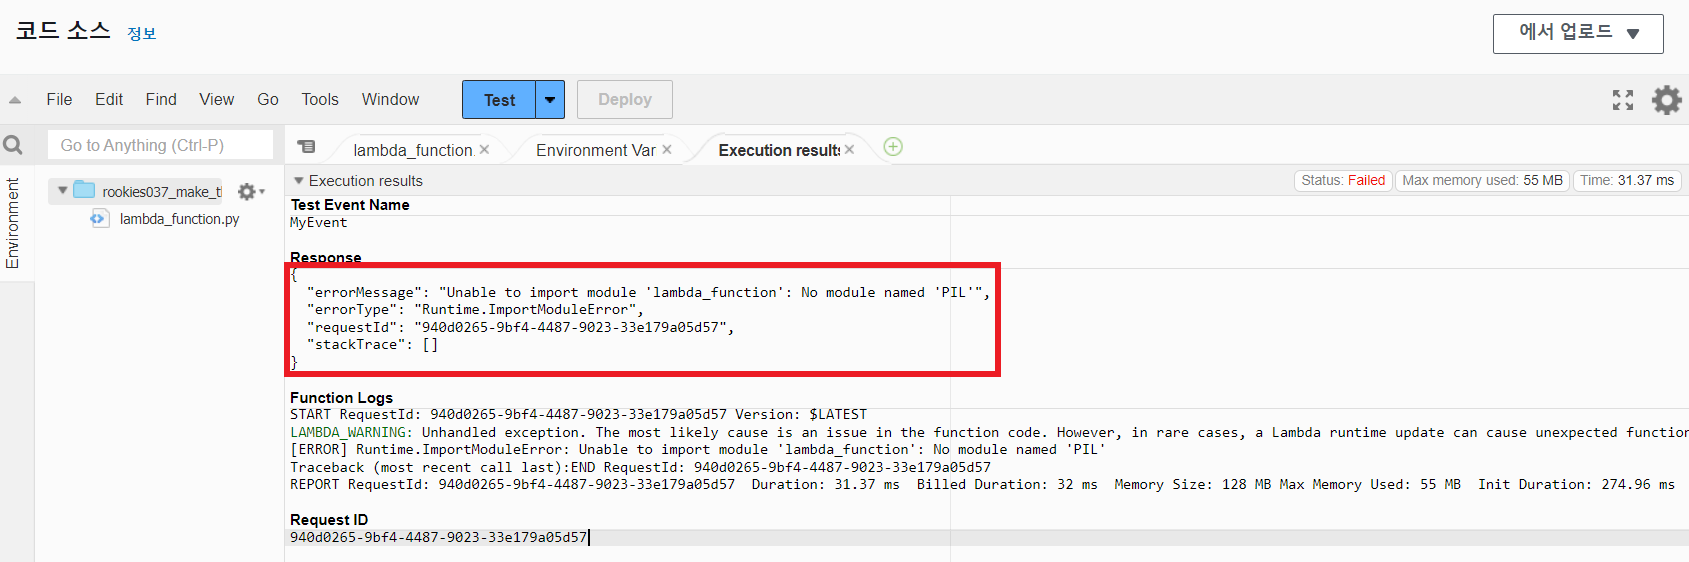
테스트
PIL 모듈이 존재하지 않기 때문에 오류가 발생
→ 파이썬 기본 라이브러리와 AWS SDK(여기에서는 boto3)를 제외한 외부 라이브러리는 직접 추가해줘야 함
람다 실행환경과 동일한 환경에서 PIL 모듈을 빌드한 후 람다 레이어(계층)로 등록
https://pillow.readthedocs.io/en/stable/installation/building-from-source.html
① 람다 런타임 확인
https://docs.aws.amazon.com/ko_kr/lambda/latest/dg/lambda-runtimes.html
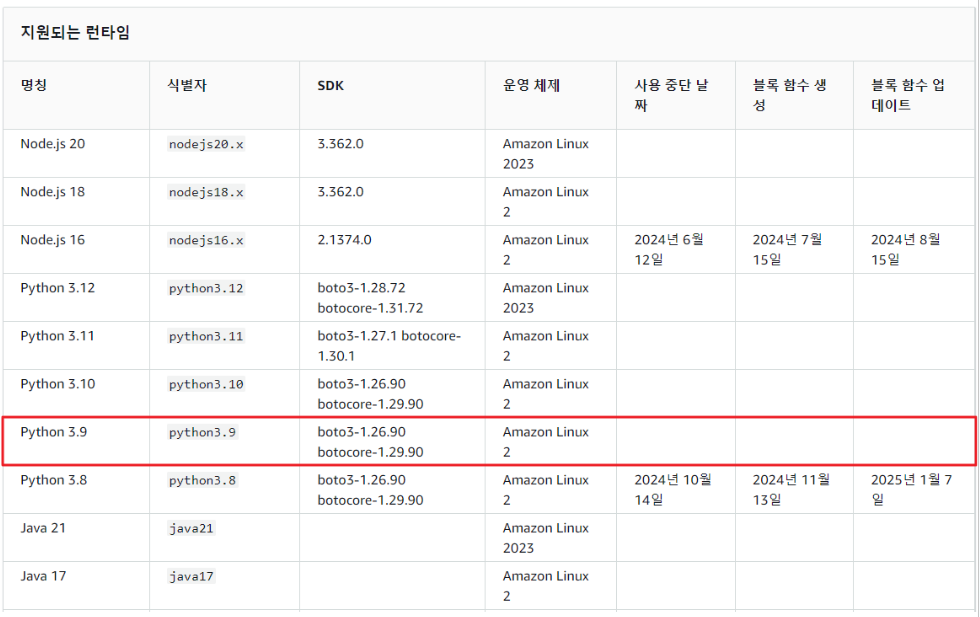
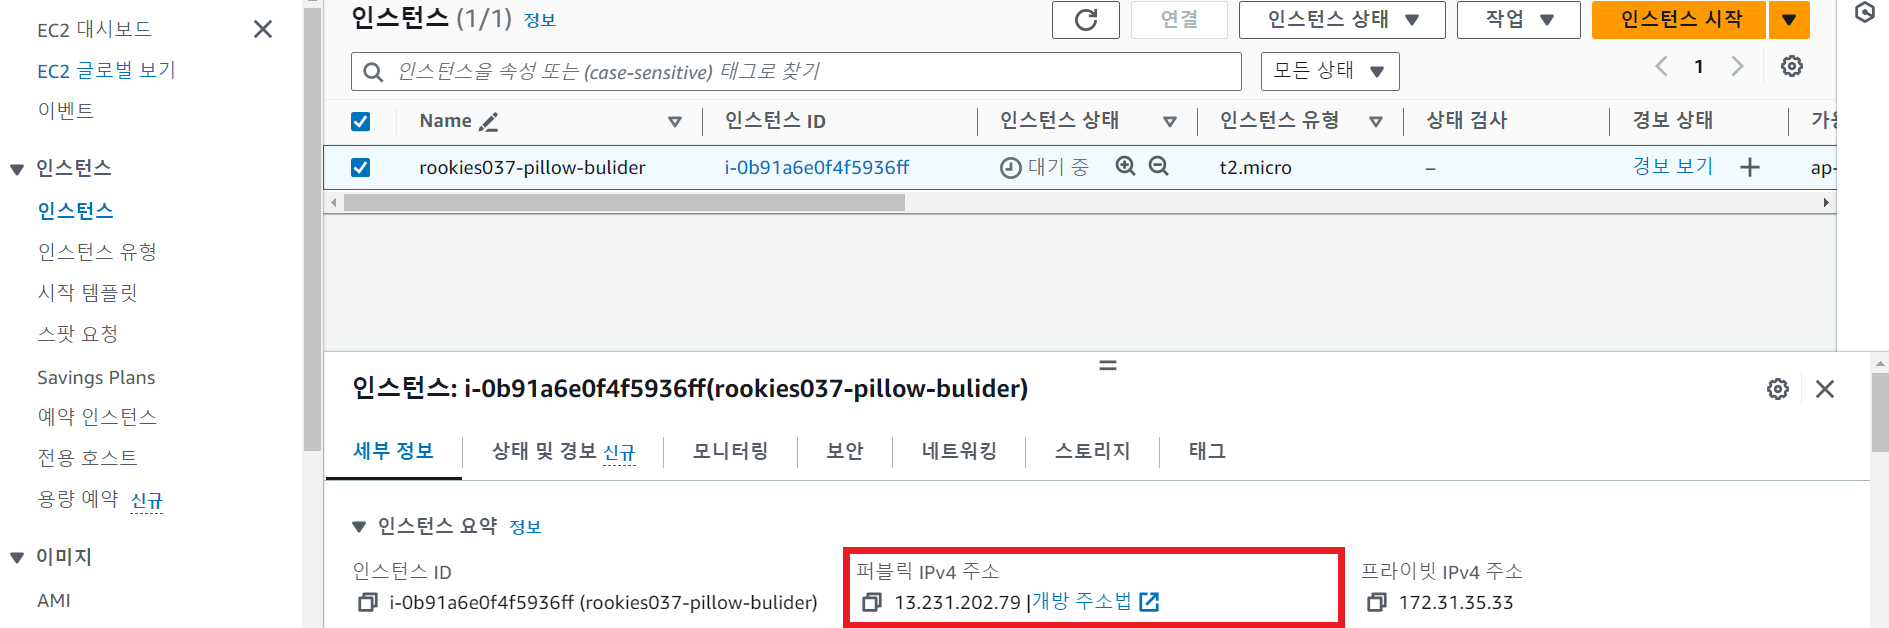
② 람다 런타임과 동일한 EC2 인스턴스 생성
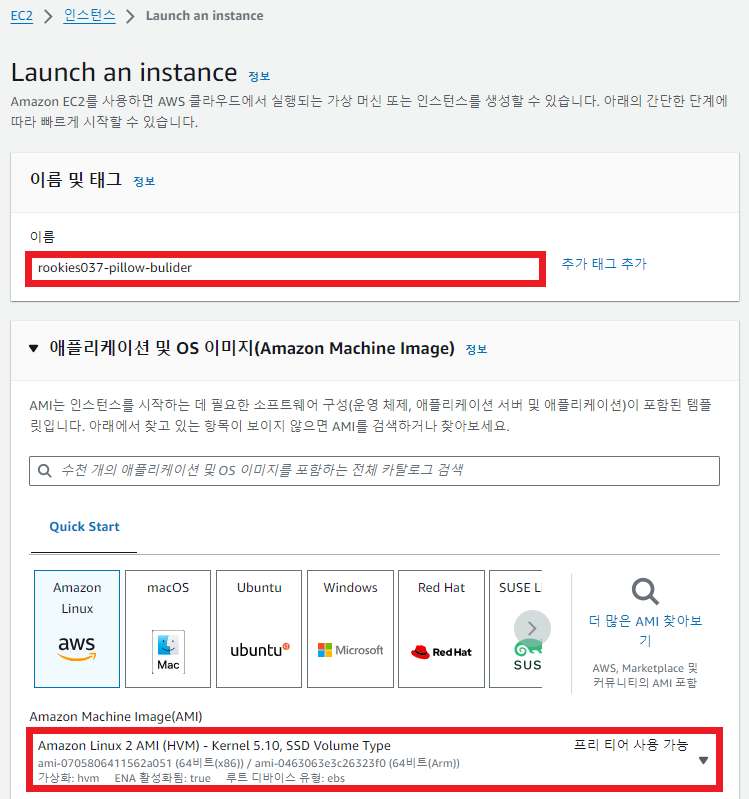
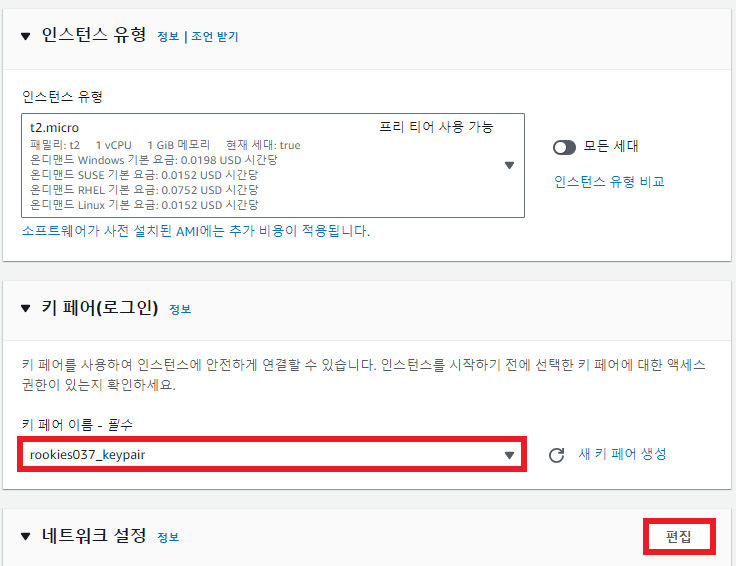
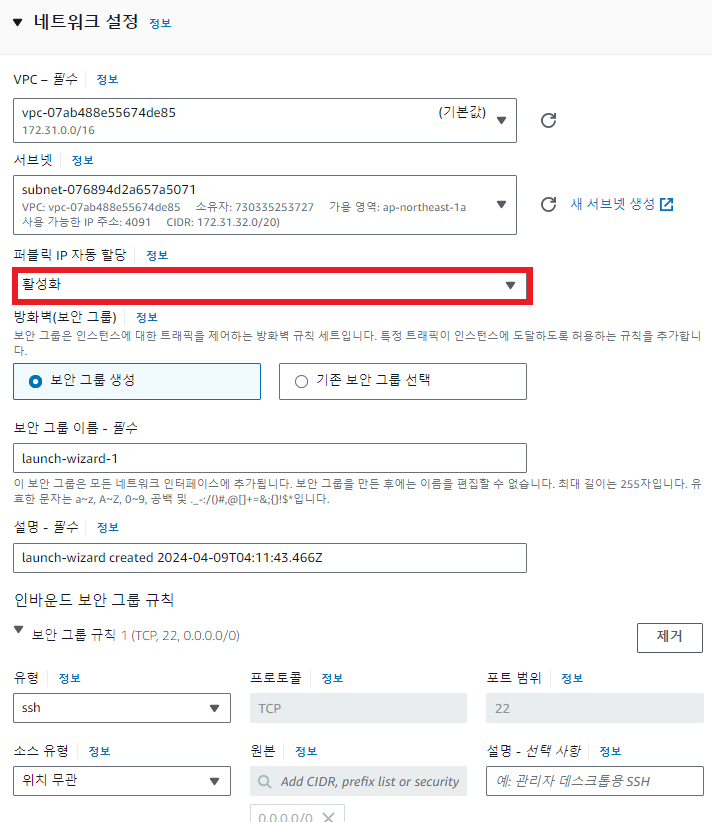
빌드 작업을 위해 SSH 접속이 가능하도록 설정
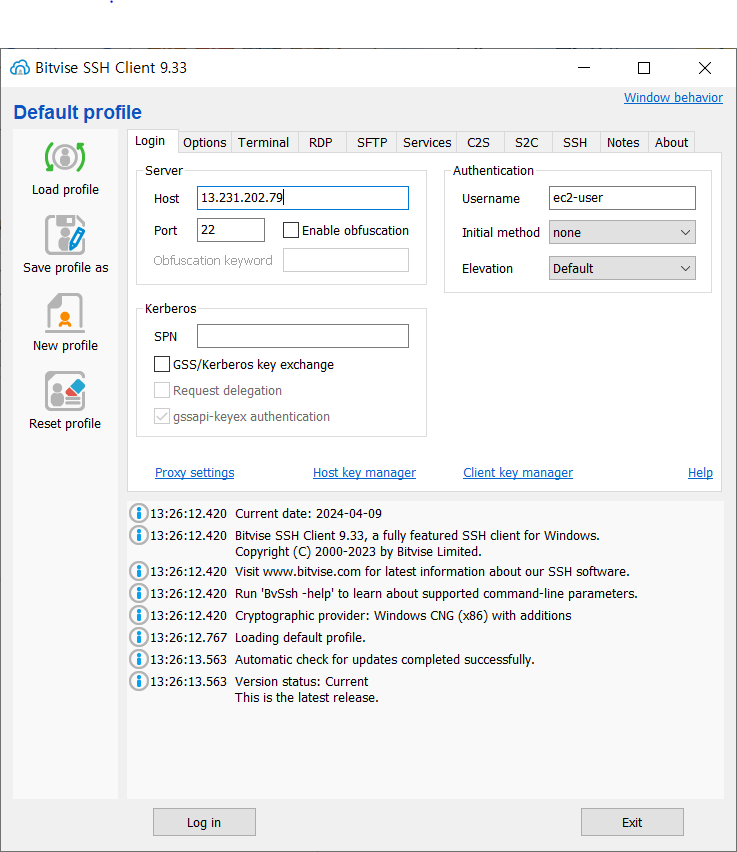
③ 해당 인스턴스로 SSH 접속
④ PIL 모듈 빌드
[ec2-user@ip-172-31-35-33 ~]$ sudo yum update -y
[ec2-user@ip-172-31-35-33 ~]$ sudo su
[root@ip-172-31-35-33 ec2-user]#

[root@ip-172-31-35-33 ec2-user]# yum install gcc bzip2-devel ncurses-devel gdbm-devel xz-devel sqlite-devel openssl-devel tk-devel uuid-devel readline-devel zlib-devel libffi-devel

[root@ip-172-31-35-33 ec2-user]# cd /home/ec2-user/
[root@ip-172-31-35-33 ec2-user]# sudo wget https://www.python.org/ftp/python/3.9.0/Python-3.9.0.tar.xz
[root@ip-172-31-35-33 ec2-user]# ls
Python-3.9.0.tar.xz

[root@ip-172-31-35-33 ec2-user]# tar -xJf Python-3.9.0.tar.xz
[root@ip-172-31-35-33 ec2-user]# ls -l
total 18428
drwxr-xr-x 17 ec2-user ec2-user     4096 Oct  5  2020 Python-3.9.0
-rw-r--r--  1 root     root     18866140 Oct  5  2020 Python-3.9.0.tar.xz

[root@ip-172-31-35-33 ec2-user]# cd Python-3.9.0
[root@ip-172-31-35-33 Python-3.9.0]# ls
aclocal.m4          configure.ac  Lib              Misc          PC             README.rst
CODE_OF_CONDUCT.md  Doc           LICENSE          Modules       PCbuild        setup.py
config.guess        Grammar       m4               netlify.toml  Programs       Tools
config.sub          Include       Mac              Objects       pyconfig.h.in
configure           install-sh    Makefile.pre.in  Parser        Python

[root@ip-172-31-35-33 Python-3.9.0]# ./configure --help
`configure' configures python 3.9 to adapt to many kinds of systems.

Usage: ./configure [OPTION]... [VAR=VALUE]...

To assign environment variables (e.g., CC, CFLAGS...), specify them as
VAR=VALUE.  See below for descriptions of some of the useful variables.
:
  --enable-optimizations  enable expensive, stable optimizations (PGO, etc.)
                          (default is no)

[root@ip-172-31-35-33 Python-3.9.0]# ./configure --enable-optimizations
			:
creating Modules/Setup.local
creating Makefile

[root@ip-172-31-35-33 Python-3.9.0]# make altinstall
:
Installing collected packages: setuptools, pip
  WARNING: The script easy_install-3.9 is installed in '/usr/local/bin' which is not on PATH.
  Consider adding this directory to PATH or, if you prefer to suppress this warning, use --no-warn-script-location.
  WARNING: The script pip3.9 is installed in '/usr/local/bin' which is not on PATH.
  Consider adding this directory to PATH or, if you prefer to suppress this warning, use --no-warn-script-location.
Successfully installed pip-20.2.3 setuptools-49.2.1

[root@ip-172-31-35-33 Python-3.9.0]# export PATH=$PATH:/usr/local/bin

[root@ip-172-31-35-33 Python-3.9.0]# pip3.9 install --upgrade pip
Collecting pip
  Downloading pip-24.0-py3-none-any.whl (2.1 MB)
     |████████████████████████████████| 2.1 MB 12.7 MB/s
Installing collected packages: pip
  Attempting uninstall: pip
    Found existing installation: pip 20.2.3
    Uninstalling pip-20.2.3:
      Successfully uninstalled pip-20.2.3
Successfully installed pip-24.0

[root@ip-172-31-35-33 Python-3.9.0]# pip3.9 install pillow
Collecting pillow
  Downloading pillow-10.3.0-cp39-cp39-manylinux_2_17_x86_64.manylinux2014_x86_64.whl.metadata (9.2 kB)
Downloading pillow-10.3.0-cp39-cp39-manylinux_2_17_x86_64.manylinux2014_x86_64.whl (4.4 MB)
   ━━━━━━━━━━━━━━━━━━━━━━━━━━━━━━━━━━━━━━━━ 4.4/4.4 MB 37.7 MB/s eta 0:00:00
Installing collected packages: pillow
Successfully installed pillow-10.3.0
WARNING: Running pip as the 'root' user can result in broken permissions and conflicting behaviour with the system package manager. It is recommended to use a virtual environment instead: https://pip.pypa.io/warnings/venv

[root@ip-172-31-35-33 Python-3.9.0]# pip3.9 install boto3
Collecting boto3
  Downloading boto3-1.34.80-py3-none-any.whl.metadata (6.6 kB)
Collecting botocore<1.35.0,>=1.34.80 (from boto3)
  Downloading botocore-1.34.80-py3-none-any.whl.metadata (5.7 kB)
Collecting jmespath<2.0.0,>=0.7.1 (from boto3)
  Downloading jmespath-1.0.1-py3-none-any.whl.metadata (7.6 kB)
Collecting s3transfer<0.11.0,>=0.10.0 (from boto3)
  Downloading s3transfer-0.10.1-py3-none-any.whl.metadata (1.7 kB)
Collecting python-dateutil<3.0.0,>=2.1 (from botocore<1.35.0,>=1.34.80->boto3)
  Downloading python_dateutil-2.9.0.post0-py2.py3-none-any.whl.metadata (8.4 kB)
Collecting urllib3<1.27,>=1.25.4 (from botocore<1.35.0,>=1.34.80->boto3)
  Downloading urllib3-1.26.18-py2.py3-none-any.whl.metadata (48 kB)
     ━━━━━━━━━━━━━━━━━━━━━━━━━━━━━━━━━━━━━━━━ 48.9/48.9 kB 4.6 MB/s eta 0:00:00
Collecting six>=1.5 (from python-dateutil<3.0.0,>=2.1->botocore<1.35.0,>=1.34.80->boto3)
  Downloading six-1.16.0-py2.py3-none-any.whl.metadata (1.8 kB)
Downloading boto3-1.34.80-py3-none-any.whl (139 kB)
   ━━━━━━━━━━━━━━━━━━━━━━━━━━━━━━━━━━━━━━━━ 139.3/139.3 kB 9.8 MB/s eta 0:00:00
Downloading botocore-1.34.80-py3-none-any.whl (12.1 MB)
   ━━━━━━━━━━━━━━━━━━━━━━━━━━━━━━━━━━━━━━━━ 12.1/12.1 MB 59.1 MB/s eta 0:00:00
Downloading jmespath-1.0.1-py3-none-any.whl (20 kB)
Downloading s3transfer-0.10.1-py3-none-any.whl (82 kB)
   ━━━━━━━━━━━━━━━━━━━━━━━━━━━━━━━━━━━━━━━━ 82.2/82.2 kB 12.1 MB/s eta 0:00:00
Downloading python_dateutil-2.9.0.post0-py2.py3-none-any.whl (229 kB)
   ━━━━━━━━━━━━━━━━━━━━━━━━━━━━━━━━━━━━━━━━ 229.9/229.9 kB 24.8 MB/s eta 0:00:00
Downloading urllib3-1.26.18-py2.py3-none-any.whl (143 kB)
   ━━━━━━━━━━━━━━━━━━━━━━━━━━━━━━━━━━━━━━━━ 143.8/143.8 kB 17.2 MB/s eta 0:00:00
Downloading six-1.16.0-py2.py3-none-any.whl (11 kB)
Installing collected packages: urllib3, six, jmespath, python-dateutil, botocore, s3transfer, boto3
Successfully installed boto3-1.34.80 botocore-1.34.80 jmespath-1.0.1 python-dateutil-2.9.0.post0 s3transfer-0.10.1 six-1.16.0 urllib3-1.26.18
WARNING: Running pip as the 'root' user can result in broken permissions and conflicting behaviour with the system package manager. It is recommended to use a virtual environment instead: https://pip.pypa.io/warnings/venv

[root@ip-172-31-35-33 Python-3.9.0]# cd /usr/local/lib/python3.9/
[root@ip-172-31-35-33 python3.9]# ls site-packages/
boto3                       pillow-10.3.0.dist-info                s3transfer-0.10.1.dist-info
boto3-1.34.80.dist-info     pillow.libs                            setuptools
botocore                    pip                                    setuptools-49.2.1.dist-info
botocore-1.34.80.dist-info  pip-24.0.dist-info                     six-1.16.0.dist-info
dateutil                    pkg_resources                          six.py
easy_install.py             __pycache__                            urllib3
jmespath                    python_dateutil-2.9.0.post0.dist-info  urllib3-1.26.18.dist-info
jmespath-1.0.1.dist-info    README.txt
PIL                         s3transfer

[root@ip-172-31-35-33 python3.9]# mkdir -p /home/ec2-user/lambda-layers/python/lib/python3.9/site-packages
[root@ip-172-31-35-33 python3.9]# cp -r site-packages/ /home/ec2-user/lambda-layers/python/lib/python3.9/

[root@ip-172-31-35-33 python3.9]# cd /home/ec2-user/lambda-layers/
[root@ip-172-31-35-33 lambda-layers]# zip -r lambda_layers.zip *

[root@ip-172-31-35-33 lambda-layers]# ls -l
total 24148
-rw-r--r-- 1 root root 24725015 Apr  9 04:39 lambda_layers.zip
drwxr-xr-x 4 root root       34 Apr  9 04:37 python
⑤ 현재 사용자가 S3에 읽고 쓸 수 있는 권한이 있는지 여부와 액세스 키 발급 여부 확인
EC2에서 빌드한 라이브러리를 S3 버킷으로 복사
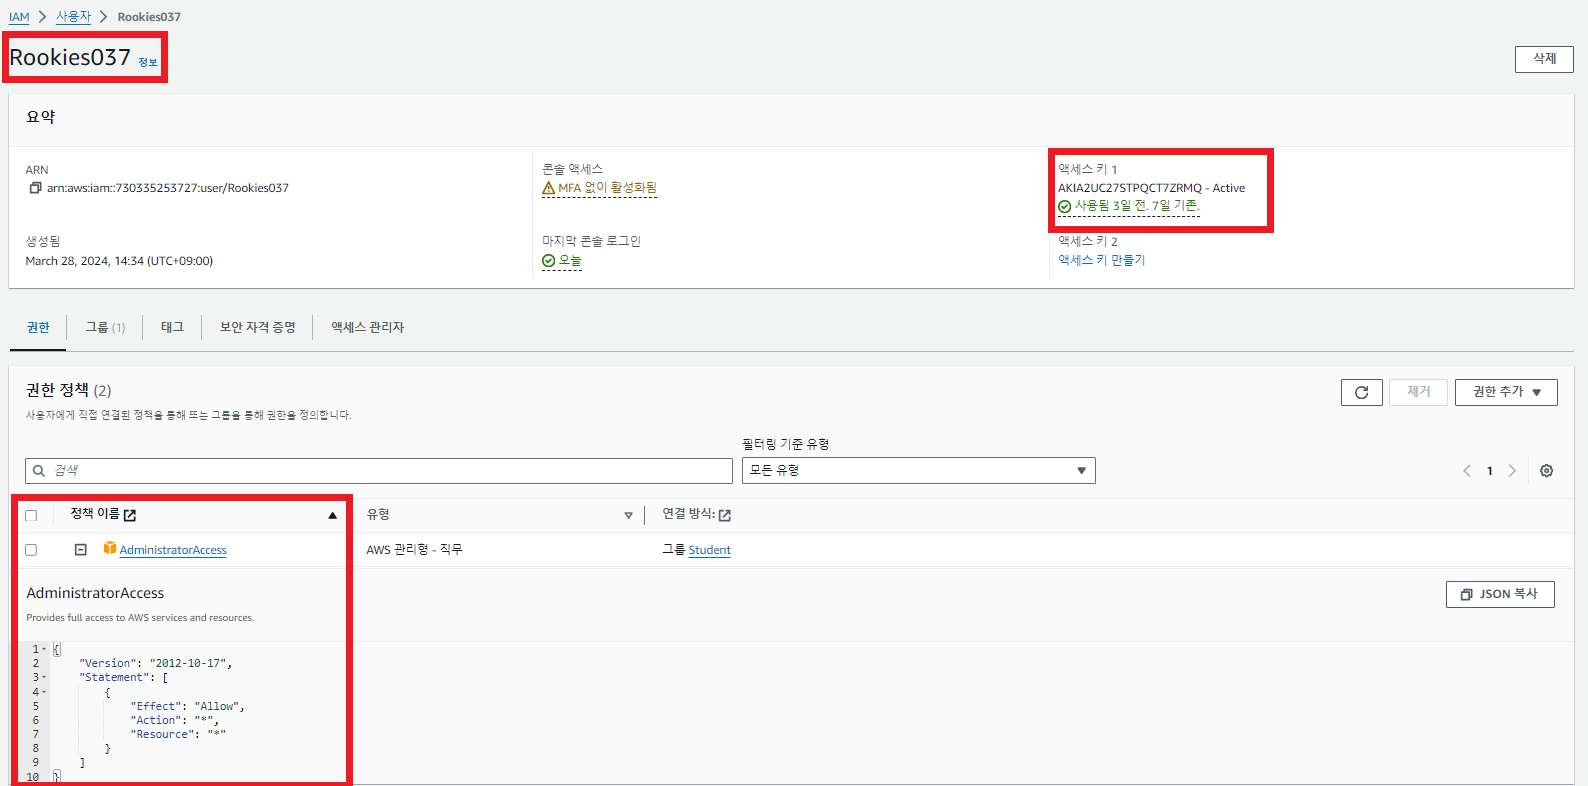
⑥ EC2에 액세스 키 등록
[root@ip-172-31-35-33 lambda-layers]# aws configure
AWS Access Key ID [****************ZRMQ]:
AWS Secret Access Key [****************uQdb]:
Default region name [ap-northeast-1]:
Default output format [json]:
람다 계층(layer) 생성
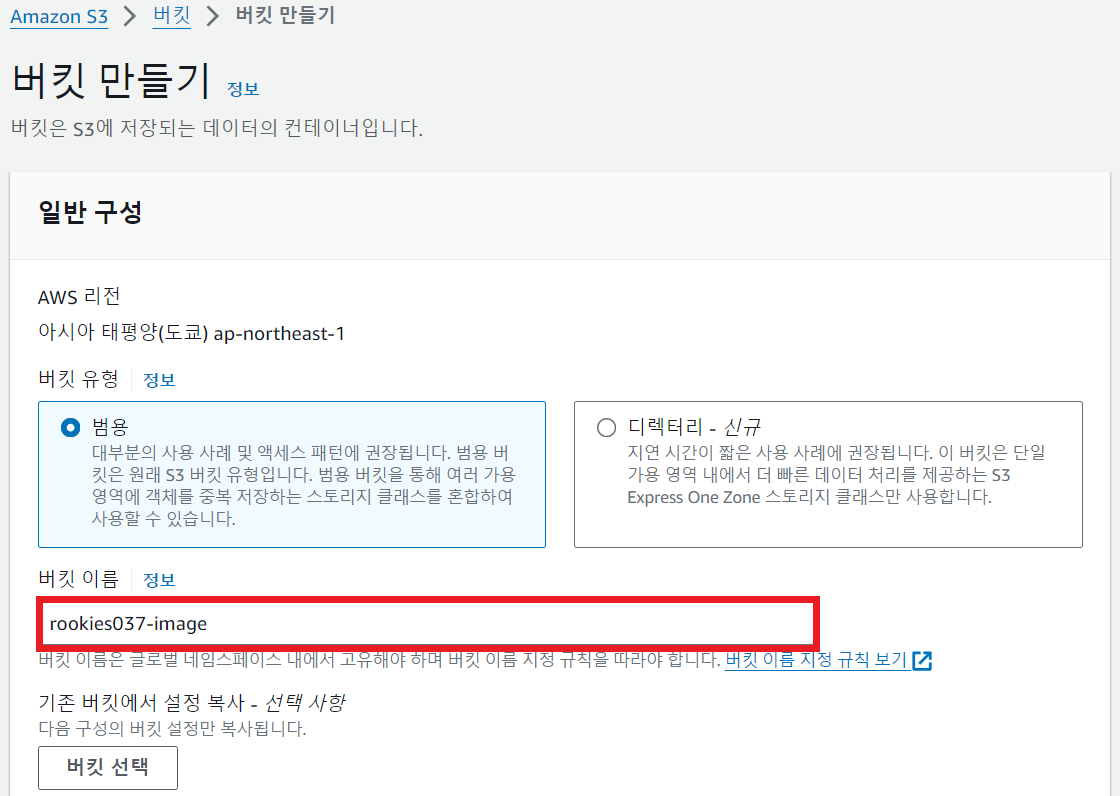
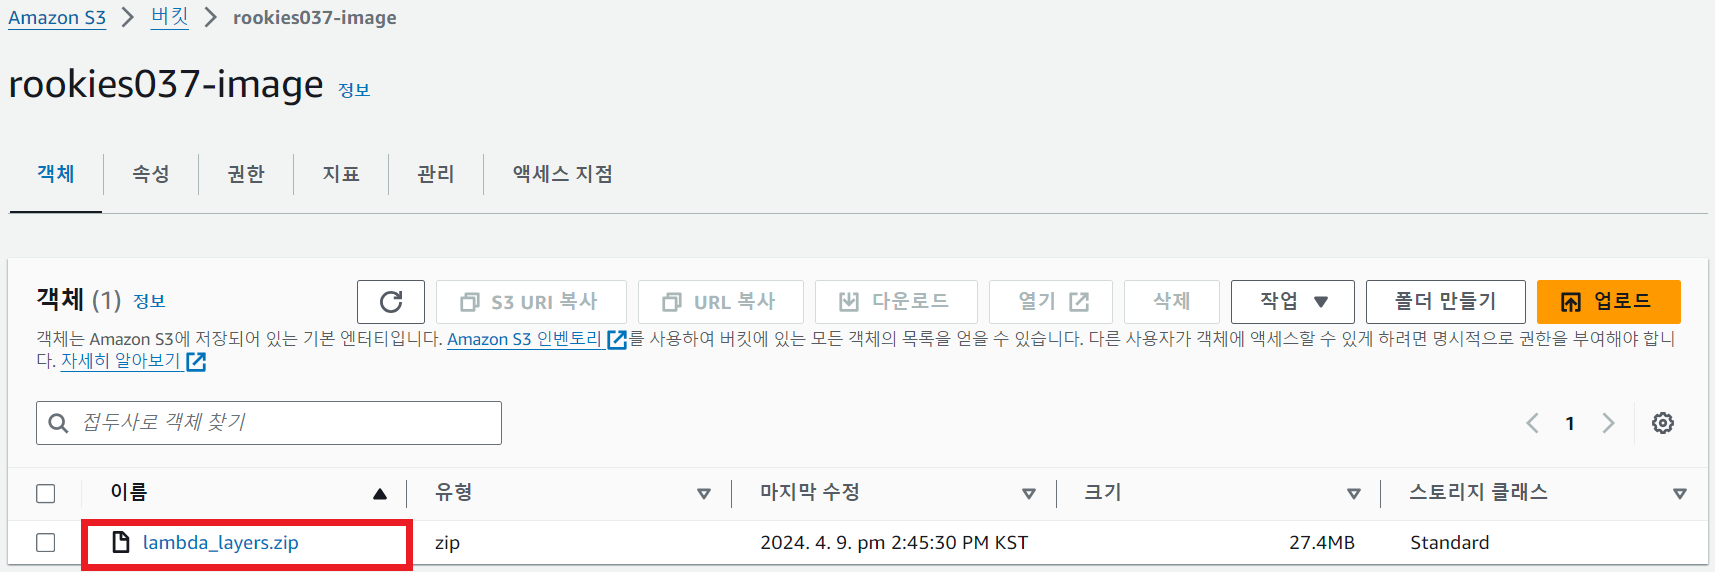
① PIL 라이브러리를 업로드할 S3 버킷 생성
② AWS CLI 명령어를 이용해서 PIL 라이브러리를 버킷에 업로드
https://docs.aws.amazon.com/cli/latest/reference/s3/cp.html
[root@ip-172-31-35-33 lambda-layers]# aws s3 cp ./lambda_layers.zip s3://rookies037-image
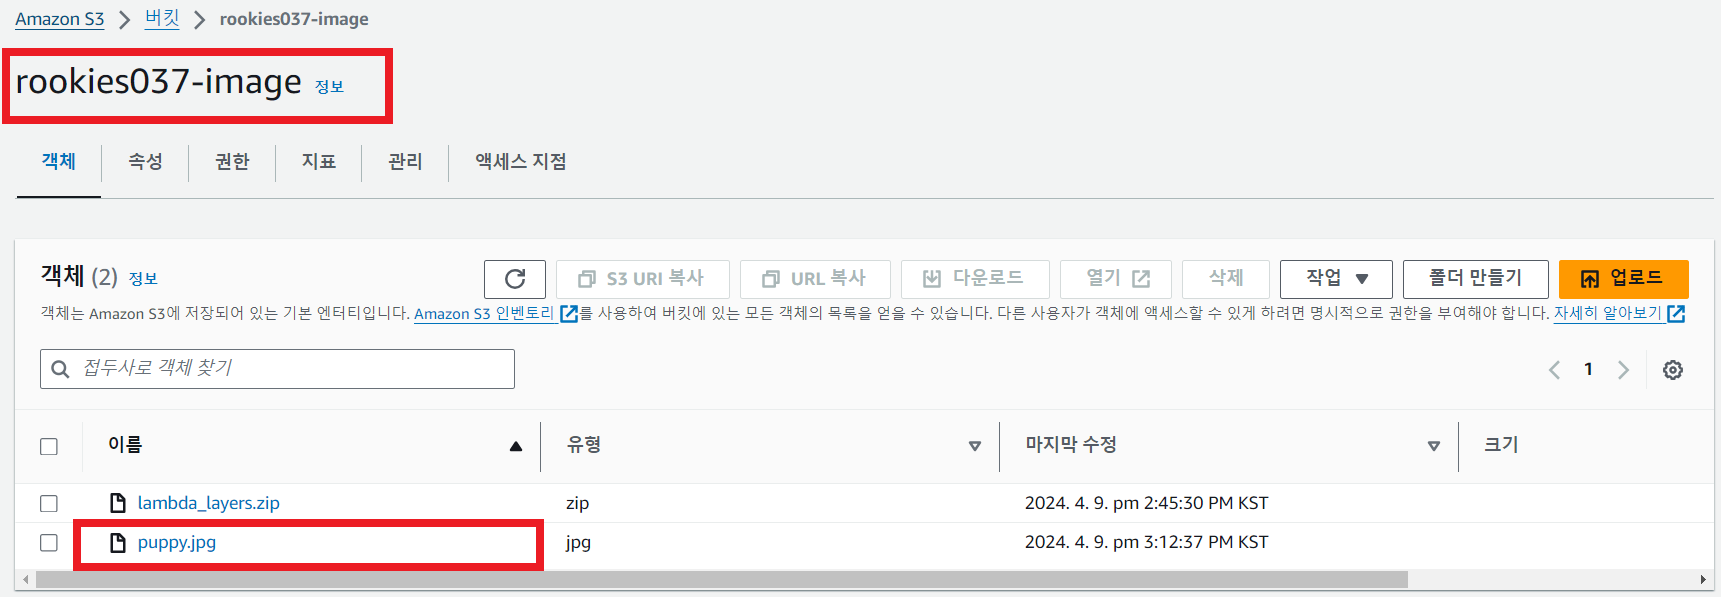
upload: ./lambda_layers.zip to s3://rookies037-image/lambda_layers.zip③ 업로드 확인
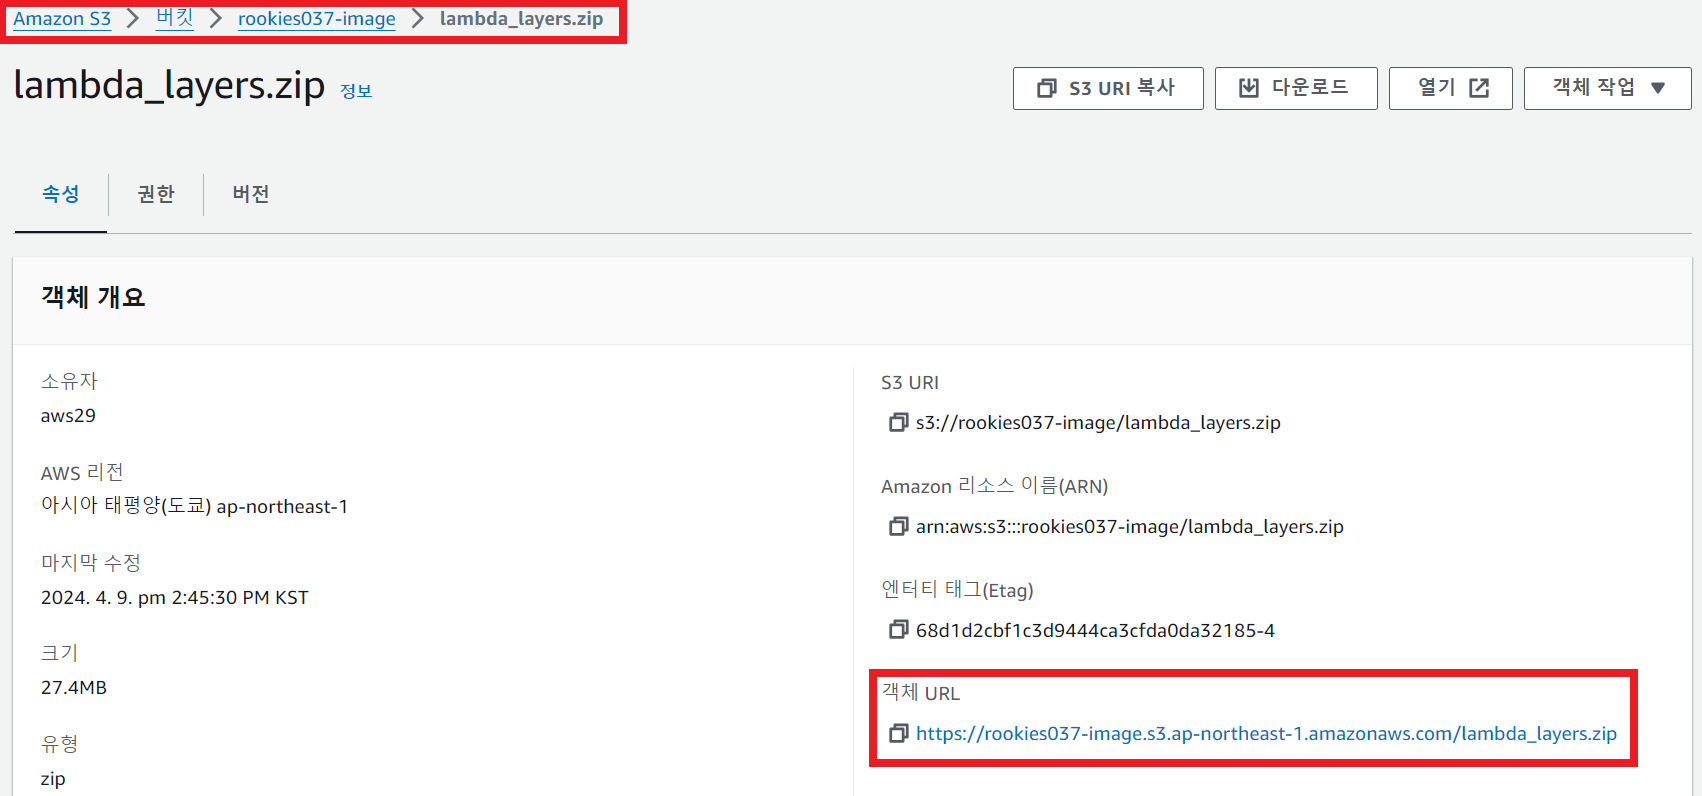
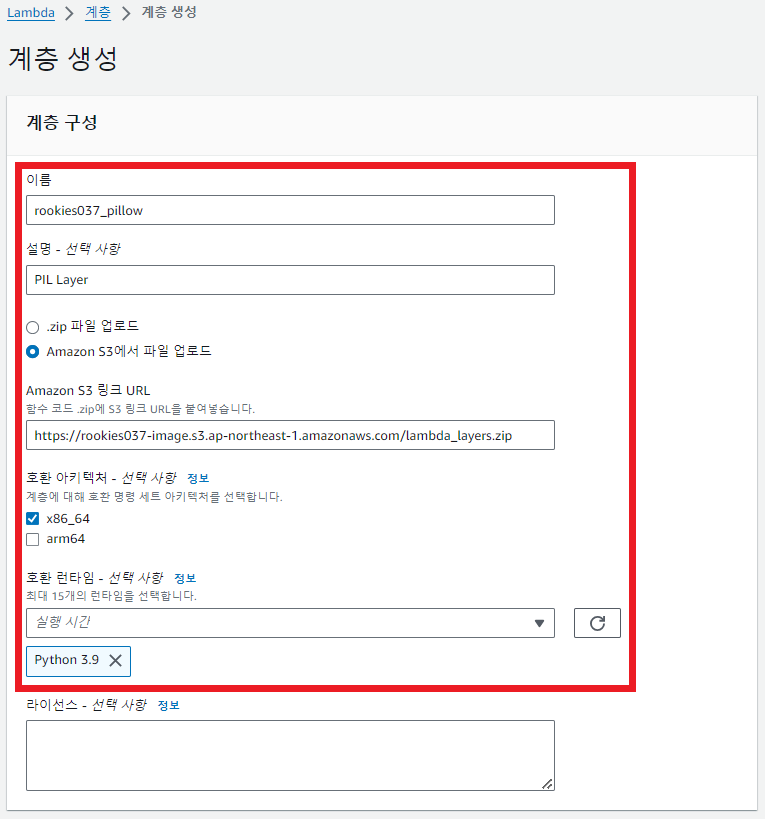
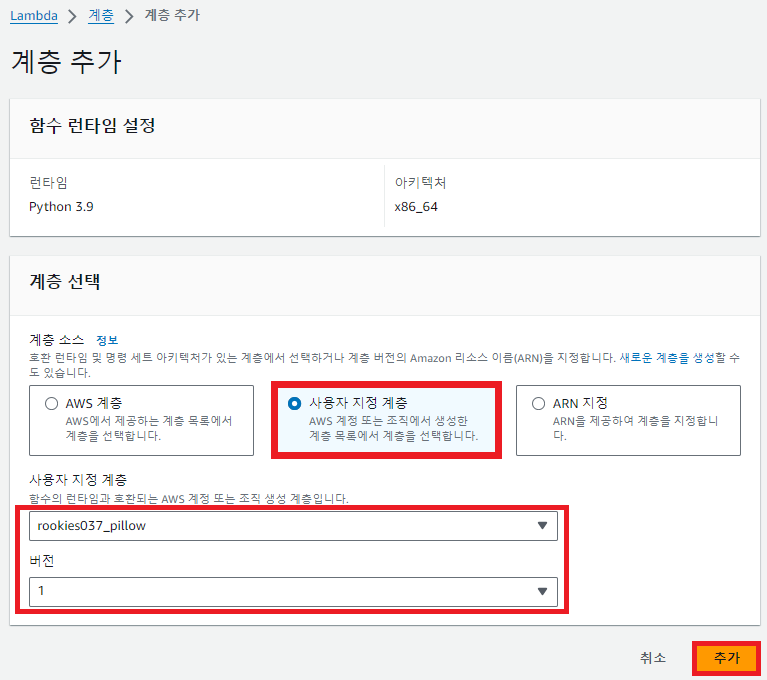
④ 업로드한 라이브러리를 람다 계층으로 등록
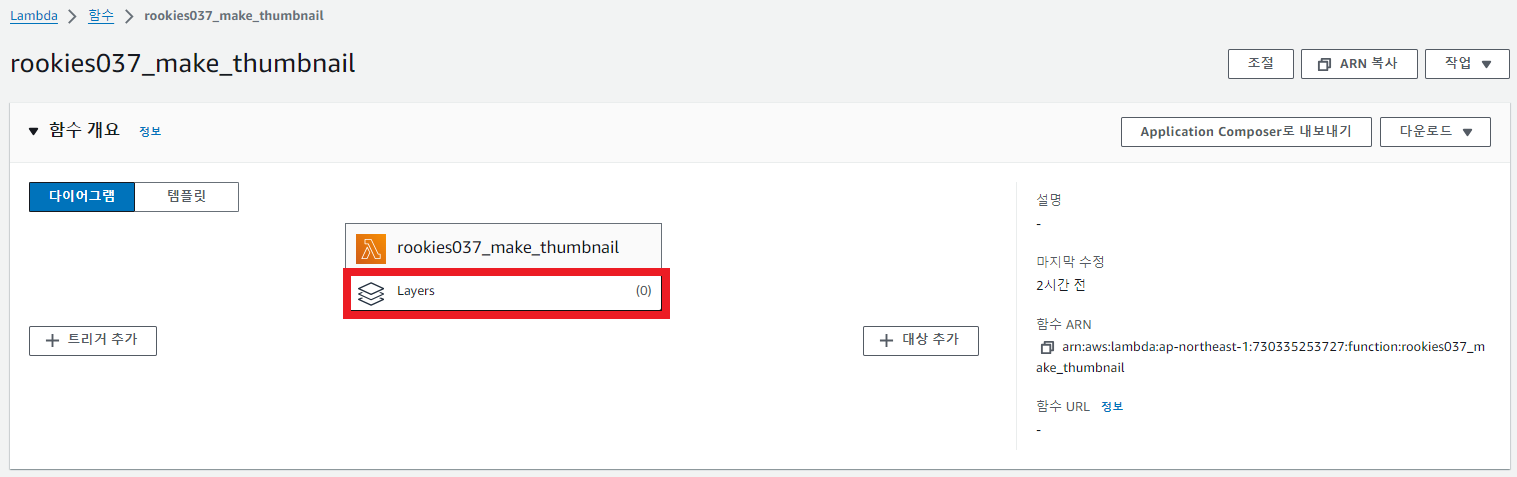
⑤ 람다 함수에 계층 추가

테스트
① 버킷에 (작은 크기의) 이미지 파일 업로드
② 테스트 환경에 맞도록 테스트 이벤트 구성 수정
본인이 생성한 S3 버킷 이름과 업로드한 이미지 파일 이름으로 변경
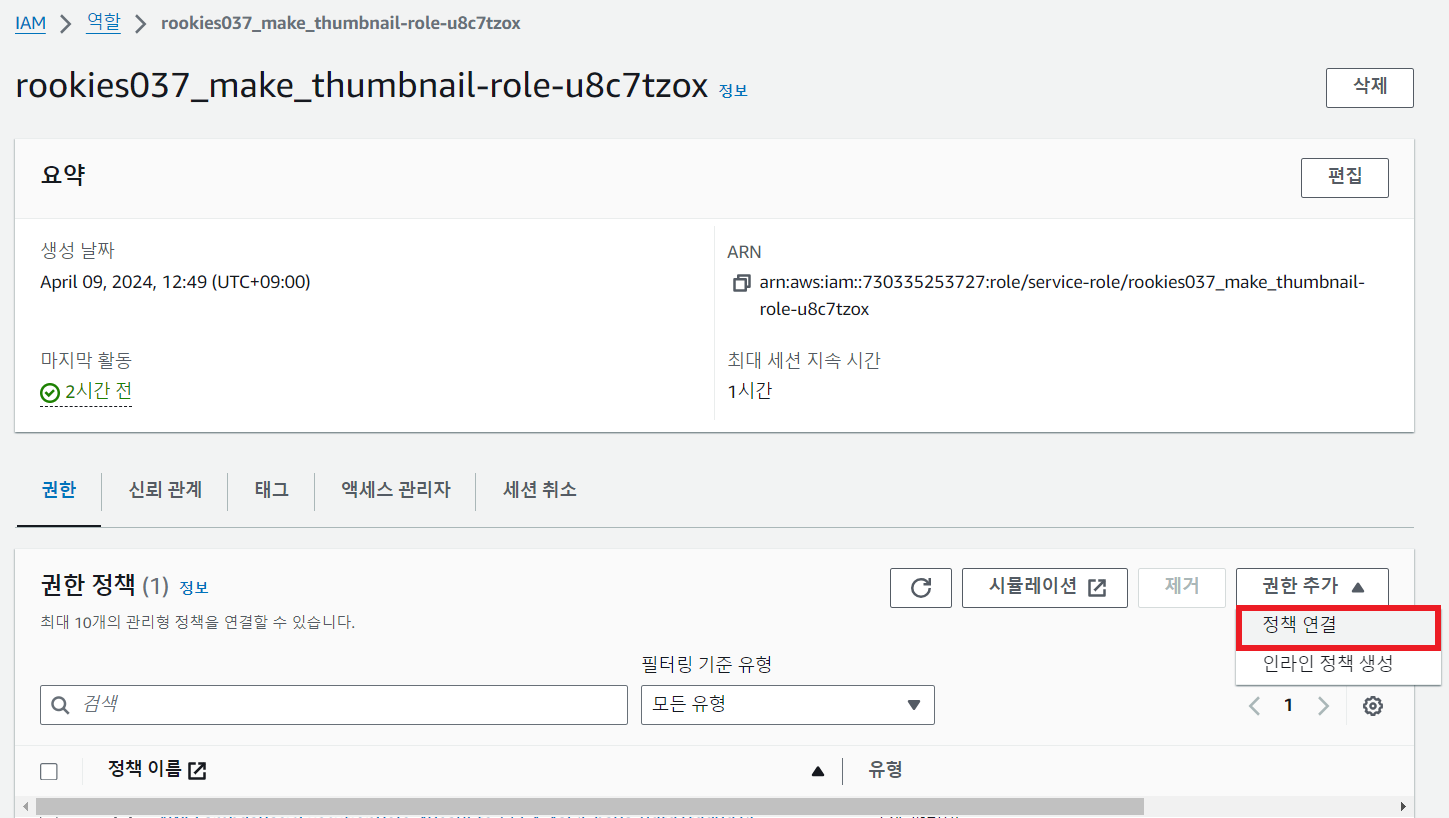
③ 테스트 결과 권한 오류 발생

④ 람다 함수 역할에 S3 버킷을 읽고 쓸 수 있는 권한 추가

⑥ 테스트
섬네일 버킷이 존재하지 않아서 오류
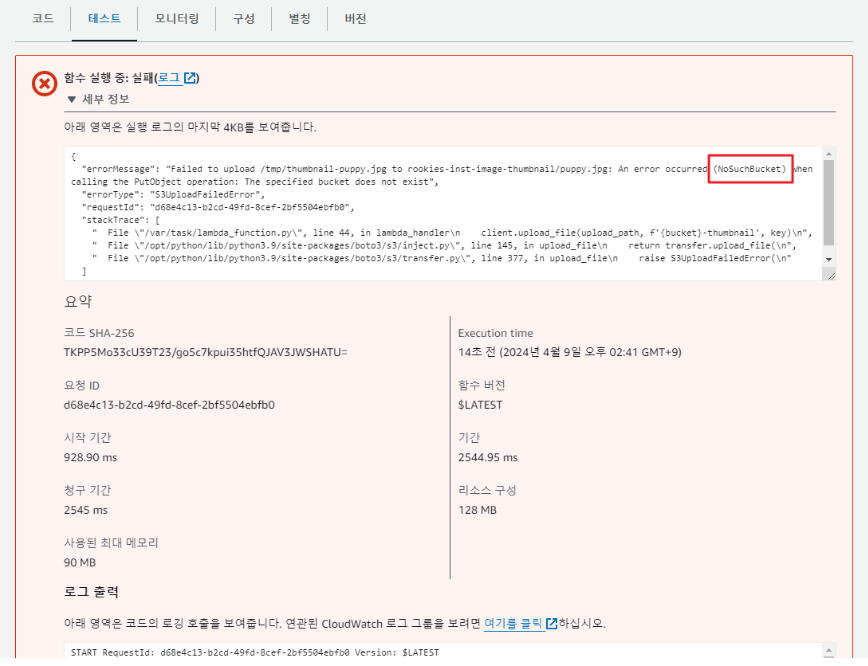
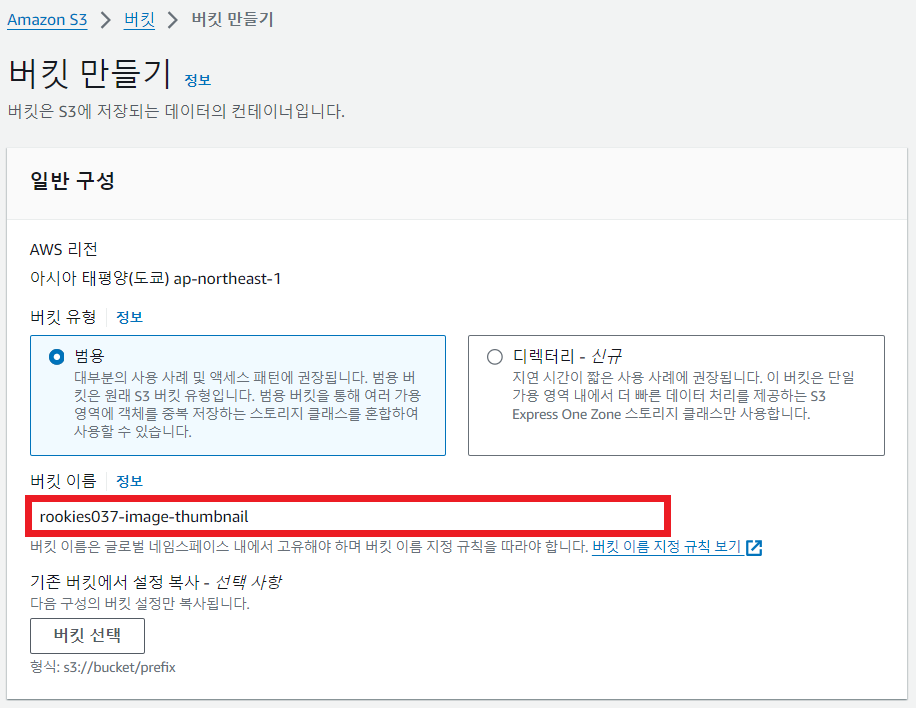
⑦ 섬네일을 저장할 버킷 생성
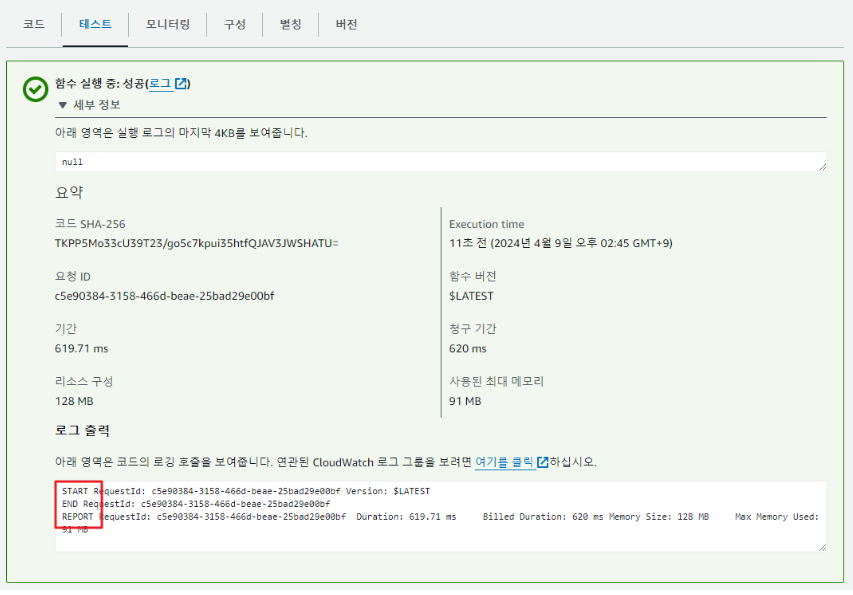
⑧ 테스트
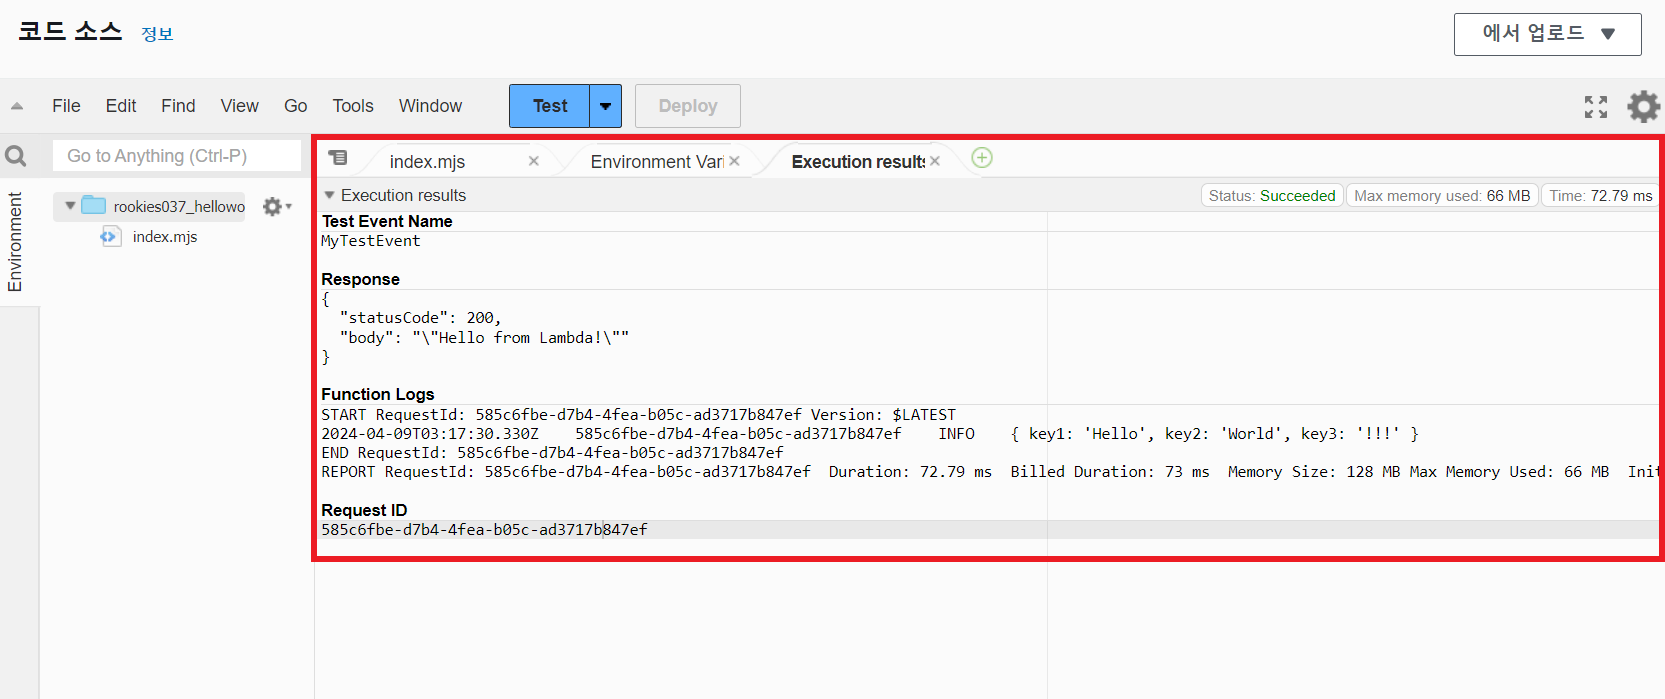
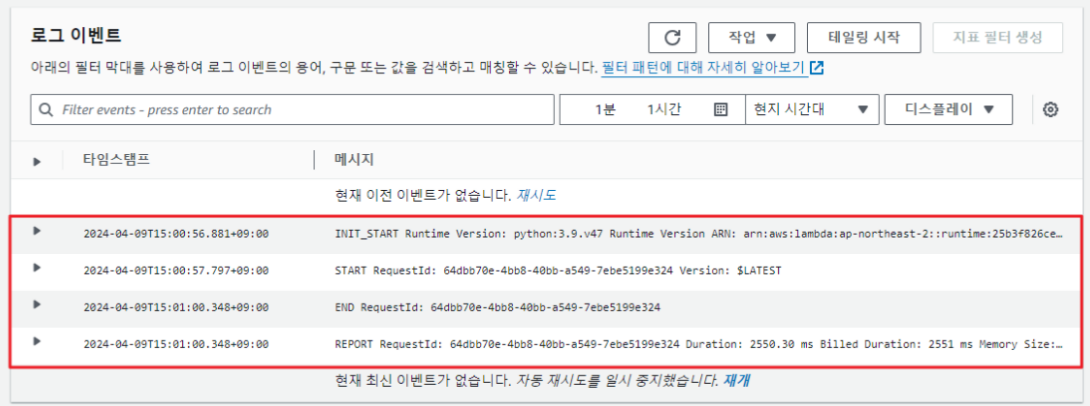
실행 결과로 실행 시간, 종료 시간, 실행에 사용된 리소스 내역이 출력되는 것을 확인
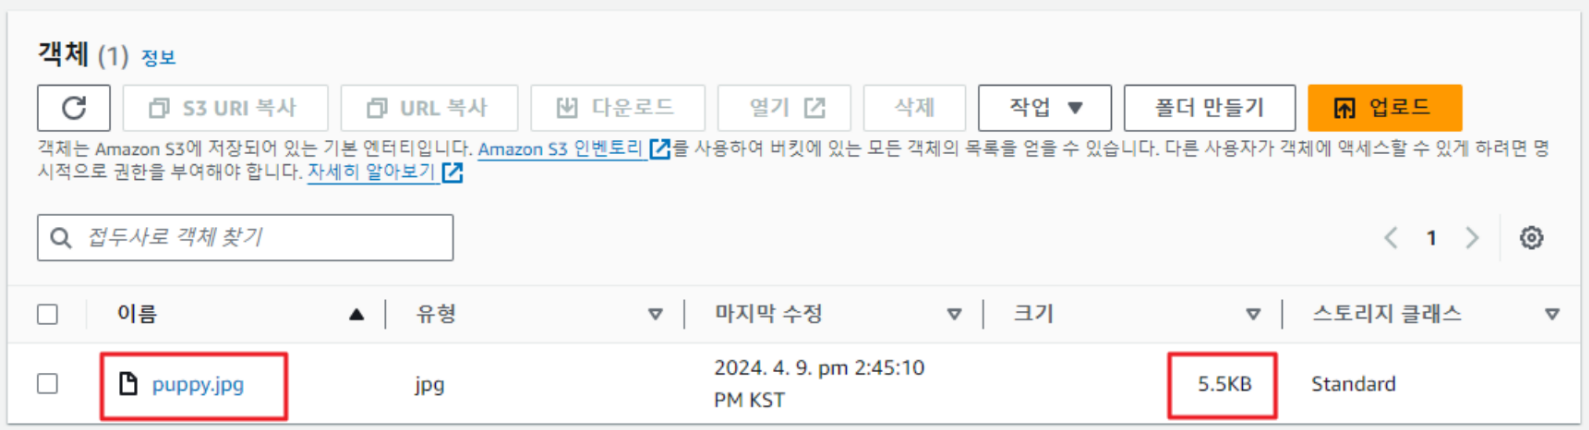
⑨ 섬네일 버킷에 섬네일이 등록된 것을 확인
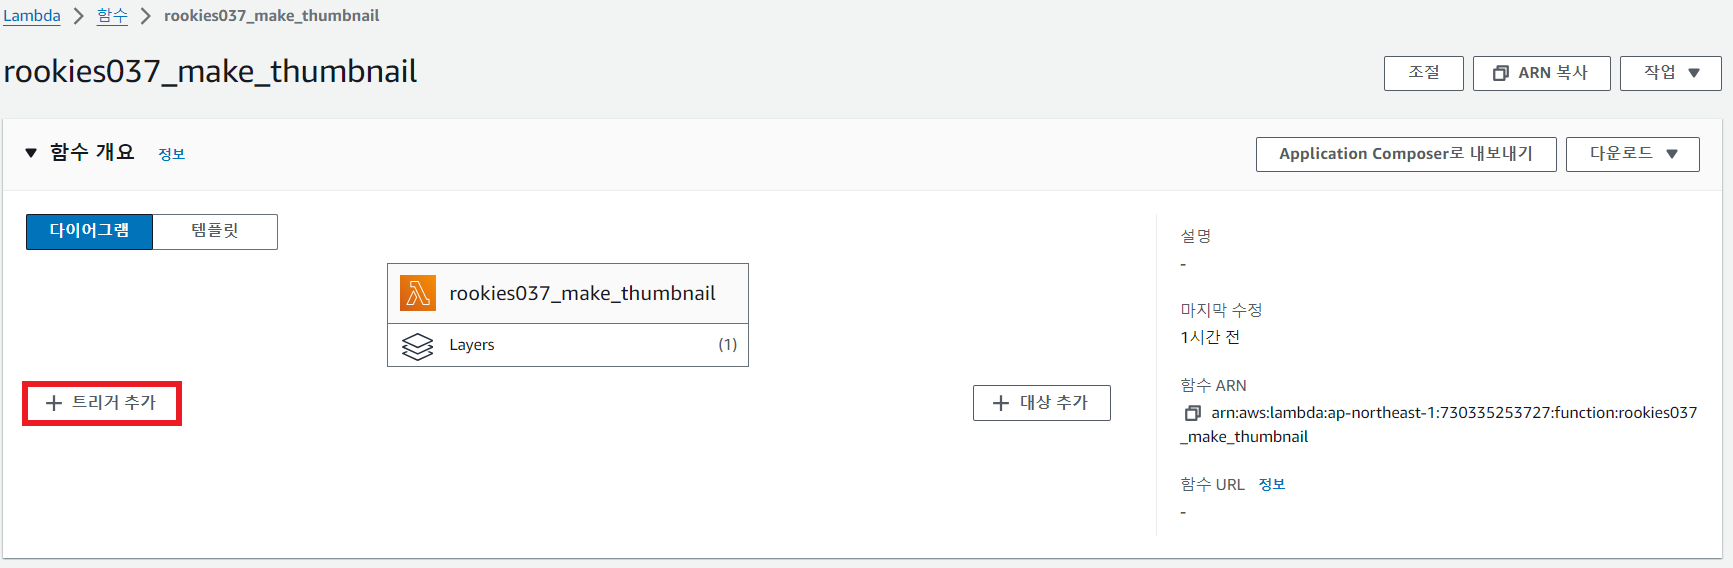
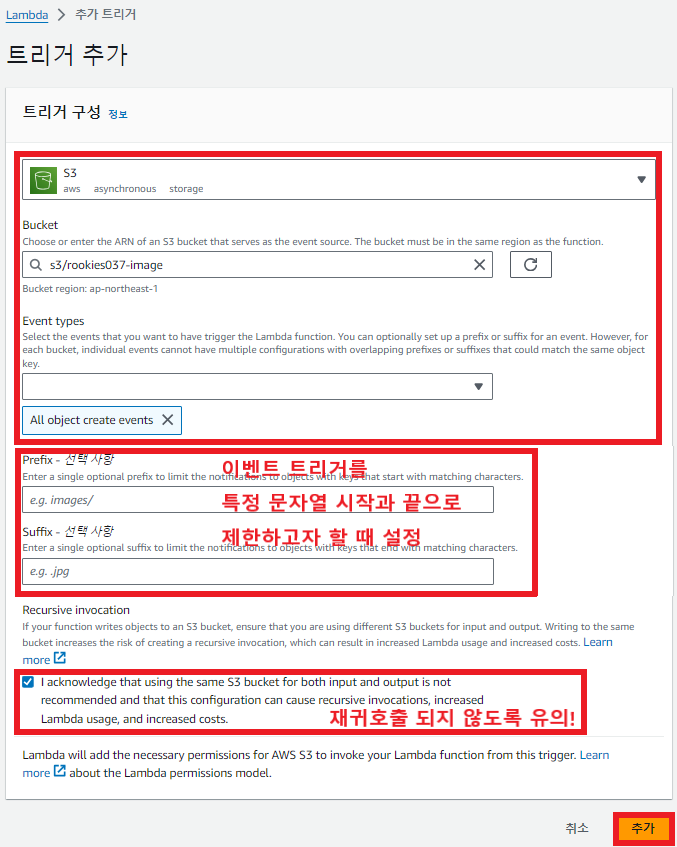
트리거 추가
① 업로드 버킷에 파일이 추가되면 람다 함수가 호출되도록 트리거 추가
② 업로드 버킷에 (작은 크기의) 이미지 파일을 등록했을 때 섬네일 버킷에 섬네일 파일이 생성되는 것을 확인


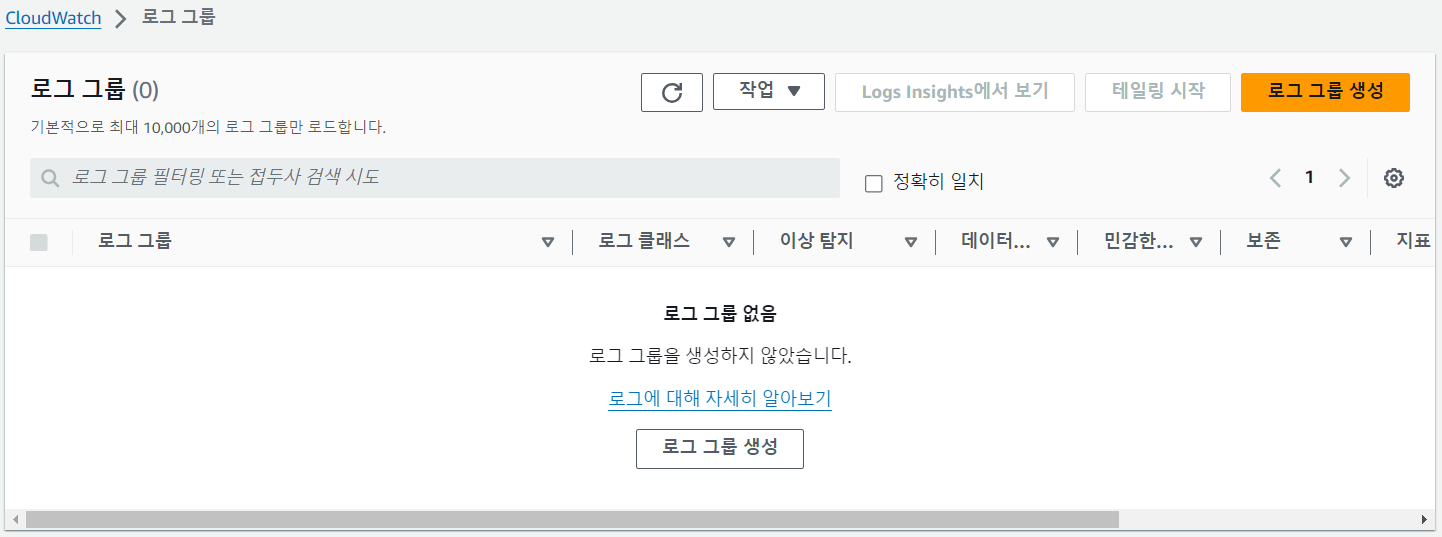
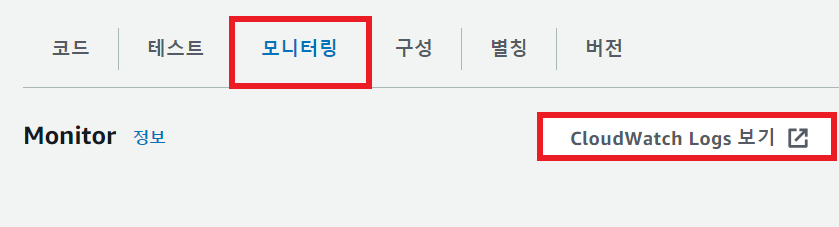
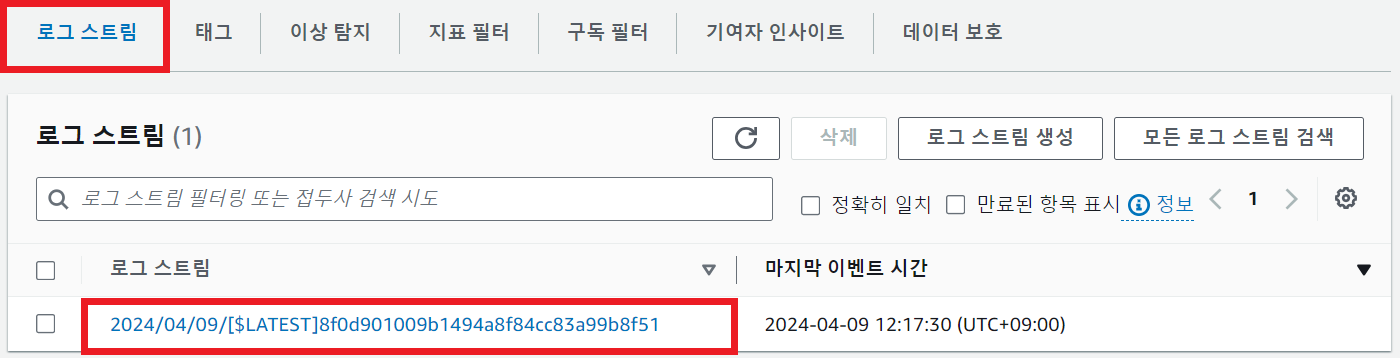
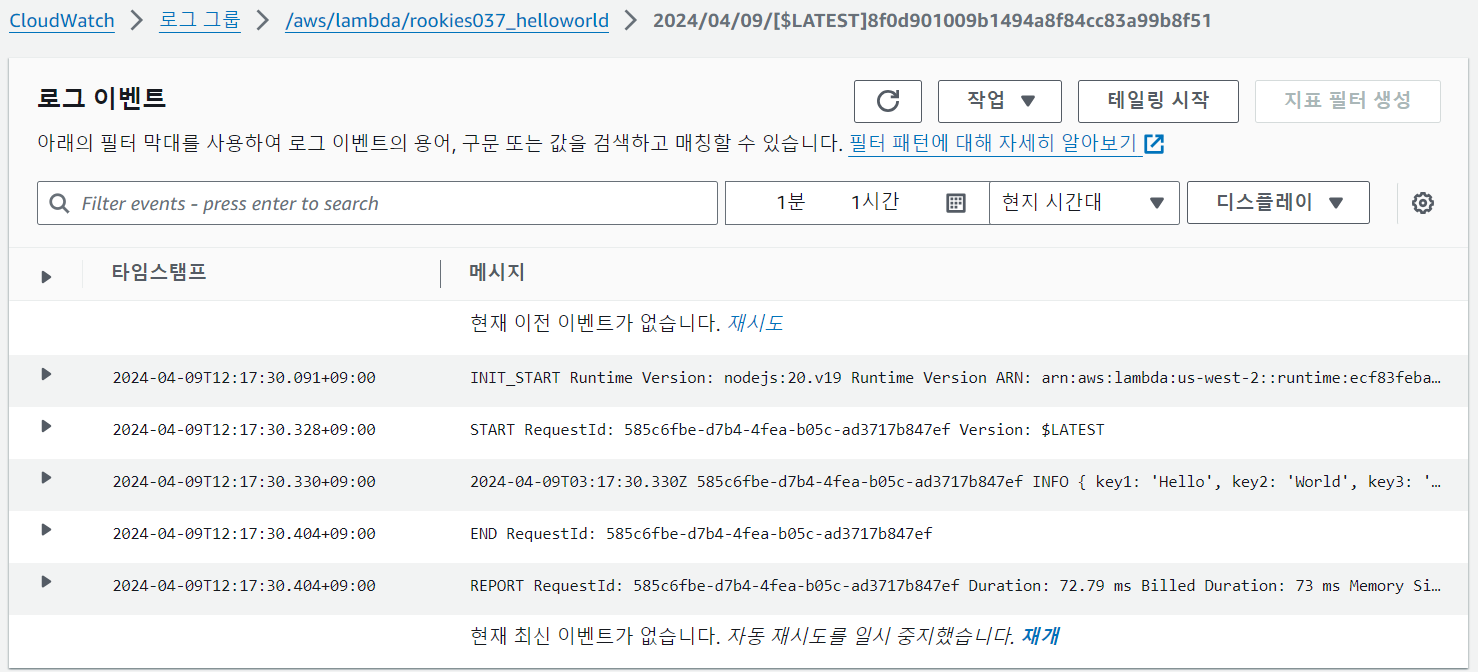
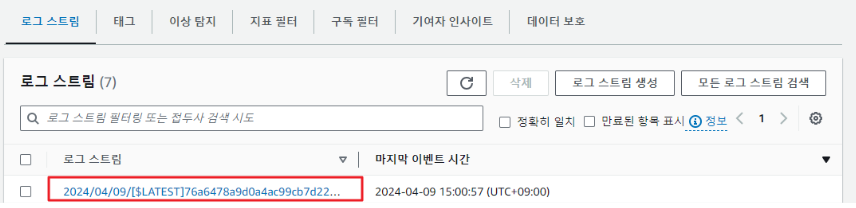
③ CloudWatch에서 로그 확인

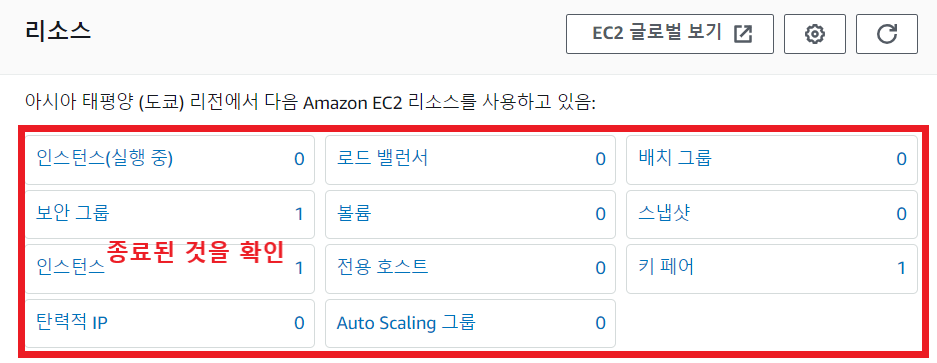
📌 리소스 정리
① EC2 인스턴스 종료
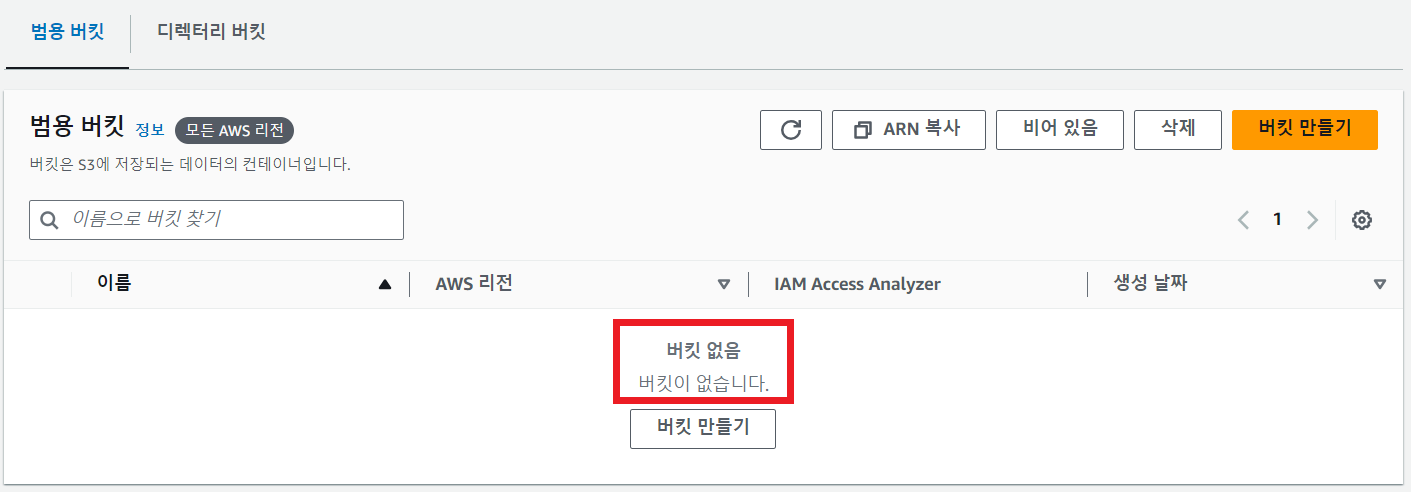
② S3 버킷 비우고 삭제
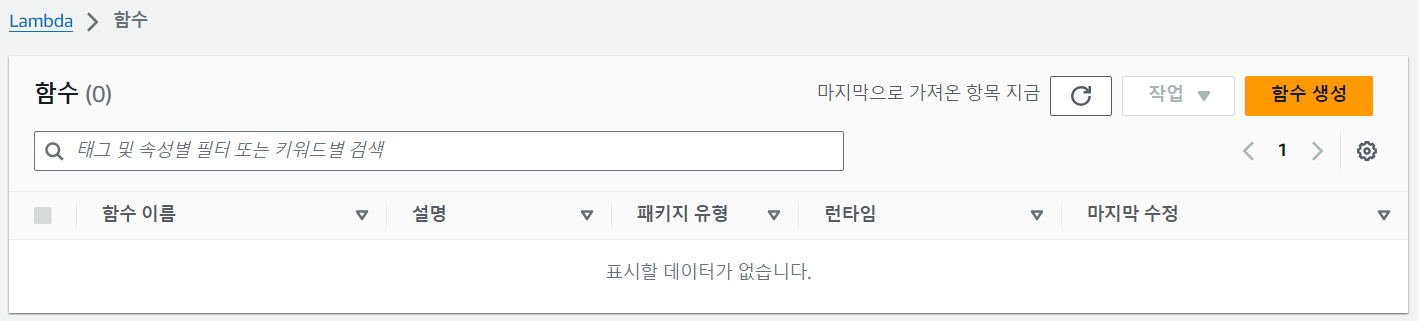
③ Lambda 함수 삭제
④ Lambda 계층 삭제

⑤ 기본 VPC 삭제

⑥ 기타 - CloudWatch 로그 그룹 및 IAM 역할 삭제