
NGINX Web Server 공식 문서
NGINX 설치 및 실행
- For MAC
brew install nginx
brew services start nginx
Terminal에서 첫번째 코드를 입력하여 설치한 후 두번째 코드로 실행 (Homebrew를 미리 설치한 후 진행)
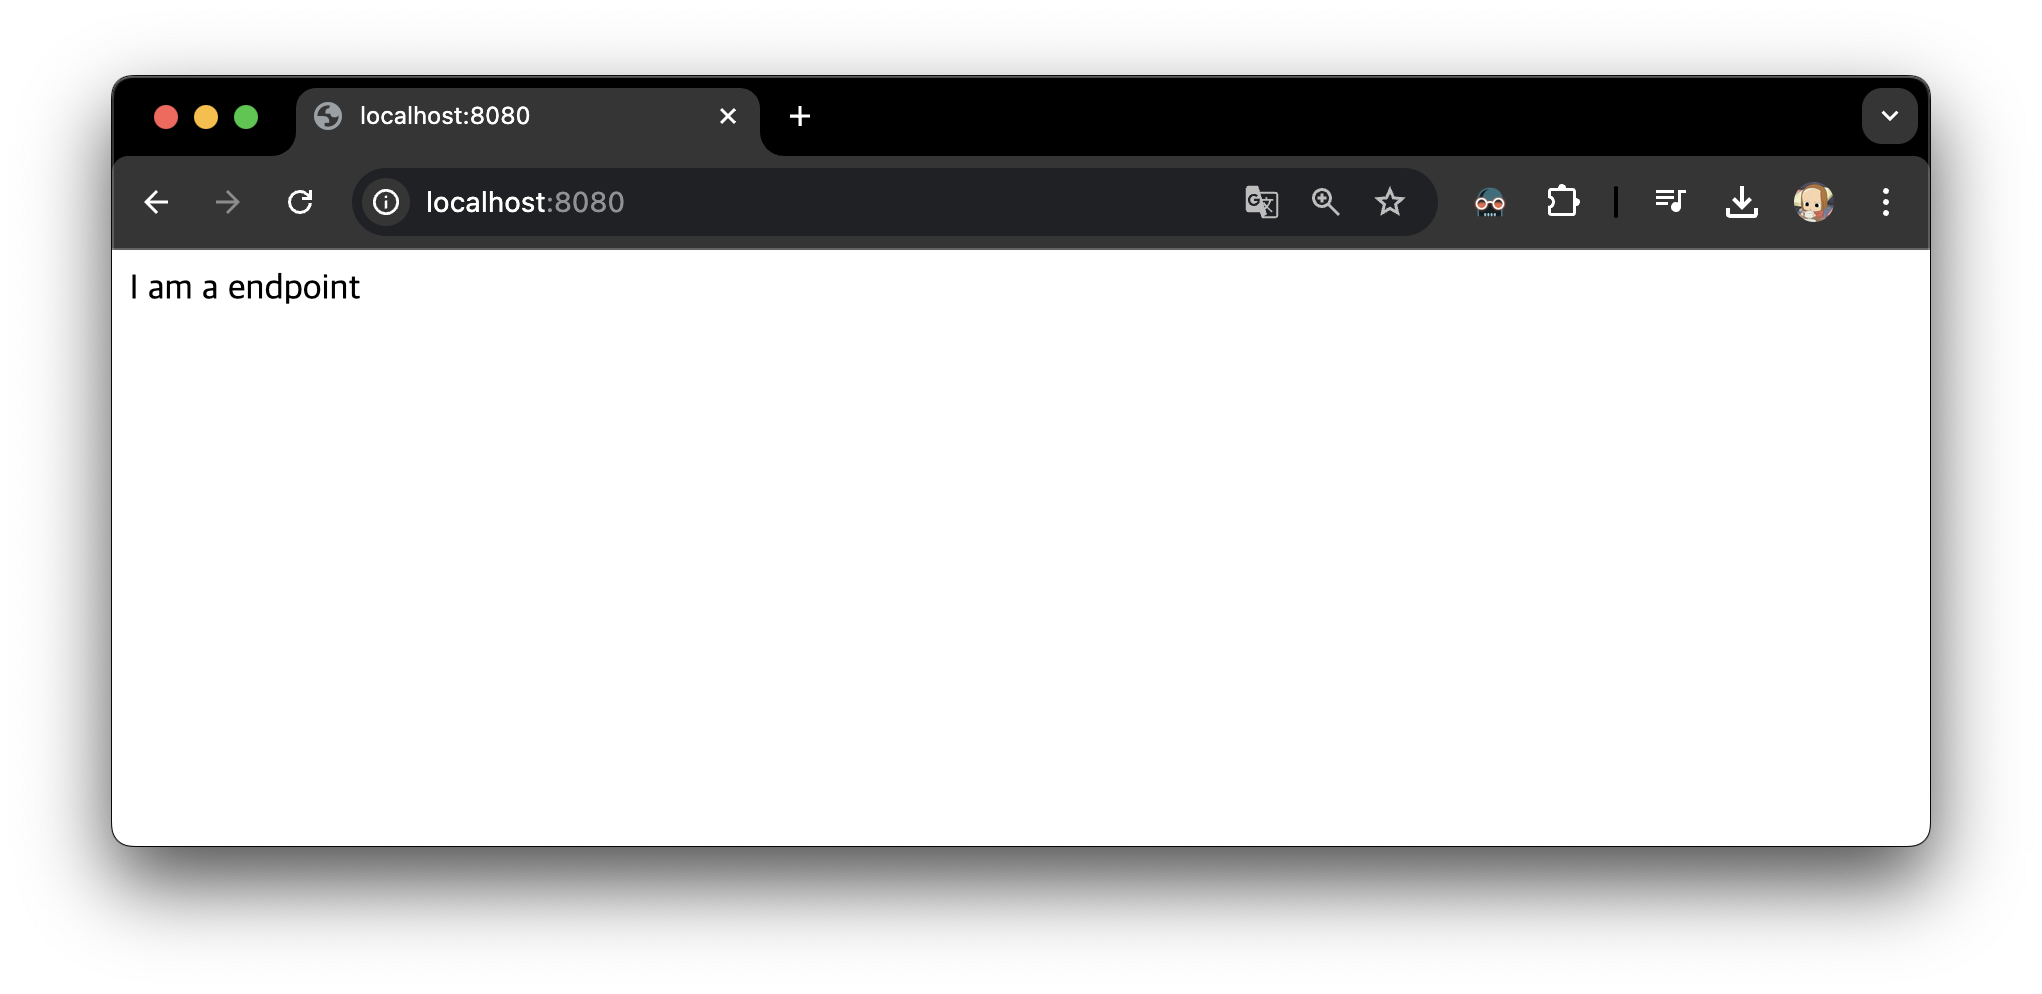
NGINX 서버 실행 : 기본 설정된 index.html 페이지 확인
brew services start nginx 입력 후 주소창에 localhost:8080을 입력하면
아래의 실행 결과와 같이 기본 설정된 index.html 페이지 확인 가능
- 실행 결과

NGINX 설정 변경 시 조작해야하는 텍스트 파일 경로 확인 방법
nginx -tbrew info nginxMAC Terminal 에서 위와 아래 두 가지 방법 모두 사용 가능
- 실행 결과
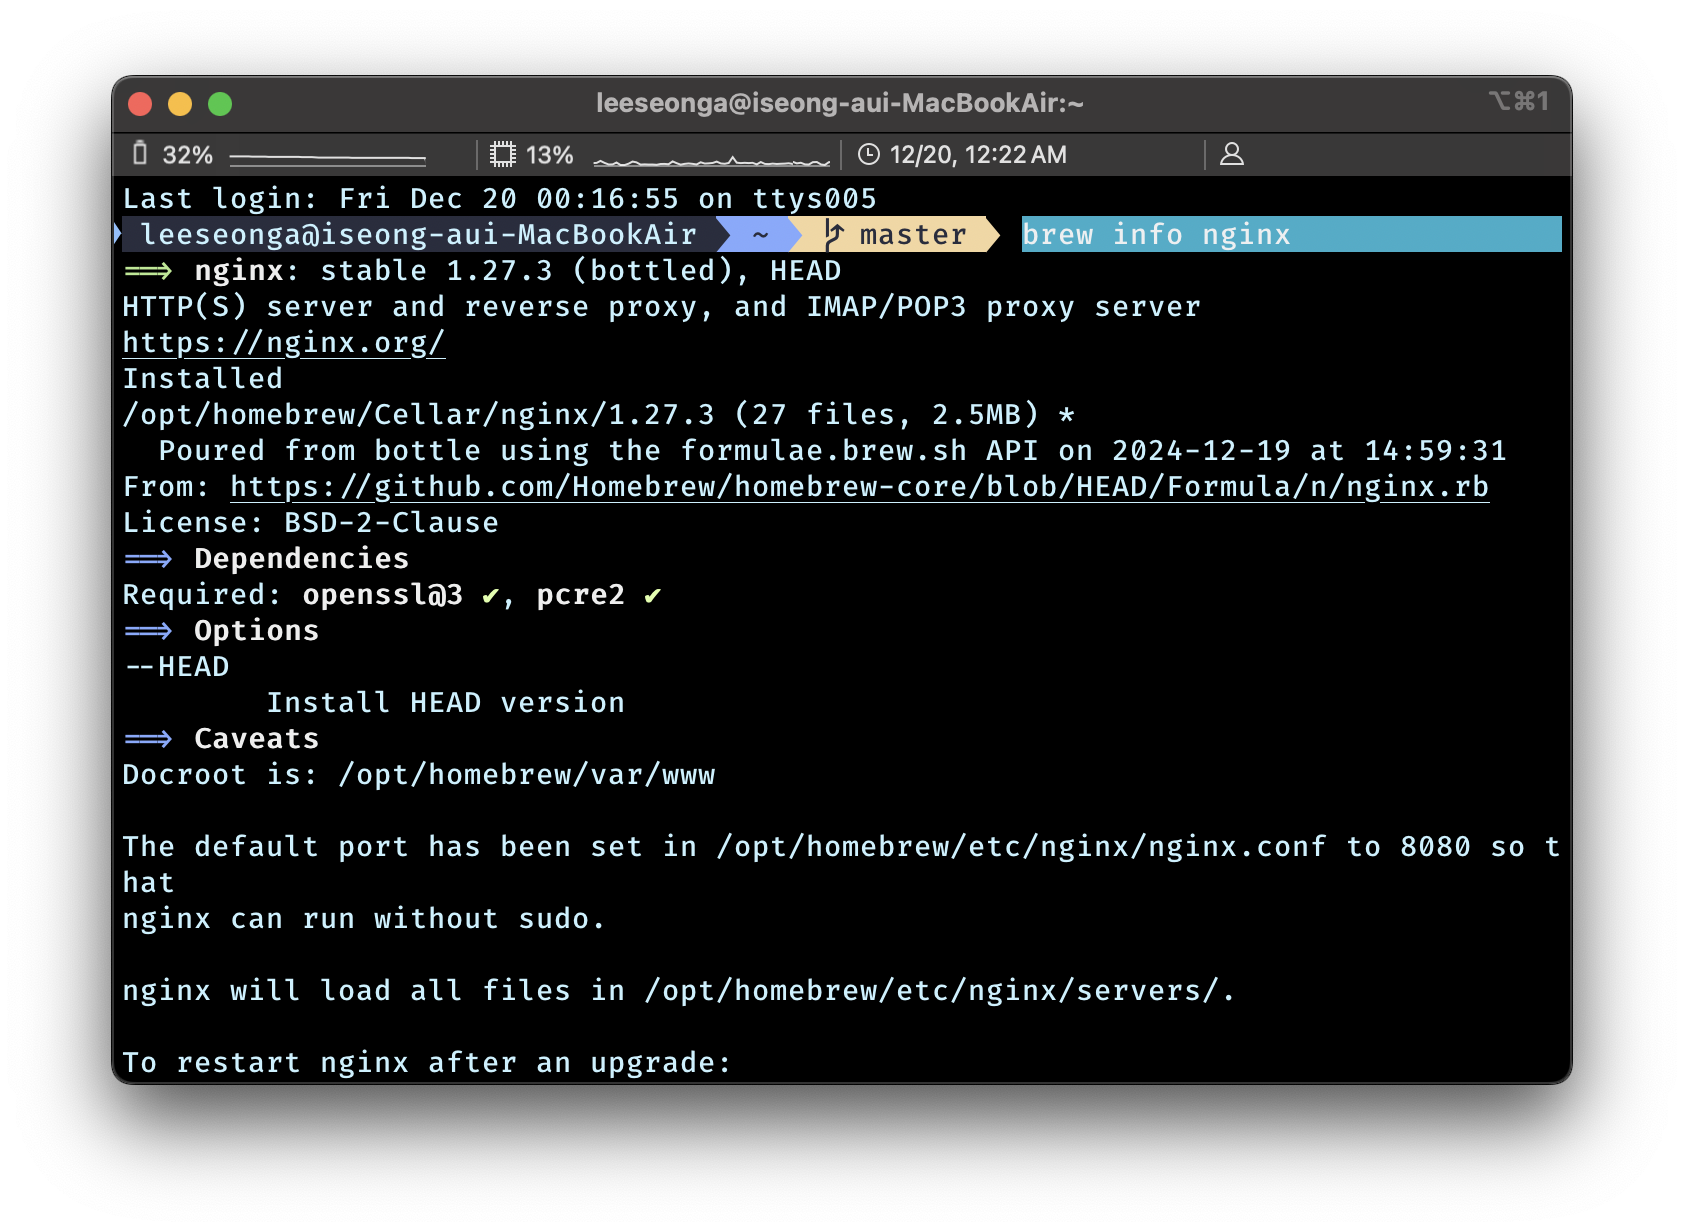
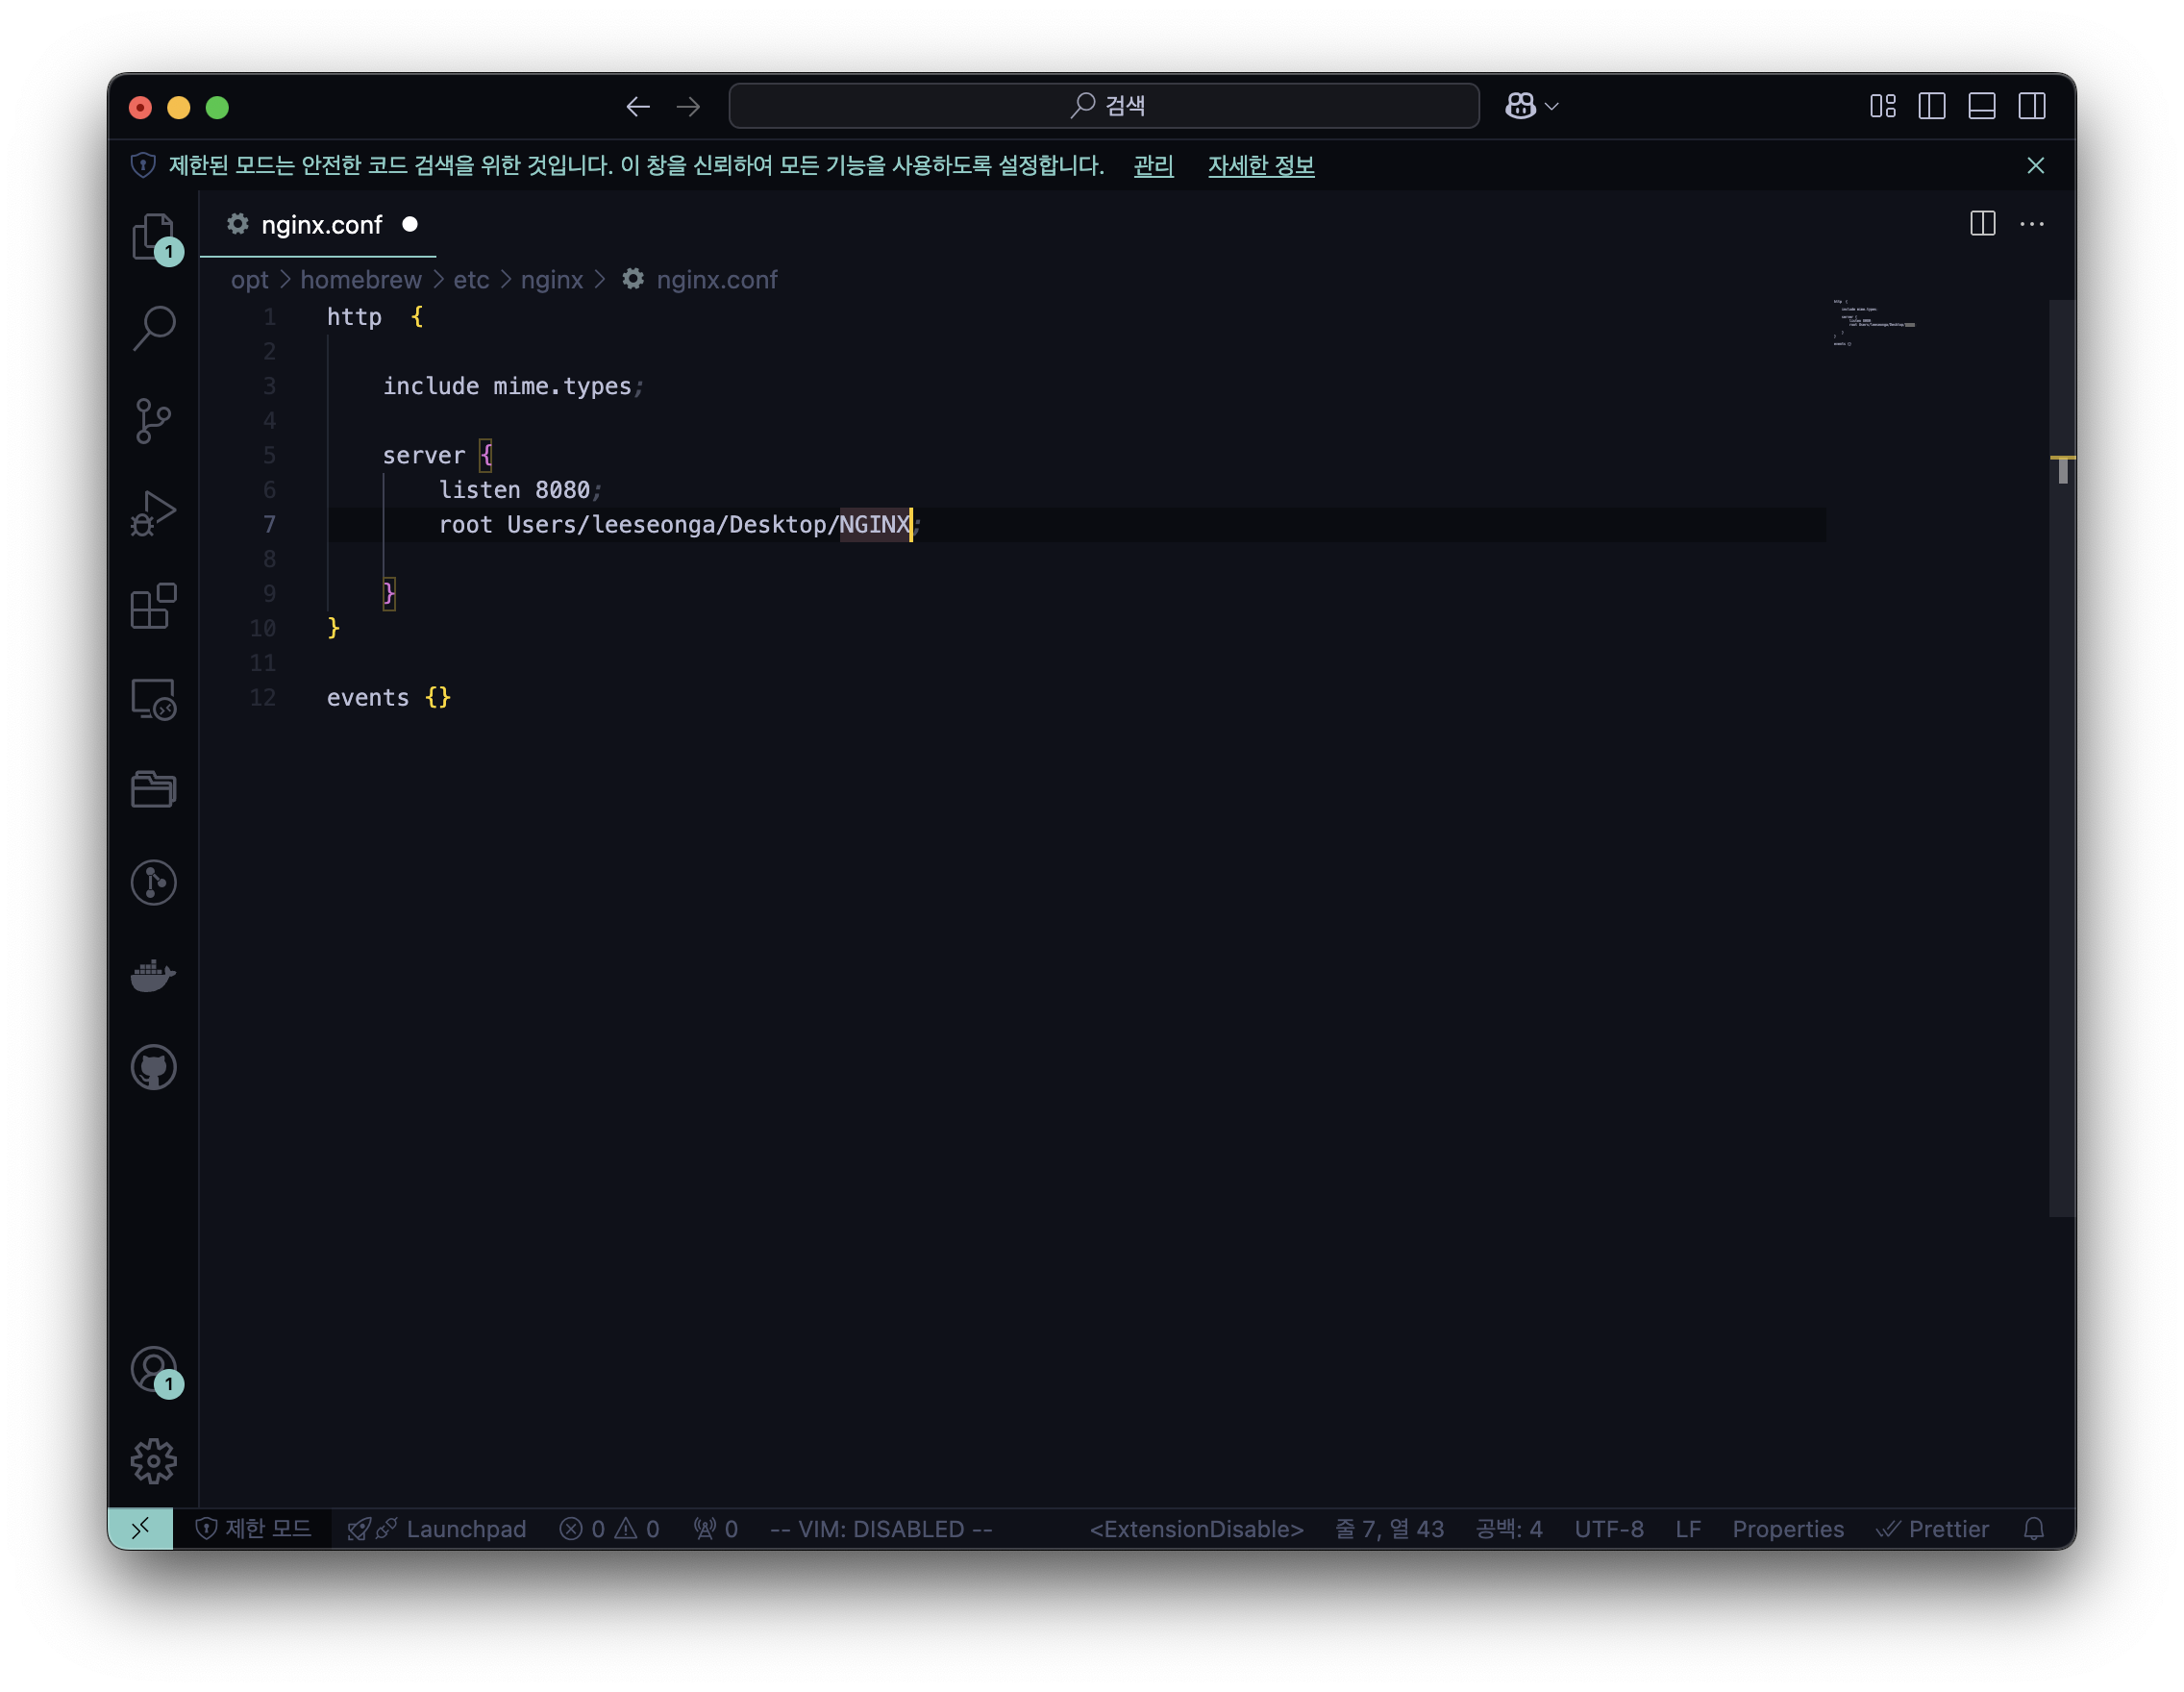
/opt/homebrew/etc/nginx/nginx.confHomebrew 를 이용해 설치했다면, 경로는 위와 동일
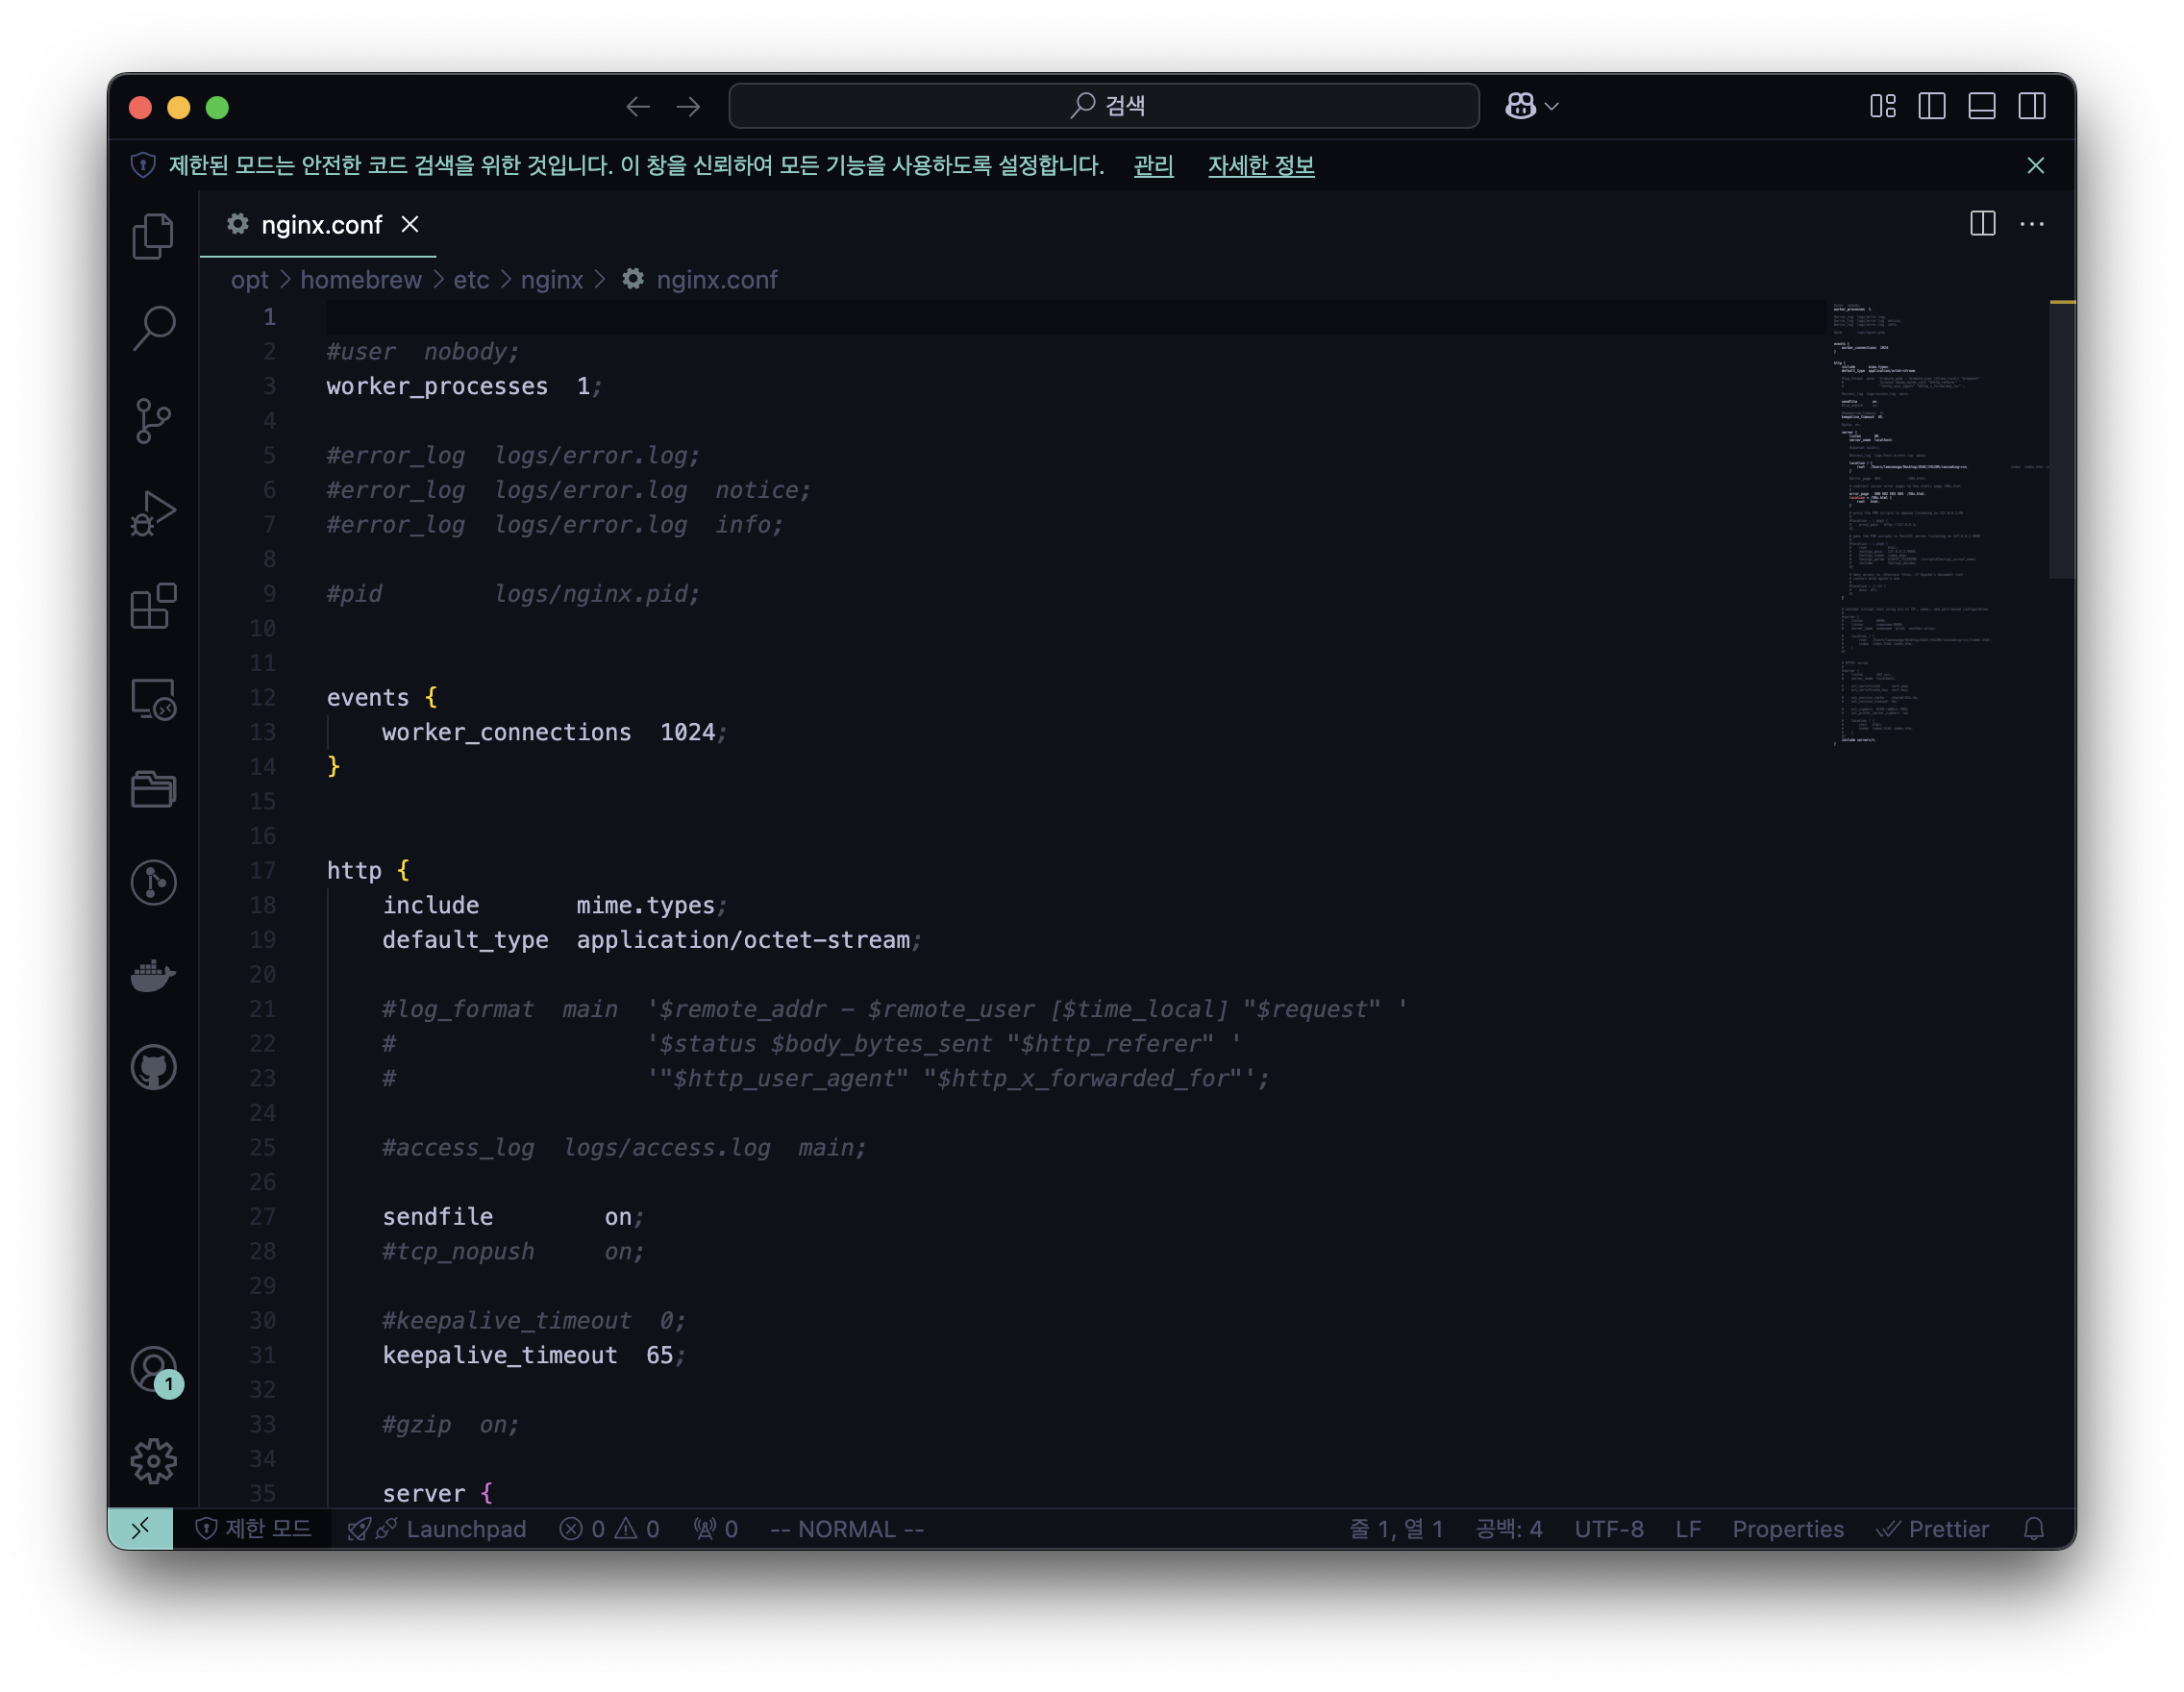
NGINX 서버 설정 변경 : nginx.conf
# vscode 가 익숙한 개발자 혹은 주니어 개발자
code /opt/homebrew/etc/nginx/nginx.conf

# vi 가 익숙한 개발자만
vi /opt/homebrew/etc/nginx/nginx.conf
Terminal 에서 code 를 이용하려면 VS Code 에서 Install ‘code’ command in path 부터 실행
- code /opt/homebrew/etc/nginx/nginx.conf 실행 결과
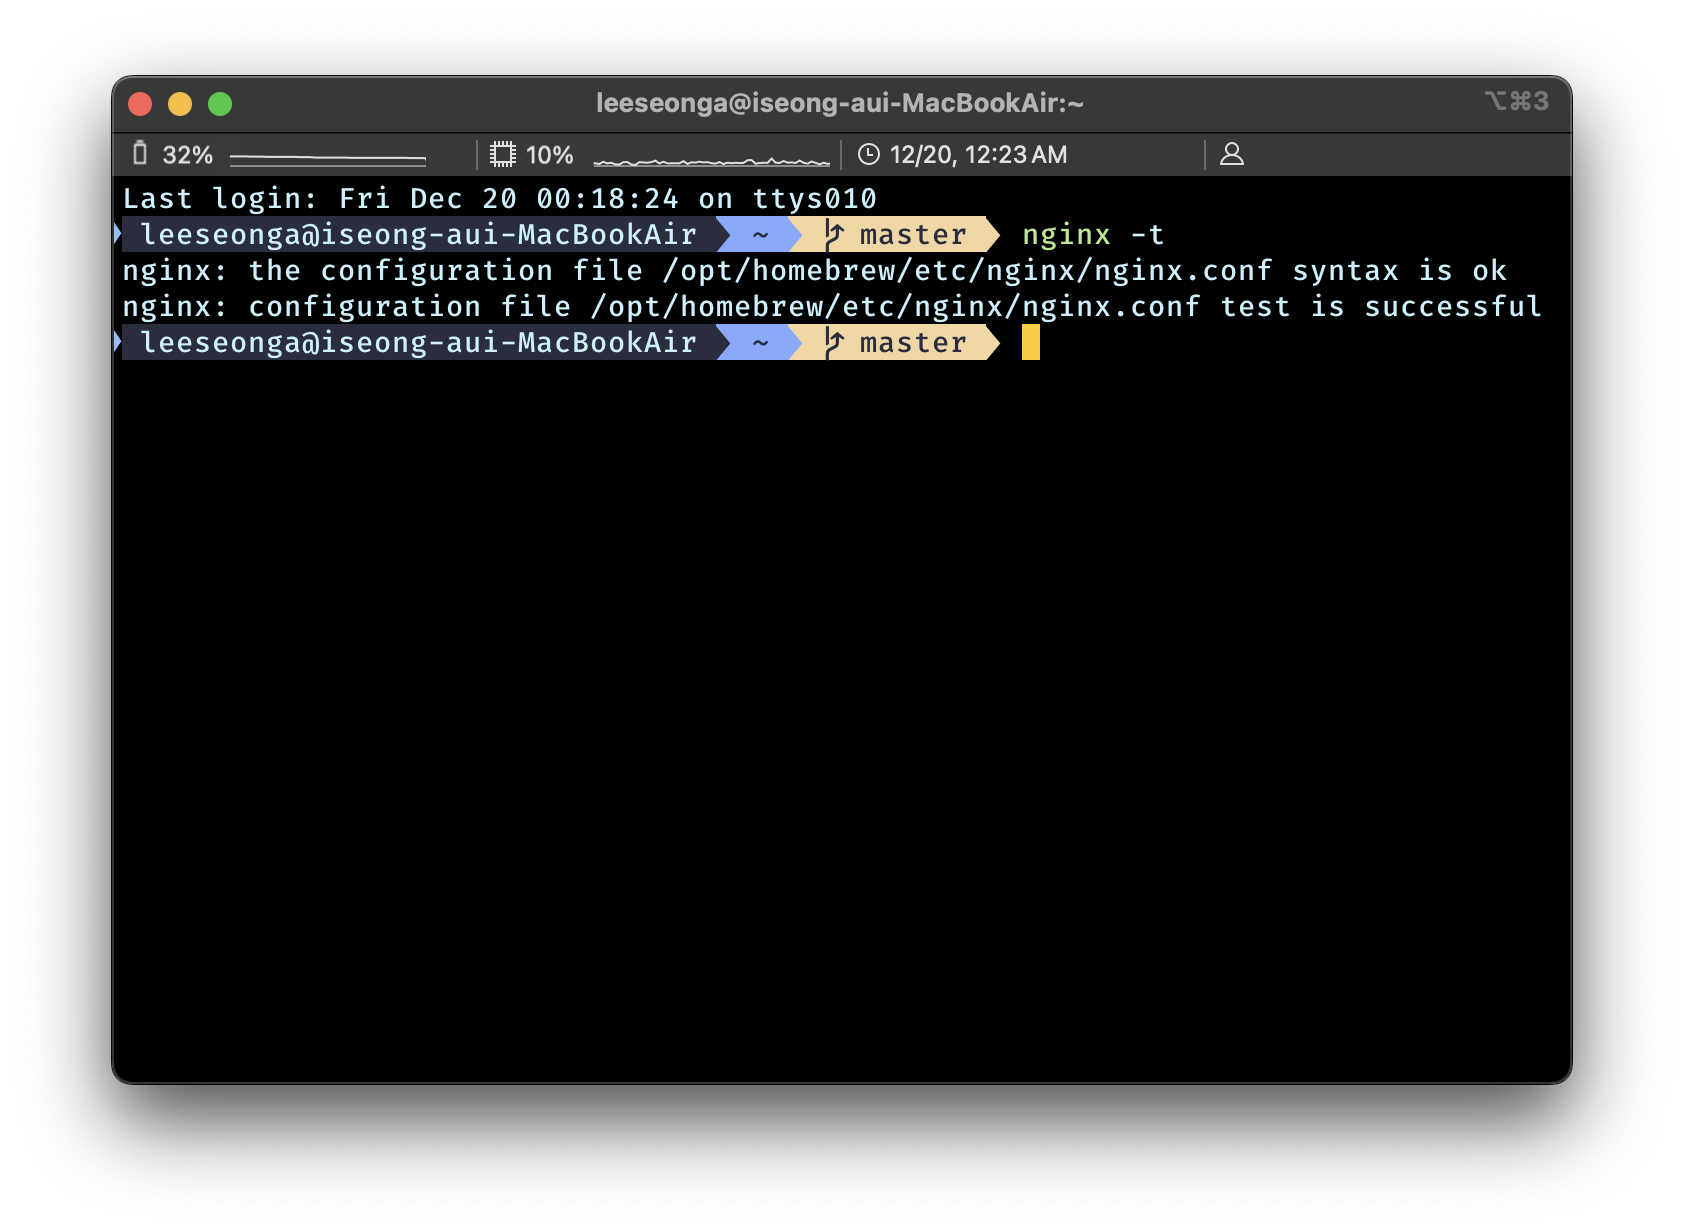
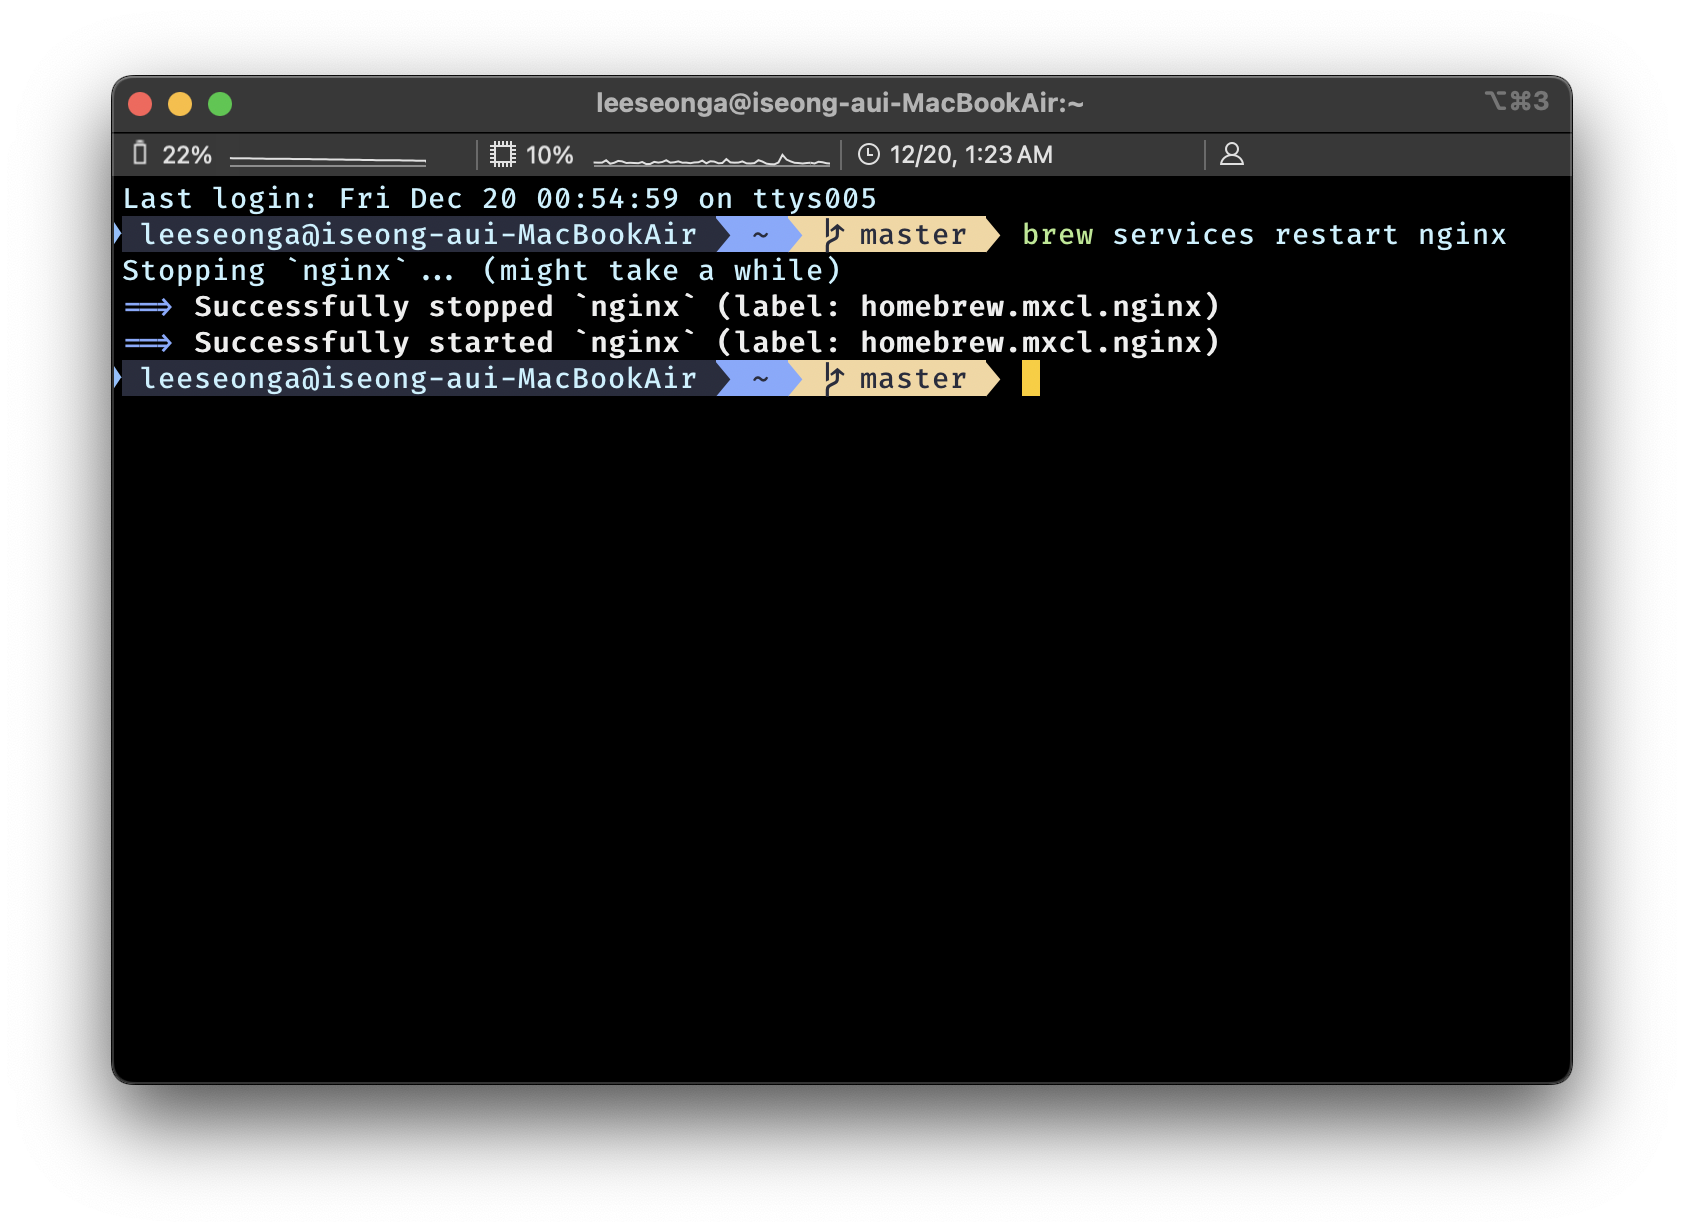
NGINX 재실행
- 설정 파일 변경 후 서버에 바뀐 값을 적용하기 위해서는 재실행이 필수
brew services restart nginxTerminal 에서 위의 코드를 입력하면 아래의 실행 결과와 같이 NGINX 재실행
⚠️ Nginx 설정 변경 후 재실행해도 적용되지 않는다면 → HTTP Cache 확인
NGINX 서버 설정 변경으로 웹 서버 동작 이해하기 : nginx.conf
- 여기부터는 위에 첨부한 영상 참고
- 변경 후, brew services restart nginx 꼭!
1. Serving Static Content
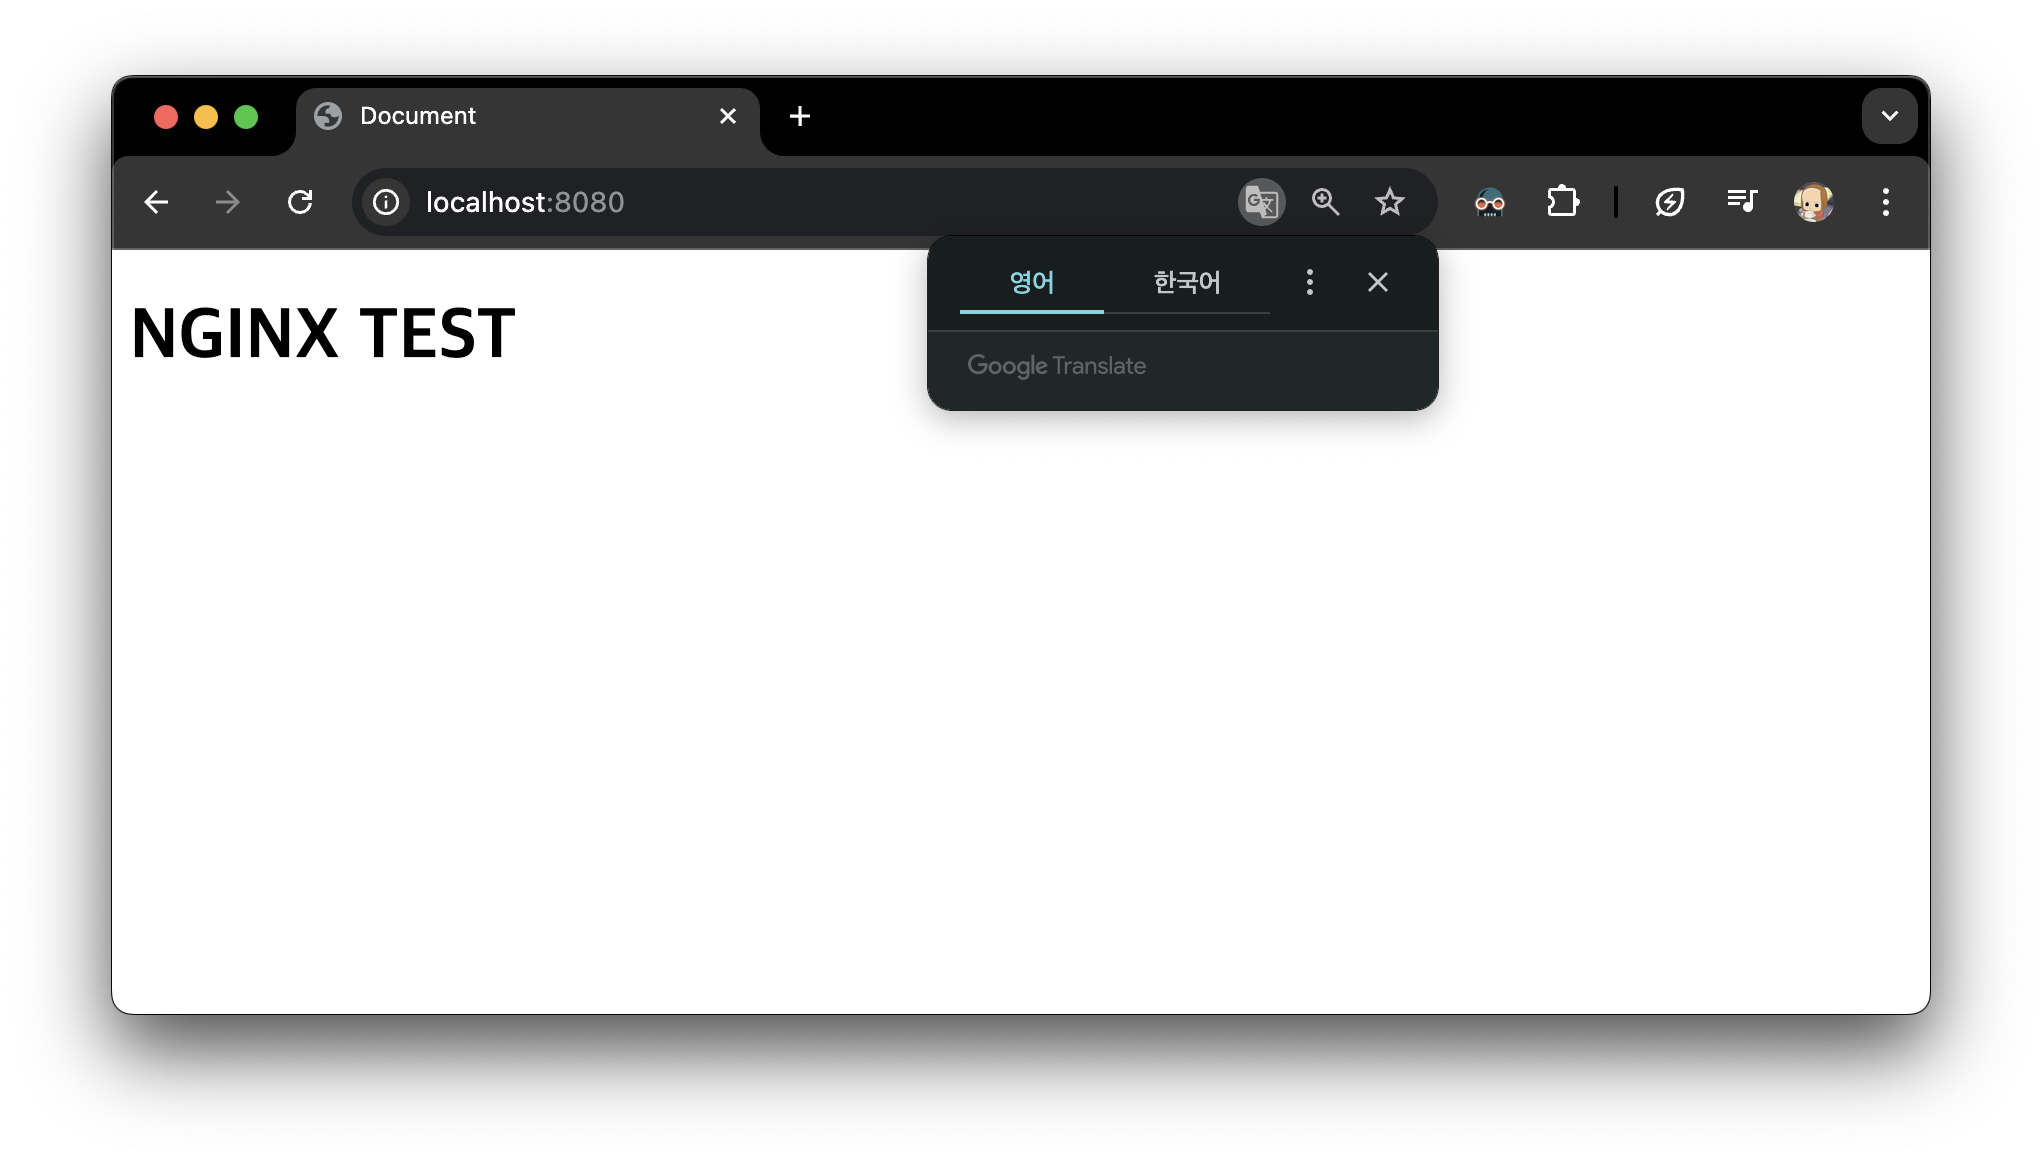
1️⃣ index.html 적용
- index.html
- ngnix.conf
- 실행 결과
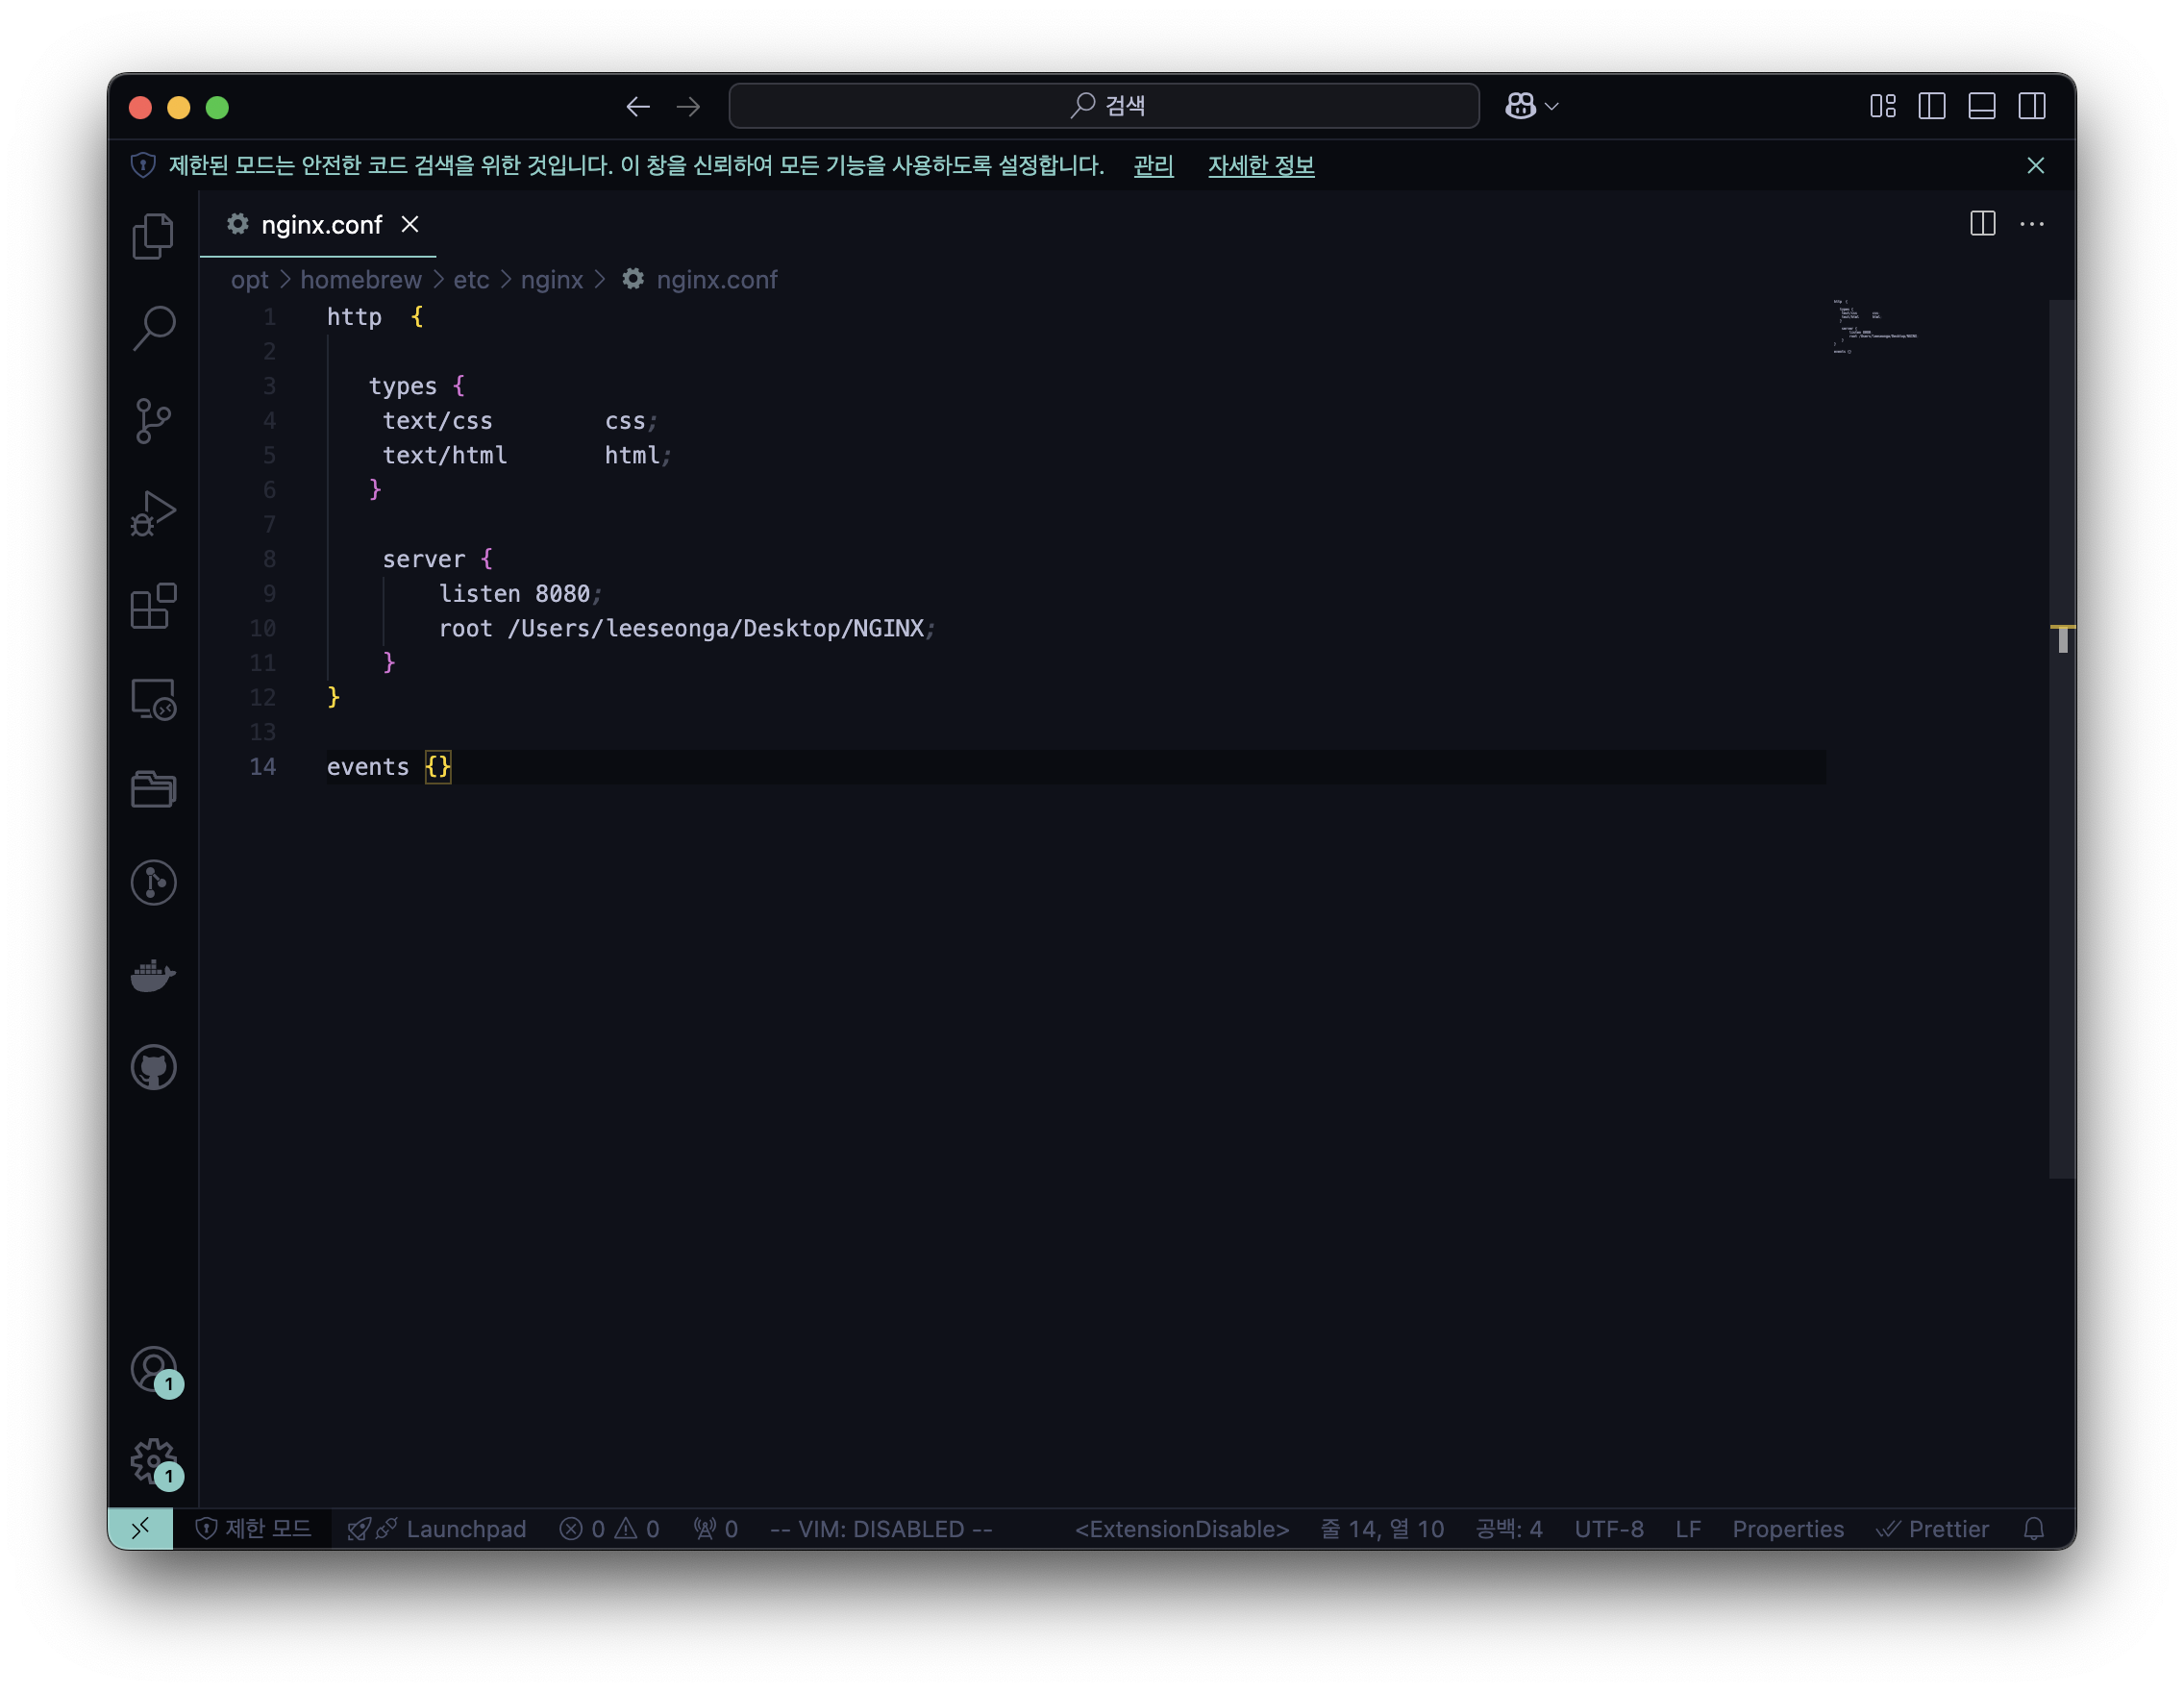
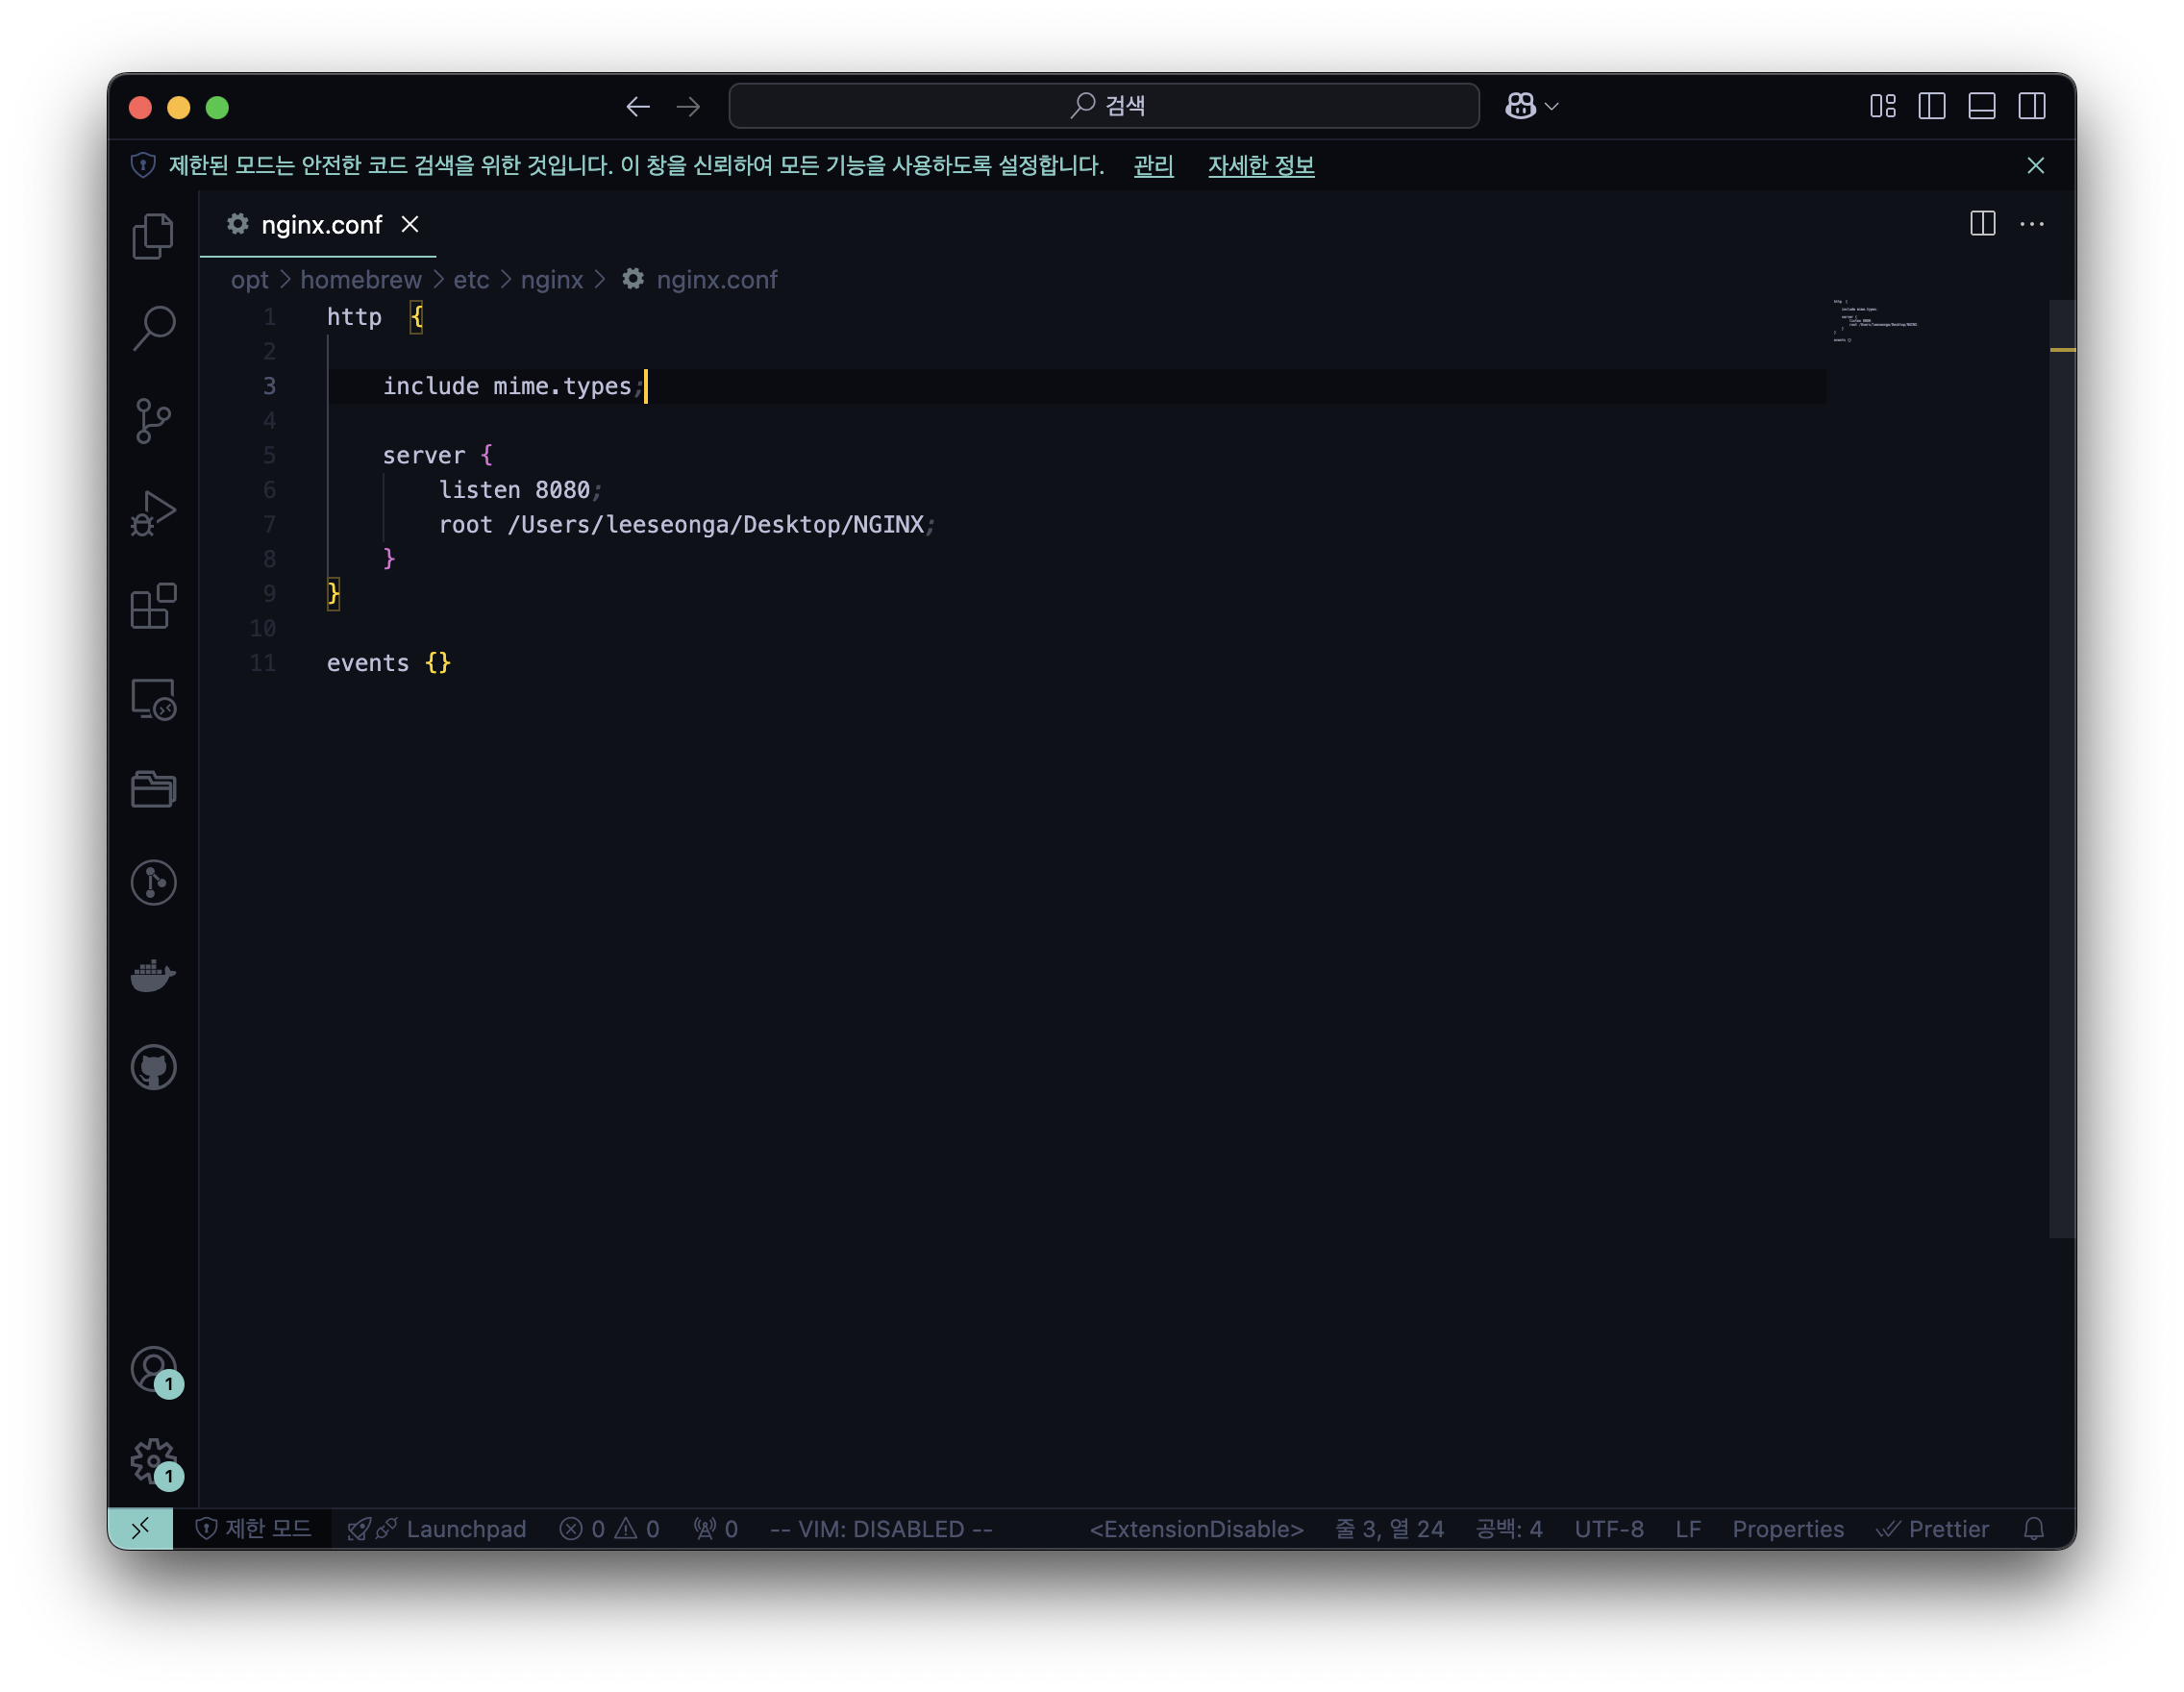
2. Mime Types
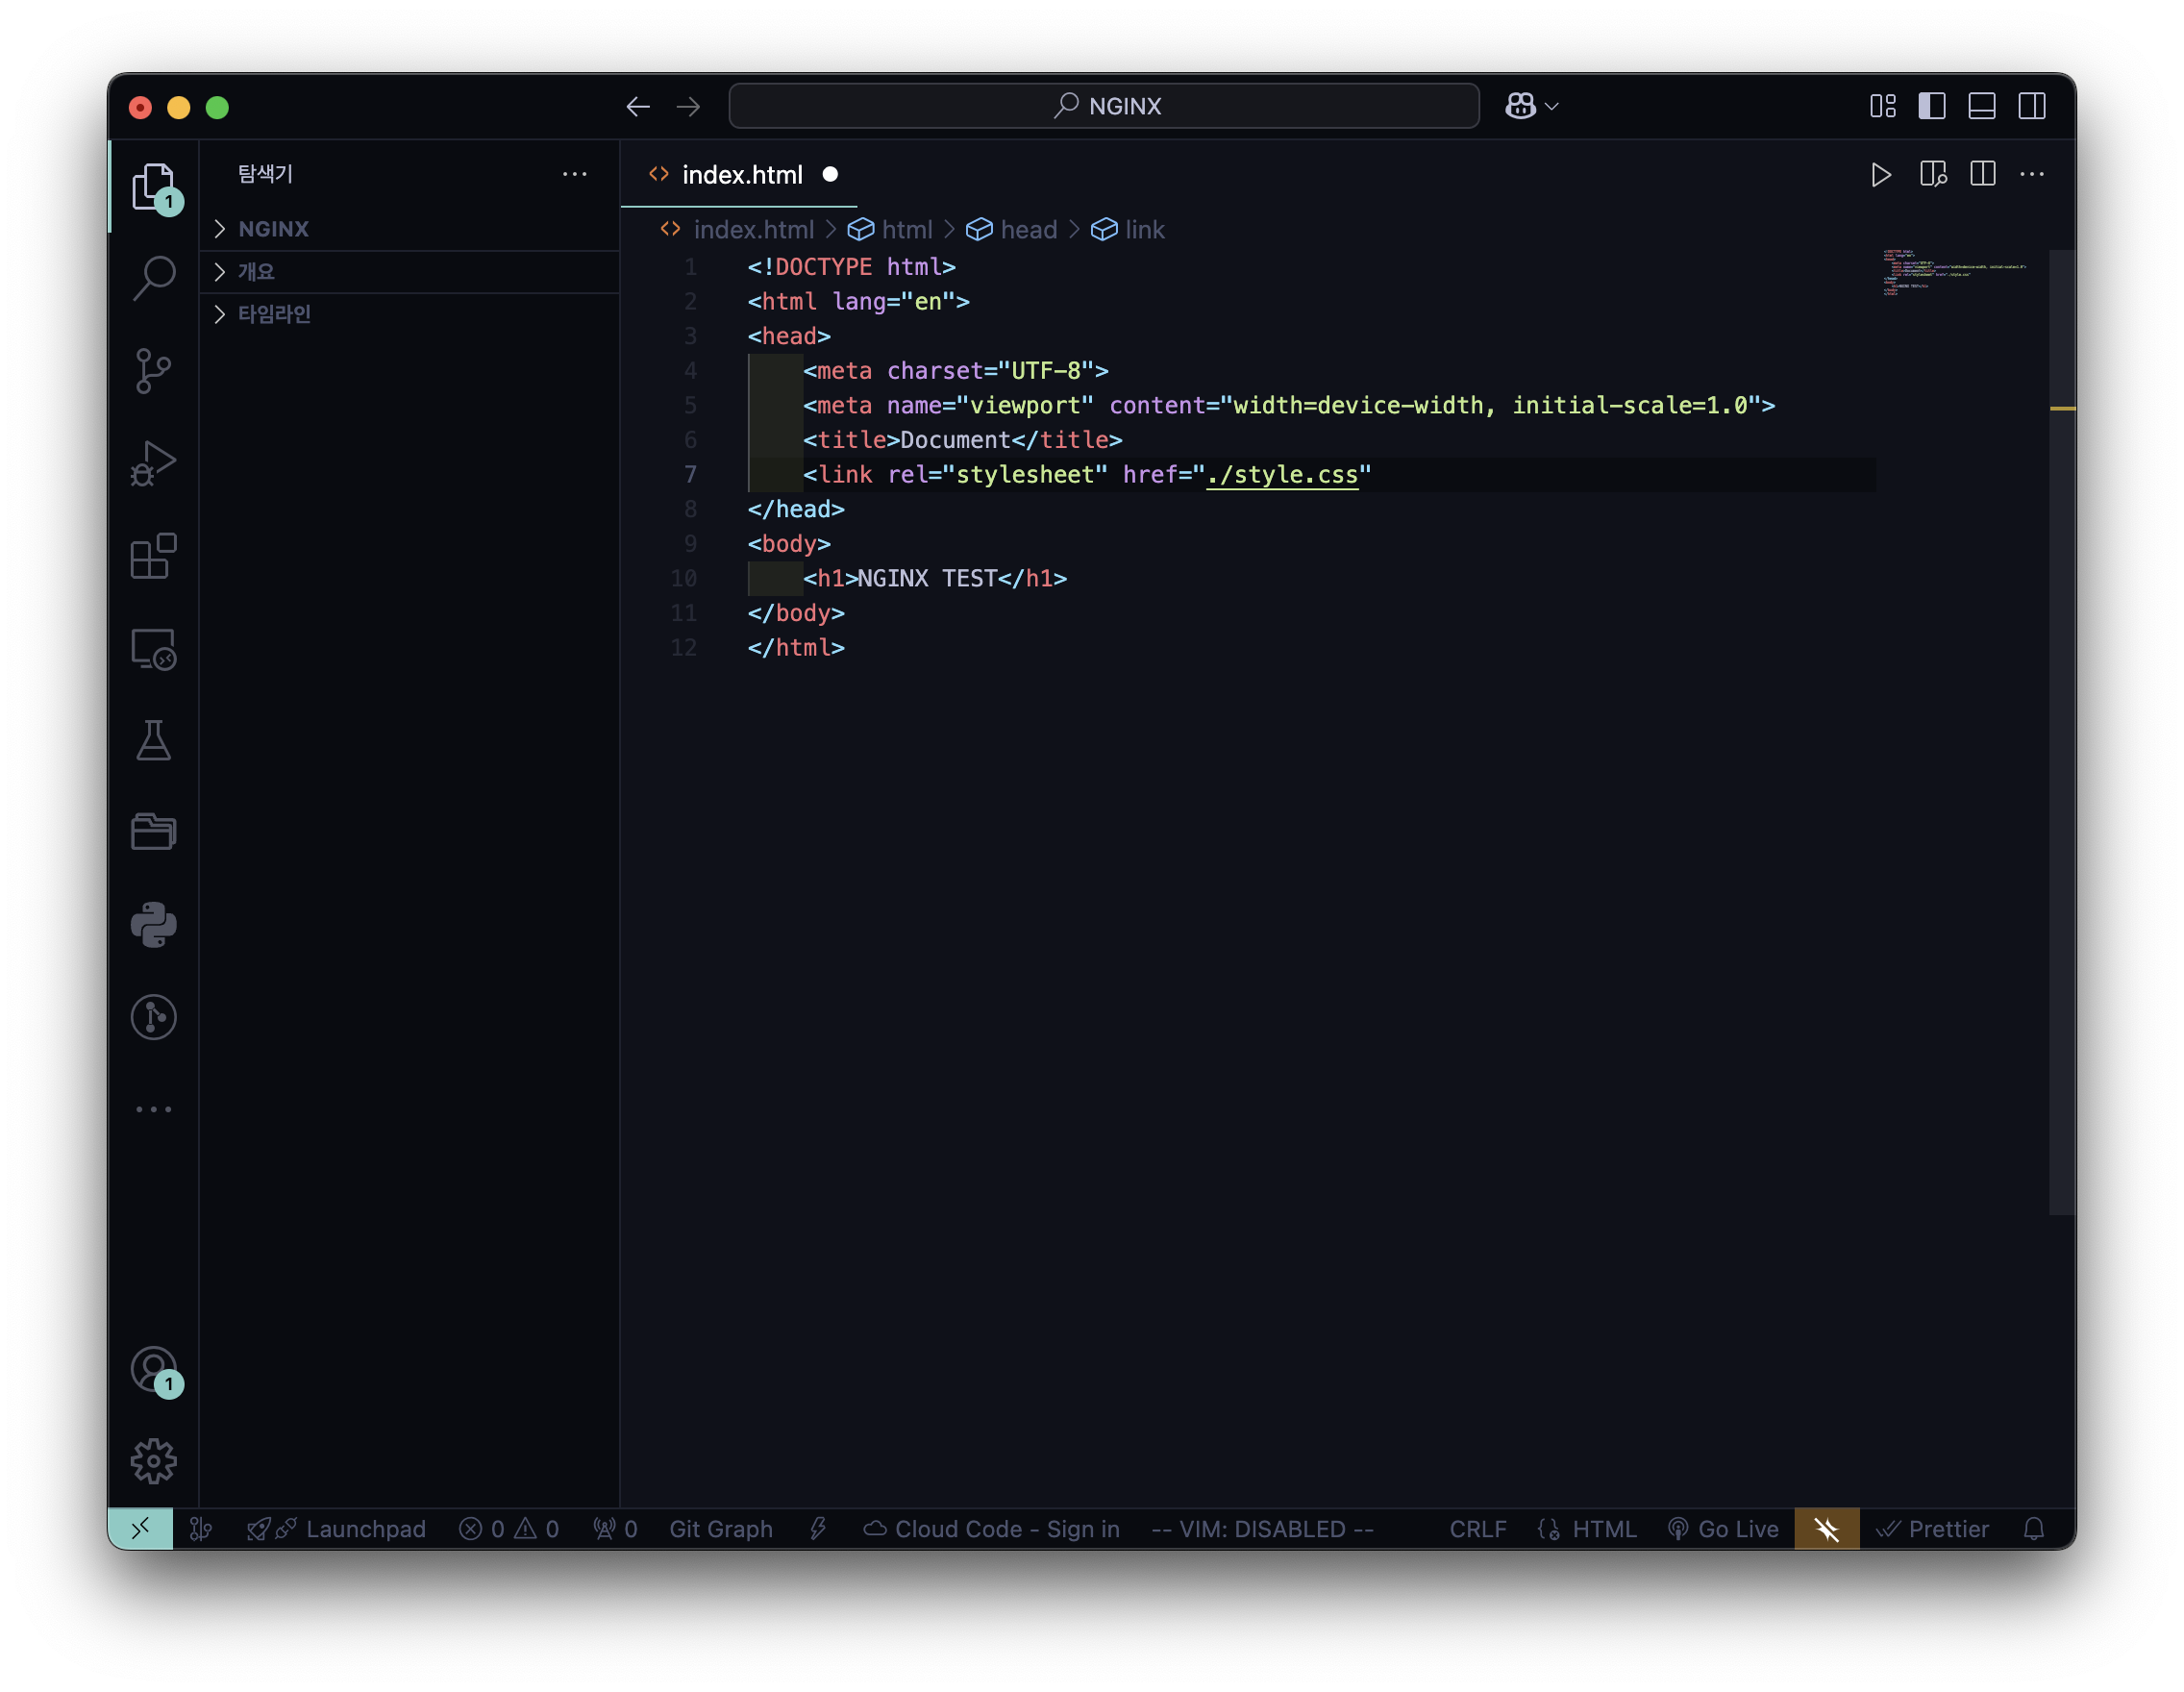
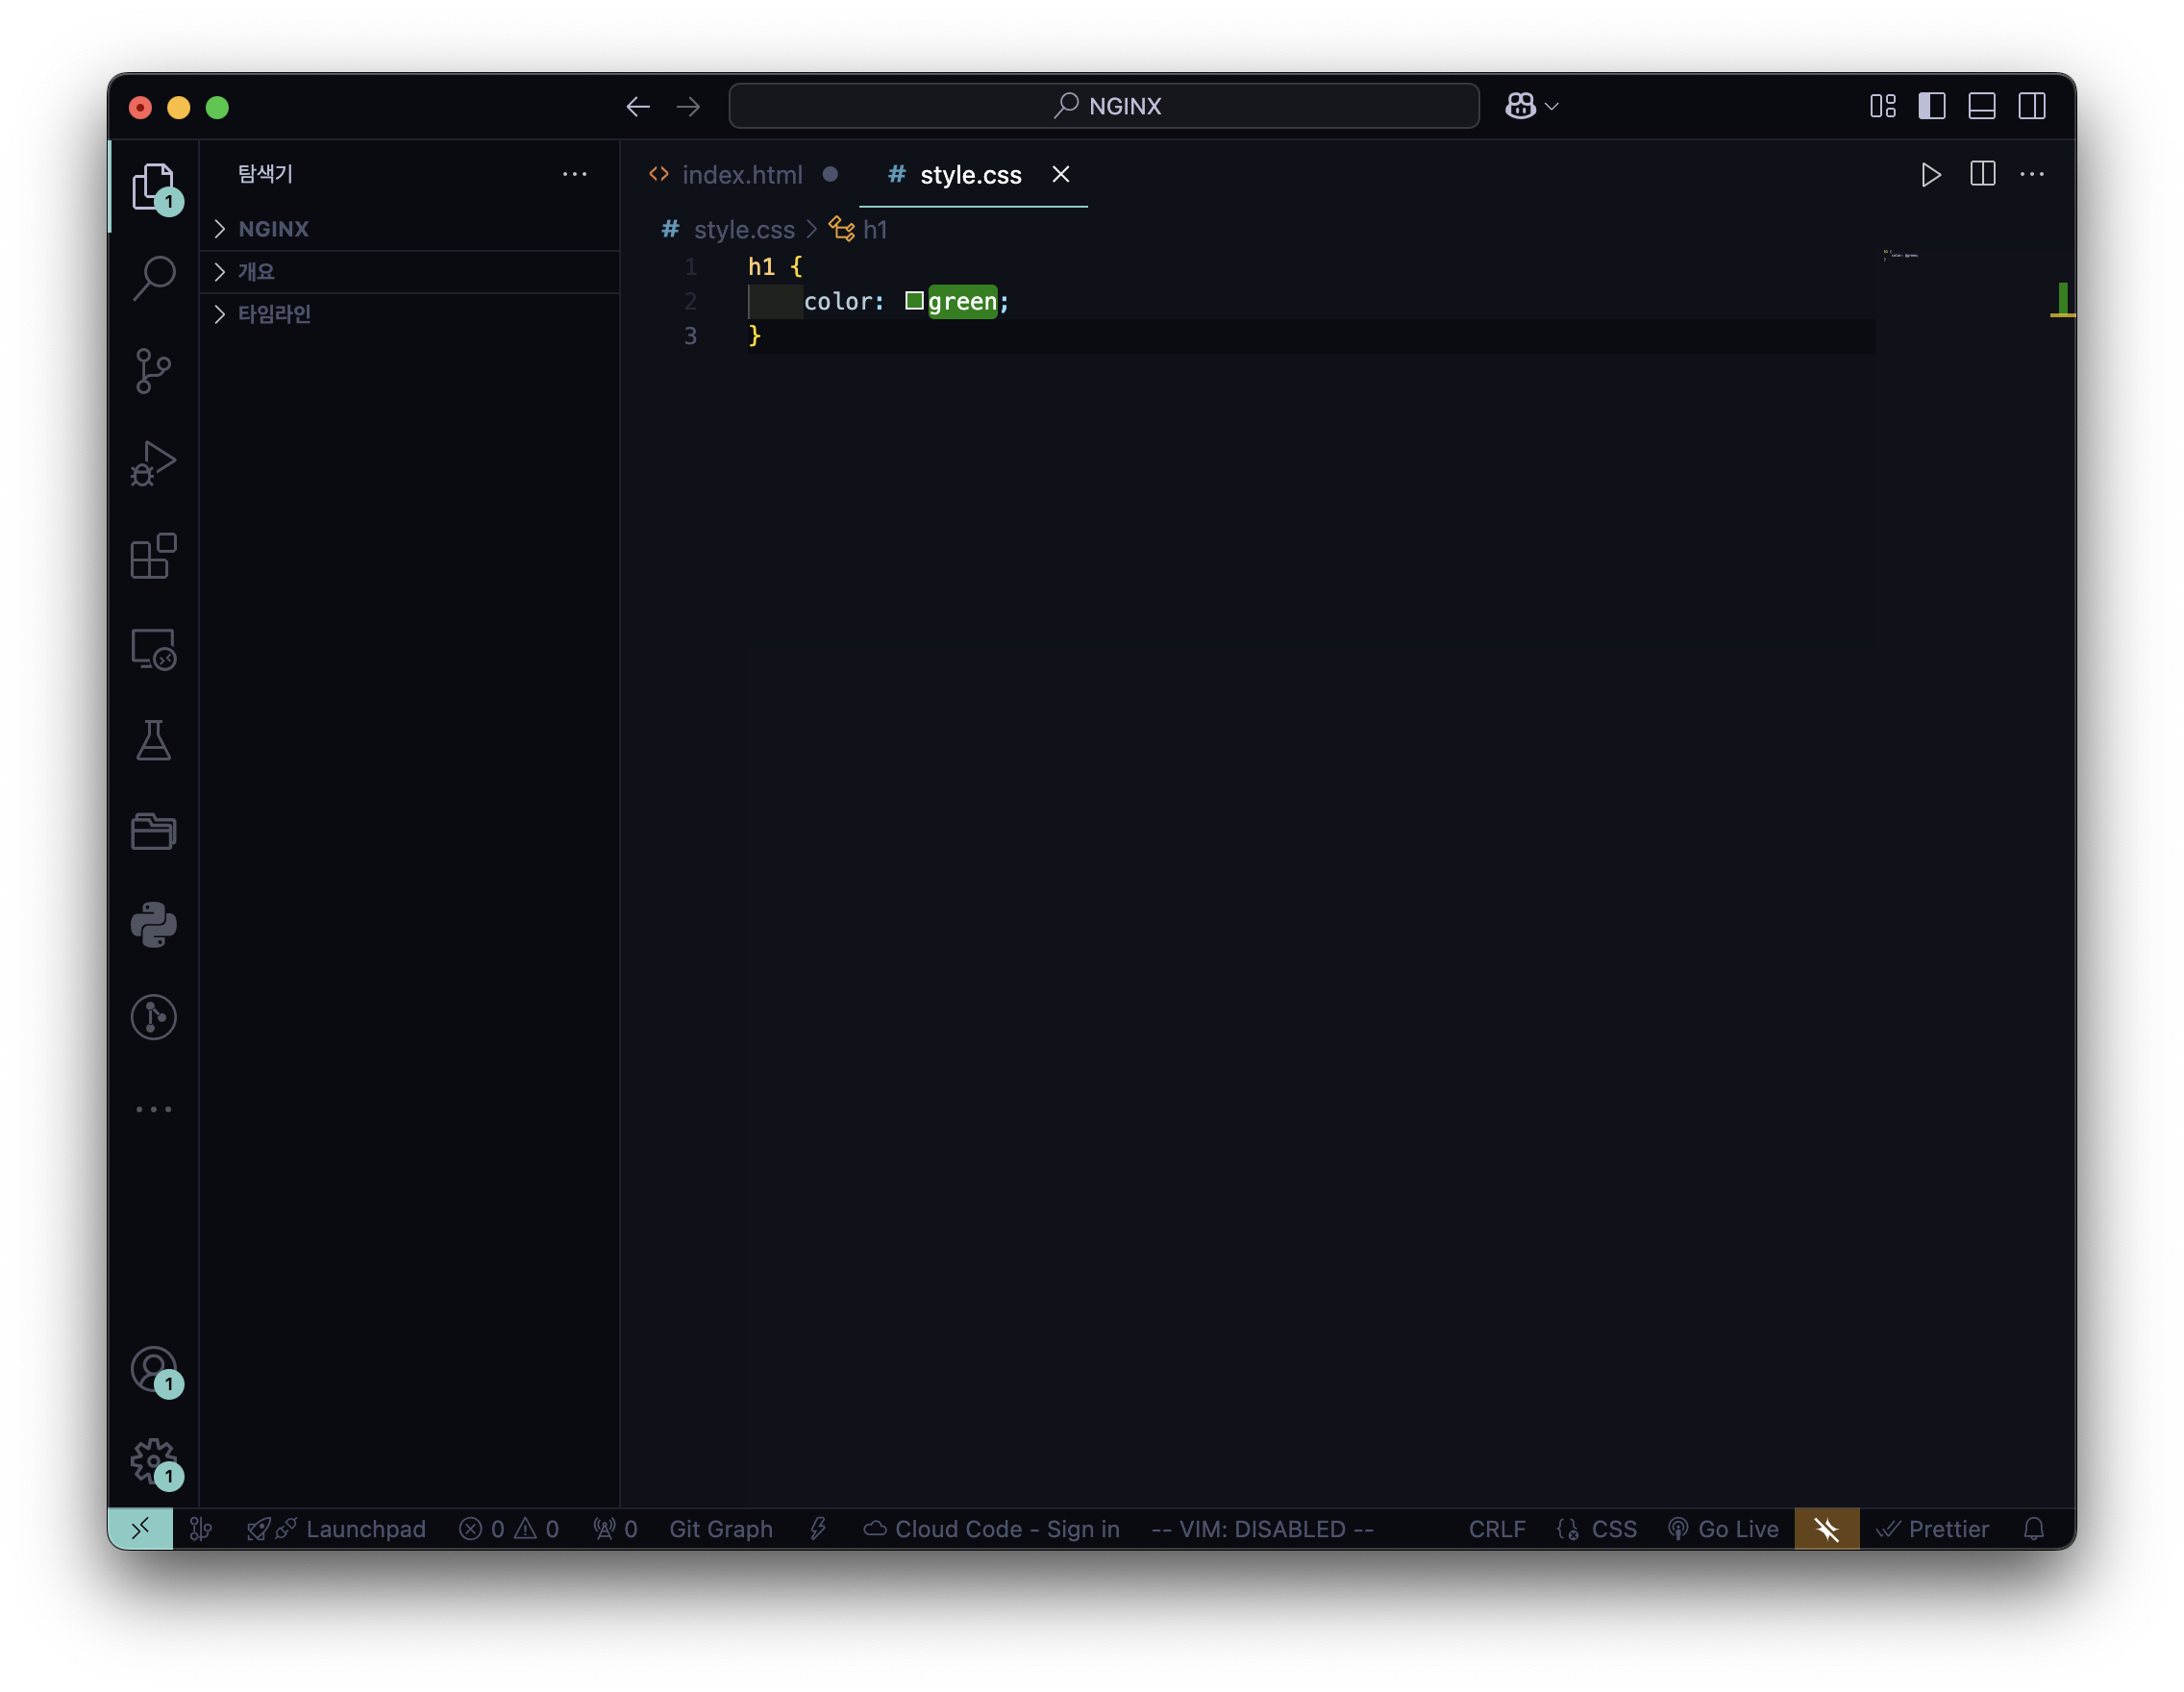
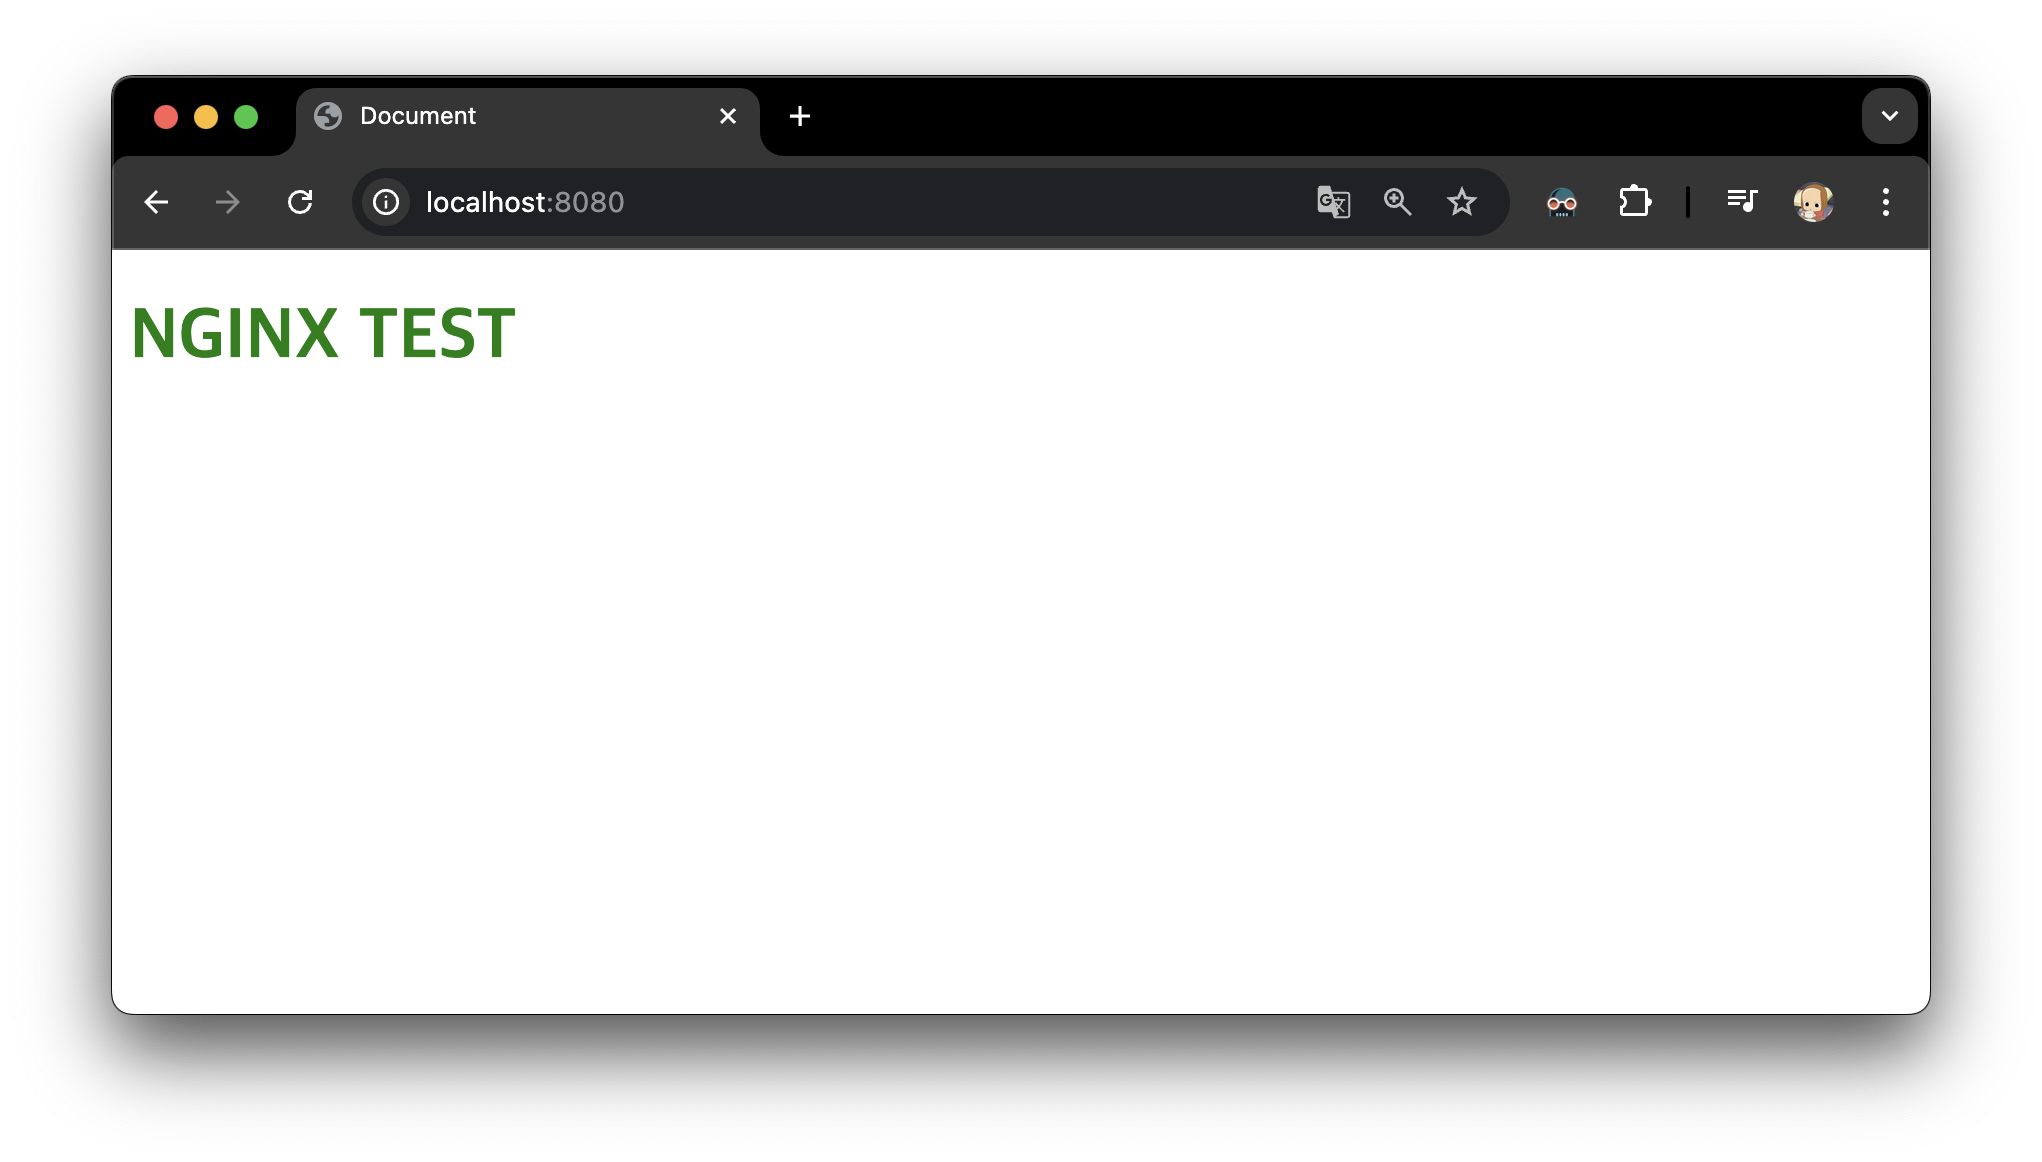
2️⃣ style.css 적용
- index.html

- style.css
- ngnix.conf
- 실행 결과

include mime.types;MIME Type 이란 문서, 파일 또는 바이트 집합의 성격과 형식으로 NGINX에서 쉽게 Type 적용 가능
- nginx.conf
- 실행 결과
이전과 동일하지만 일일이 type을 명시해주지 않아도 한 줄의 코드로 적용 가능
3. Location Context
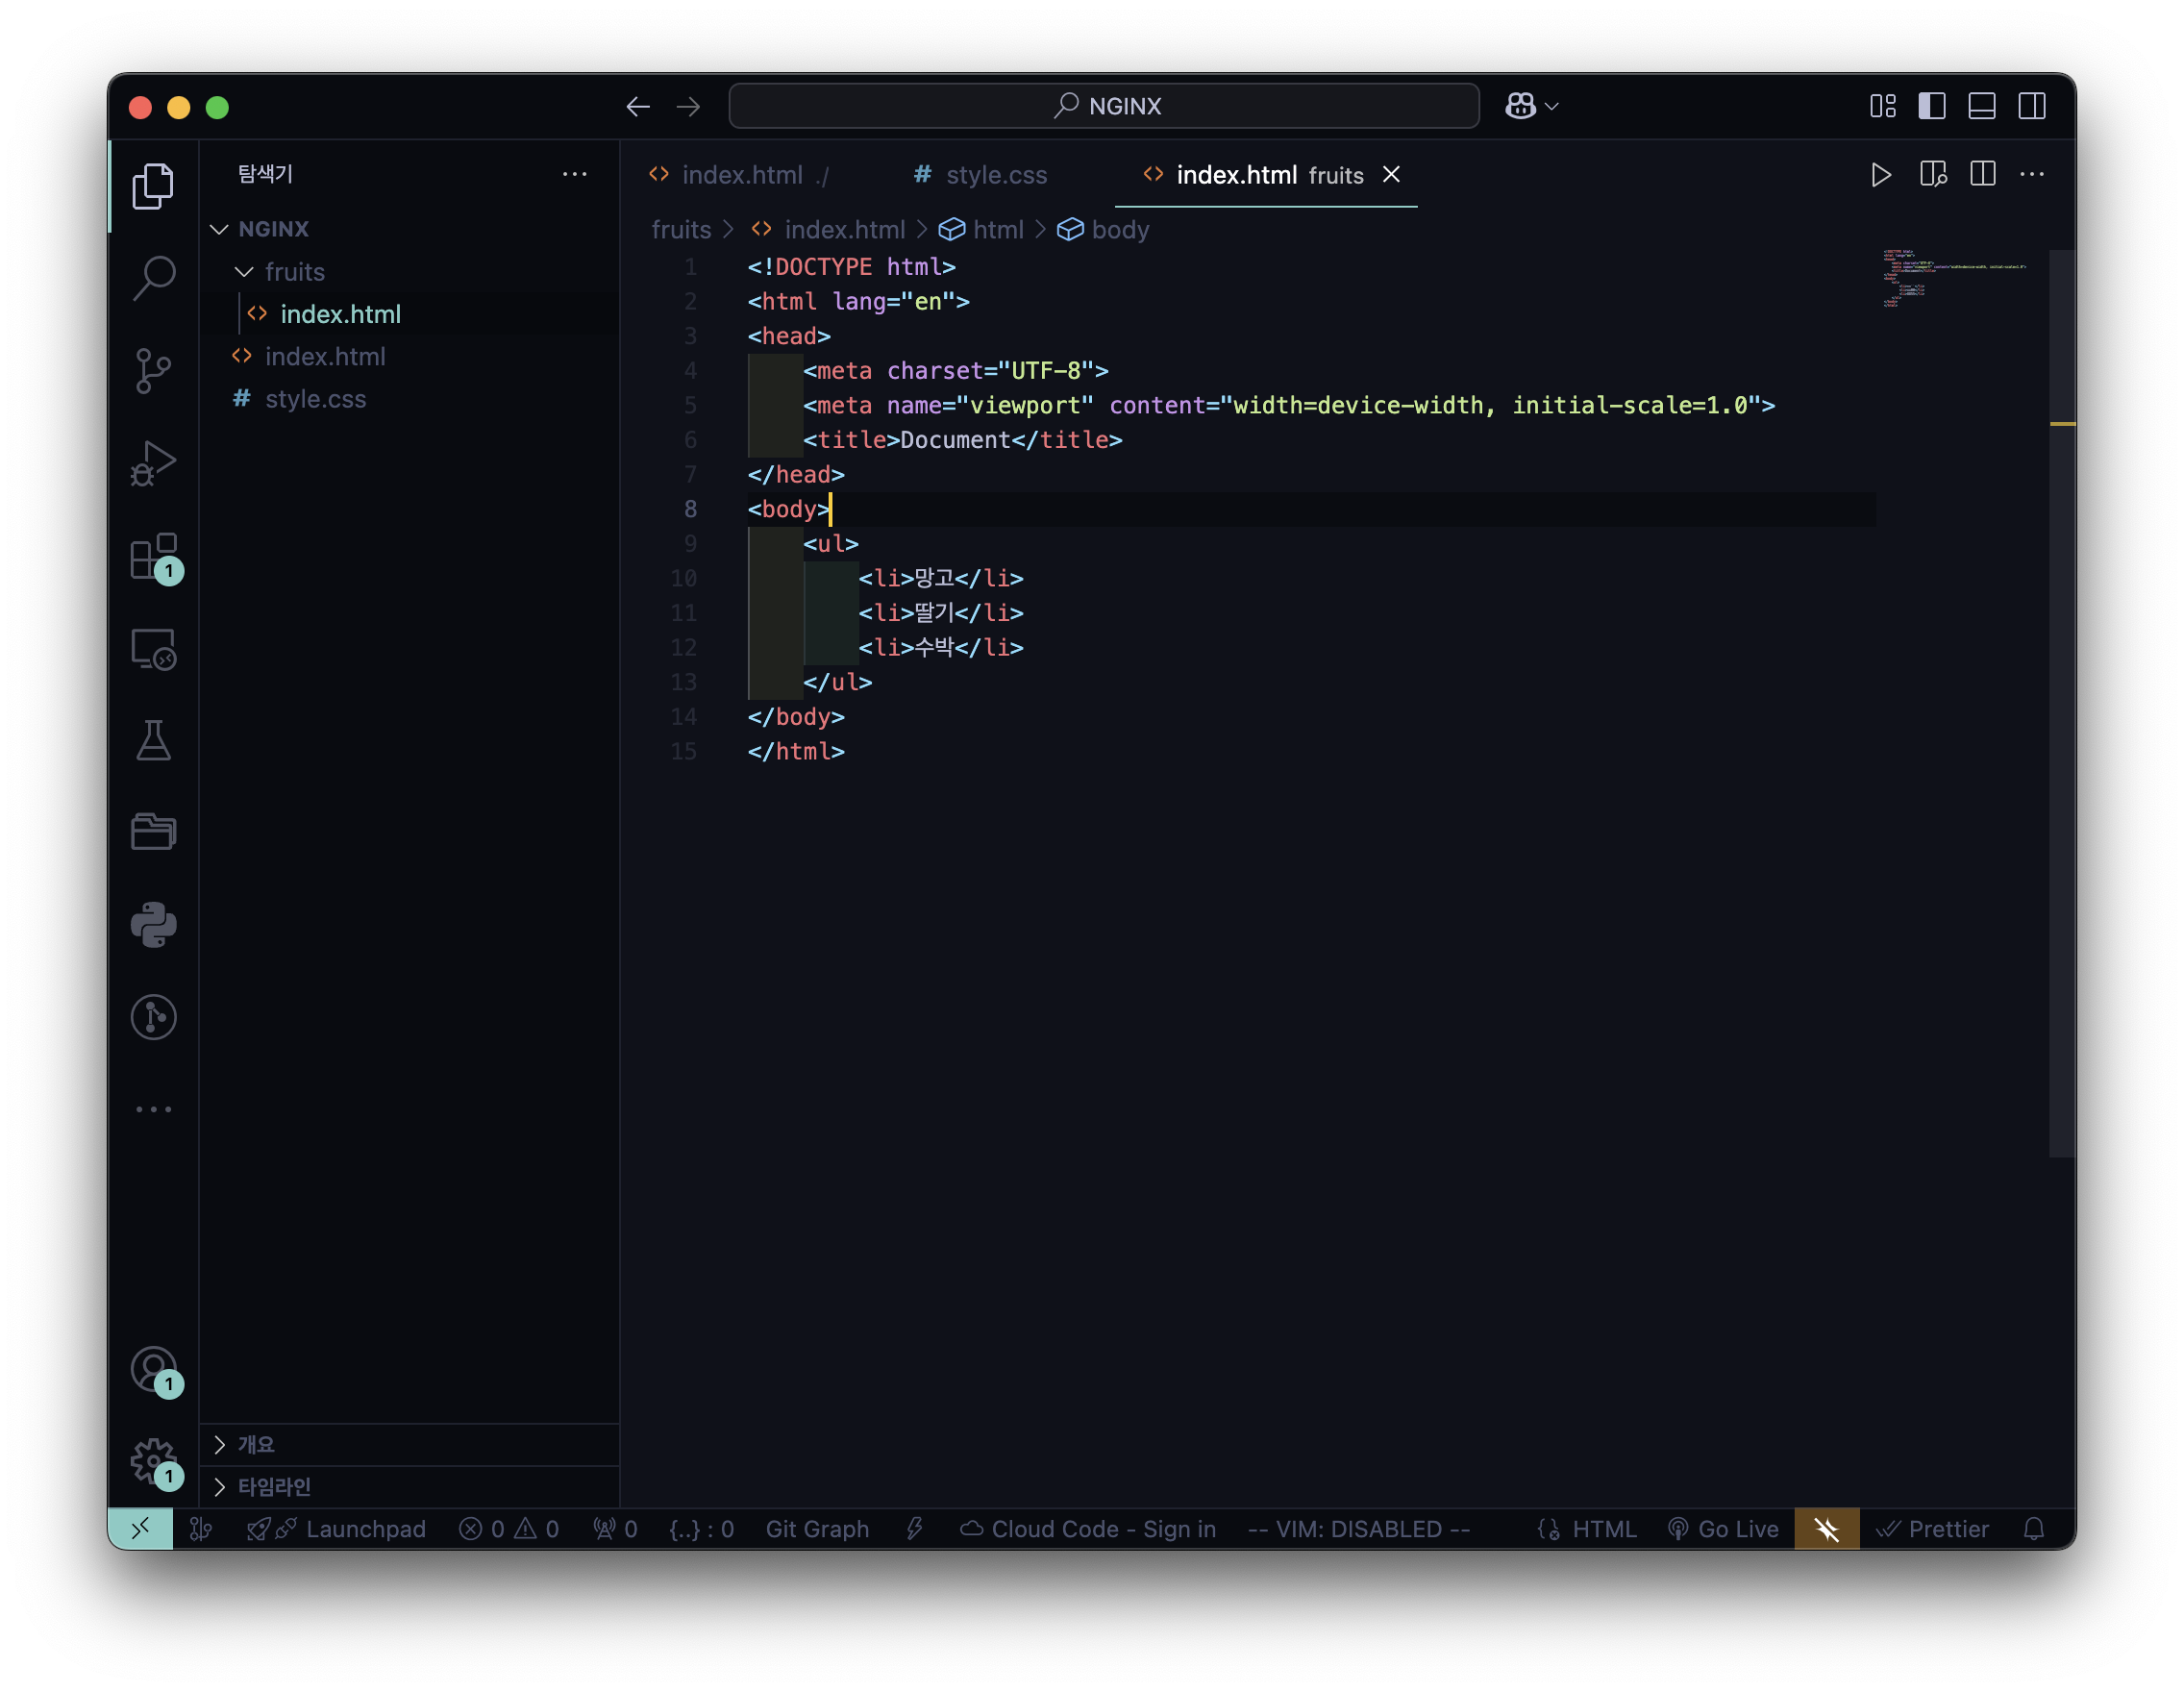
3️⃣ 폴더 내 폴더에서 index.html 을 만들고, nginx.conf 에 적용
- fruits >index.html
- nginx.conf
- 실행 결과

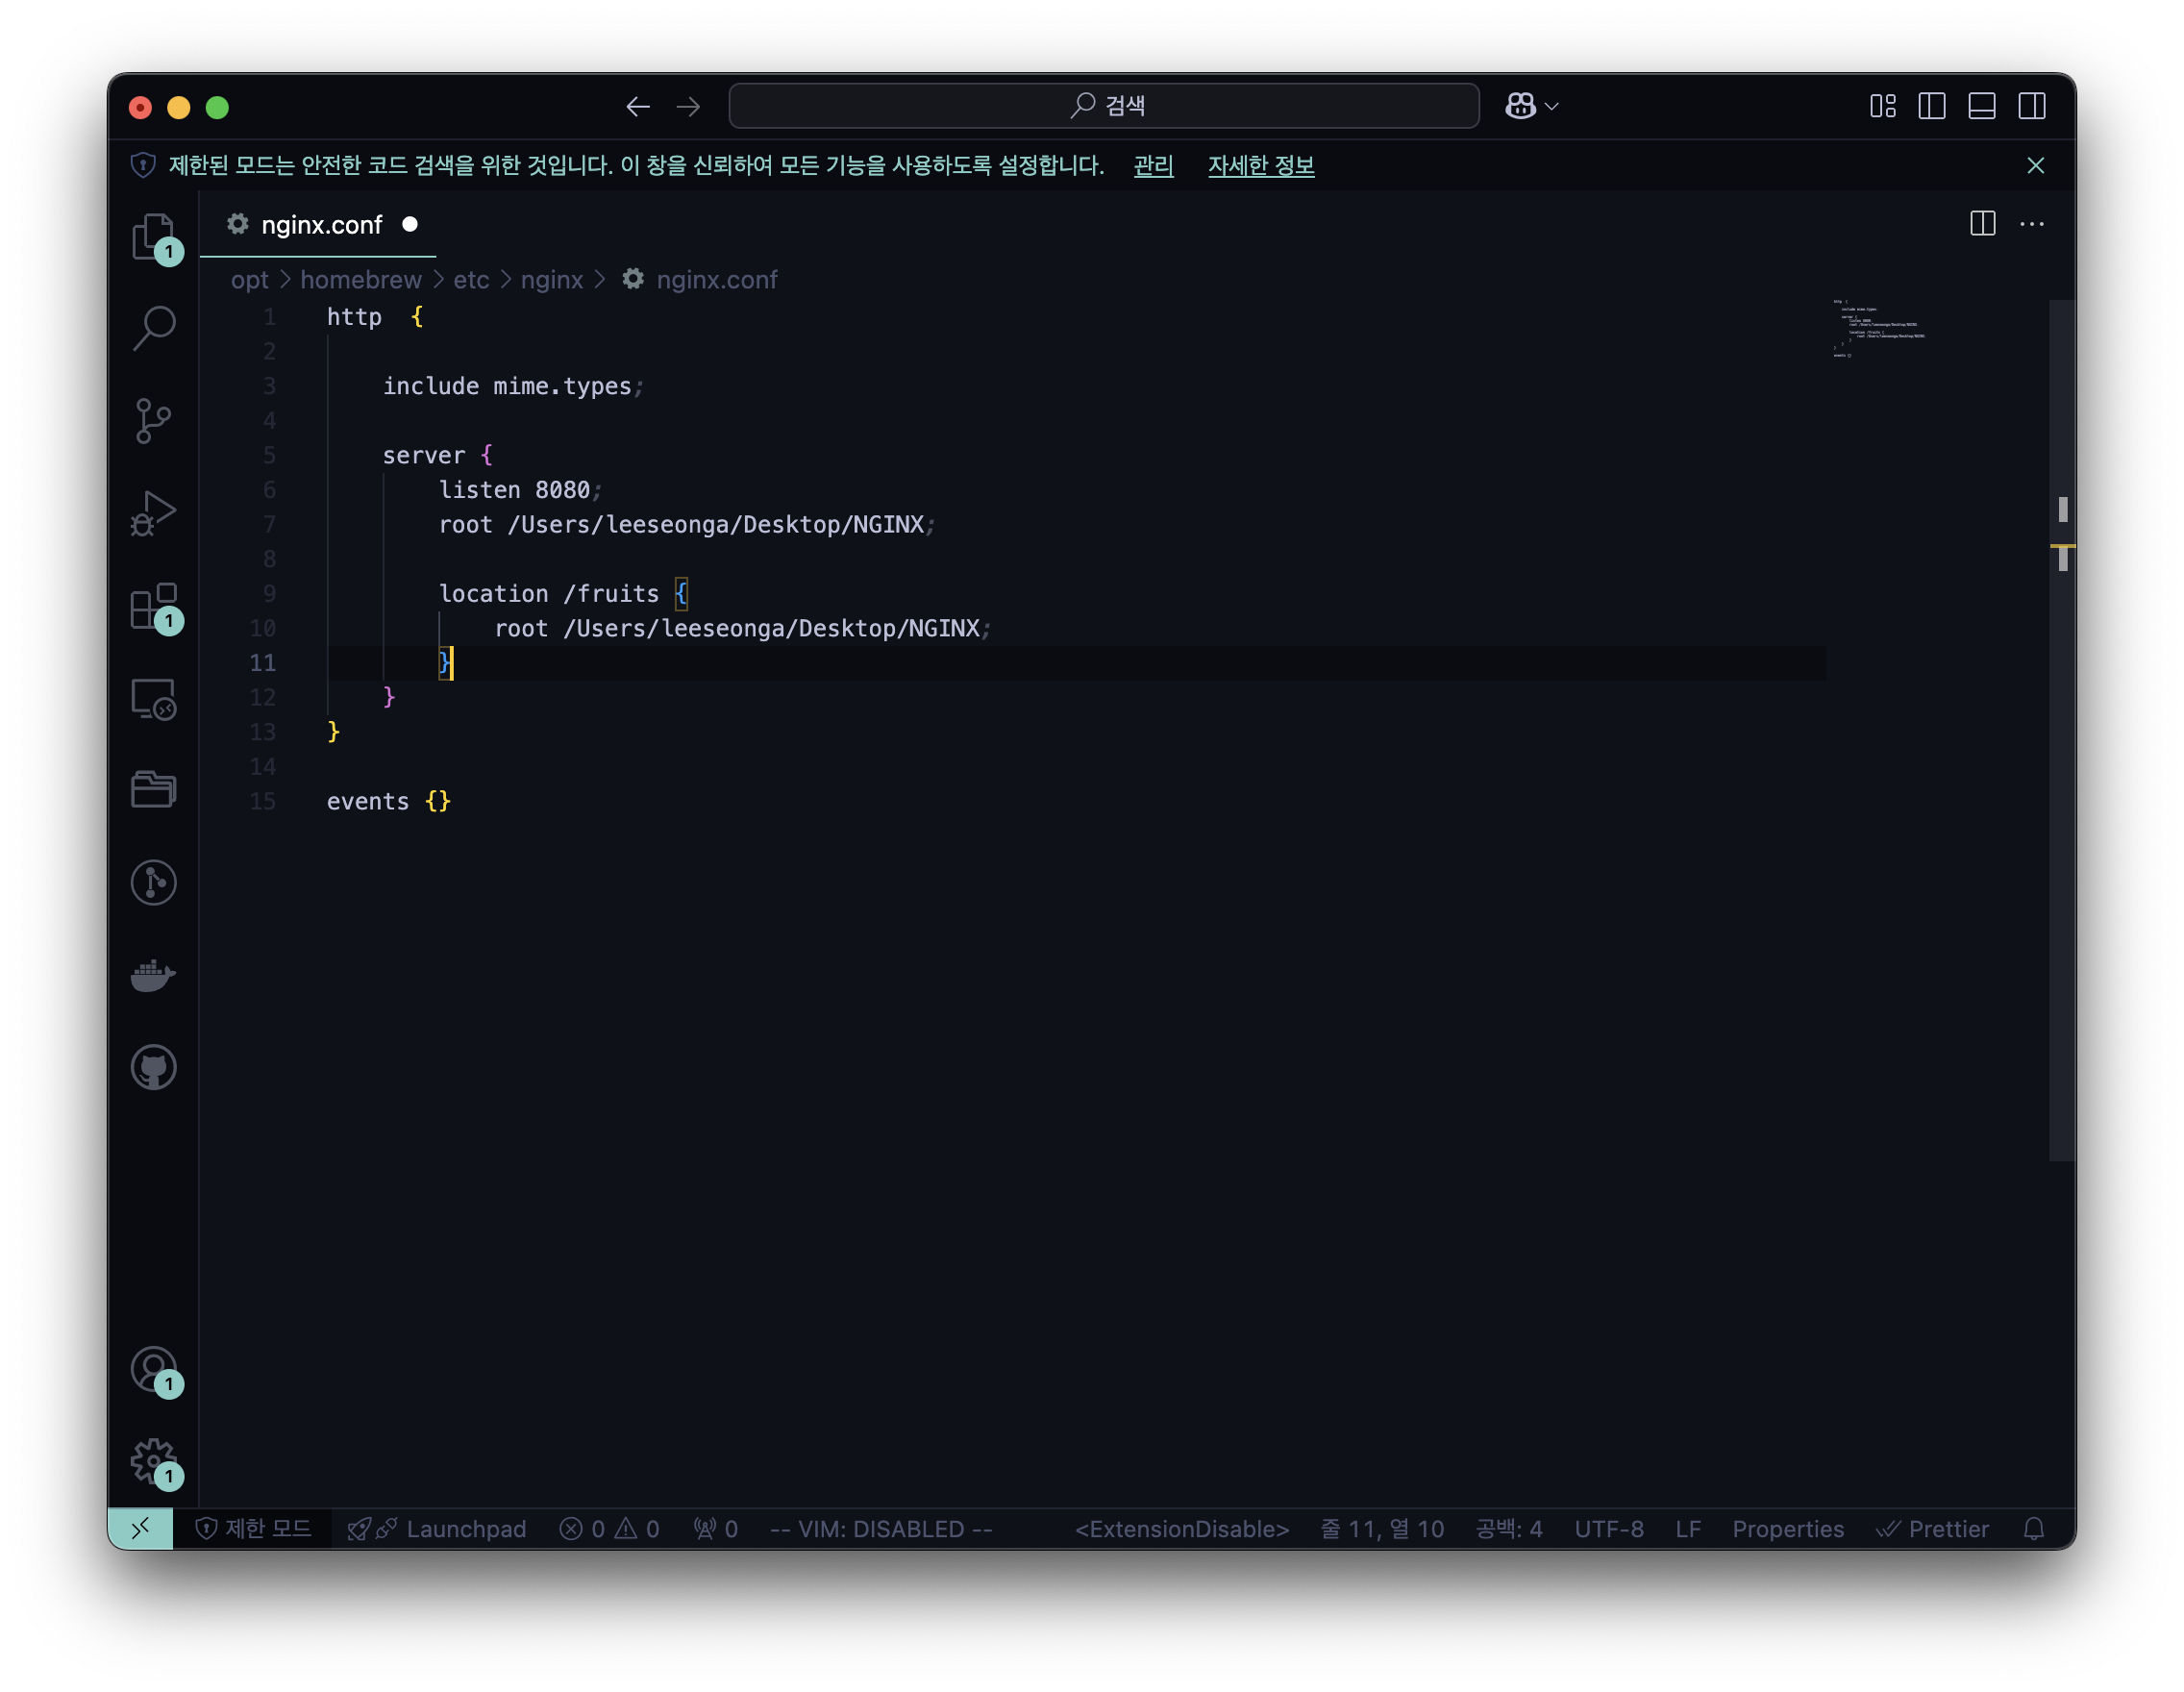
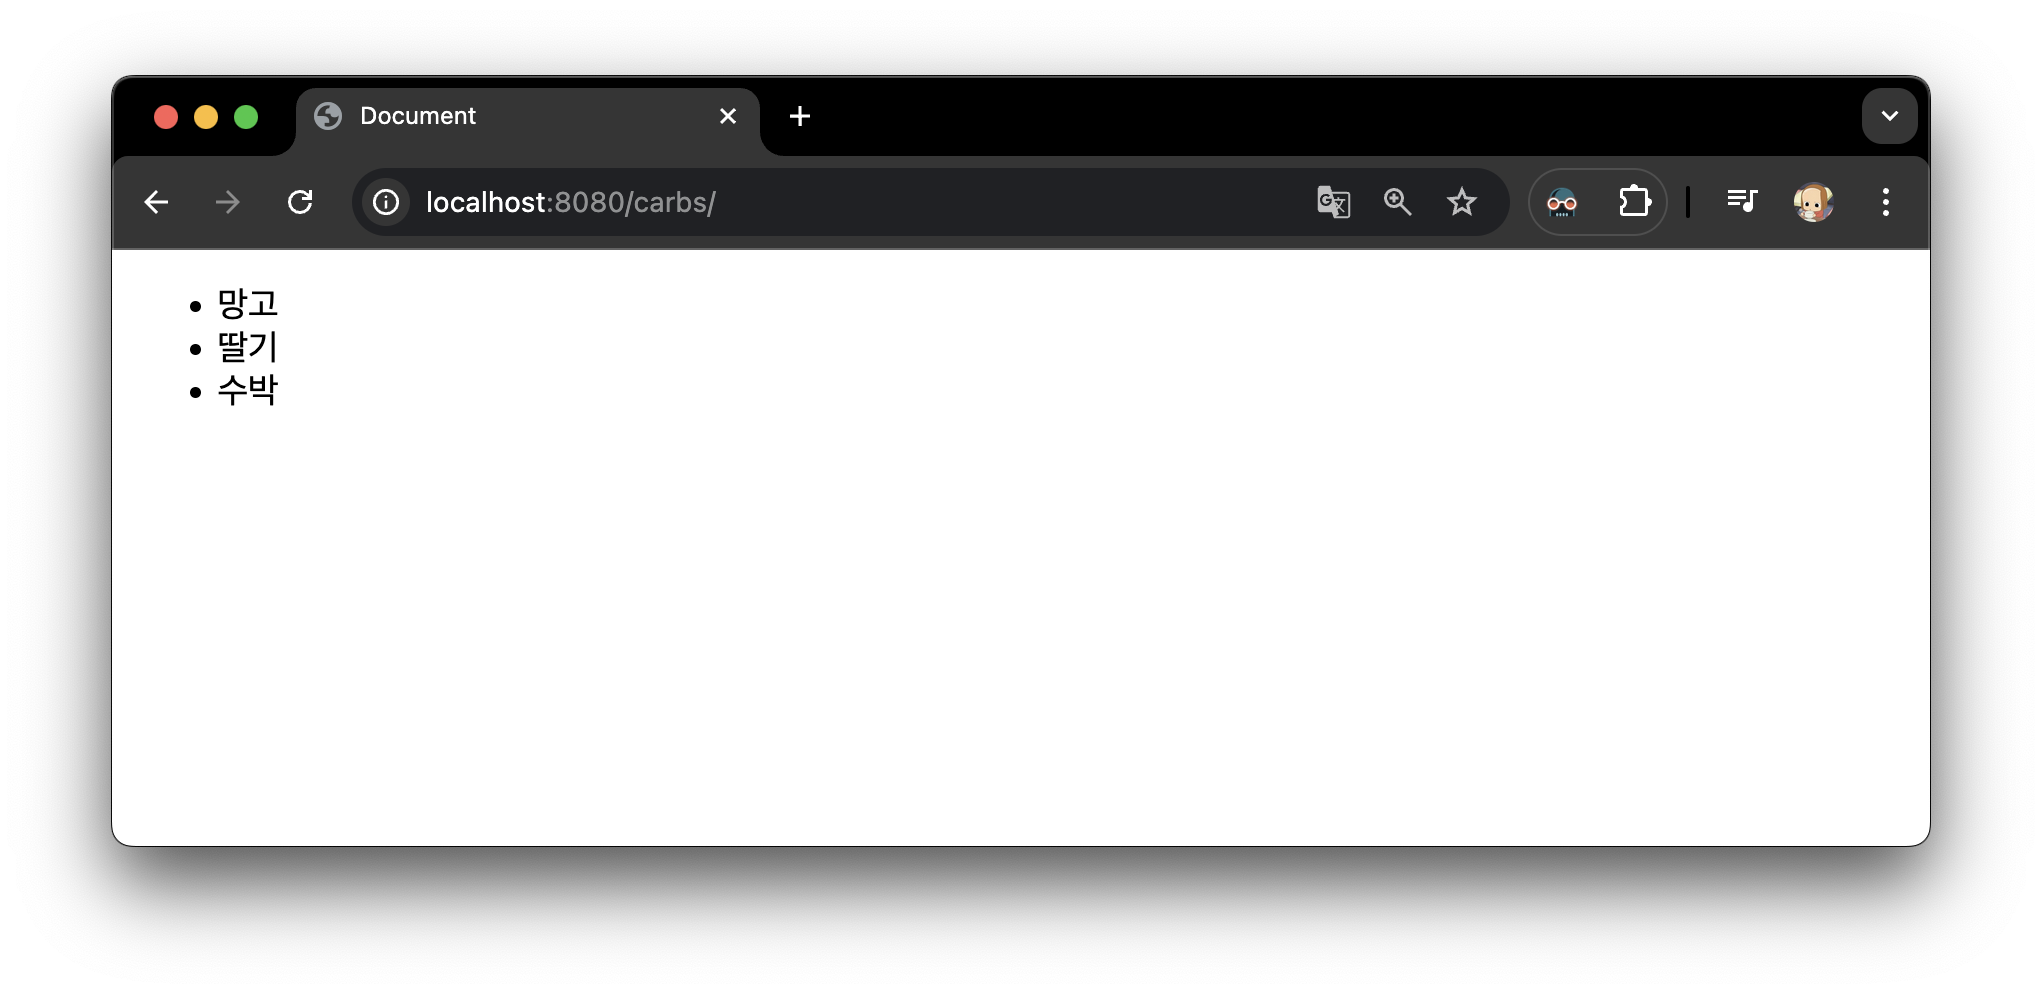
4️⃣ location alias : 존재하지 않는 폴더일 때
- nginx.conf
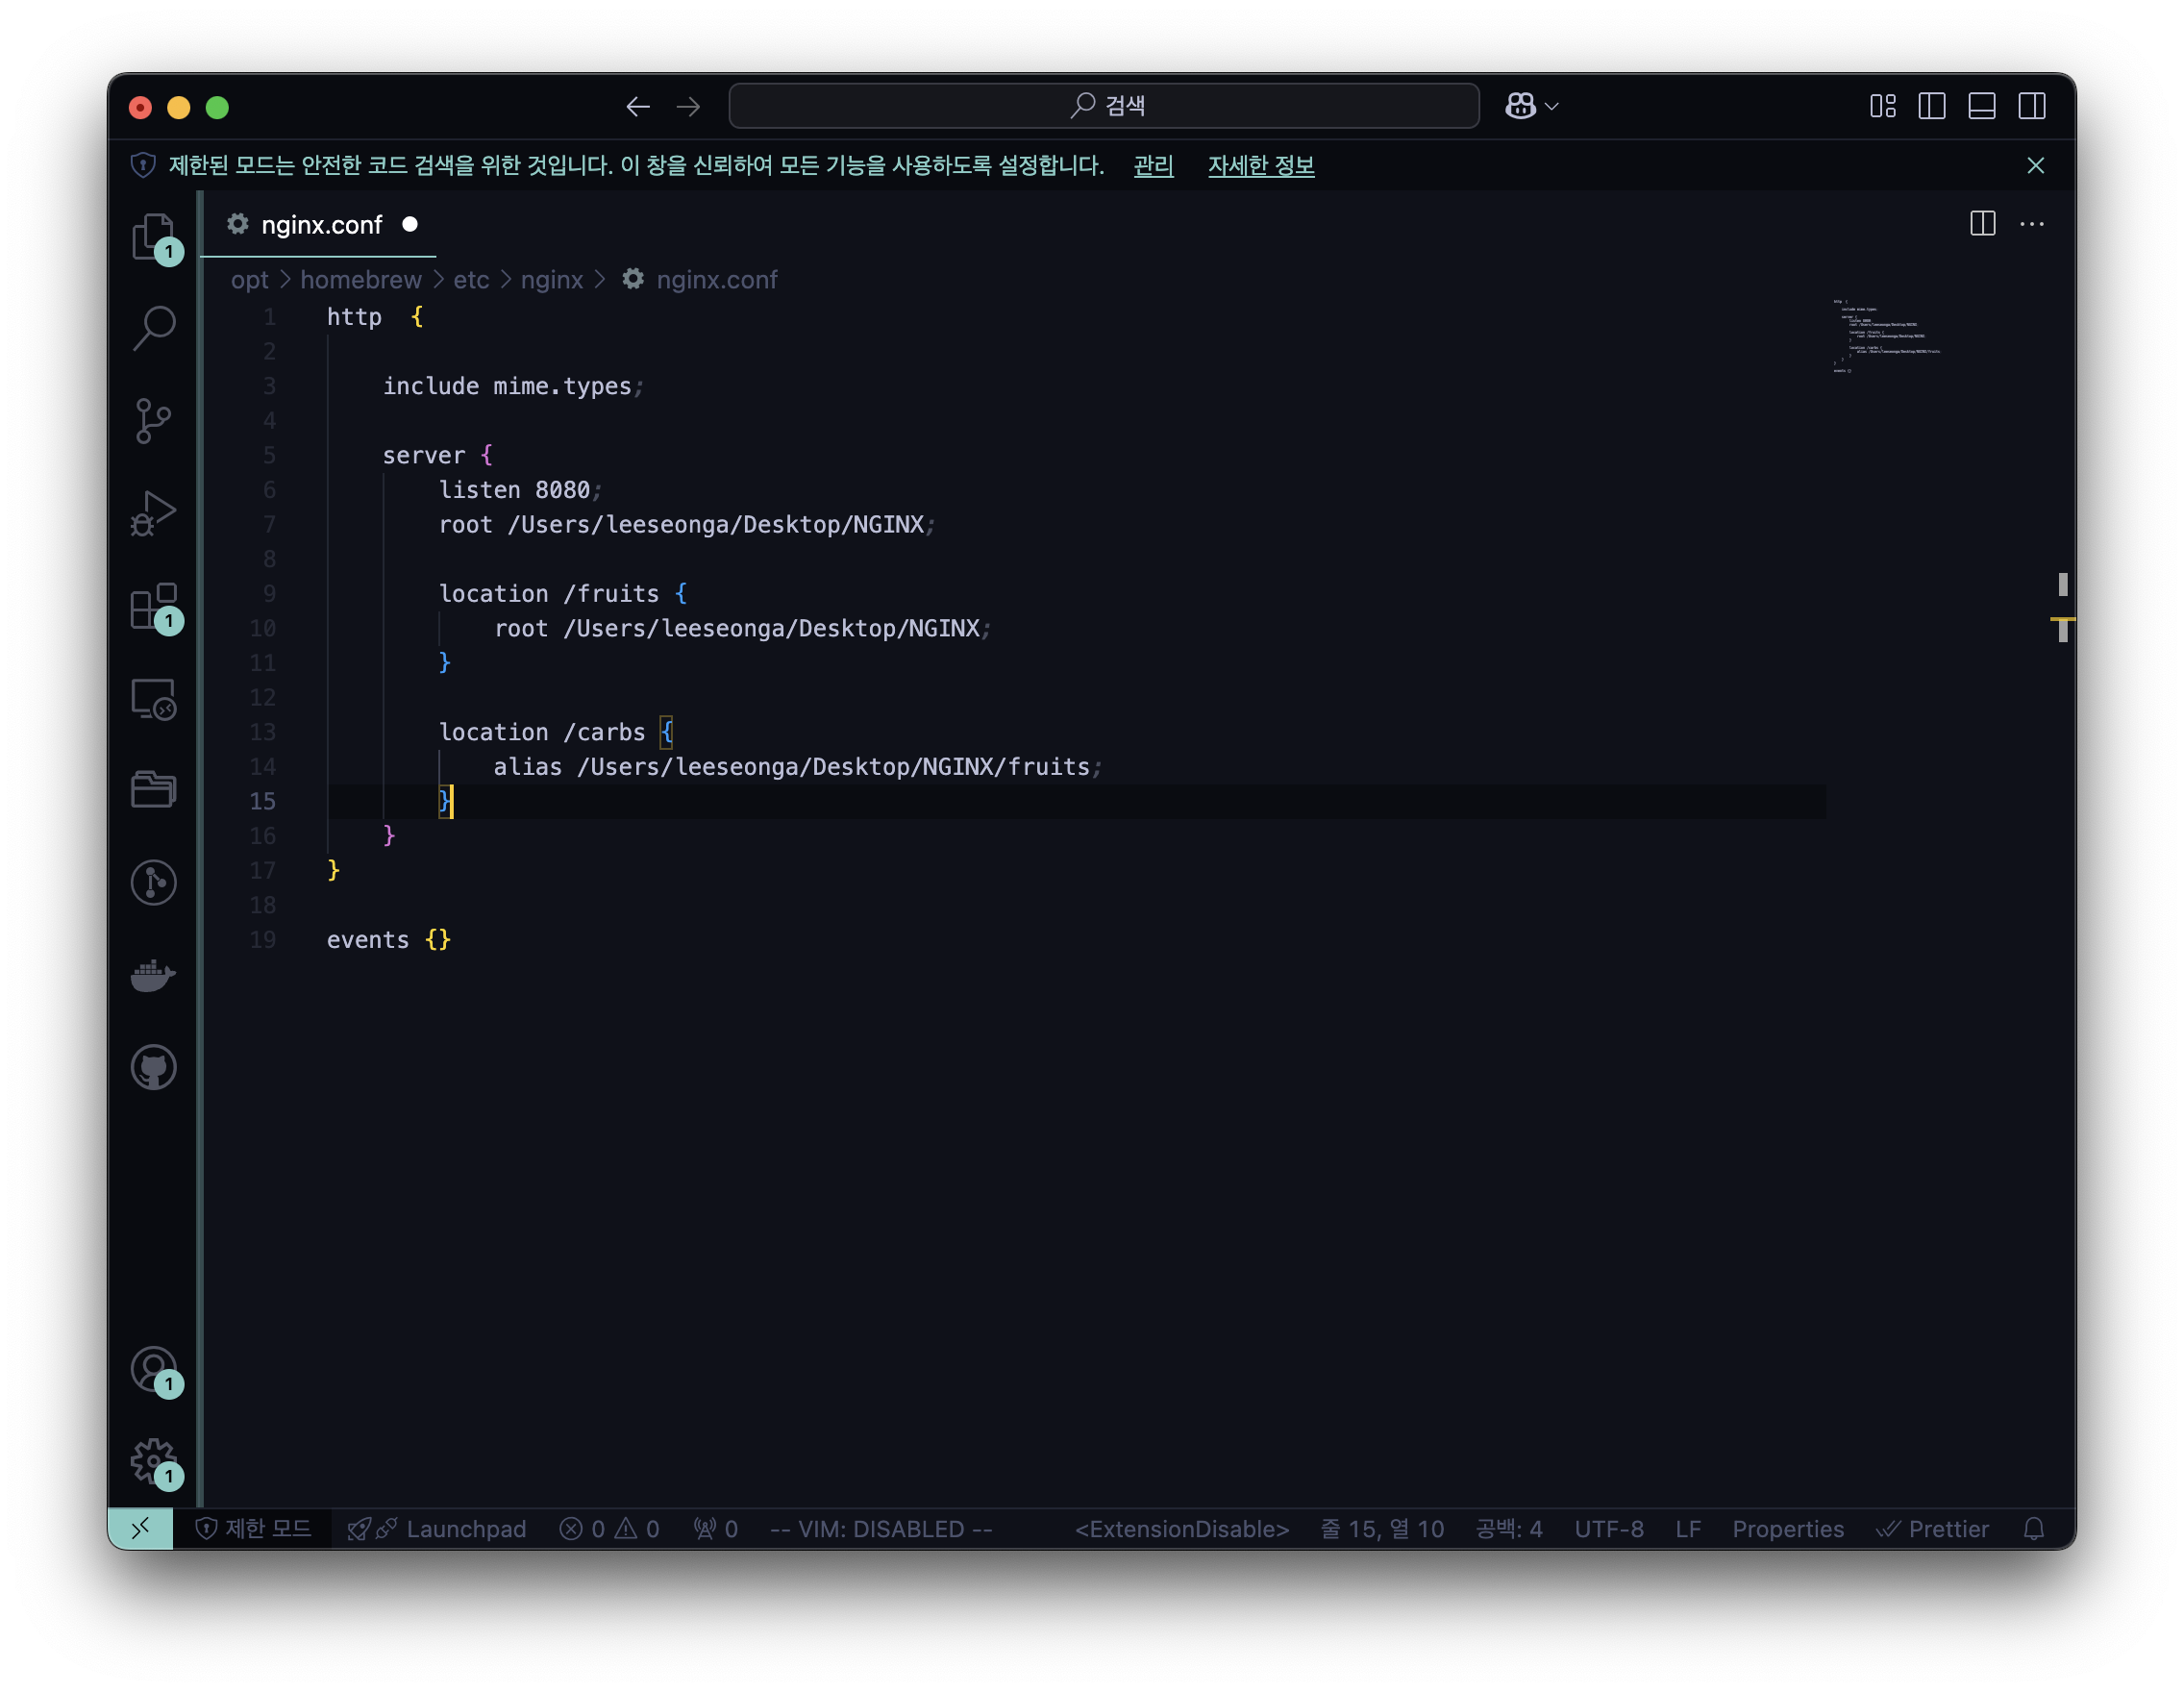
- 실행 결과
존재하지 않는 디렉토리를 입력했을 때, alias에 입력된 root로 매핑
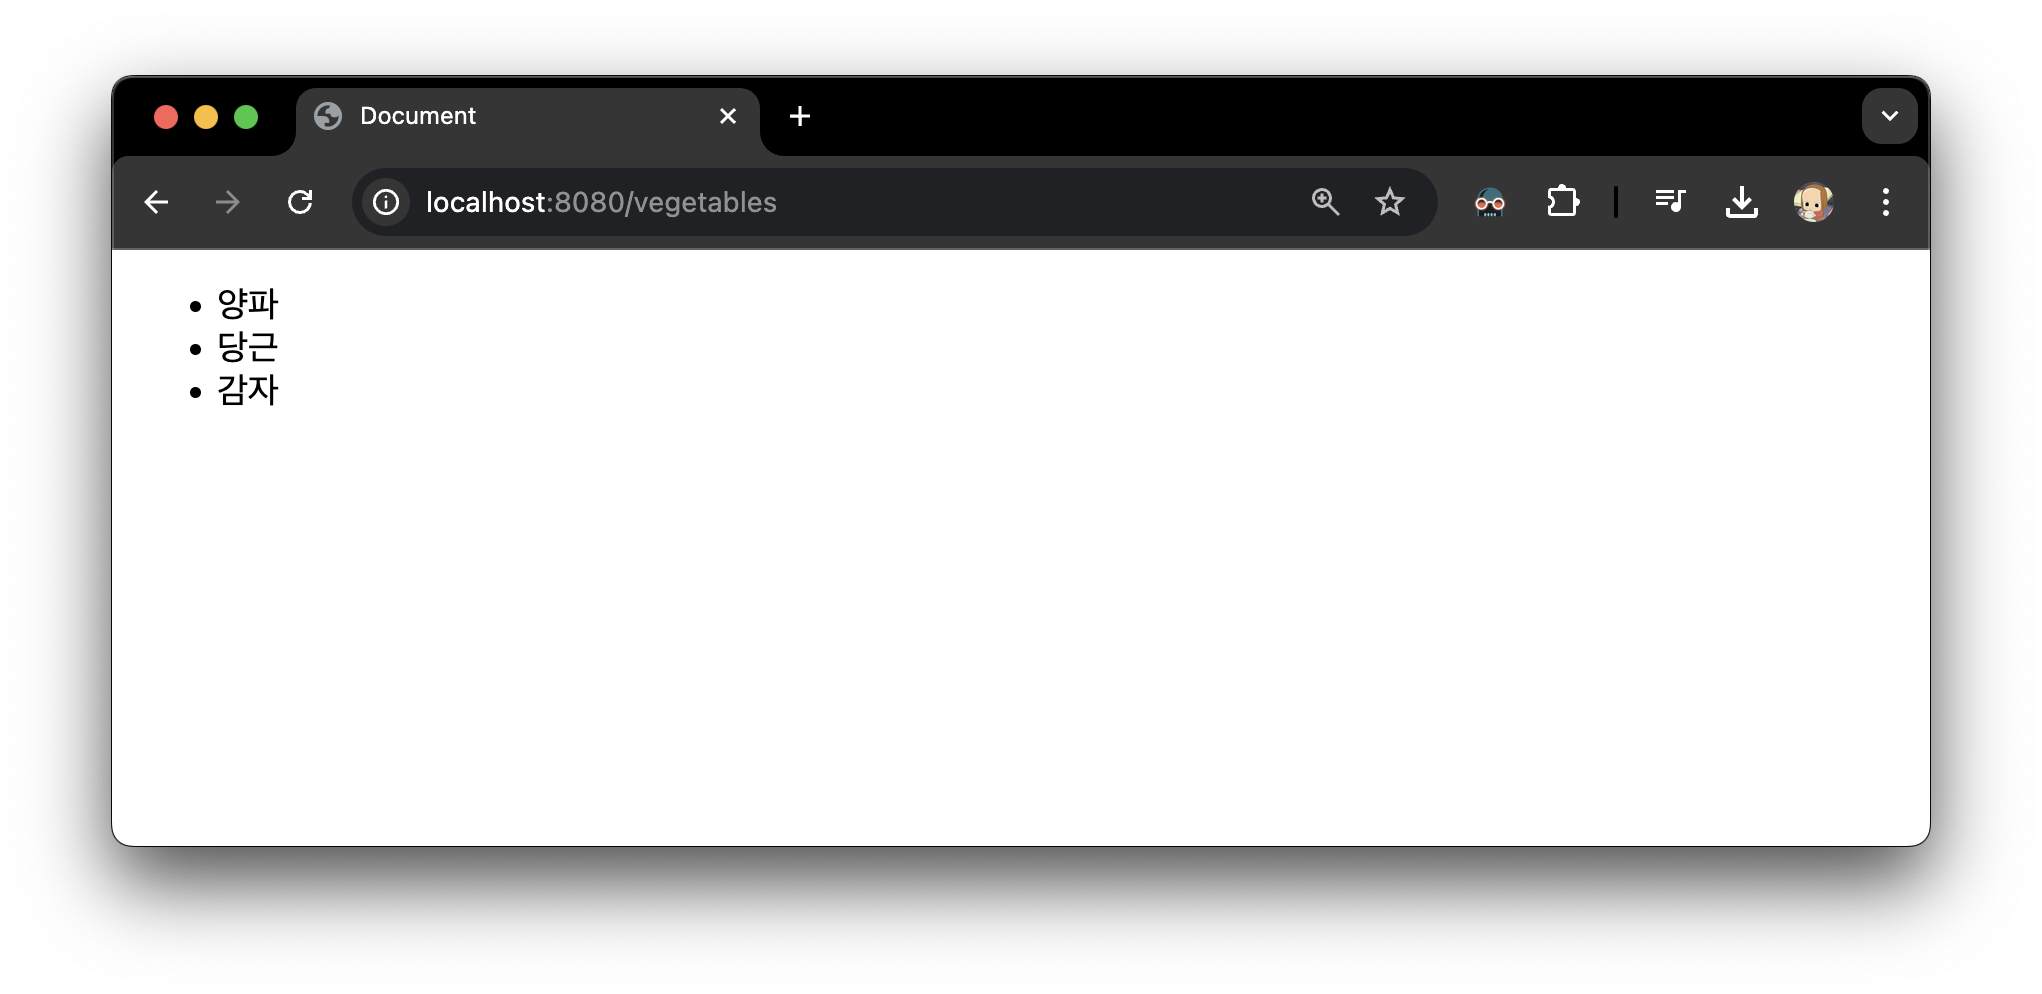
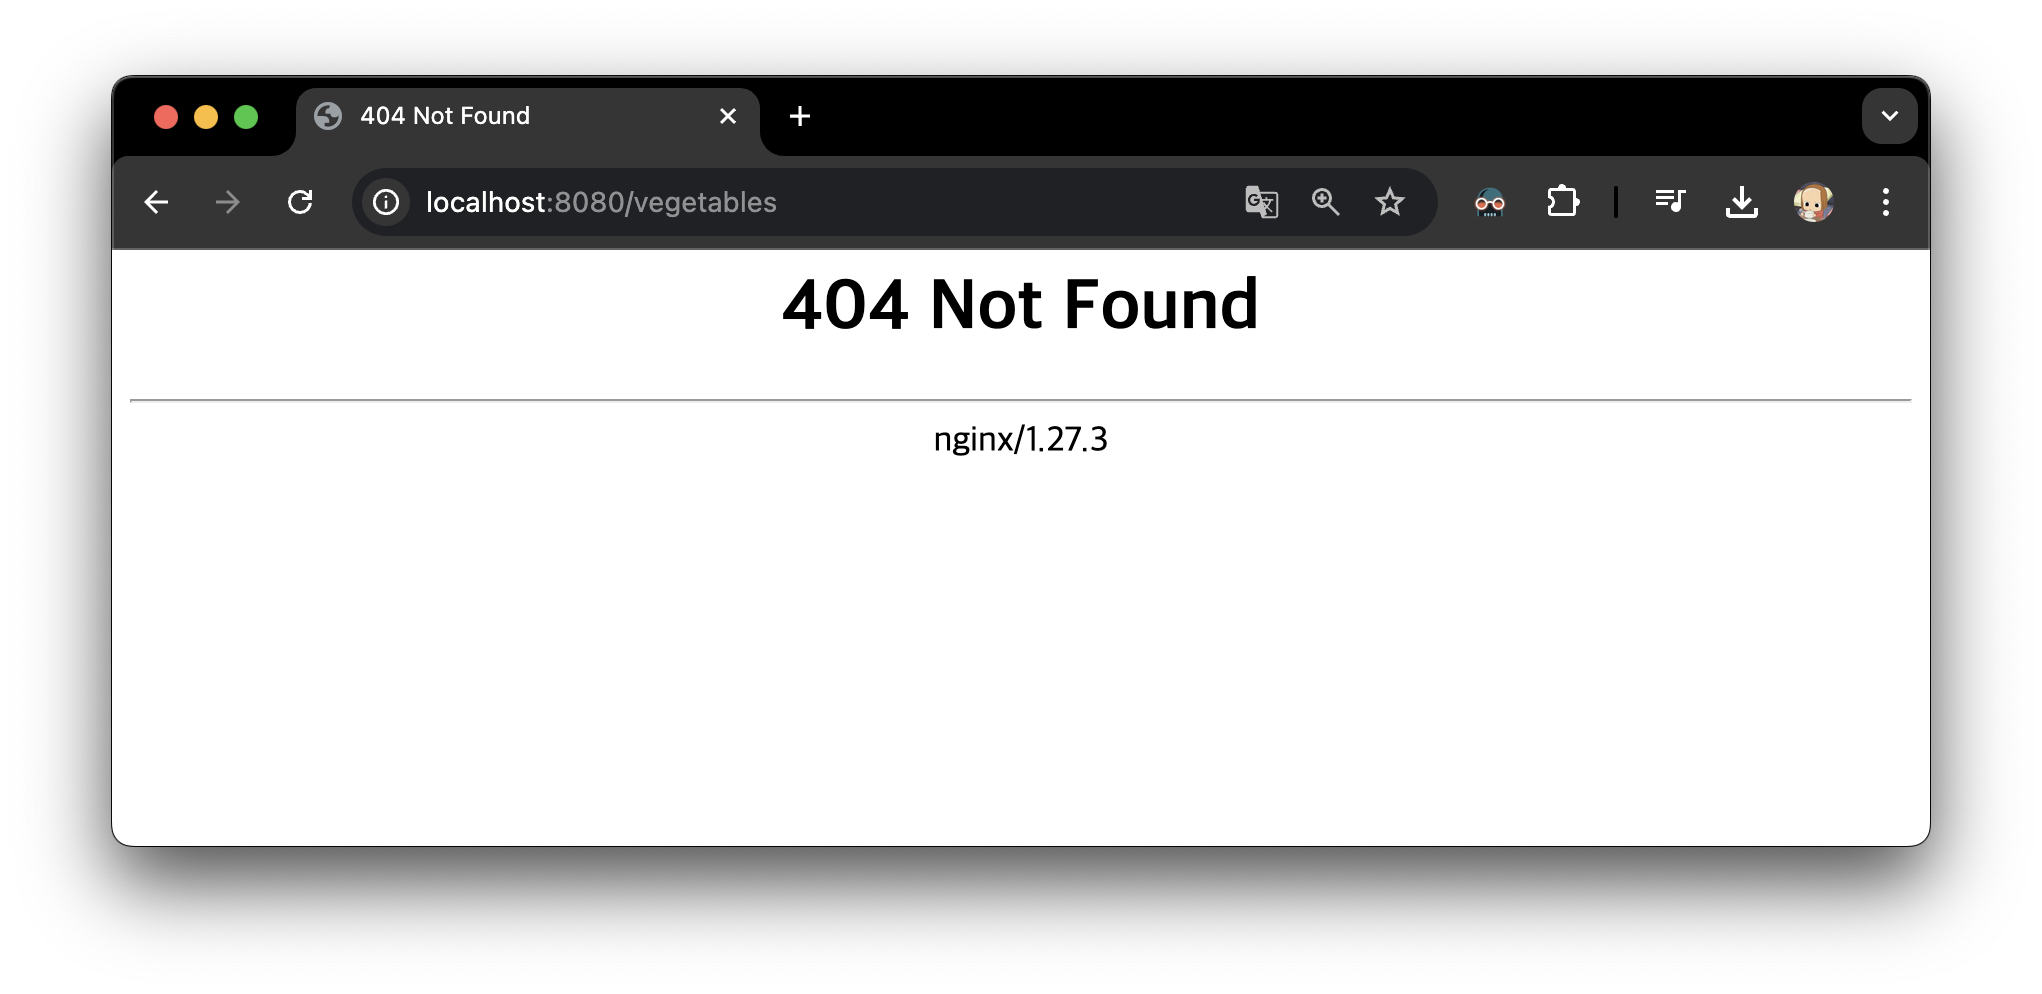
5️⃣ try_files 활용
- vegetables >veggies.html
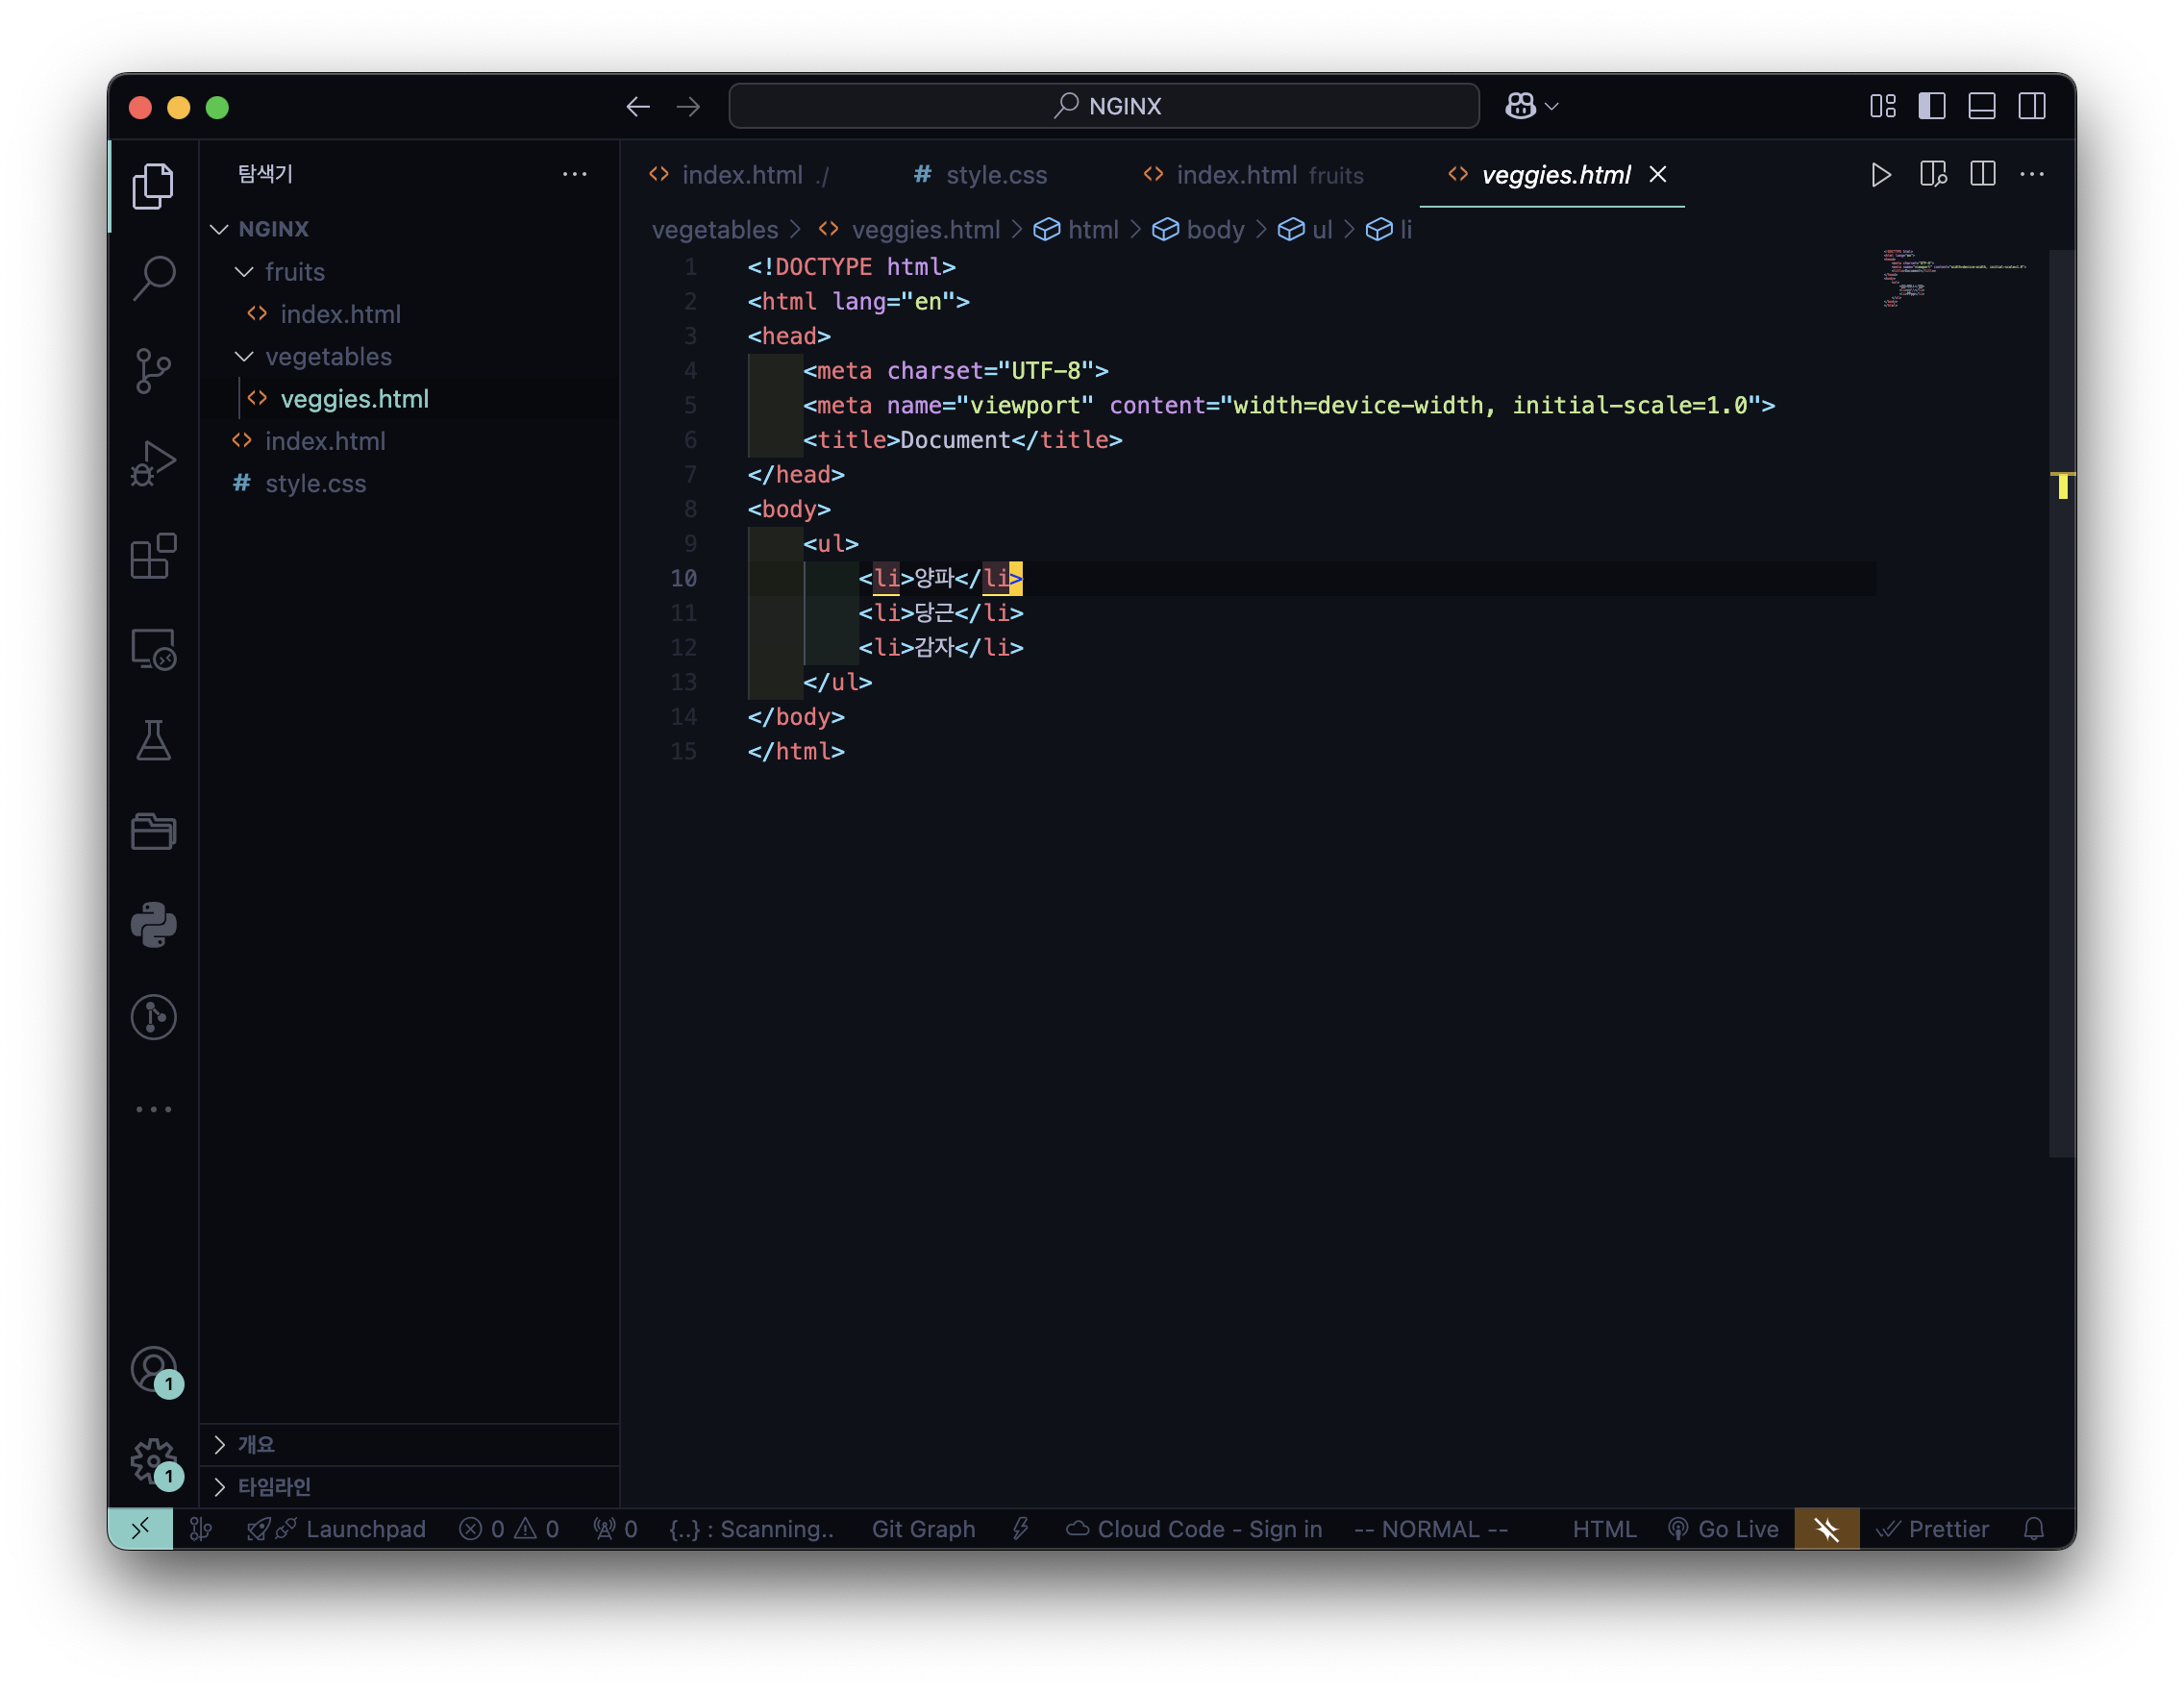
- nginx.conf
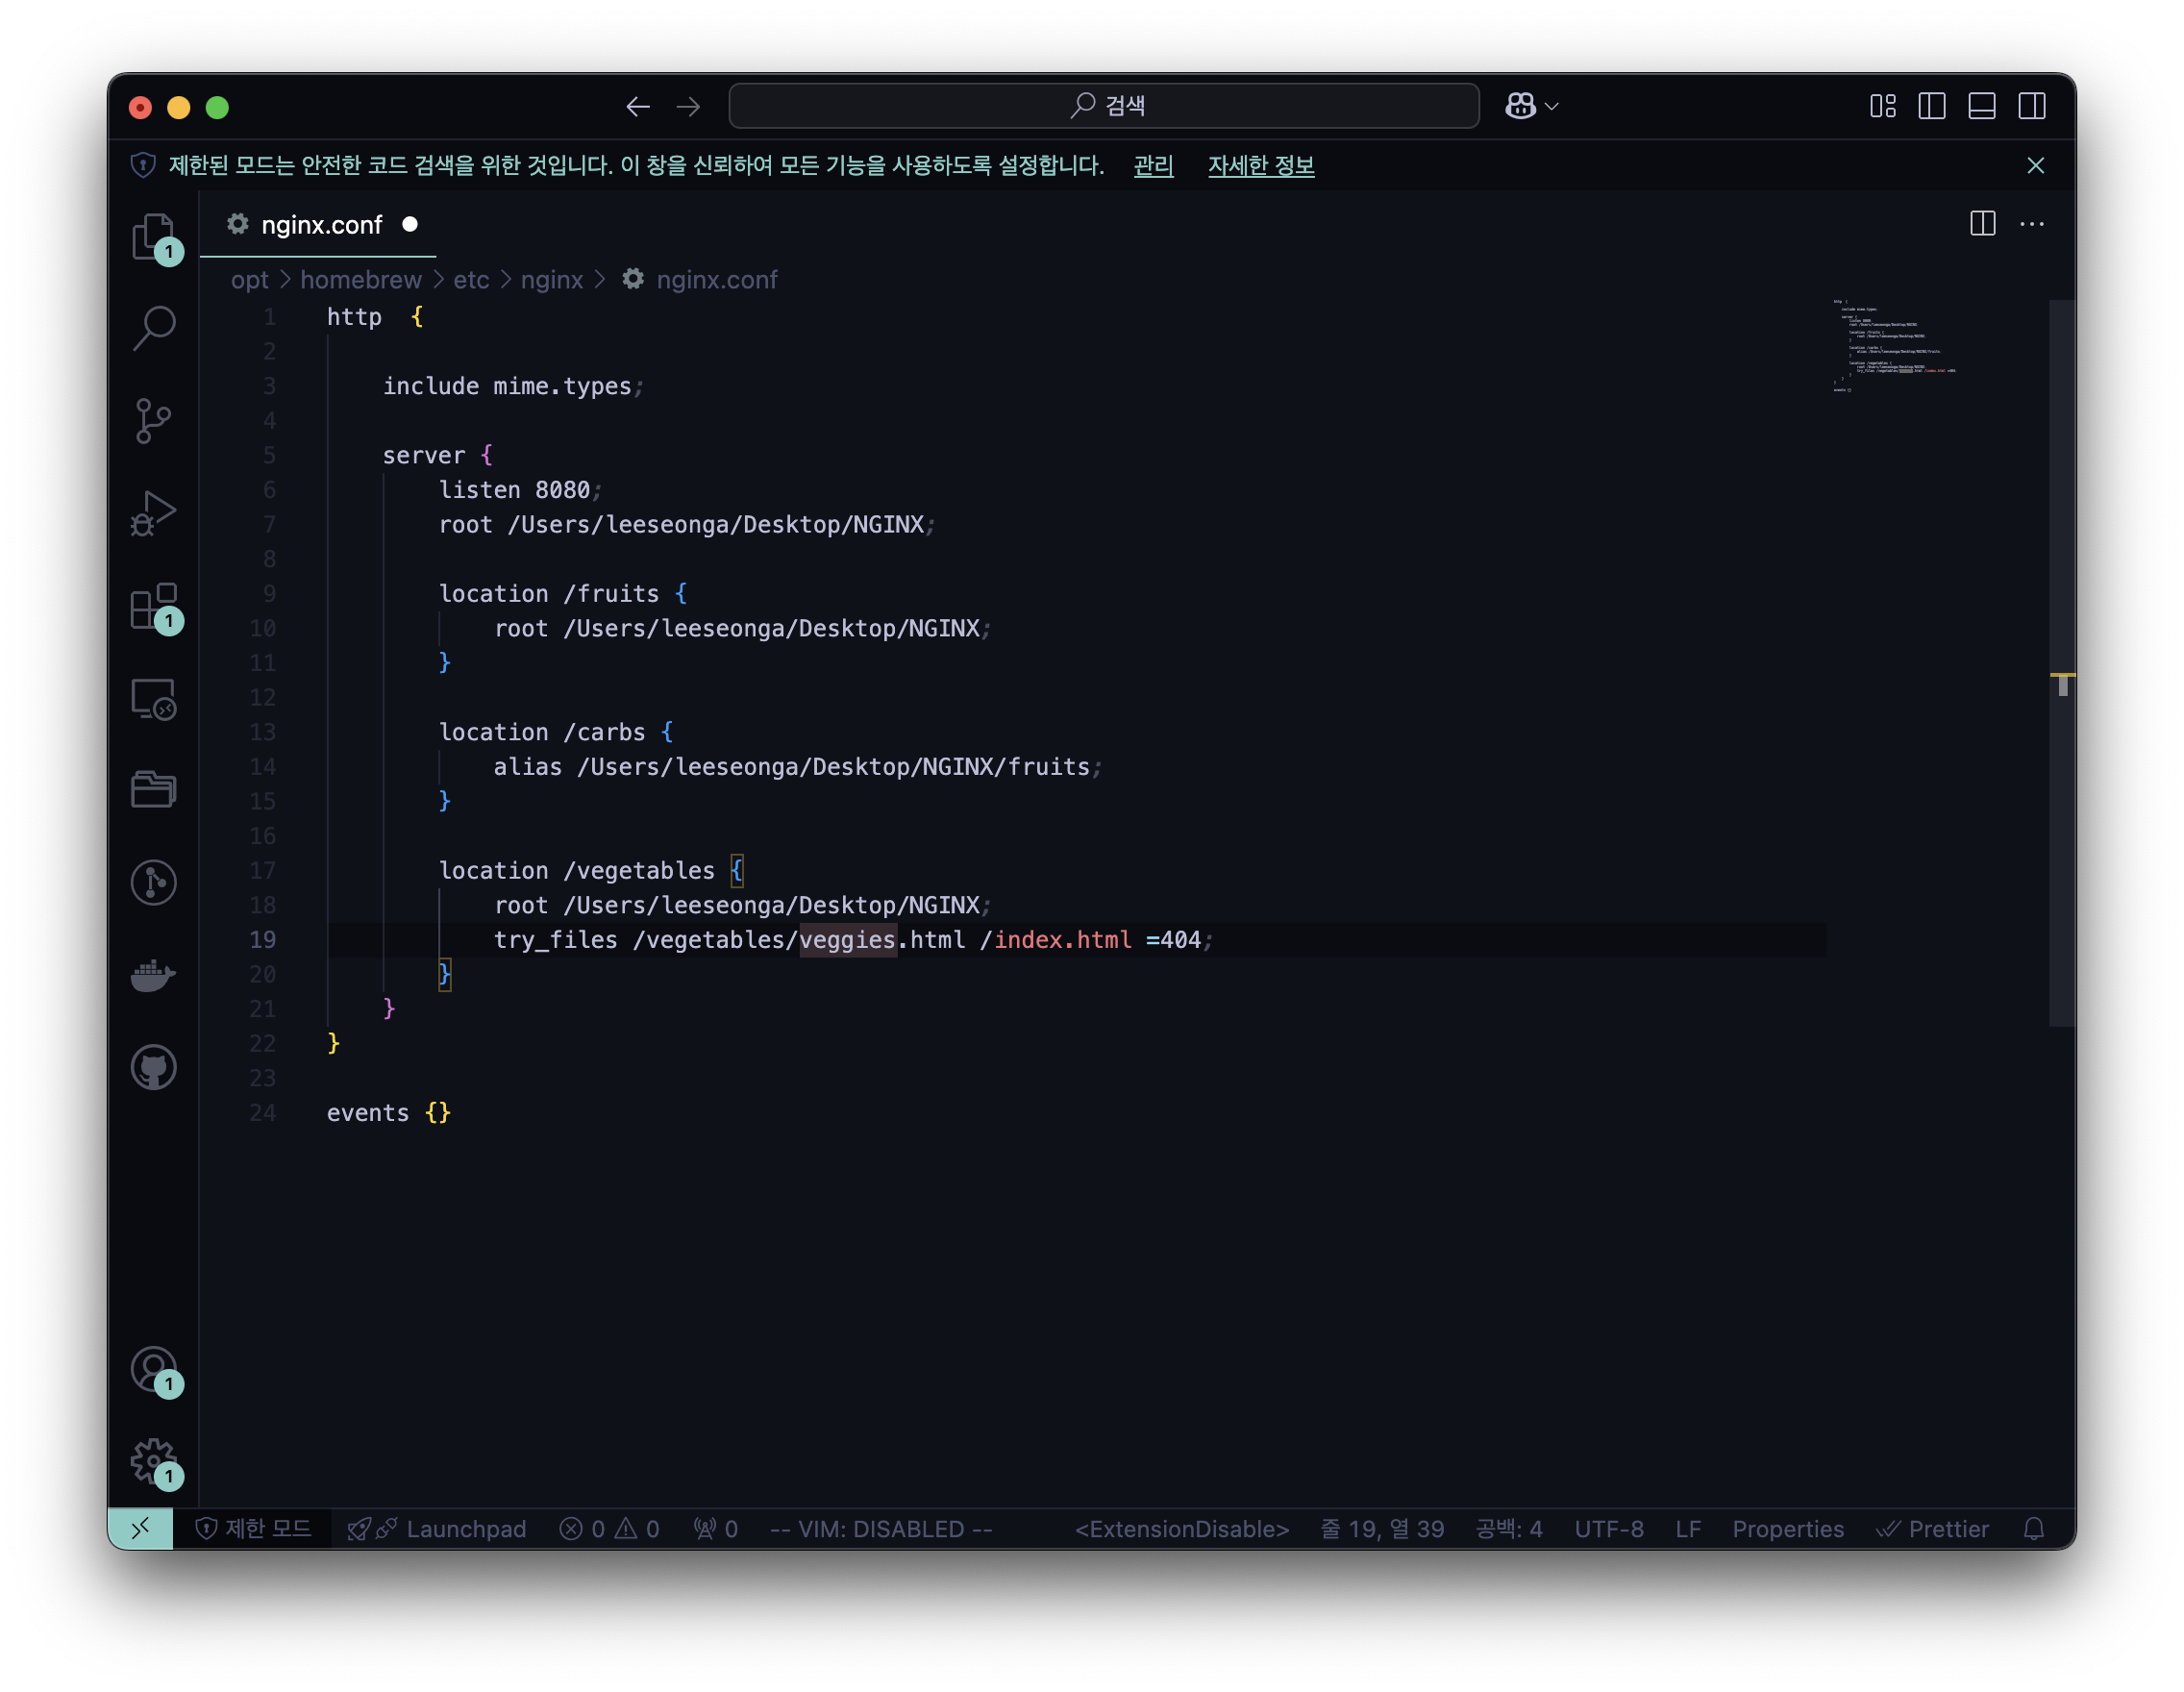
try_files (원하는 파일) (대체 파일) (에러 코드);
- 실행 결과 → (원하는 파일)
추가 1) 만약, veggies.html 을 veggiez.html로 수정한다면
- veggiez.html
- 실행 결과 → (대체 파일)
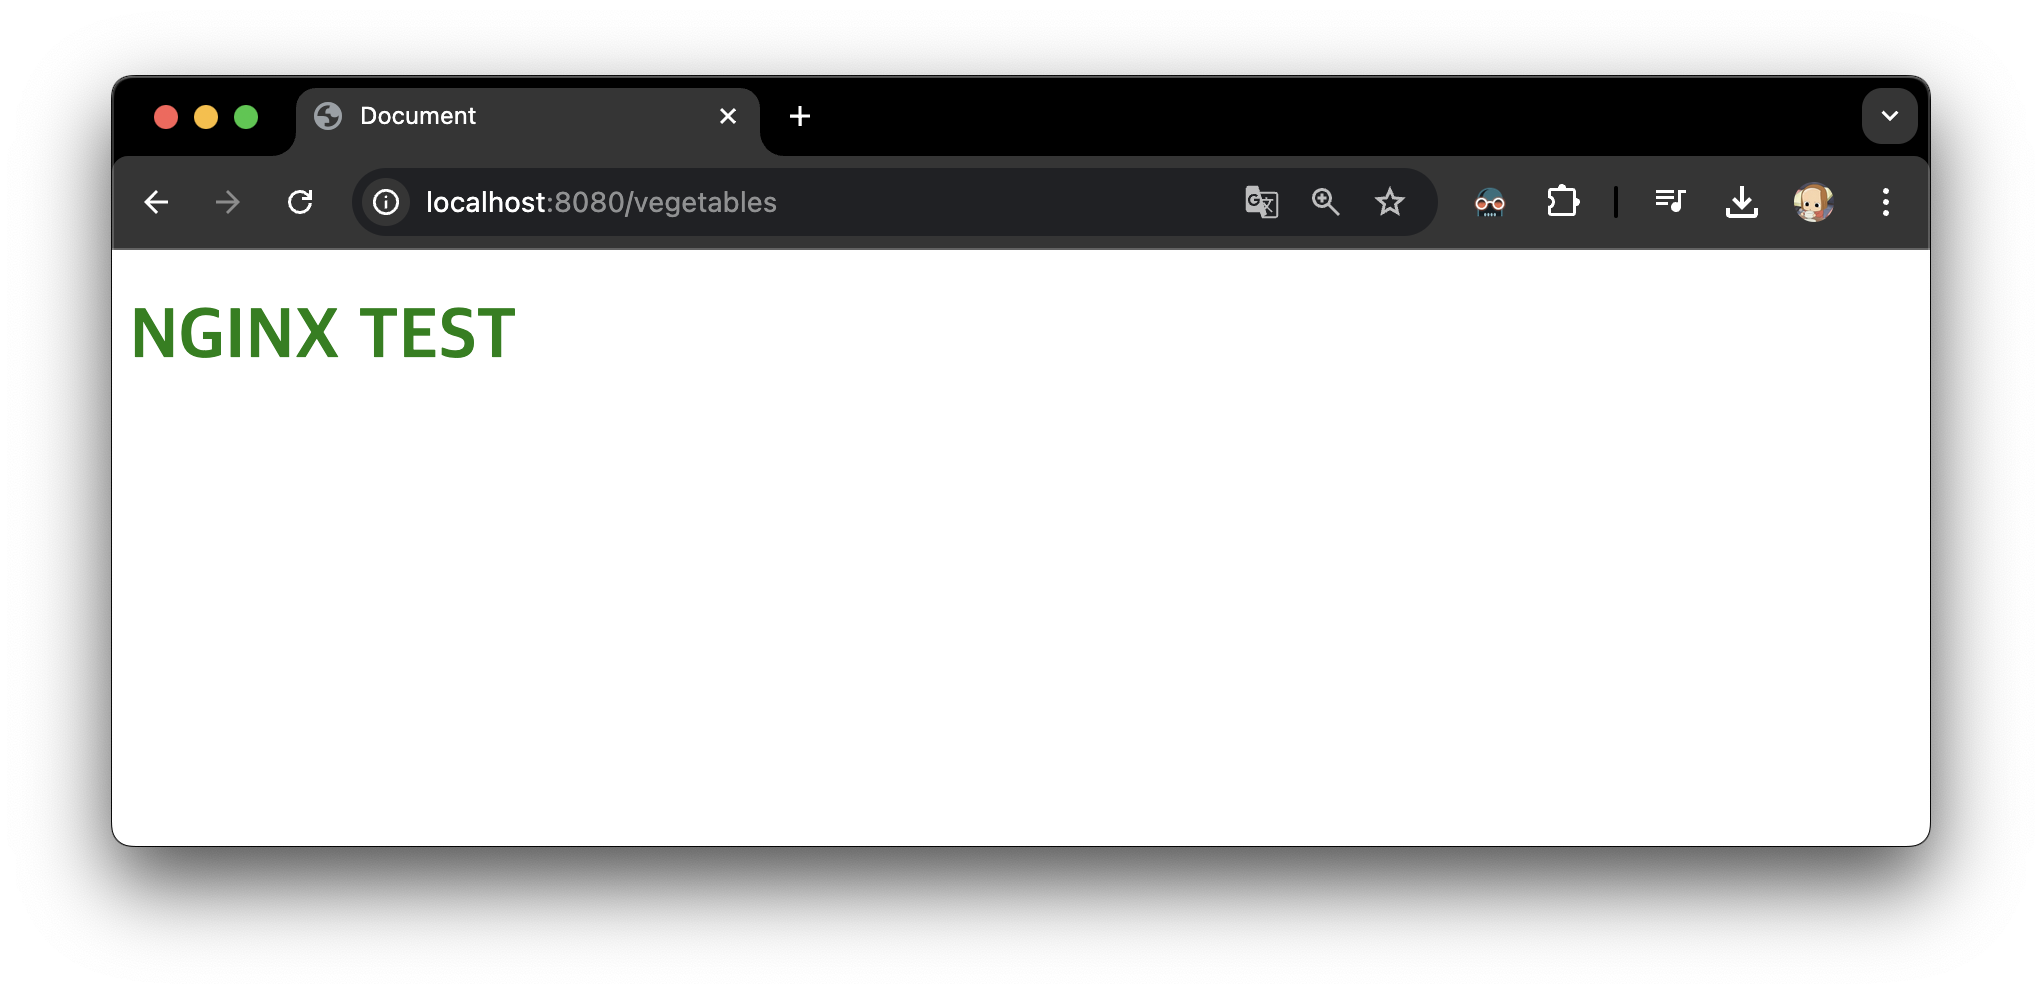
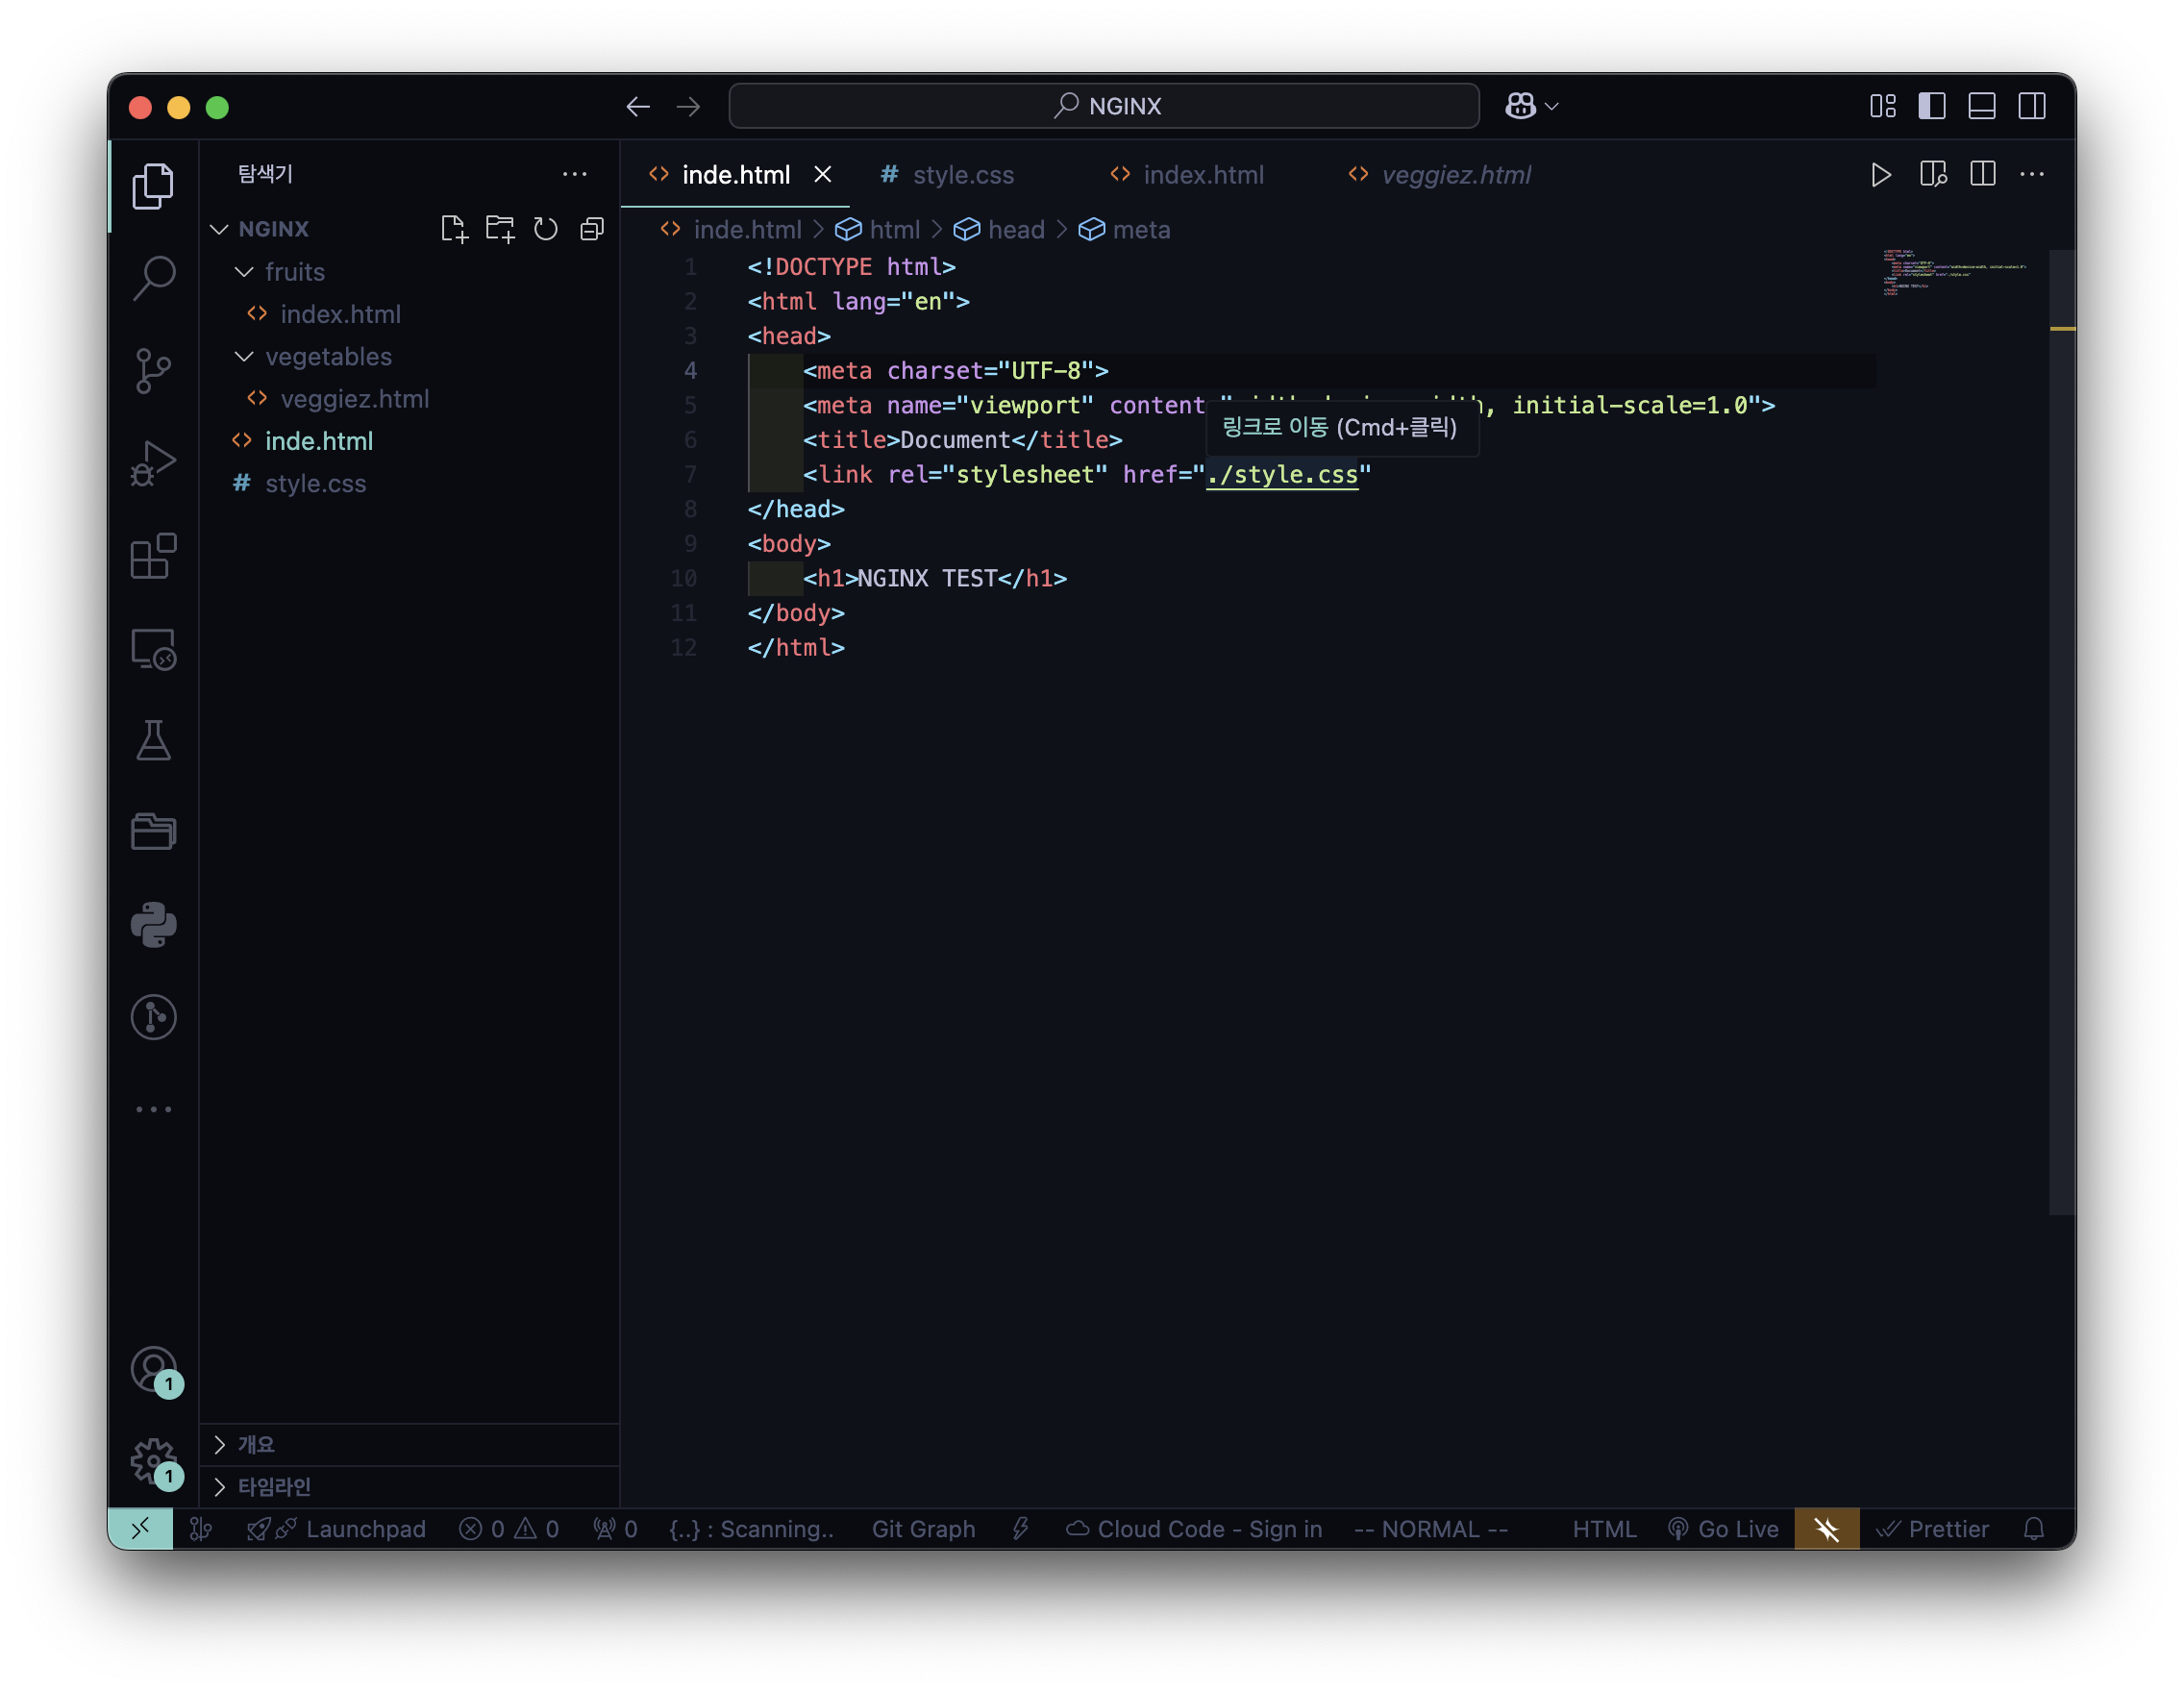
추가 2) 만약, 기본 디렉토리 내 index.html 을 inde.html로 수정한다면
- inde.html

- 실행 결과 → (에러 코드)
6️⃣ 정규 표현식 활용
- ngnix.conf
- 실행 결과
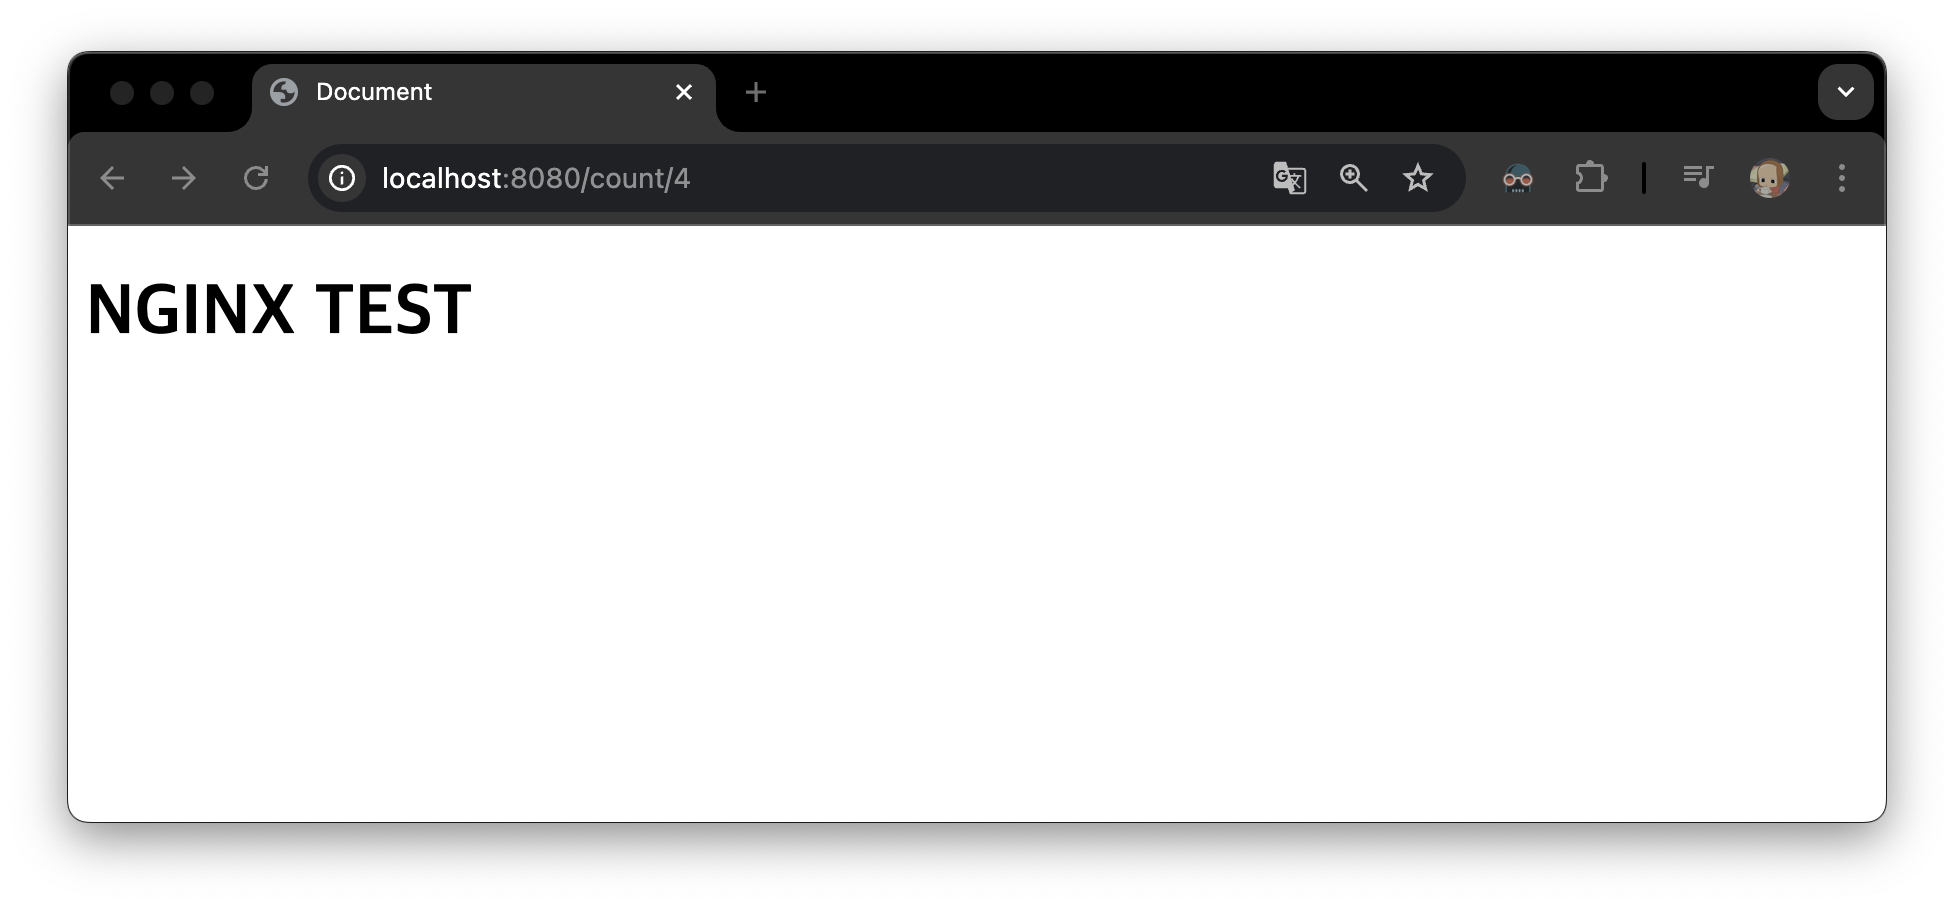
style.css는 적용이 안된 이유 → try_files 는 지정된 파일만 강제 반환
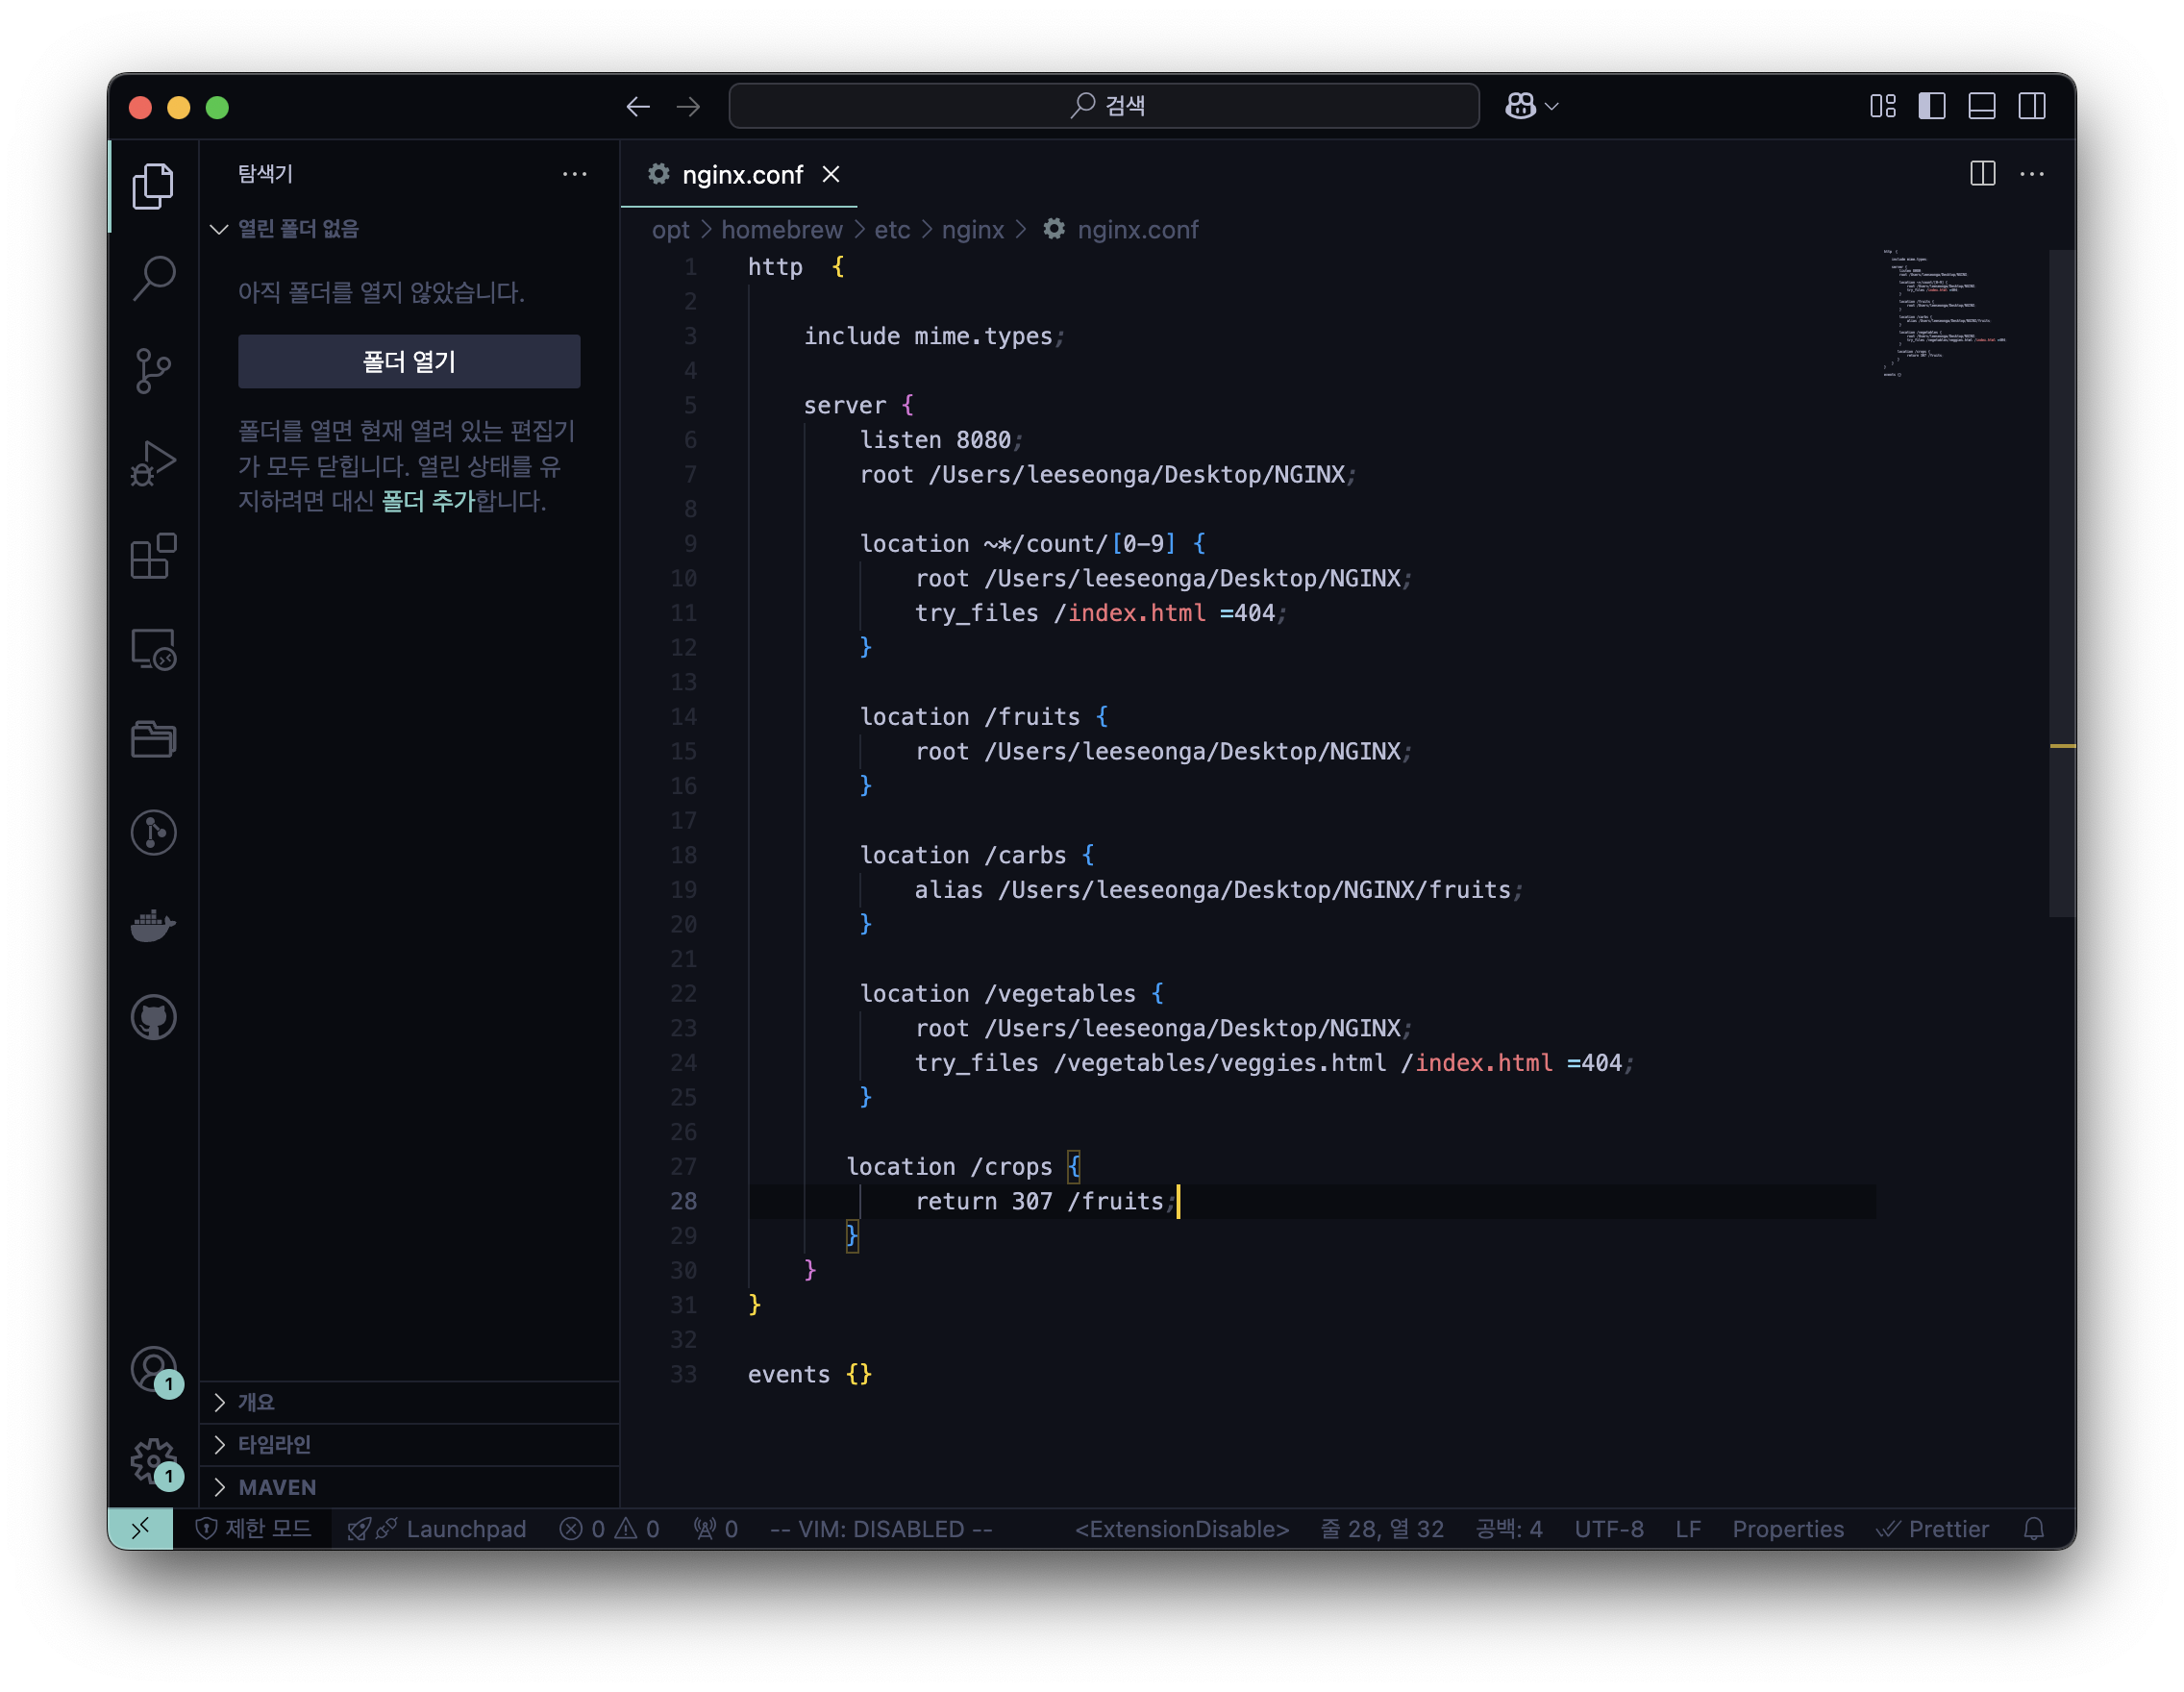
4. Rewrite and Redirect
7️⃣ Redirect : URL 변동 O (페이지 전환)
- ngnix.conf

- 실행 결과

이 경우, localhost:8080/crops 를 입력하더라도 결과는 localhost:8080/fruits
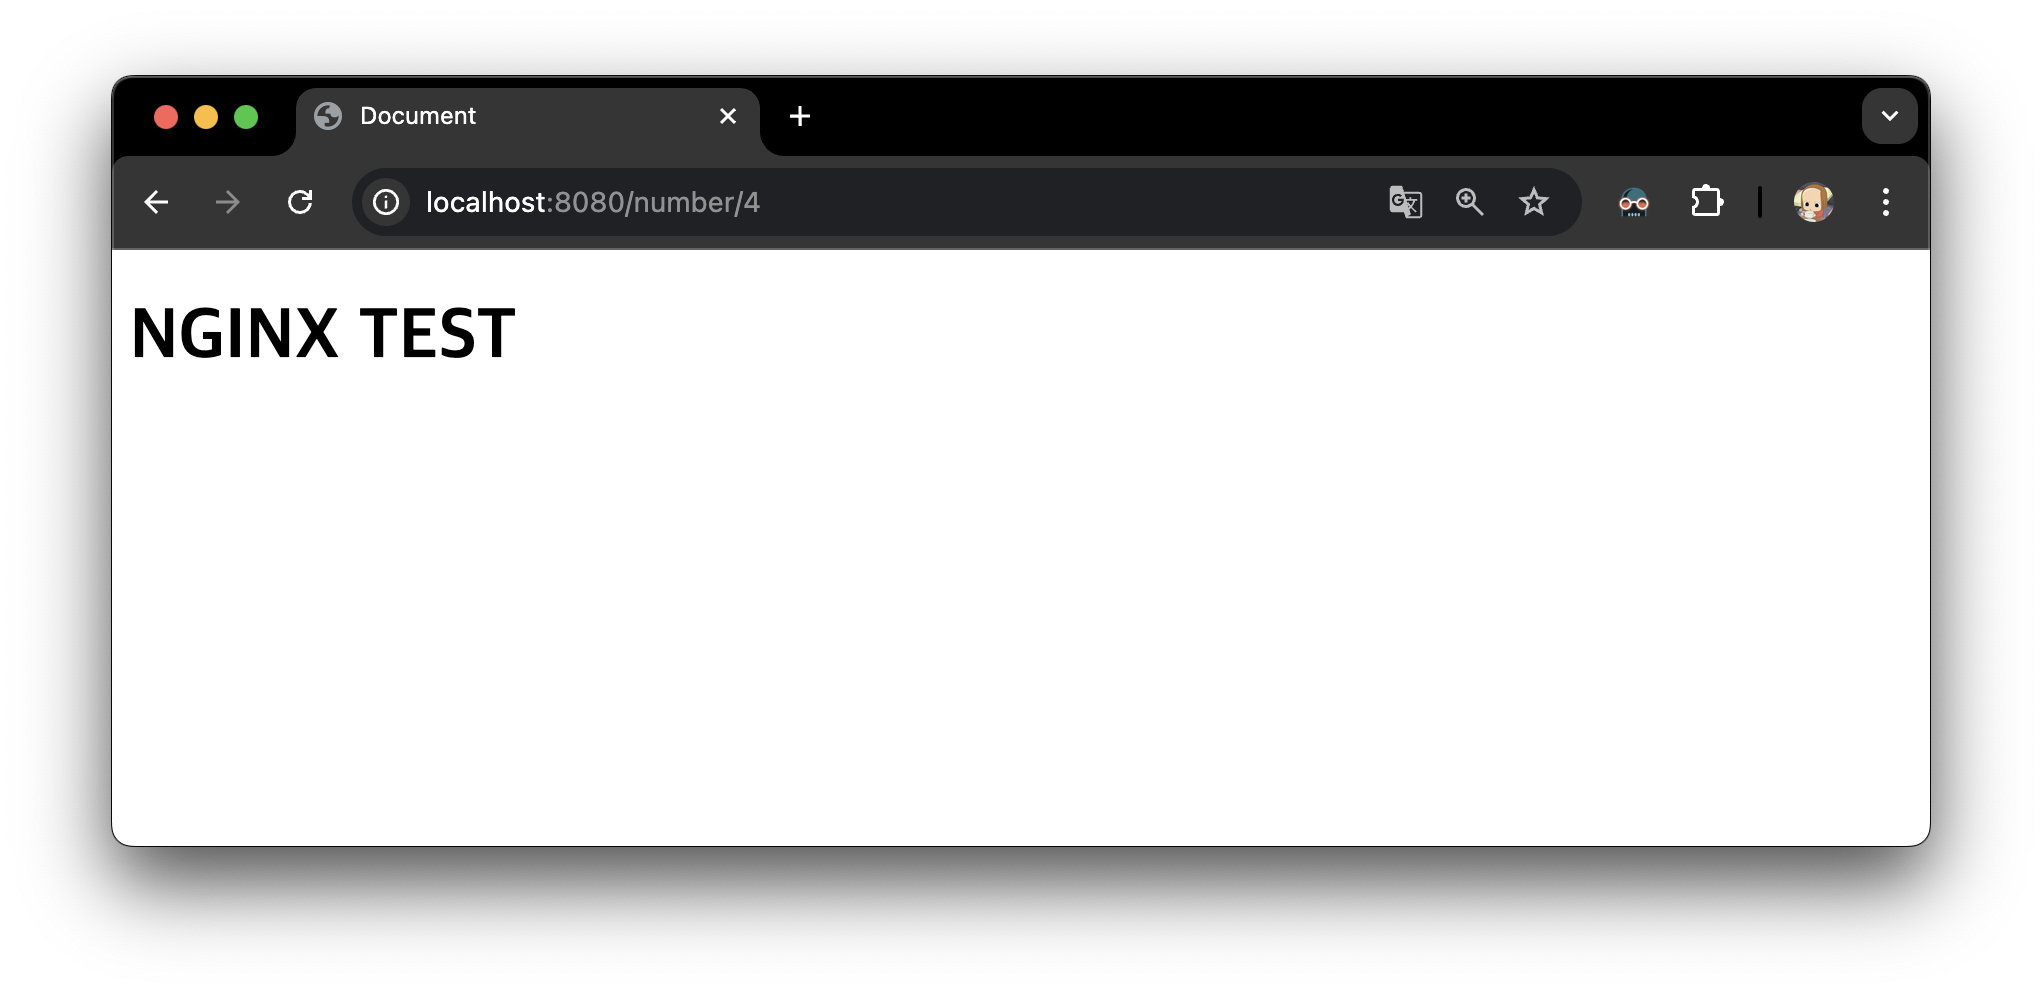
8️⃣ Rewrite : URL 변동 X (페이지 재활용)
- ngnix.conf

- 실행 결과
5. NGINX as a Load Balancer (Reverse Proxy)
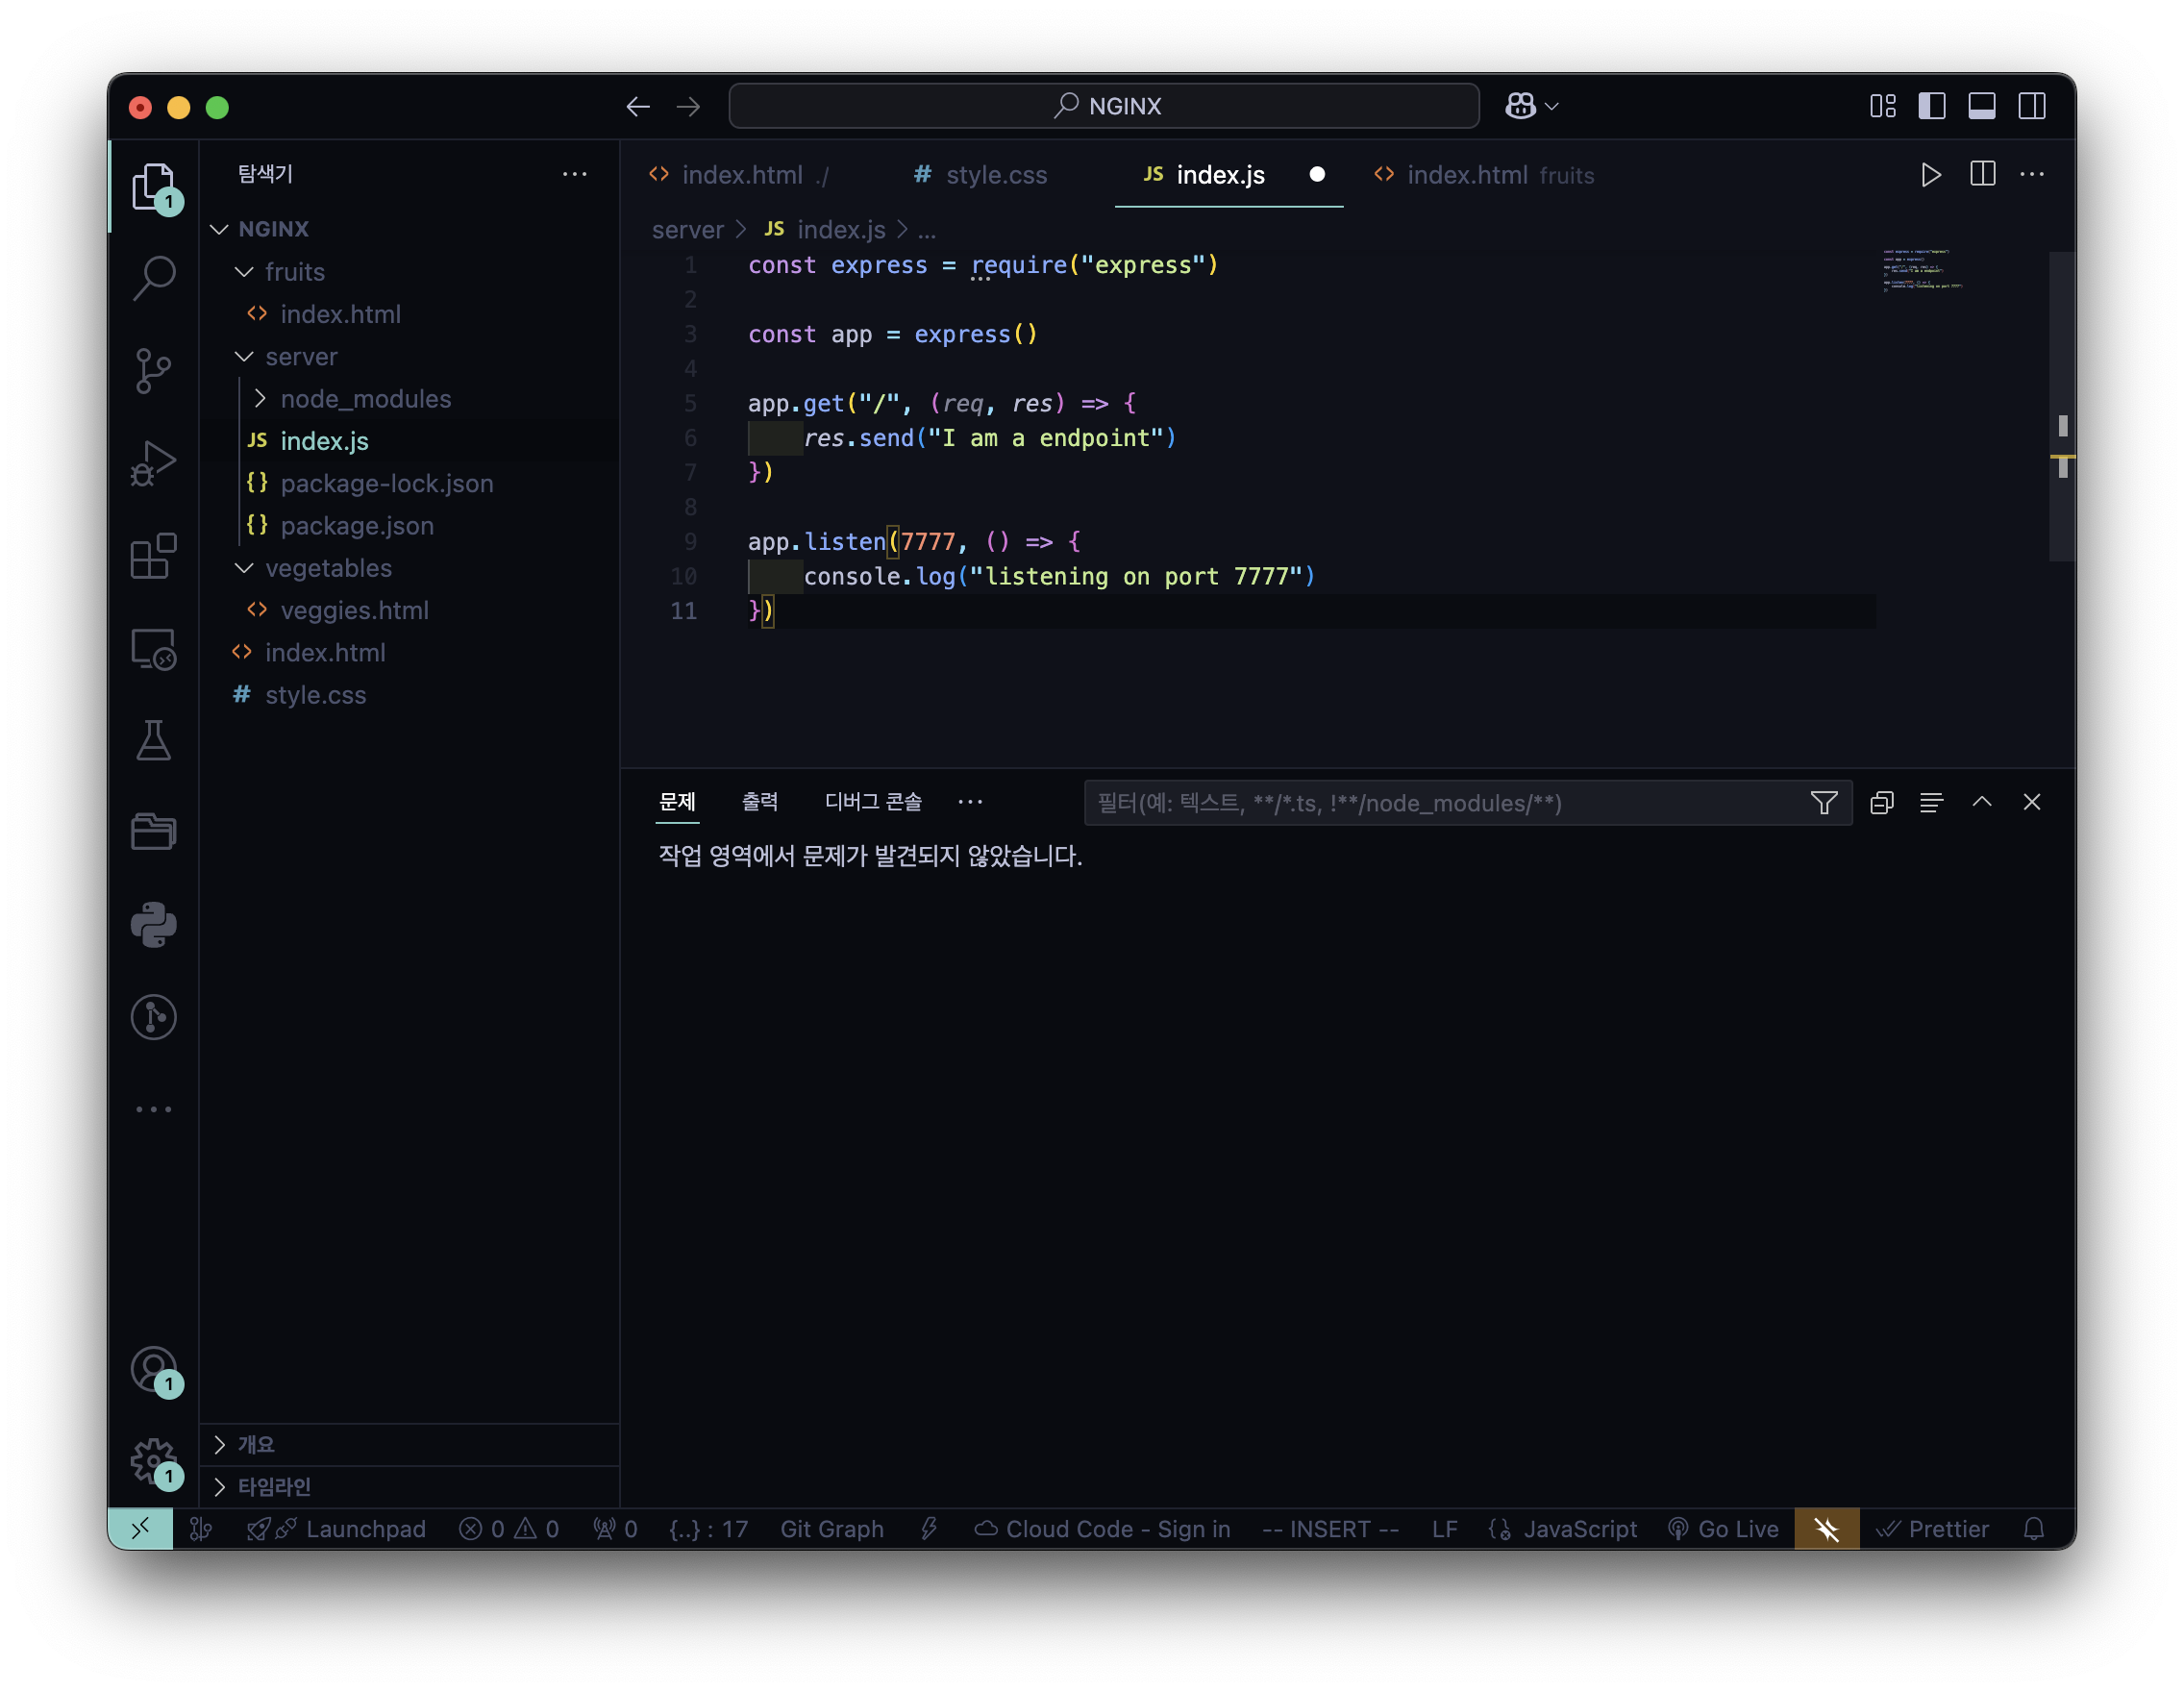
- index.js
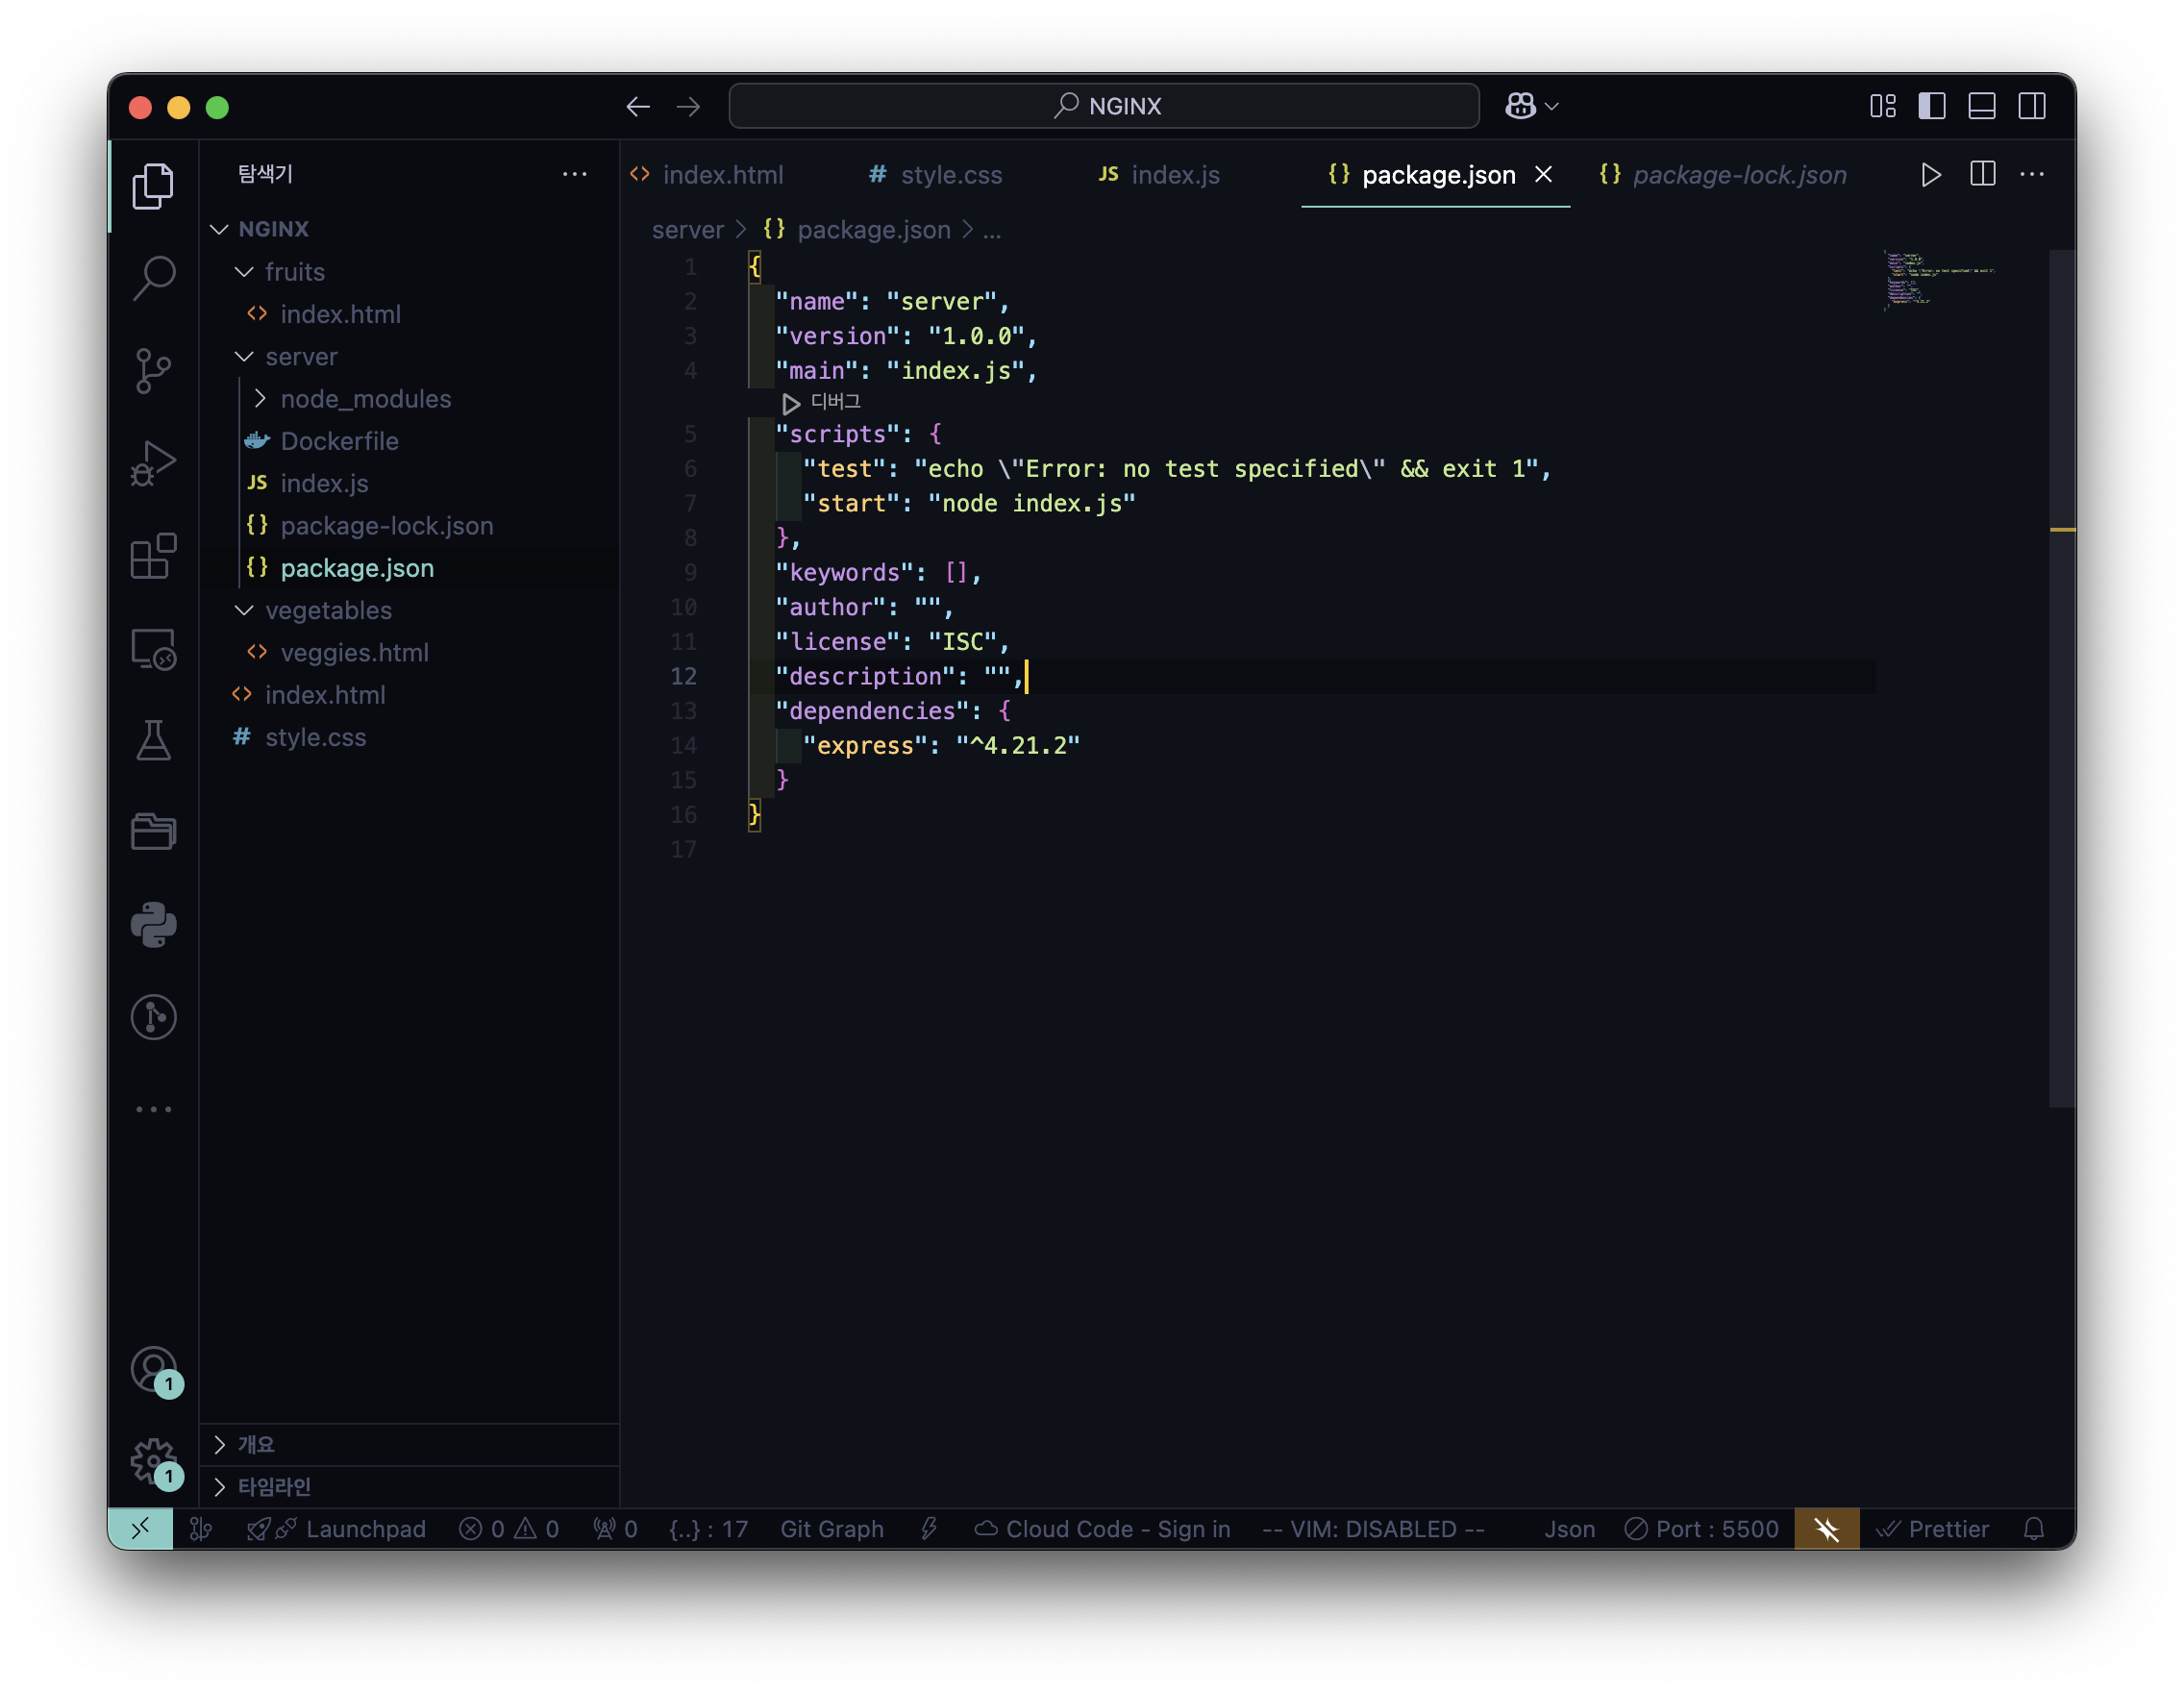
- package.json
- Dokerfile 생성
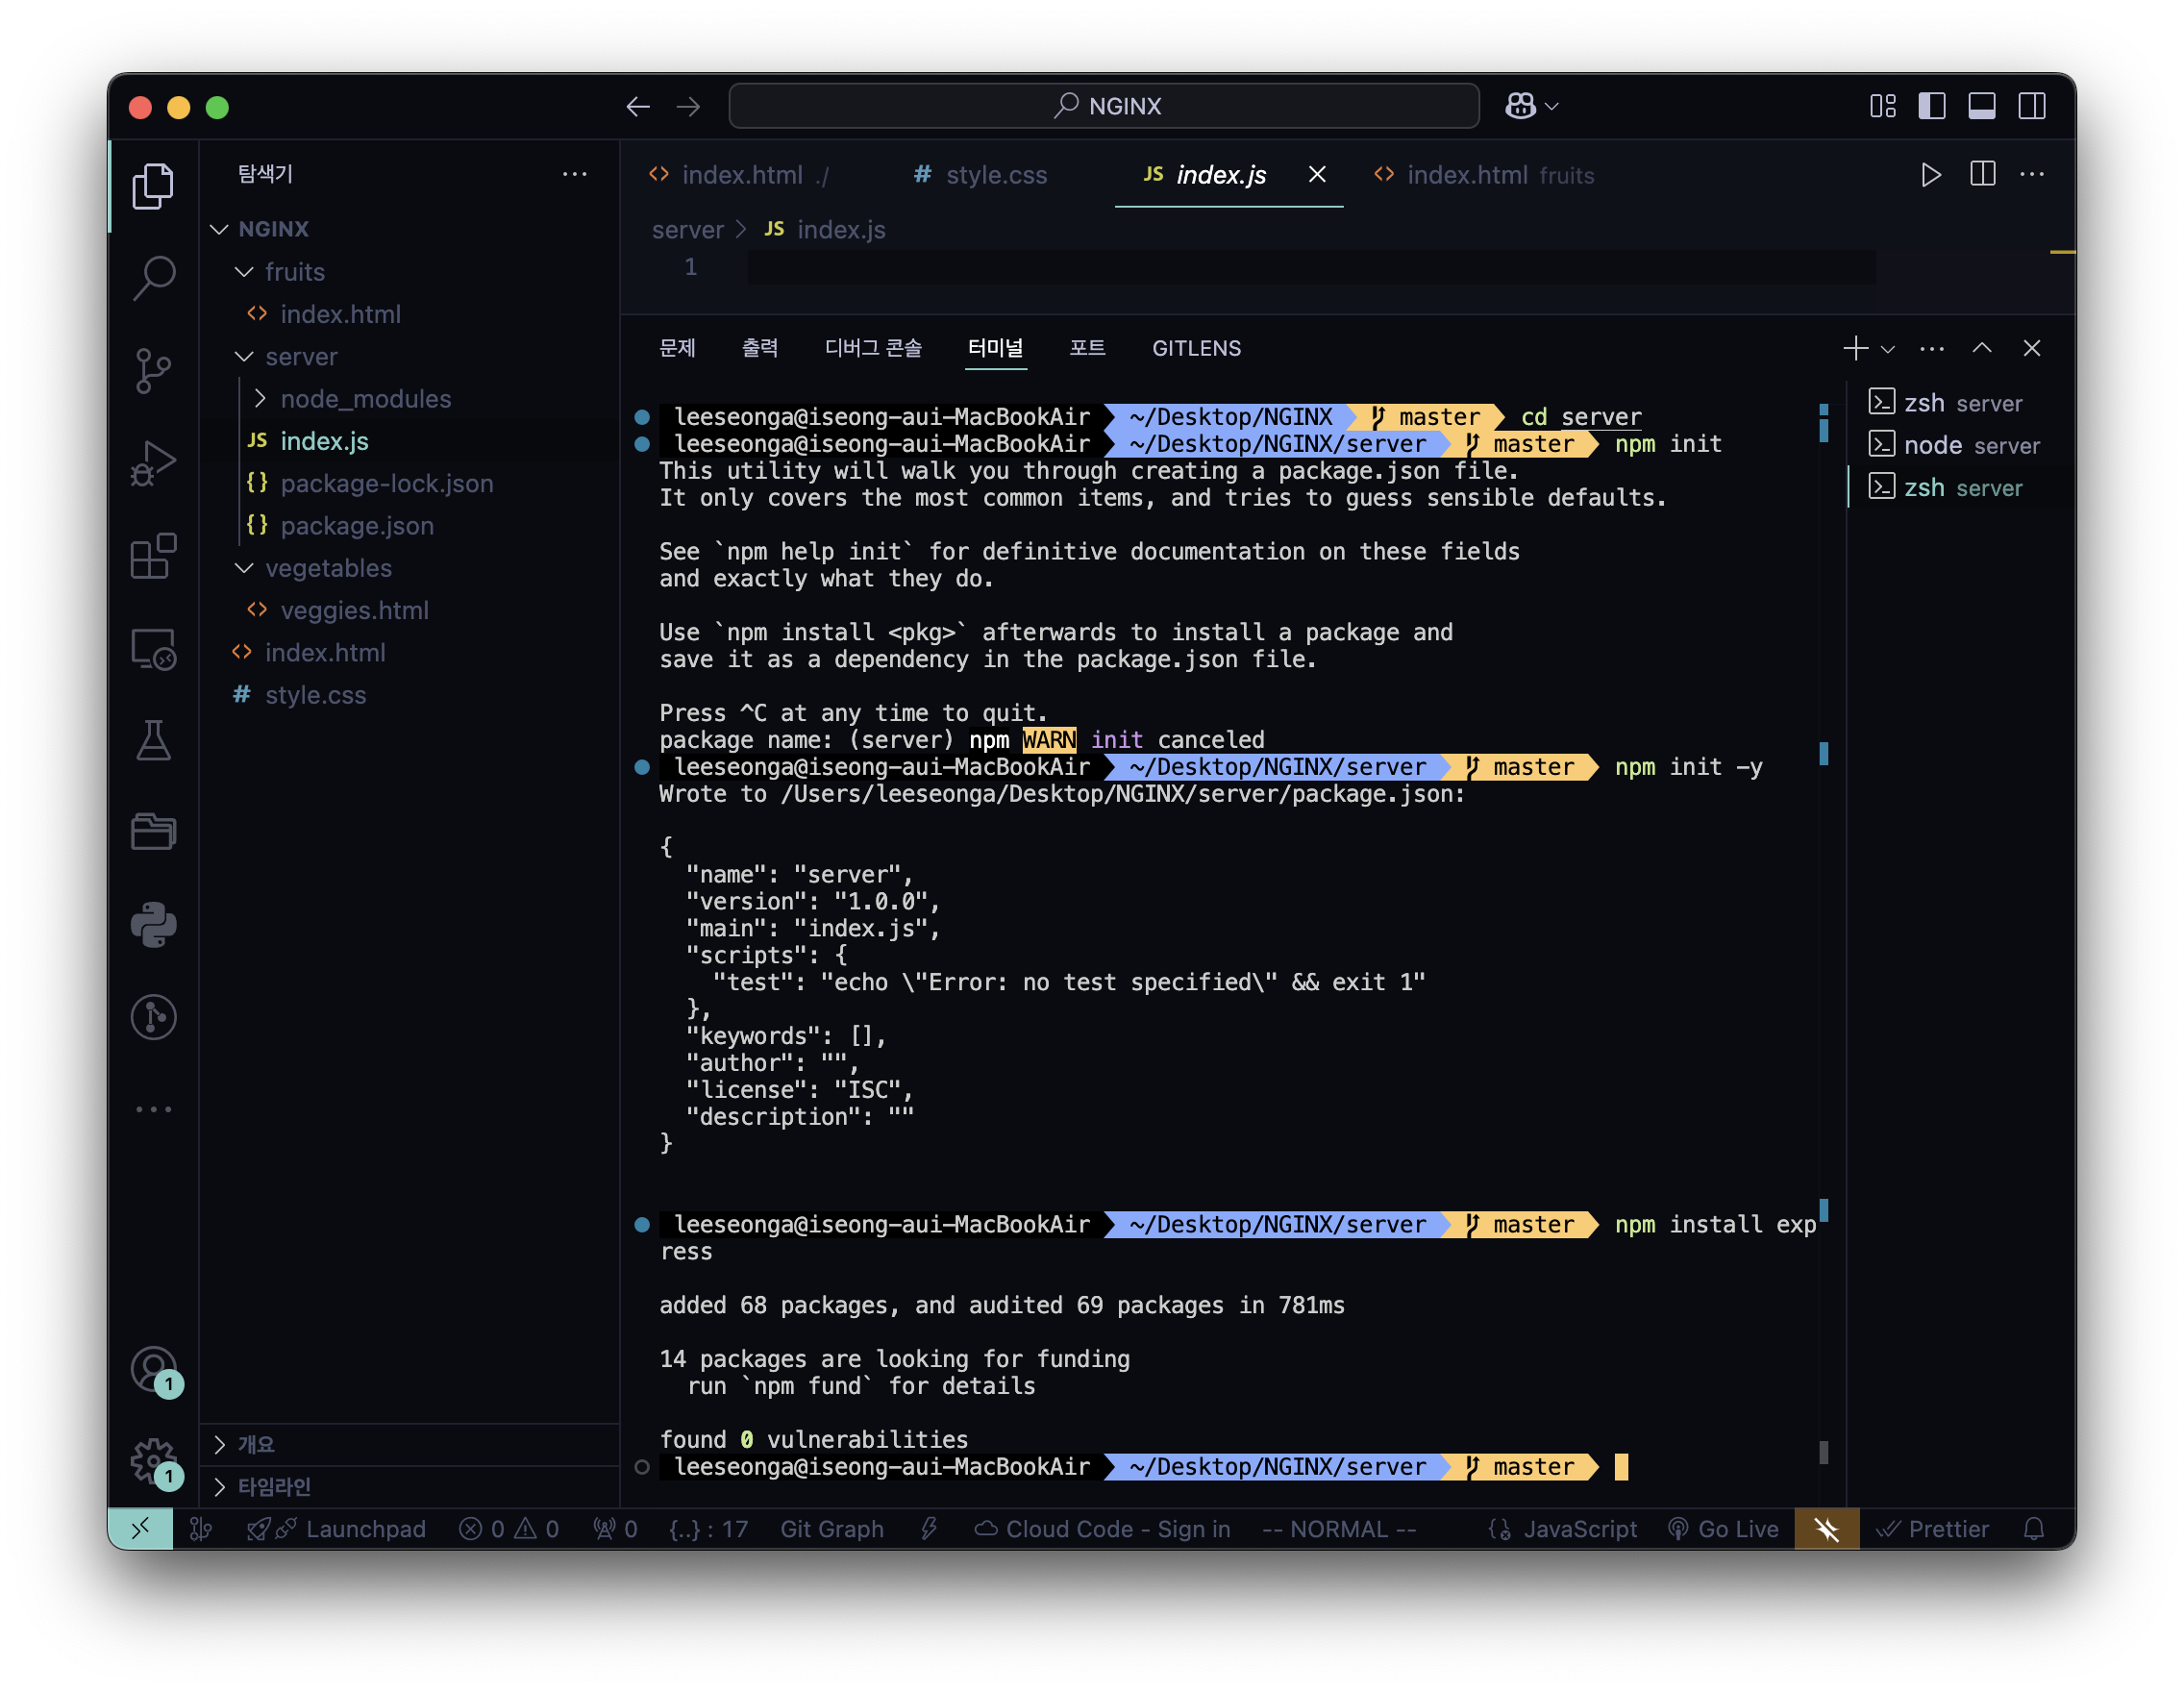
cd ~/Desktop/NGINX/serverserver 폴더로 이동
touch DockerfileDokerfile을 생성
nano DockerfileDockerfile에 내용을 작성
# Base Image : Express.js 구동을 위한 Node 버전 명시
FROM node:16.20.2

# Create app directory
WORKDIR /usr/src/app

# Install app dependencies
# A wildcard(*) is used to ensure both package.json and package-lock.json are copied
COPY package*.json ./

RUN npm install
# If you are building your code for production
# RUN npm ci --only=production

# Bundle app source
COPY . .

EXPOSE 7777
CMD [ "npm", "run", "start" ]
위의 코드들을 실행 후 작성해야할 Dockerfile 내용
💡 Node 버전을 모르겠다면 → Terminal 에서 아래의 코드 입력
node -v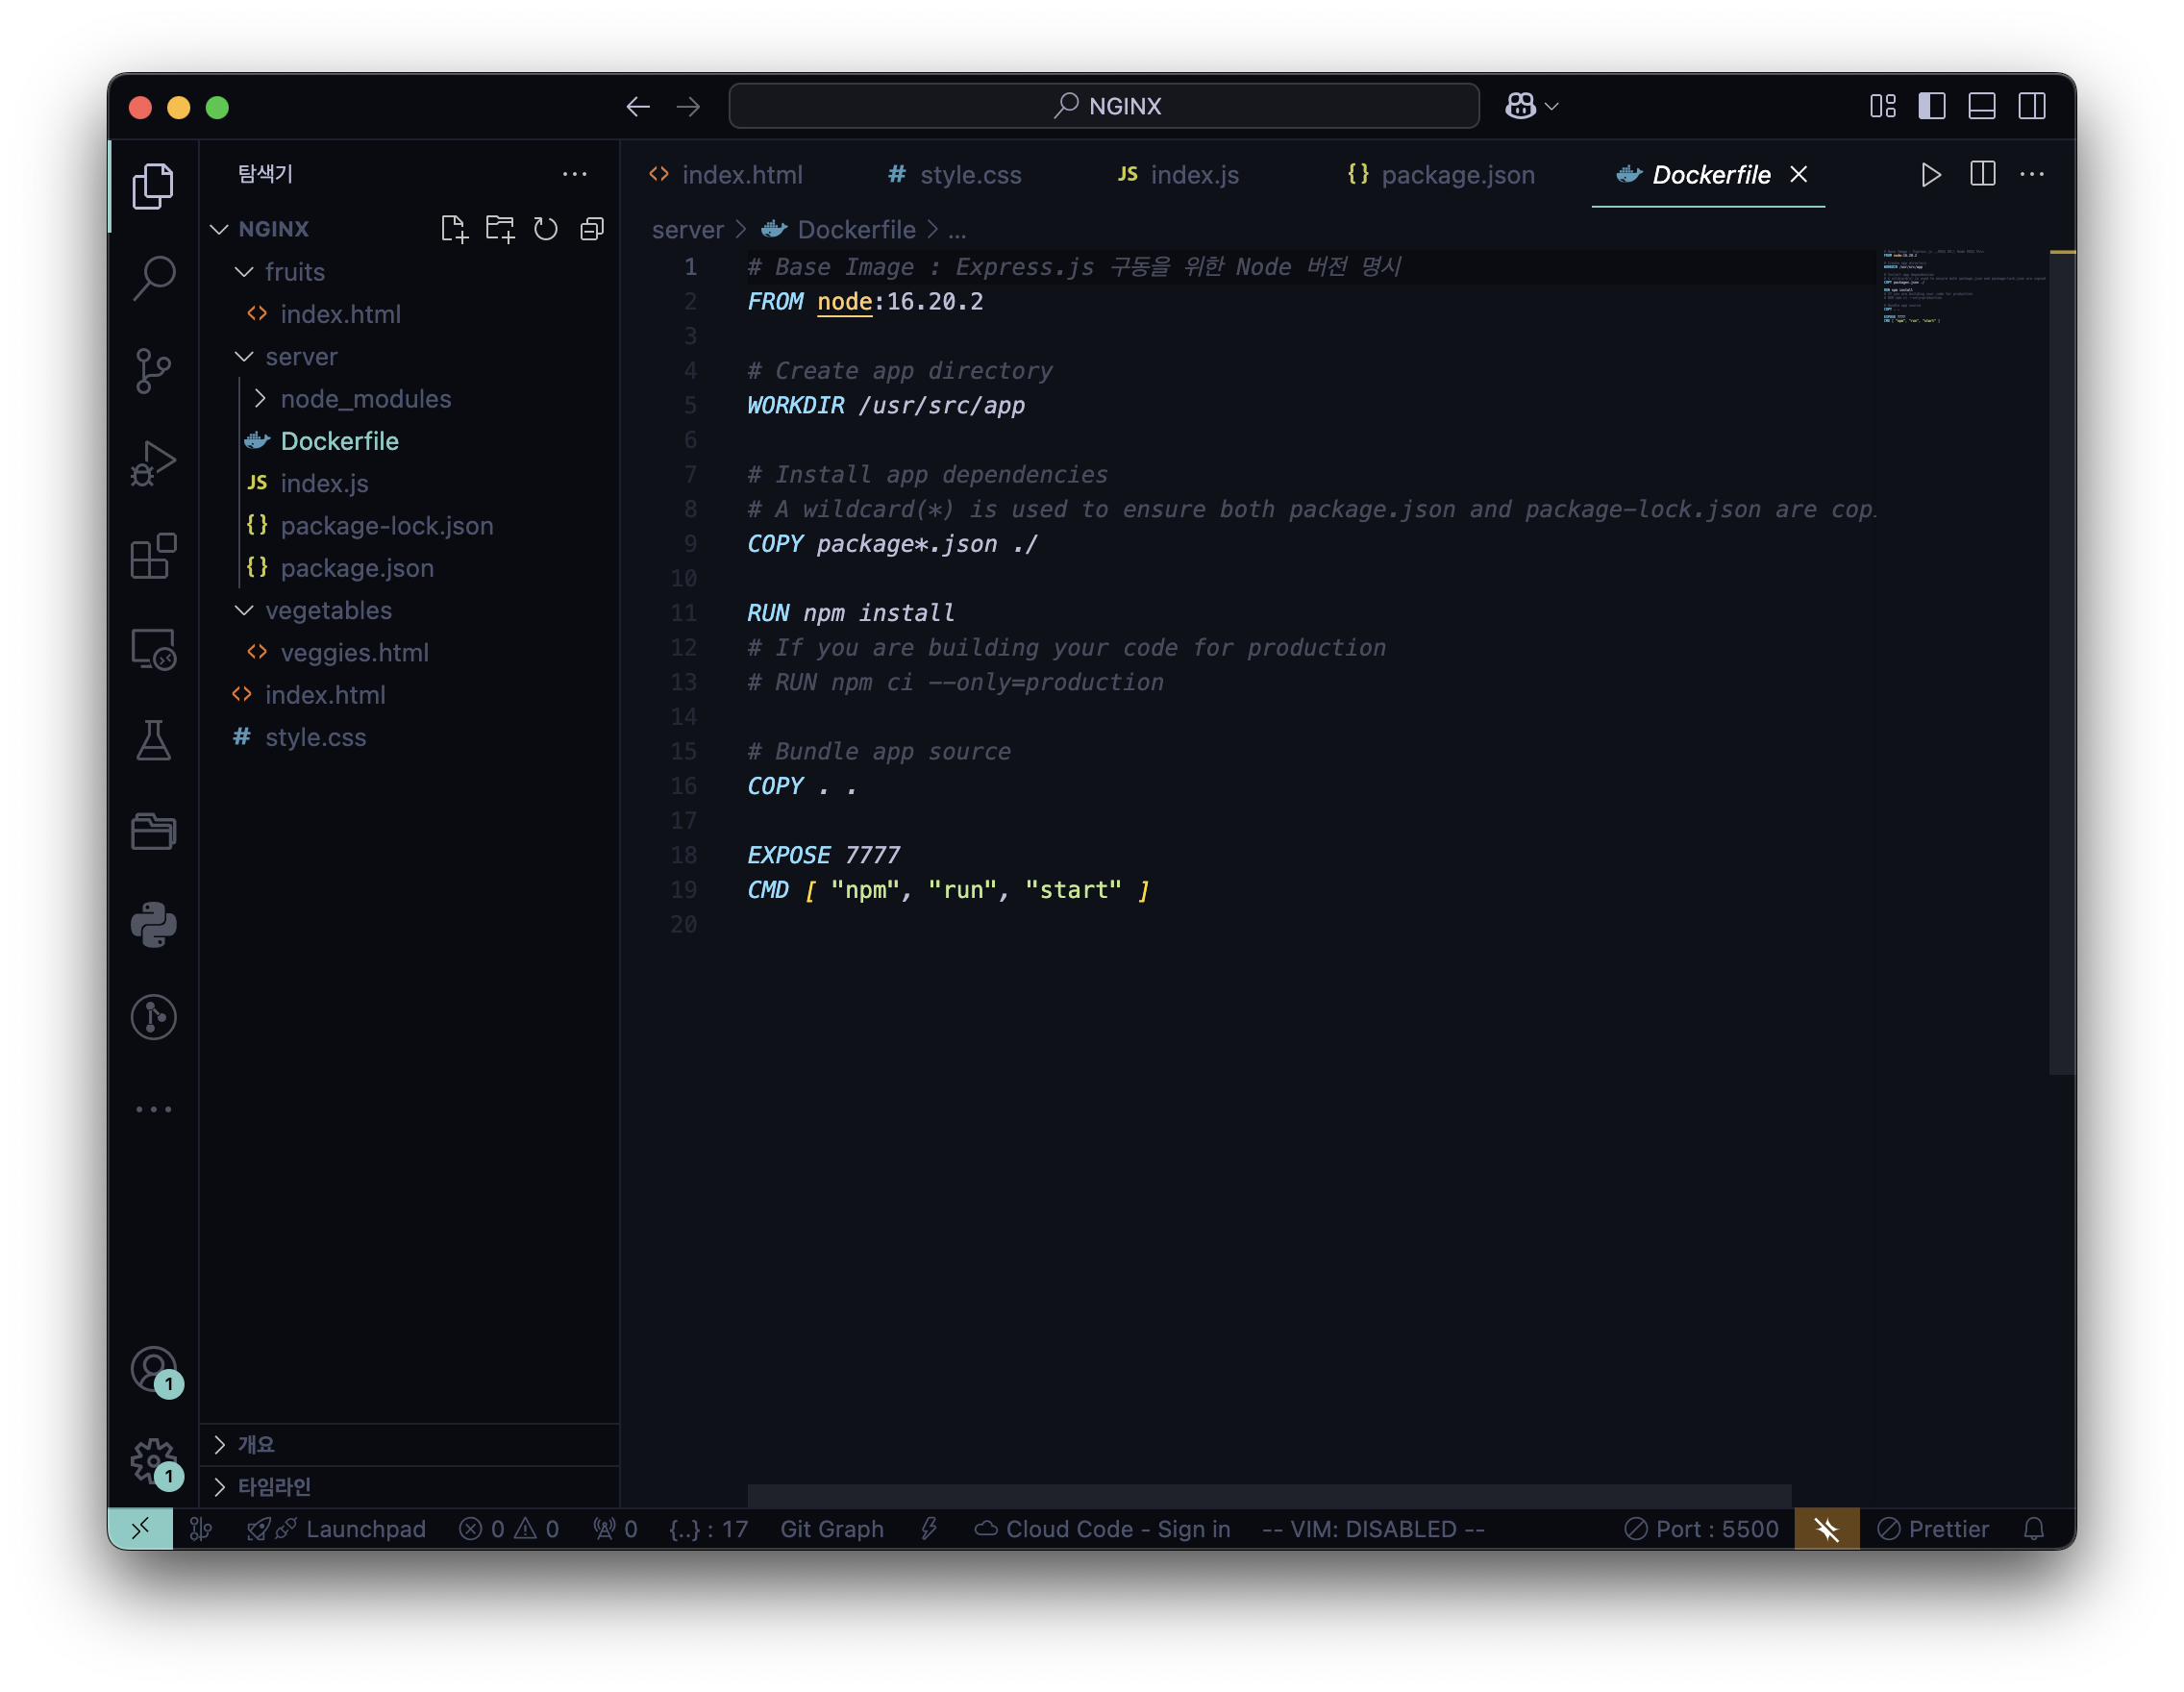
- Docker
⚠️ 아래에서 Download Docker Desktop 후 진행
https://www.docker.com/products/docker-desktop/
docker build -t express-server .docker run -p 1111:7777 express-server
docker run -p 2222:7777 express-server
docker run -p 3333:7777 express-server
docker run -p 4444:7777 express-server4개의 Express.js 서버를 Docker에 띄우는 과정

upstream backendserver {
		server 127.0.0.1:1111;
		server 127.0.0.1:2222;
		server 127.0.0.1:3333;
		server 127.0.0.1:4444;
}

server {
		listen 8080;

		location / {
				proxy_pass http://backendserver/;
		}
}
nginx.conf 내 Load Balancer (Reverse Proxy) 설정 추가
- 실행 결과
✨ Round Robin (RR) Scheduling
NGINX Load Balancing은 Round Robin (RR) Scheduling을 따르는데,
Load Balancer는 Upstream Server 목록을 순차적으로 실행하여 연결 요청을 각 서버에 차례로 할당
backend upstream 그룹의 다음 샘플 구성이 주어지면, Load Balancer는 연결 요청을
server 127.0.0.1:1111, server 127.0.0.1:2222,
server 127.0.0.1:3333, server 127.0.0.1:4444 에 순서대로 보내는 식으로 연결 요청 전송
5. 추가 ) 심화 : Load Balancer 취지에 맞게 특정 인스턴스에 가중치
upstream backendserver {
		server 127.0.0.1:1111 weight=3;
		server 127.0.0.1:2222;
		server 127.0.0.1:3333;
		server 127.0.0.1:4444;
}

server {
		listen 8080;

		location / {
				proxy_pass http://backendserver/;
		}
}
nginx.conf 내 Load Balancer (Reverse Proxy) 설정 추가 중 특정 인스턴스에 가중치
6. 추가 ) 심화 : X-Forwarded-For 헤더 추가
-
X-Forwarded-For(XFF) Header
HTTP 요청 헤더 중 하나로, 클라이언트의 IP 주소 식별에 사용
프록시 서버나 로드 밸런서 사용 시 웹 서버는 클라이언트의 실제 IP 주소가 아닌
프록시 서버나 로드 밸런서의 IP 주소를 받게 되는데
이때 클라이언트의 원래 IP 주소를 전달하기 위해 사용
🔎 HINT : proxy_pass 사용 시 proxy_set_header 를 함께 써서 요청 넘겨줄 때 헤더를 붙여주기
location / {
    proxy_pass         http://backendserver/;
    proxy_redirect     off;
    proxy_set_header   Host $host;
    proxy_set_header   X-Real-IP $remote_addr;
    proxy_set_header   X-Forwarded-For $proxy_add_x_forwarded_for;
}X-Forwarded-For에 설정할 값 종류$remote_addr: nginx 로 요청을 보낸 client 의 addressex) • **128.128.128.128**$http_x_forwarded_for: nginx 로 들어온 요청에 존재하던 X-Forwarded-For 설정 그대로ex) • 203.0.113.195, 70.41.3.18, 150.172.238.178$proxy_add_x_forwarded_for: nginx 로 들어온 요청에 존재하던 X-Forwarded-For 설정에$remote_addr앞에 추가ex) • **128.128.128.128**, 203.0.113.195, 70.41.3.18, 150.172.238.178
proxy_set_header   X-Forwarded-For $remote_addr;
proxy_set_header   X-Forwarded-For $http_x_forwarded_for;
proxy_set_header X-Forwarded-For $proxy_add_x_forwarded_for;- 내가 작성한
nginx.conf
http  {

    include mime.types;

    log_format main '$http_x_forwarded_for - $remote_user [$time_local] '
                    '"$request" $status $body_bytes_sent '
                    '"$http_referer" "$http_user_agent"';
    access_log /opt/homebrew/var/log/nginx/access.log; # 기본 로그
    access_log /opt/homebrew/var/log/nginx/ip.log main; # 클라이언트 IP 주소 로그

    upstream backendserver {
		server 127.0.0.1:1111 weight=3;
		server 127.0.0.1:2222;
		server 127.0.0.1:3333;
		server 127.0.0.1:4444;
    }

	server {
		listen 8080;
		root /Users/leeseonga/Desktop/NGINX;

        location / {
            proxy_pass http://backendserver/;
            proxy_redirect     off;
            proxy_set_header   Host $http_host;
            proxy_set_header   X-Real-IP $remote_addr;
            proxy_set_header   X-Forwarded-For $http_x_forwarded_for;
            proxy_set_header   X-Forwarded-For $proxy_add_x_forwarded_for;
        }

        location ~*/count/[0-9] {
			root /Users/leeseonga/Desktop/NGINX;
			try_files /index.html =404;
		}

        location /fruits {
            root /Users/leeseonga/Desktop/NGINX;
        }

        location /carbs {
            alias /Users/leeseonga/Desktop/NGINX/fruits;
        }

        location /vegetables {
            root /Users/leeseonga/Desktop/NGINX;
            try_files /vegetables/veggies.html /index.html =404;
        }

        location /crops {
            return 307 /fruits;
        }
    }
}

events {}
⚠️주의 : Nginx 웹 서버를 통한 커스텀 로드밸런서를 만들 때 worker_connections 유의
- 이유 : Nginx 에 연결된 수많은 WAS 의 성능이 뛰어나더라도 Nginx 에서 병목현상 발생 가능
- 병목현상 : Nginx 가 수많은 요청 트래픽을 처리하지 못해 WAS 자원이 넘쳐도 서비스 못하는 상황
- Nginx 가 처리가능한 트래픽의 양이 여유로워야함
- 해결 : Nginx 는 요청 트래픽을 FD(파일 디스크립터) I/O 형태로 처리하기에 FD 를 늘려야함
- Nginx 의 처리가능한 FD = 프로세스 수 + 프로세스 당 처리 가능 FD + 총 처리 가능 FD 수
- worker_processes : Nginx 가 운용하는 프로세스 수 < 서버 CPU 의 Core 수
- worker_rlimit_nofile : 프로세스 당 처리 가능 FD
- worker_connections : Nginx 가 열 수 있는 총 처리 가능 FD 수
- Nginx 의 처리가능한 FD = 프로세스 수 + 프로세스 당 처리 가능 FD + 총 처리 가능 FD 수
- 유념 : Nginx 에 대한 스트레스 테스트가 꼭 필수적으로 이뤄진 뒤 운영되어야 미연에 문제 방지
worker_rlimit_nofile 가 중요한 이유 :
프로세스 하나 당 처리 가능한 FD 가 적합해야함
**아무리 worker_connections 가 높다해도 worker_rlimit_nofile** 가 낮으면너무 많은 파일이 열려있다라는 Too many open files 에러 발생
- 가장 많이 실수하는 NGINX 설정 에러 10가지