
🦮마우스 호버 시 특정 텍스트 보여주기
Next.js 환경에서 했던 것이니 Next 태그를 넣긴 했지만 이 녀석은 거진 React..
회사 프로젝트를 진행하다가 어려웠던 부분이 있었는데 그거를 집에서 혼자 해보고 싶었습니다.. 주절주절..😑
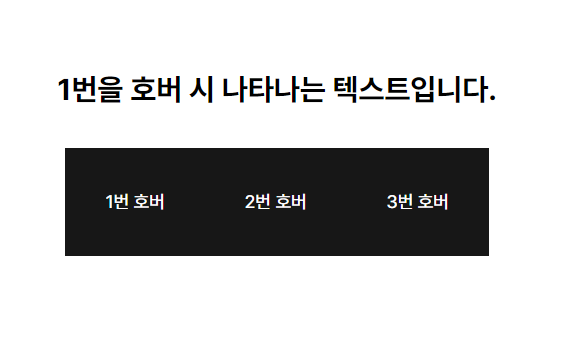
우선 화면에 보이지 않으면 내가 답답하기 때문에 퍼블리싱부터 빠르게 해주었습니다.
export default function Hover() {
  return (
    <div className='flex flex-col items-center'>
      <div className='text-3xl font-bold pb-10'>1번을 호버 시 나타나는 텍스트입니다.</div>
      <div className="flex">
        <div className='p-10 bg-blackDefault text-white text-lg'>1번 호버</div>
        <div className='p-10 bg-blackDefault text-white text-lg'>2번 호버</div>
        <div className='p-10 bg-blackDefault text-white text-lg'>3번 호버</div>
        <div className='p-10 bg-blackDefault text-white text-lg'>4번 호버</div>
      </div>
    </div>
  );
}
저는 Next.js 환경에서 Tailwind CSS와 TypeScript를 사용하고 있습니다.
매우 간단한 퍼블리싱을 마치고 이후에는 반복되는 요소를 map을 이용하여 맵핑해야겠다고 생각했습니다. 왜냐구요?..그렇게 해야 깔끔한 코드라고 합니다.
추가적으로 기능과 페이지를 나누라는 말도 듣긴했는데..음 우선은 모르겠다.
🦮Interface 설정
interface HoverTextProps {
  text: string;
  isHover: string;
}

const hoverText: HoverTextProps[] = [
  {
    text: '1번 호버',
    isHover: '1번을 호버 시 나타나는 텍스트입니다.',
  },
  {
    text: '2번 호버',
    isHover: '2번을 호버 시 나타나는 텍스트입니다.',
  },
  {
    text: '3번 호버',
    isHover: '3번을 호버 시 나타나는 텍스트입니다.',
  }
]HoverTextProps라는 인터페이스를 정의해줍니다. HoverTextProps에는 text, isHover가 정의되어 있는데 둘다 문자열로 정의하였습니다.
hoverText라는 배열을 정의해줍니다. text는 기본 텍스트, isHover는 호버할 때 보여질 텍스트를 정의하였습니다.
🦮반복 요소 맵핑
export default function Hover() {
  return (
    <div className='flex flex-col items-center'>
      <div className='text-3xl font-bold pb-10'>1번을 호버 시 나타나는 텍스트입니다.</div>
      <div className='flex'>
        {hoverText.map((hover: HoverTextProps, index: number) => (
          <div
            key={index}
            className='p-10 bg-blackDefault text-white text-lg cursor-pointer'>
            {hover.text}
          </div>
        ))}
      </div>
    </div>
  );
}
텍스트 박스 부분을 map을 이용하여 맵핑을 시켜줍니다. 이때 타입스크립트 오류가 발생하는데 hover와 index에 타입을 지정해주면 오류가 발생하지 않습니다. 추가로 반복되는 요소에 key값을 추가해주었습니다.
호버 시 나타나는 텍스트는 호버 박스 index 값을 가져와서 호버한 박스의 index값에 해당하는 isHover의 텍스트를 뿌려주어야 하기 때문에 이 요소는 맵핑 안에 들어가면 안 되기에 빼주었습니다.
🦮상태 관리할 useState 정의하기
'use client'
import { useState } from 'react';
최상단에 use client를 선언해주고 useState를(index 상태 관리를 위함) import 해줍니다.
이후에 index 가져오는 hoverTextIndex 상태를 정의해줍니다.
const [hoverTextIndex, setHoverTextIndex] = useState<number | null>(null);기본값을 null로 선언하고 number 또는 null 값으로 타입을 지정해줍니다.
🦮박스에 마우스 이벤트 추가하기
<div
  key={index}
  onMouseEnter={ () => setHoverTextIndex(index) }
  onMouseLeave={ () => setHoverTextIndex(null) }
  className='p-10 bg-blackDefault text-white text-lg cursor-pointer'>
  {hover.text}
</div>hover.text에 마우스 호버시에 함수를 적용해줍니다. onMouseEnter와 onMouseLeave를 정의해줍니다.
onMouseEnter, onMouseLeave : 오직 해당 요소에서만 마우스 이벤트를 처리합니다.
onMouseOver, onMouseOut : 요소 내의 자식 요소 위로 마우스가 이동해도 마우스 이벤트를 처리합니다.
🦮박스의 Index 값 가져오기
<div className='text-3xl font-bold pb-10'>
  {hoverTextIndex !== null ? hoverText[hoverTextIndex].isHover : '마우스를 올려보세요!'}
</div>
이제 호버한 박스의 index 값을 가져와서 해당하는 isHover 텍스트를 출력해주었습니다.
상태 관리 중인 hoverTextIndex 값이 null 값이 아닐 경우에 hoverText[hoverTextIndex]를 해줘서 해당하는 index에 찾아가도록 해줍니다. 이후에 isHover를 출력해주고 hoverTextIndex 값이 null일 경우에는 '마우스를 올려보세요!' 를 출력하도록 해주었습니다.
추가로 background-color의 색상 코드를 HoverTextProps에 정의하여 요소마다 배경 색상이 달라지도록 설정하였습니다.
전체 코드는 다음과 같습니다.
'use client'

import { useState } from 'react';

interface HoverTextProps {
  text: string;
  isHover: string;
  bgColor: string;
}

const hoverText: HoverTextProps[] = [
  {
    text: '1번 호버',
    isHover: '1번을 호버 시 나타나는 텍스트입니다.',
    bgColor: '#ff6060'
  },
  {
    text: '2번 호버',
    isHover: '2번을 호버 시 나타나는 텍스트입니다.',
    bgColor: '#6bc16b'
  },
  {
    text: '3번 호버',
    isHover: '3번을 호버 시 나타나는 텍스트입니다.',
    bgColor: '#6a6aff'
  }
]

export default function Service() {
  const [hoverTextIndex, setHoverTextIndex] = useState<number | null>(null);

  return (
    <div className='flex flex-col items-center'>
      <div className='text-3xl font-bold pb-10'>
        {hoverTextIndex !== null ? hoverText[hoverTextIndex].isHover : '마우스를 올려보세요!'}
      </div>
      <div className='flex'>
        {hoverText.map((hover: HoverTextProps, index: number) => (
          <div
            key={index}
            onMouseEnter={ () => setHoverTextIndex(index) }
            onMouseLeave={ () => setHoverTextIndex(null) }
            className='p-10 text-white text-lg cursor-pointer'
            style={{ backgroundColor: `${hover.bgColor}` }}
            >
            {hover.text}
          </div>
        ))}
      </div>
    </div>
  );
}
굉장히 쉬운 코드이지만 나에게는 어려운..😂😂 ㅆ..
