
xml파일
<?xml version="1.0" encoding="utf-8"?>
<LinearLayout xmlns:android="http://schemas.android.com/apk/res/android"
    xmlns:app="http://schemas.android.com/apk/res-auto"
    xmlns:tools="http://schemas.android.com/tools"
    android:layout_width="match_parent"
    android:layout_height="match_parent"
    android:orientation="vertical"
    tools:context=".MainActivity">

    <EditText
        android:id="@+id/et_id"
        android:layout_width="300dp"
        android:layout_height="wrap_content"
        android:hint="아이디를 입력하세요..." />

    <Button
        android:id="@+id/btn_test"
        android:layout_width="wrap_content"
        android:layout_height="wrap_content"
        android:text="버튼"/>
</LinearLayout>
editText
키보드로 텍스트를 입력받을 수 있다.
특정속성을 지정해줄 수 있다
- hint : editText에 무엇을 입력해야하는지 힌트를 알려줄 수 있음
- inputType : 키보드 모양을 설정해줄 수 있음
Button
클릭했을 때 이벤트를 발생하도록 할 수 있다.
java파일
package com.example.edittext;

import androidx.appcompat.app.AppCompatActivity;

import android.os.Bundle;
import android.view.View;
import android.widget.Button;
import android.widget.EditText;

public class MainActivity extends AppCompatActivity {

    EditText et_id;
    Button btn_test;

    @Override
    protected void onCreate(Bundle savedInstanceState) {
        super.onCreate(savedInstanceState);
        setContentView(R.layout.activity_main);

        et_id = findViewById(R.id.et_id);
        btn_test = findViewById(R.id.btn_test);

        btn_test.setOnClickListener(new View.OnClickListener() {
            @Override
            public void onClick(View view) {
                et_id.setText("홍드로이드");
            }
        });
    }
}
EditText et_id;
Button btn_test;각 컴포넌트 변수를 선언한다.
et_id = findViewById(R.id.et_id);
btn_test = findViewById(R.id.btn_test);
findViewById를 이용하여 xml파일에서 id로 선언했던 부분을 컴포넌트 변수에 넣는다.
 btn_test.setOnClickListener(new View.OnClickListener() {
            @Override
            public void onClick(View view) {
                et_id.setText("홍드로이드");
            }
        });
btn_test 버튼을 눌렀을 때 이벤트 리스너를 만든다.
클릭했을 때 editText부분이 "홍드로이드"로 바뀌도록 하였다.
결과화면
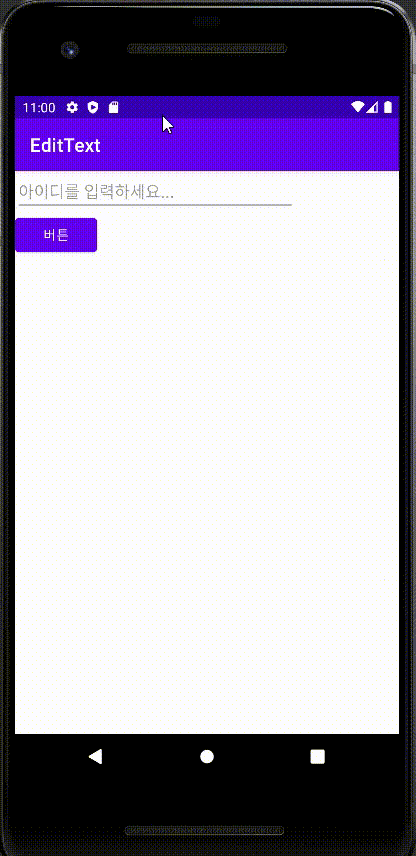
어떤 텍스트를 입력해도 "홍드로이드"로 바뀌는것을 확인할 수 있다.

개발, 디자인에 관심있는 문어발