
🍎프롤로그
이번에 Gatsby 튜토리얼 따라하기 시리즈 포스팅을 시작하였습니다. Gatsby는 React 기반의 정적 사이트 생성 프레임워크입니다.
Gatsby 프로젝트에 TypeScript와 CSS modules을 사용하기 위한 개발환경을 설정하는 방법을 정리 해보겠습니다.
1. 🍷Gastby + 🍸TypeScript 로 시작하기
Gastby와 TypeScript를 초기화 단계에서 함께 설치하는 방법입니다. 만약 TypeScript를 나중에 추가하는 경우는 수동으로 설치해주어야 합니다.
1-1. 초기화
npm install -g gatsby-cli
gatsby new / npm init gatsby -ts
cd [프로젝트 폴더이름]
npm run develop
프롬프트에서 기본 언어로 TypeScript를 선택합니다.
sass도 선택해줄 수 있습니다.
🔮TypeScript로 마이그레이션
: 만약 이미 만들어진 Gatsby 프로젝트에 TypeScript를 사용하려면 몇 가지 작업을 하여야 합니다.
gatsby clean: 오래된 아티팩트를 제거하려면 실행하세요..js/.jsx파일을.ts/.tsx파일로 변환하세요.devDependencies에@types/node,@types/react,@types/react-dom, 그리고typescript를 설치합니다.gatsby-minimal-starter-ts를 사용하거나npx tsc --init을 사용하여tsconfig.json file을 추가하세요.gatsby-*파일들의 이름을 바꿔줍니다. :gatsby-node.js------>gatsby-node.tsgatsby-config.js---->gatsby-config.tsgatsby-browser.js--->gatsby-browser.tsxgatsby-ssr.js-------->gatsby-ssr.tsx
gatsby-config.ts도 만들어줍니다.gatsby-plugin-typescript플러그인도 설치해줍니다.
✨gatsby-config.ts 작성
/* gatsby-config.ts */
import type { GatsbyConfig } from "gatsby"

const config: GatsbyConfig = {
  siteMetadata: {
    title: "Your Title",
  },
  plugins: [],
}

export default config
✨gatsby-plugin-typescript 플러그인 설치
npm install gatsby-plugin-typescript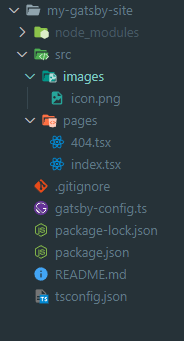
yarn add gatsby-plugin-typescript- Gatsby와 Typescript 세팅이 모두 완료되면 처음 구조는 아래와 같습니다.
1-2. gatsby-config.ts
사이트의 메타데이터, 플러그인 및 기타 일반 구성을 정의합니다.
/* gatsby-config.ts */
import type { GatsbyConfig } from "gatsby";

const config: GatsbyConfig = {
  siteMetadata: {
    title: `My Gatsby Site`,
    siteUrl: `https://www.yourdomain.tld`,
    description: `Blazing fast modern site generator for React`,
  },
  graphqlTypegen: true,
  plugins: ["gatsby-plugin-sass"]
};

export default config;
1-3. tsconfig.json
TypeScript를 올바르게 처리할 수 있도록 하는 데 사용됩니다.
.d.ts파일을include시켜주고,exclude도 설정합니다.
{
  "compilerOptions": {
    /* Language and Environment */
    "target": "es5",
    "lib": ["dom", "esnext"],
    "jsx": "react",
    /* Modules */
    "module": "CommonJS",
    "baseUrl": "./src",
    "paths": {},
    "resolveJsonModule": true /* ts 파일에서 json imoprt 허용 */,
    /* JavaScript Support */
    "allowJs": true,
    /* Emit */
    "declaration": true /* .d.ts 파일 자동생성 */,
    "removeComments": true /* 컴파일시 주석 제거. */,
    "noEmit": true /* 컴파일 완료된 결과 파일을 저장할지 여부를 설정하는 옵션 */,

    /* Interop Constraints */
    "isolatedModules": true /* 각 파일을 모듈화 (import, export)*/,
    "esModuleInterop": true /* default export가 없는 모듈이라 하더라도 default export가 있는 모듈인 것처럼 default import로 불러와 사용할 수 있도록 컴파일을 한다 */,
    "forceConsistentCasingInFileNames": true /* 파일명을 대소문자 판별하게 하는 옵션 */,
    /* Type Checking */
    "strict": true,
    "noUnusedLocals": true /* 쓰지않는 지역변수 있으면 에러내기 */,
    "noUnusedParameters": true /* 쓰지않는 파라미터 있으면 에러내기 */,
    "noImplicitReturns": true /* 함수에서 return 빼먹으면 에러내기 */,
    "noFallthroughCasesInSwitch": true /* switch문 이상하면 에러내기  */,
    "noUncheckedIndexedAccess": true /* index signature에 'undefined' 포함 */,
    /* Completeness */
    "skipLibCheck": true /* Skip type checking all .d.ts files. */
  },
  "include": [
    "./src/**/*",
    "./gatsby-node.ts",
    "./gatsby-config.ts",
    "./plugins/**/*",
    "./src/gatsby-types.d.ts"
  ],
  "exclude": ["node_modules", "public", ".cache"]
}
1-4. package.json
타입스크립트를 함께 설치하였기 때문에 따로 설치하지 않아도 기본세팅이 되어있습니다.
/* package.json */
{
  "name": "my-gatsby-site",
  "version": "1.0.0",
  "private": true,
  "description": "my-gatsby-site",
  "author": "",
  "keywords": [
    "gatsby"
  ],
  "scripts": {
    "develop": "gatsby develop",
    "start": "gatsby develop",
    "build": "gatsby build",
    "serve": "gatsby serve",
    "clean": "gatsby clean",
    "typecheck": "tsc --noEmit"
  },
  "dependencies": {
    "gatsby": "^5.13.2",
    "gatsby-plugin-sass": "^6.13.1",
    "react": "^18.2.0",
    "react-dom": "^18.2.0",
    "sass": "^1.70.0"
  },
  "devDependencies": {
    "@types/node": "^20.11.5",
    "@types/react": "^18.2.48",
    "@types/react-dom": "^18.2.18",
    "typescript": "^5.3.3"
  }
}
2. ✨Alias 설정
코드를 깔끔하게 관리하기 위해서 상대경로에서 절대경로로 바꿔줍니다.
ex.
'../../components/navbar.js' -> '@components/navbar'
🏓Gastby 프로젝트 구조
/
|-- /src
    |-- /components
    |-- /layouts
    |-- /api
    |-- /pages
    |-- /styles
    |-- /utils
    |-- /hooks
    |-- /images
    |-- /types
    |-- /templates
    |-- /posts
|-- /static
|-- gatsby-config.js
|-- gatsby-node.js
|-- gatsby-ssr.js
|-- gatsby-browser.js
2-1. 플러그인 설치
먼저, Gatsby 플러그인을 설치해줍니다.
npm i --save gatsby-plugin-alias-imports
yarn add gatsby-plugin-alias-imports
2-2. Alias 설정
그다음,
gatsby-config.ts와 tsconfig.json 에서 Alias를 설정해줍니다.
/* gatsby-config.ts */
import type { GatsbyConfig } from "gatsby";

const config: GatsbyConfig = {
 siteMetadata: {
   title: `My Gatsby Site`,
   siteUrl: `https://www.yourdomain.tld`,
   description: `Blazing fast modern site generator for React`,
 },
 graphqlTypegen: true,
 plugins: [
   "gatsby-plugin-sass",
   {
     resolve: "gatsby-plugin-alias-imports",
     options: {
       alias: {
         "@src": "src",
         "@components": "src/components",
         "@layouts": "src/layouts",
         "@api": "src/api",
         "@pages": "src/pages",
         "@styles": "src/styles",
         "@utils": "src/utils",
         "@hooks": "src/hooks",
         "@images": "src/images",
         "@types": "src/types",
         "@templates": "src/templates",
         "@posts": "content/posts",
       },
     },
   },
 ],
};

export default config;
/* tsconfig.json */
{
  "compilerOptions": {
    /* Language and Environment */
    "target": "es5",
    "lib": ["dom", "esnext"],
    "jsx": "react",
    /* Modules */
    "module": "CommonJS",
    "baseUrl": "./src",
    "paths": {
      "@/*": ["src/*"],
      "@components/*": ["./components/*"],
      "@layouts/*": ["src/layouts/*"],
      "@api/*": ["src/api/*"],
      "@pages/*": ["src/pages/*"],
      "@styles/*": ["src/styles/*"],
      "@utils/*": ["src/utils/*"],
      "@hooks/*": ["src/hooks/*"],
      "@images/*": ["src/images/*"],
      "@types/*": ["src/types/*"],
      "@templates/*": ["src/templates/*"],
      "@posts/*": ["content/posts/*"],
    },
    "resolveJsonModule": true /* ts 파일에서 json imoprt 허용 */,
    /* JavaScript Support */
    "allowJs": true,
    /* Emit */
    "declaration": true /* .d.ts 파일 자동생성 */,
    "removeComments": true /* 컴파일시 주석 제거. */,
    "noEmit": true /* 컴파일 완료된 결과 파일을 저장할지 여부를 설정하는 옵션 */,

    /* Interop Constraints */
    "isolatedModules": true /* 각 파일을 모듈화 (import, export)*/,
    "esModuleInterop": true /* default export가 없는 모듈이라 하더라도 default export가 있는 모듈인 것처럼 default import로 불러와 사용할 수 있도록 컴파일을 한다 */,
    "forceConsistentCasingInFileNames": true /* 파일명을 대소문자 판별하게 하는 옵션 */,
    /* Type Checking */
    "strict": true,
    "noUnusedLocals": true /* 쓰지않는 지역변수 있으면 에러내기 */,
    "noUnusedParameters": true /* 쓰지않는 파라미터 있으면 에러내기 */,
    "noImplicitReturns": true /* 함수에서 return 빼먹으면 에러내기 */,
    "noFallthroughCasesInSwitch": true /* switch문 이상하면 에러내기  */,
    "noUncheckedIndexedAccess": true /* index signature에 'undefined' 포함 */,
    /* Completeness */
    "skipLibCheck": true /* Skip type checking all .d.ts files. */,
  },
  "include": [
    "./src/**/*",
    "./gatsby-node.ts",
    "./gatsby-config.ts",
    "./plugins/**/*",
    "./src/gatsby-types.d.ts",
  ],
  "exclude": ["node_modules", "public", ".cache"],
}
3. 🪅ESlint & Prettier
ESLint: JavaScript 코드의 문제를 찾아 자동으로 문제를 해결하는 자동검출 도구입니다. 올바른 코딩 습관을 위해 필수로 사용하는 것이 좋습니다.Prettier: 코드 포멧터. 코드를 일관된 스타일로 지정합니다.
VSCode 익스텐션과 npm 둘다 설치합니다.
3-1. 📌VSCode 익스텐션 설치

Prettier - Code formatter 와 ESLint 익스텐션을 설치합니다.
설치후, 설정(Ctrl+,)으로 이동하여 settings.json에 아래 설정을 추가합니다.
/* .settings.json */
  "eslint.validate": [
    "html",
    "javascript",
    "javascriptreact",
    "typescript",
    "typescriptreact"
  ],
// 파일을 저장할 때마다 `eslint` 규칙에 따라 자동으로 코드를 수정
"editor.codeActionsOnSave": { "source.fixAll.eslint": true },
// `prettier`를 기본 포맷터로 지정
"editor.defaultFormatter": "esbenp.prettier-vscode",
// 파일을 저장할 때마다 포매팅 실행
"editor.formatOnSave": true,
3-2. 📌 npm 설치
eslint , prettier 설치
npm install eslint prettier eslint-plugin-prettier eslint-config-prettier @typescript-eslint/eslint-plugin @typescript-eslint/parsereslint-config-prettier: ESLint 설정 중에서 Prettier와 충돌하는 부분을 비활성화 한다.eslint-plugin-prettier: Prettier를 ESLint 규칙으로 실행 시켜준다.@typescript-eslint/eslint-plugin: typescript-eslint의 규칙들을 사용할 수 있게 해준다.@typescript-eslint/parser: TypeScript 고유의 문법을 파싱한다.
* ESLint 설정
루트 폴더 위치에서 eslintrc.json 를 생성하여 수동으로 설정하거나 빠른시작 명령으로 설치합니다.
npm init @eslint/config/* .eslintrc.json */
{
"root": true,
"env": {
"browser": true,
"commonjs": true,
"es2021": true,
"node": true
},
"extends": [
"eslint:recommended",
"plugin:react/recommended",
"plugin:react-hooks/recommended",
"plugin:@typescript-eslint/recommended",
"plugin:@typescript-eslint/recommended-requiring-type-checking",
"plugin:prettier/recommended" // Prettier와 ESLint를 함께 사용하기 위한 설정
],
// TypeScript 코드를 분석하기 위한 파서
"parser": "@typescript-eslint/parser",
"parserOptions": {
"ecmaVersion": "latest",
"sourceType": "module",
"ecmaFeatures": {
"jsx": true
},
"project": ["./tsconfig.json"]
},
// ESLint에 추가적인 기능을 제공하는 플러그인들을 명시
"plugins": ["react", "@typescript-eslint", "react-hooks", "prettier"],
// ESLint가 파일을 무시하도록 하는 패턴.
"ignorePatterns": ["pulbic/", "node_modules/"],
"rules": {
"prettier/prettier": ["error", { "endOfLine": "auto" }] // Delete `CR` eslint(prettier/prettier) 에러 해결법 - prettier의 개행 방식을 auto로 변경
}
}
* Prettier 설정
루트 폴더 위치에 .prettierrc 파일을 생성합니다.
touch .prettierrc아래 내용을 작성합니다.
/* .prettierrc */
{
  "printWidth": 80,
  "tabWidth": 2,
  "useTabs": false,
  "semi": true,
  "singleQuote": true,
  "quoteProps": "as-needed",
  "trailingComma": "all",
  "bracketSpacing": true,
  "arrowParens": "avoid",
  "endOfLine": "lf"
}
4. 🍹CSS Modules 적용하기
4-1. module 정의하기
TypeScript 에서 CSS 모듈을 가져오려면 src 폴더에 module.css.d.ts 정의파일을 추가해줍니다.
/* src/module.css.d.ts */
declare module "*.module.css";
예제
/* my-component.module.css */
.container {
  margin: 3rem auto;
  max-width: 600px;
}
/* my-component.tsx */
import React from 'react';
import containerStyles from '@components/my-component.module.css';

interface ContainerProps {
  children: string;
}

export default function Container({ children }: ContainerProps) {
  return <section className={containerStyles.container}>{children}</section>;
}
참고사이트
[Gatsby alias lint 설정하기] posted by liendmch
[모던자바스크립트 ESLint] by poiemaweb
[알아두면 쓸데있는 ESLint-Prettier 설정 방법] posted by 2wndrhs.log
[Webpack + React + TypeScript Boilerplate (1) - 프로젝트 초기화 및 eslint, prettier 설정하기]
ESLint 공식사이트
Prettier 공식사이트
[Gastsby 공식문서 - TypeScript/css-modules]