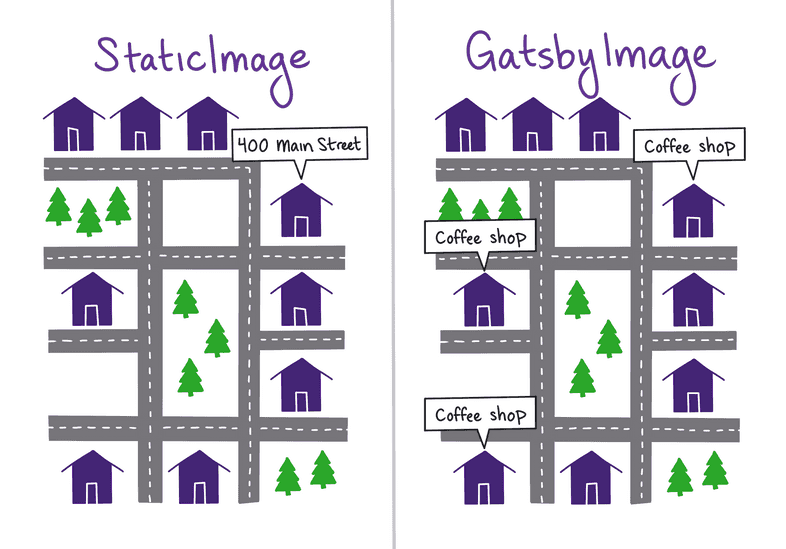
1. Static Image
Static Image 컴포넌트는 하드 코딩된 파일 경로 또는 원격 URL과 같은 정적 이미지 소스를 사용할때 쓰인다.
1-1. Plugin Install
npm install gatsby-plugin-image gatsby-plugin-sharp gatsby-source-filesystem gatsby-transformer-sharp
1-2. Config 설정
// gatsby-config.ts
import type { GatsbyConfig } from "gatsby";

const config: GatsbyConfig = {
  siteMetadata: {
    title: `My Blog`,
    description: `Example project for the Gatsby Head API`,
    siteUrl: `https://www.yourdomain.tld`,
  },
  graphqlTypegen: true,
  plugins: [
    "gatsby-plugin-mdx",
    "gatsby-plugin-image",
    "gatsby-plugin-sharp",
    "gatsby-transformer-sharp",
    {
      resolve: "gatsby-source-filesystem",
      options: {
        name: `blog-posts`,
        path: `${__dirname}/blog-posts`,
      },
    },
  ],
};

export default config;
2. Gastby Image
GastbyImage 컴포넌트는 동적이미지(Dynamic Image) 소스용으로 쓰인다.
2-1. 각 블로그 게시물의 히어로 이미지 추가하기
- 우선,
blog-posts폴더의 하위 디렉토리를 만들고 폴더명을mdx파일명으로 변경합니다. - 기존
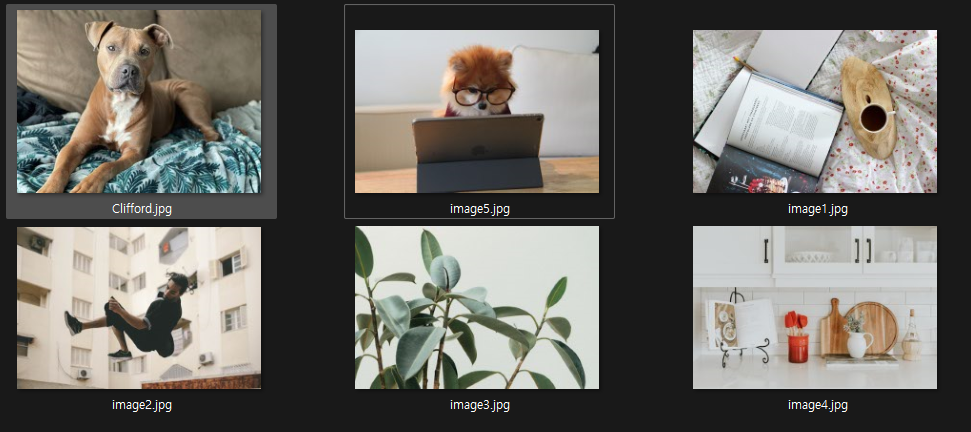
mdx파일의 파일명을 하위 디렉토리의index.mdx로 변경합니다. blog-posts/my-post/index.mdx- Unsplash 와 같은 사이트에서 마음에 드는 이미지를 찾은 다음, 각각의 게시물 폴더에 각각 다른 이미지를 넣어줍니다.
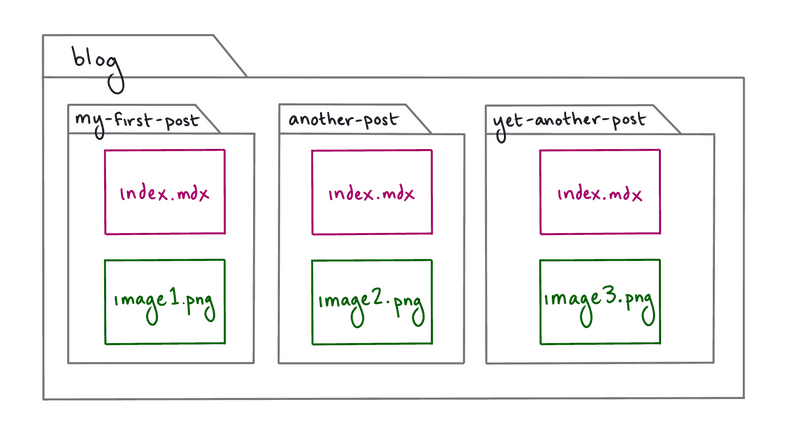
- 구조
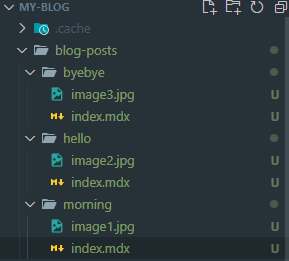
- 이미지
2-2. 각 게시물의 머리말 필드 추가하기
hero_image: 해당 게시물의 히어로 이미지 파일에 대한 상대 경로hero_image_alt: 이미지에 대한 간단한 설명으로, 화면 판독기의 대체 텍스트로 사용되거나 이미지가 올바르게 로드되지 않는 경우에 사용됩니다.hero_image_credit_text: 사진작가에게 히어로 이미지에 대한 크레딧을 제공하기 위해 표시할 텍스트입니다.hero_image_credit_link: 히어로 이미지를 다운로드한 페이지에 대한 링크
// blog/my-first-post/index.mdx
---
title: "My First Post"
date: "2021-07-23"
slug: "my-first-post"
hero_image: "./christopher-ayme-ocZ-_Y7-Ptg-unsplash.jpg"
hero_image_alt: "A gray pitbull relaxing on the sidewalk with its tongue hanging out"
hero_image_credit_text: "Christopher Ayme"
hero_image_credit_link: "https://unsplash.com/photos/ocZ-_Y7-Ptg"
---

...
2-3. 이미지를 게시물에 넣기
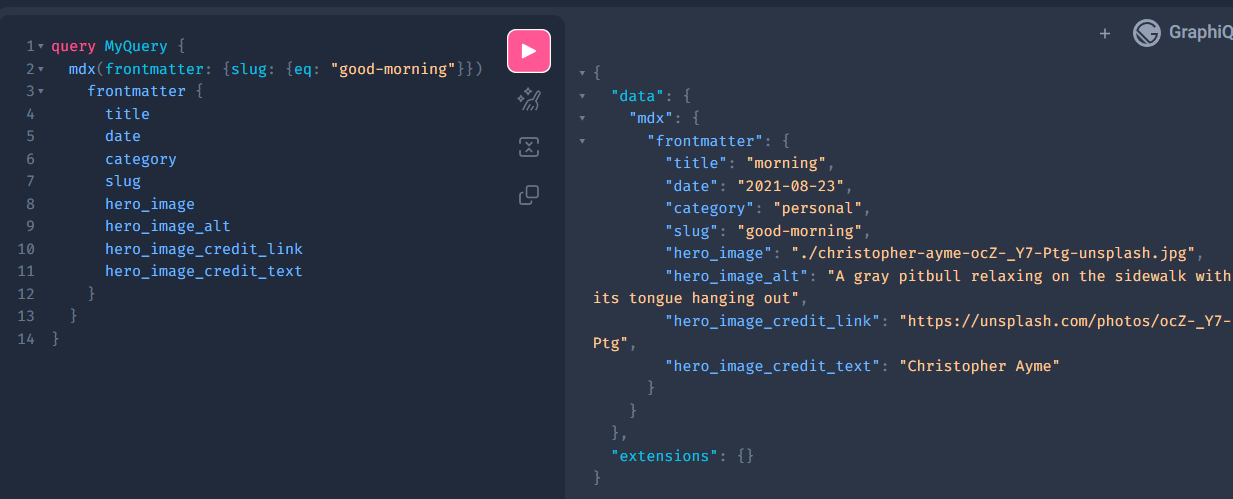
1. GraphiQL을 사용하여 쿼리 작성
localhost:8000/___graphql웹 브라우저로 이동하여 GraphiQL을 작성한다.hero_image_alt,hero_image_credit_link,hero_image_credit_text를 선택하고 쿼리를 실행한다.- 아래와 같이 나온다.
hero_image의 토글을 열어보면childImageSharp필드와 그 아래gatsbyImageData필드를 찾을 수 있다.
query MyQuery {
  mdx(frontmatter: {slug: {eq: "good-morning"}}) {
    frontmatter {
      title
      date
      category
      slug
      hero_image {
        childImageSharp {
          gatsbyImageData
        }
      }
    }
  }
}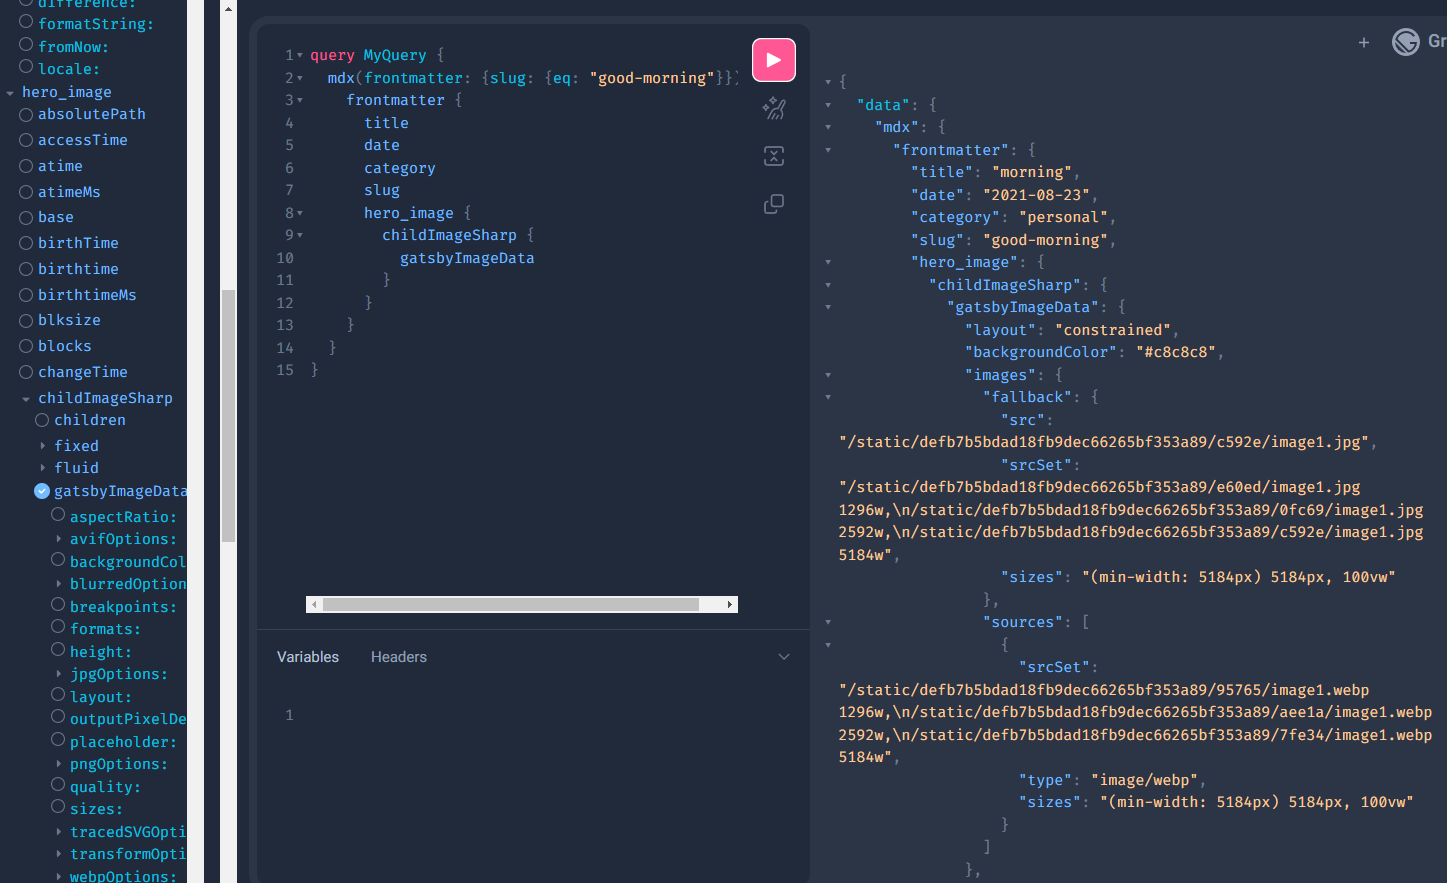
프로팁💡: GraphiQL은 hero_image frontmatter 필드에 추가 필드를 추가하는 방법을 어떻게 알고 있나요?
- Gatsby가 사이트를 구축할 때, 데이터 계층의 다양한 유형의 데이터를 설명하는 GraphQL 스키마를 생성한다. Gatsby는 그 스키마를 구축할 때, 각 필드에 대한 데이터 유형을 추측하려고 한다. 이 과정을 스키마 추론이라고 한다.
- 체크하고 쿼리를 실행하면 아래와 같이 나온다.
{
  "data": {
    "mdx": {
      "frontmatter": {
        "title": "morning",
        "date": "2021-08-23",
        "category": "personal",
        "slug": "good-morning",
        "hero_image": {
          "childImageSharp": {
            "gatsbyImageData": {
              "layout": "constrained",
              "backgroundColor": "#c8c8c8",
              "images": {
                "fallback": {
                  "src": "/static/defb7b5bdad18fb9dec66265bf353a89/c592e/image1.jpg",
                  "srcSet": "/static/defb7b5bdad18fb9dec66265bf353a89/e60ed/image1.jpg 1296w,\n/static/defb7b5bdad18fb9dec66265bf353a89/0fc69/image1.jpg 2592w,\n/static/defb7b5bdad18fb9dec66265bf353a89/c592e/image1.jpg 5184w",
                  "sizes": "(min-width: 5184px) 5184px, 100vw"
                },
                "sources": [
                  {
                    "srcSet": "/static/defb7b5bdad18fb9dec66265bf353a89/95765/image1.webp 1296w,\n/static/defb7b5bdad18fb9dec66265bf353a89/aee1a/image1.webp 2592w,\n/static/defb7b5bdad18fb9dec66265bf353a89/7fe34/image1.webp 5184w",
                    "type": "image/webp",
                    "sizes": "(min-width: 5184px) 5184px, 100vw"
                  }
                ]
              },
              "width": 5184,
              "height": 3456
            }
          }
        }
      }
    }
  },
  "extensions": {}
}hero_image.childImageSharp의gatsbyImageDataobject를 살펴보면hero_image에 대한 다양한 정보(크기, 다양한 크기의 이미지 파일 경로, 이미지가 로드되는 동안 placeholder로 사용할 폴백 이미지.)가 포함되어 있음을 알 수 있다. 이 모든 data는 빌드하는 동안gatsby-plugin-sharp로 인해 계산된다.
2-4. 컴포넌트를 사용하여 히어로 이미지 추가
- 쿼리를 설정한 후에, 블로그 게시물 페이지 템플릿(
{mdx.frontmatter__slug}.tsx)에 추가한다.
- 기존의 쿼리를 히어로 이미지 머리말 필드가 포함된 쿼리로 바꿔준다.
// src/pages/blog/{mdx.frontmatter__slug}.tsx

export const query = graphql`
  query PostDetail($frontmatter__slug: String) {
    mdx(frontmatter: { slug: { eq: $frontmatter__slug } }) {
      frontmatter {
        title
        category
        date
        slug
        hero_image {
          childImageSharp {
            gatsbyImageData
          }
        }
      }
    }
  }
`;GatsbyImage컴포넌트와getImage도우미 함수를 import 한다.
// src/pages/blog/{mdx.frontmatter__slug}.tsx

import React from "react";
import Layout from "../../components/Layout";
import Seo from "../../components/Seo";
import { graphql } from "gatsby";
import { GatsbyImage, getImage } from "gatsby-plugin-image";

// ...getImage함수를 사용하여hero_image필드로 부터gatsbyImageData객체를 가져온다.
// src/pages/blog/{mdx.frontmatter__slug}.tsx
export default function BlogPost({ data, children }: BlogPostProps) {
  const image = getImage(
    data.mdx?.frontmatter?.hero_image?.childImageSharp?.gatsbyImageData!
  );
  return (
    // ...
  )
}
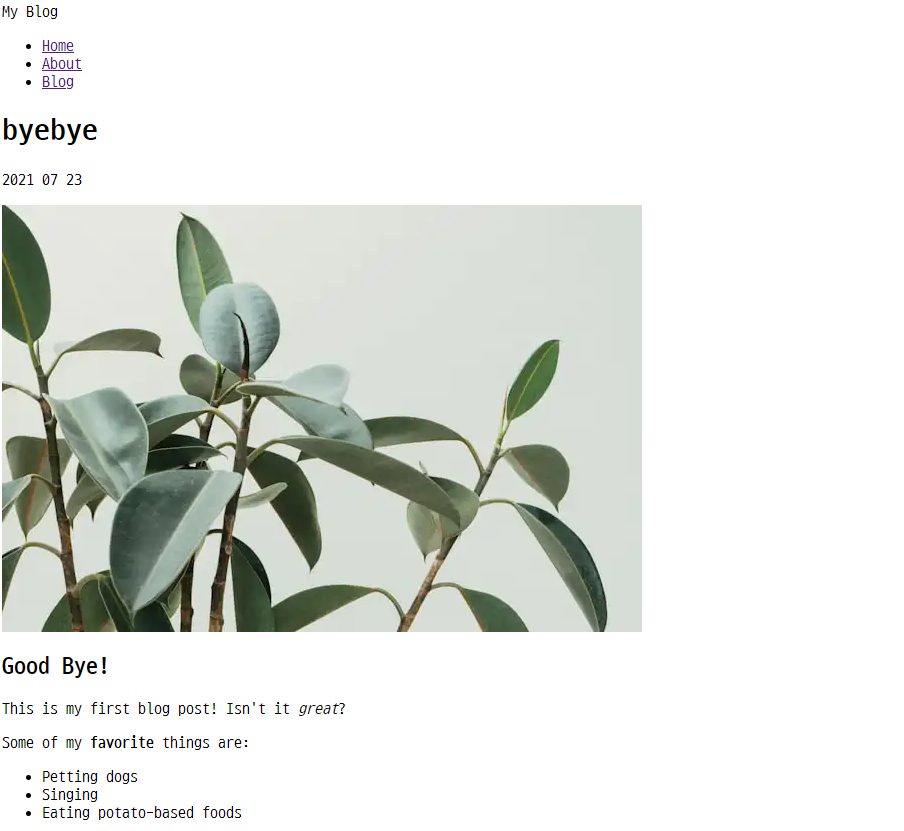
// ...GatsbyImage컴포넌트를 사용해서hero image data를 렌더링한다.
GatsbyImageprops :
-image:gatsbyImageData객체
-alt: 이미지 대체 텍스트
// src/pages/blog/{mdx.frontmatter__slug}.tsx
export default function BlogPost({ data, children }: BlogPostProps) {
  const image = getImage(
    data.mdx?.frontmatter?.hero_image?.childImageSharp?.gatsbyImageData!
  );
  return (
    <Layout title={data.mdx?.frontmatter?.title as string}>
      <p>{data.mdx?.frontmatter?.date}</p>
      <GatsbyImage image={image as any} alt={data.mdx?.frontmatter?.title!} />
      {children}
    </Layout>
  );
}
- Image placeholders
- 이미지가 로드되기전에 placeholder를 사용하여 이미지의 레이아웃이 이리저리 움직이지 않게 하는 기능이다.
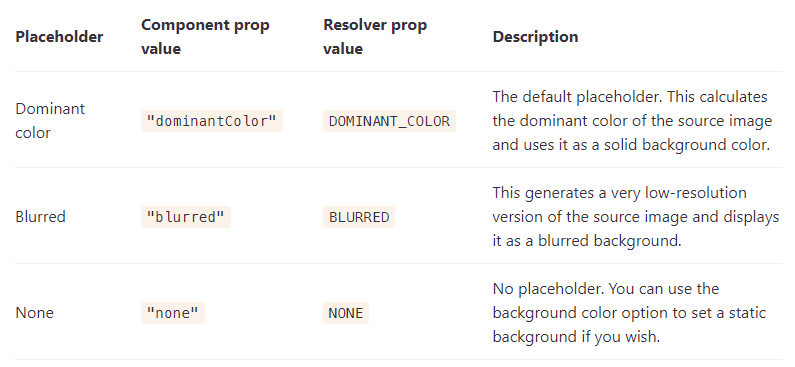
dominantColor: 소스 이미지의 주요 색상을 계산하여 단색 배경색을 사용.
blurred: 소스 이미지의 매우 낮은 해상도 버전이 생성되어 흐린 배경으로 표시된다.
none: no placeholer. 원하는 경우 배경색 옵션을 사용하여 정적 배경을 설정할 수 있습니다.
// src/pages/blog/{mdx.frontmatter__slug}.tsx
export const query = graphql`
  query PostDetail($frontmatter__slug: String) {
    mdx(frontmatter: { slug: { eq: $frontmatter__slug } }) {
      frontmatter {
        title
        category
        date(formatString: "YYYY MM DD")
        slug
        hero_image {
          childImageSharp {
            gatsbyImageData(placeholder: BLURRED)
          }
        }
      }
    }
  }
`;- 전체코드
// src/pages/blog/{mdx.frontmatter__slug}.tsx
import React from "react";
import Layout from "../../components/Layout";
import Seo from "../../components/Seo";
import { graphql } from "gatsby";
import { GatsbyImage, getImage } from "gatsby-plugin-image";

interface BlogPostProps {
  data: Queries.PostDetailQuery;
  children: any;
}

export default function BlogPost({ data, children }: BlogPostProps) {
  const image = getImage(
    data.mdx?.frontmatter?.hero_image?.childImageSharp?.gatsbyImageData!
  );
  return (
    <Layout title={data.mdx?.frontmatter?.title as string}>
      <p>{data.mdx?.frontmatter?.date}</p>
      <GatsbyImage image={image as any} alt={data.mdx?.frontmatter?.title!} />
      {children}
    </Layout>
  );
}

export const query = graphql`
  query PostDetail($frontmatter__slug: String) {
    mdx(frontmatter: { slug: { eq: $frontmatter__slug } }) {
      frontmatter {
        title
        category
        date(formatString: "YYYY MM DD")
        slug
        hero_image {
          childImageSharp {
            gatsbyImageData(height: 450, placeholder: BLURRED)
          }
        }
      }
    }
  }
`;

export const Head = ({ data }: BlogPostProps) => (
  <Seo title={data.mdx?.frontmatter?.title!} />
);
참고
Gastby 공식 튜토리얼- part 7
Gastby Components/gatsby-plugin-image/placeholders

오늘도 개발하는 코맹이