📗 Swagger 적용하기
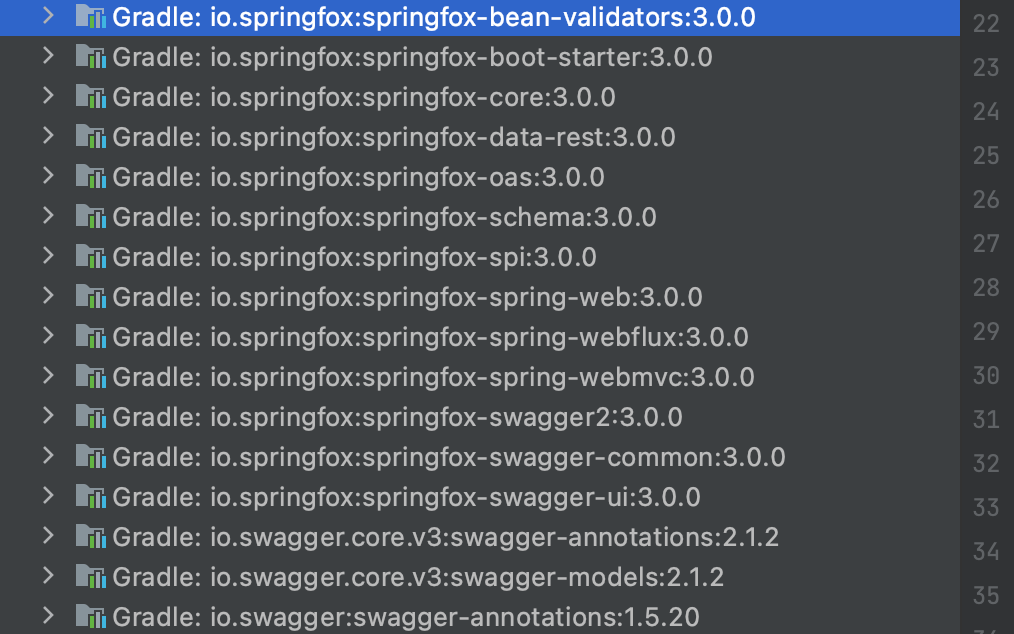
1. 의존성 추가
swagger2로 swagger을 활성화 시켜주고, swagger-ui 를 추가해 웹 UI 화면을 확인할 수 있습니다. 2.9.2 버전이 다운로드 횟수가 가장 많습니다.
만약 3.x 버전을 사용한다면 springfox-starter 를 설치하면 하위에 필요한 모든 라이브러리가 포함되어 있습니다.
build.gradle
dependencies {
	...
   	implementation 'io.springfox:springfox-swagger-ui:2.9.2'
	implementation 'io.springfox:springfox-swagger2:2.9.2'
    	//혹은
	implementation 'io.springfox:springfox-boot-starter:3.0.0'
    ...
    }
2. Config 추가
/**
 * http://localhost:8080/v2/api-docs
 * http://localhost:8080/swagger-resources/configuration/ui
 * http://localhost:8080/swagger-resources/configuration/security
 * http://localhost:8080/swagger-ui/index.html
 */
@Configuration
@EnableSwagger2
public class SwaggerConfig {

    @Bean
    public Docket restAPI() {
        return new Docket(DocumentationType.SWAGGER_2)
        	.useDefaultResponseMessages(false)
                .apiInfo(apiInfo())
                .select()
                .apis(RequestHandlerSelectors.basePackage("com.example.demo"))
                .paths(PathSelectors.any())
                .build();
    }

    private ApiInfo apiInfo() {
        return new ApiInfoBuilder()
                .title("SpringBoot + React Boilerplate API")
                .version("1.0.0")
                .description("스프링부트의 swagger api 입니다.")
                .build();
    }
}
@EnableSwagger2: 기능을 활성화하는 어노테이션입니다.
SwaggerConfig.java 가 아니라 어플리케이션에 추가해도 동작합니다.
...
@EnableSwagger2
@SpringBootApplication
public class DemoApplication {
	public static void main(String[] args) {
    		SpringApplication.run(DemoApplication.class, args);
        }
}
...-
useDefaultResponseMessages: Swagger에서는 기본적으로 401(Unauthorized), 403(Forbidden), 404(Not Found) 등에 대한 설정을 추가해줍니다. 이를 사용하고 싶지 않다면 false 옵션을 추가해줍니다. -
apis: API 문서를 만들어줄 범위를 지정합니다.
위 예제에서는com.example.demo하위 구조를 탐색하여 문서를 생성해줍니다.
RequestHandlerSelectors.any()로 설정해주면 현재 RequestMapping으로 할당된 모든 URL 리스트를 추출해서 만들어줍니다. -
paths: API 의 URL 경로를 지정할 수 있습니다.
.paths(PathSelectors.ant("api/v1/**"))와 같이 하면 http://localhost/api/v1/ 하위 경로를 가지는 API에 대해 문서를 생성해줍니다.
PathSelectors.any()를 적용하면 모든 URL에 대한 문서를 볼 수 있습니다. -
apiInfo: API 문서에 부가적으로 추가하고싶은 내용이 있을 땐 apiInfo로 설정할 수 있습니다.
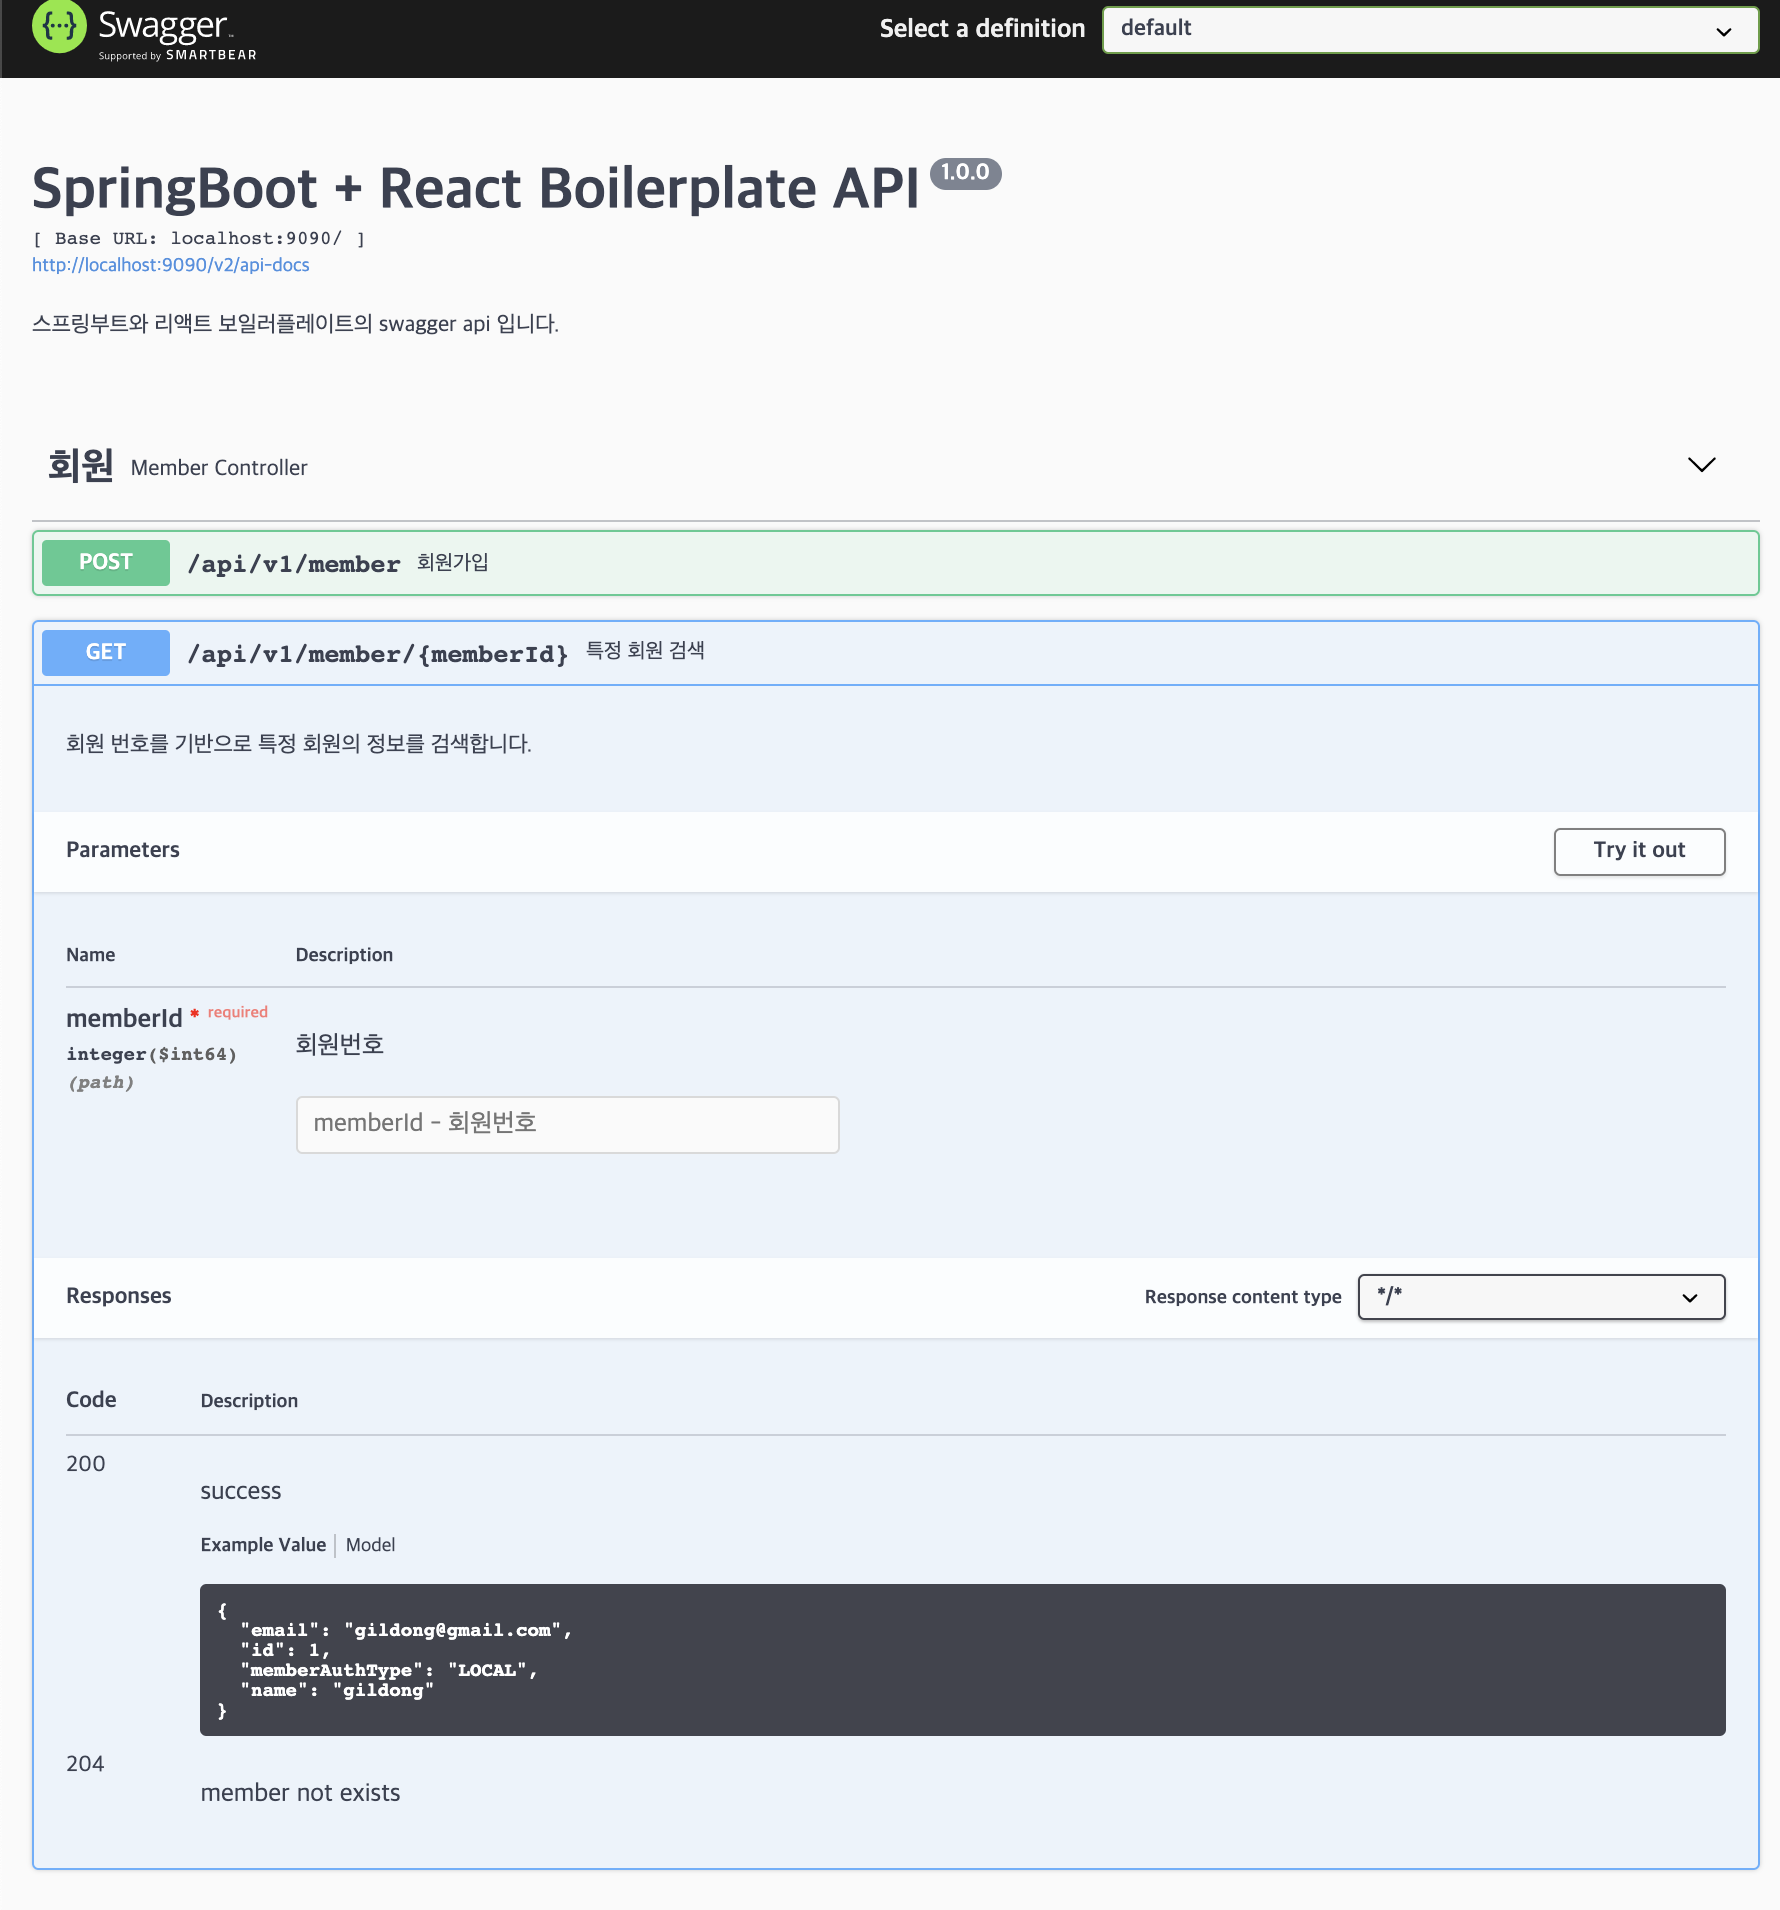
3. Controller에 적용
MemberController.java
@RestController
@RequiredArgsConstructor
@Api(tags = {"회원"})
@RequestMapping(value = "api/v1/member")
public class MemberController {
    private final MemberService memberService;

    // 메서드 정보
    @ApiOperation(value = "특정 회원 검색", notes = "회원 번호를 기반으로 특정 회원의 정보를 검색합니다.")
    // request 정보
    @ApiImplicitParam(name = "memberId", value = "회원번호")
    // response 정보
    @ApiResponses({
            @ApiResponse(code = 200, message = "success", response = MemberResponseDto.class),
            @ApiResponse(code = 204, message = "member not exists"),
    })
    @GetMapping("/{memberId}")
    public ResponseEntity<MemberResponseDto> searchUser(@PathVariable final Long memberId) {
        Member member = memberService.findMember(memberId);
        if(member!=null) { return ResponseEntity.ok(new MemberResponseDto(member)); }
        else return new ResponseEntity(HttpStatus.NO_CONTENT);
    }
}
dto에도 @ApiModelProperty(example = "") 어노테이션을 이용해 디폴트값을 설정해 줄 수 있습니다.
MemberResponseDto.java
@Getter
@Setter
@NoArgsConstructor
public class MemberResponseDto {
    @ApiModelProperty(example = "1")
    private Long id;
    @ApiModelProperty(example = "gildong")
    private String name;
    @ApiModelProperty(example = "gildong@gmail.com")
    private String email;
    @ApiModelProperty(example = "LOCAL")
    private MemberAuthType memberAuthType;

    public MemberResponseDto(Member member) {
        BeanUtils.copyProperties(member, this);
    }

}
4. Swagger 접속
서버를 실행한 후 URL 접속하면 Swagger 문서를 확인할 수 있습니다. 2.x 버전과 3.x 버전의 주소가 조금 다릅니다.
Swagger2: http://localhost:8080/swagger-ui.html
Swagger3: http://localhost:8080/swagger-ui/index.html
⚡️ 문제
failed to start bean 'documentationpluginsbootstrapper'; nested exception is java.lang.nullpointerexception
처음 설정 후 null 에러가 계속 발생했습니다. 구글링해보니 버전 문제인것 같은데 dependency 버전을 아무리 바꿔도 해결이 안돼서 스프링부트 버전을 2.6.1 에서 2.5.7로 다운그레이드하니 바로 해결됐습니다.
https://github.com/springfox/springfox/issues/3462
https://stackoverflow.com/questions/70036953/springboot-2-6-0-spring-fox-3-failed-to-start-bean-documentationpluginsboot
Swagger-ui.html 404 not found error 와 "Unable to infer base url."
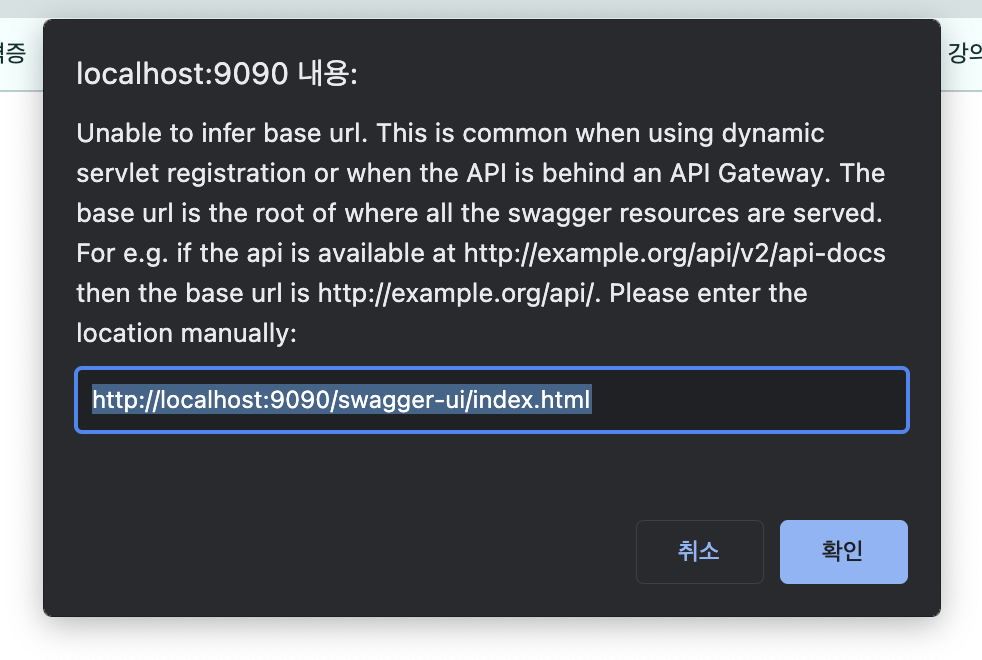
404 에러는 위 스웨거 버전에 따른 접속 URL이 상이해서 발생했습니다. 그래서 맞는 url로 이동하니... 위와 같은 에러가 발생했습니다. Spring Security가 Swagger-ui에서 필요한 특정 리소스에 대한 접근을 제한하기 때문인데, Security 설정에 다음을 추가해주니 해결됐습니다.
private static final String[] DOC_URLS = {
        "/v2/api-docs", "/swagger-resources/**", "/swagger-ui.html","/swagger-ui/**"
};

@Override
public void configure(WebSecurity webSecurity) throws Exception {
    webSecurity.ignoring().requestMatchers(PathRequest.toStaticResources().atCommonLocations())
            .and().ignoring().antMatchers(DOC_URLS);
}POST Method 에서 response type을 명시했음에도 적용되지 않는 문제
GET Method에서는 분명 잘 적용이 됐는데 POST에서는 Response가 계속 공백으로 나왔습니다..
아래 글에 나와있듯 Swagger 3.x 버전에서 사용하는 v3 Model 때문이었습니다.
1. application.properties 에 springfox.documentation.swagger.use-model-v3=false를 추가하고
2. Docket의 DocumentType을 Swagger2로 바꿔주면 됩니다.
// application.yml
...
springfox:
  documentation:
    swagger:
      use-model-v3: false
...

// SwaggerConfig.java
...
@Bean
public Docket restAPI() {
    return new Docket(DocumentationType.SWAGGER_2)
            ...
    }
}