🔍 구현할 사항
✔️ 다음의 순서에 맞게 코드를 작성하여 ID, PW
<input>에 입력된 값을 state 에 저장해주세요.
1. ID<input>에서onChangeevent 발생
2. event 발생 시handleIdInput함수 실행
3.handleIdInput는 이벤트를 인자로 받음
4. event가 일어난 요소에 담긴 value 값 (event.target.value)을 state에 저장
5. 위의 과정을 PW<input>에도 동일하게 적용
6. Refactoring
📚 과정
1. 부모 컴포넌트에 state 값 만들기
- 먼저 id값과 pw값을 담아올 Login 컴포넌트의 자식 컴포넌트인 input 컴포넌트를 봐보자!
현재input의 컴포넌트render()안의 부분이다.
두 개의input을 가지고 있고 각각 id와 pw를 받아오는input이다.
  return (
      <section className="inputId">
        <input                      // 첫번째 input
          className="loginId"
          type="text"
          placeholder="전화번호, 사용자 이름 또는 이메일"
        />
        <input                      // 두번째 input
          className="loginInput"
          type="password"
          placeholder="비밀번호"
        />
      </section>
    );
  }
input의 부모 컴포넌트인 Login컴포넌트에state값을 주고 어떠한 함수가 발생하면
각input의value를 받아올 것이다.
현재 부모 컴포넌트 Login 컴포넌트에서state를 아무 값을 받아오지 않은 초기 상태를 만들어준다.
state값으로 빈idValue와pwValue가 들어있는 객체inputValue를 만든다.
class Login extends React.Component {
  constructor() {
    super();
    this.state = {
      inputValue: { idValue: '', pwValue: '' },
    };
  }
}
2. 사용자가 입력시 input의 값을 받아서 setState해주기
- 이제 이 객체에
input에 값이 들어오면 이 값을inputValue에 저장해주는 함수를 만들어보자
  handleIdInput = e => {
    this.setState({
      inputValue: { ...this.state.inputValue, idValue: e.target.value },
    });
  };
  handlePwInput = e => {
    this.setState({
      inputValue: { ...this.state.inputValue, pwValue: e.target.value },
    });
  };
handleIdInput함수는
setState함수를 통해 변경된 state값으로 업데이트 한다.
이것은 inputValue의 값의 idValue를 이벤트가 일어난 타겟의 value로 업데이트 해준다.
✔️ 처음에 잘못 썼던 방법
handleIdInput = e => {
    this.setState({
      idValue: e.target.value     // 잘못된 방법
    });
  };
이렇게 해주었는데 이렇게 하게 되면 inputValue의 객체의 값은 처음 state값처럼 비어있고 idValue에만 값이 들어가게된다.
따라서 전개연산자를 사용하면 inputValue의 값도 같이 받아올 수 있다.
전개연산자는 ...을 앞에 붙여서 사용할 수 있는데
이 객체를 복사해 오고 프로퍼티를 업데이트 해줄 수도 있다.
따라서 this.state.inputValue를 펼치고 그중 idValue를 e.target.value 로 업데이트 해준다.
3. input에 이벤트가 일어날때마다 함수 호출하기
- 이제 이 함수를
input의 값이 바뀔때마다 실행되어 값을 넣어줘야한다.
현재input태그은 자식 컴포넌트 안에 있어서 부모컴포넌트인 Login에서 이것을 props를 통해 넘겨주고input의 값이 바뀔때마다 이 함수를 호출해준다.
부모 컴포넌트 Login
render() {
    return (
      <div className="loginSection">
        <header className="westaLogo">Westagram</header>
        <InputId
          getIdInput={this.handleIdInput}
          getPwInput={this.handlePwInput} // getIdInput,getPwInput props를 이용해 자식에게 함수를 넘겨준다.
        />
        <Button changeColor={this.state.isButtonOn} />
        <footer>비밀번호를 잊으셨나요?</footer>
      </div>
    );
  }
자식 컴포넌트 Input
render() {
    return (
      <section className="inputId">
        <input
          className="loginId"
          type="text"
          placeholder="전화번호, 사용자 이름 또는 이메일"
          onChange={this.props.getIdInput} //onChange이벤트가 일어날때마다 props로 전달해준 함수 호출
        />
        <input
          className="loginInput"
          type="password"
          placeholder="비밀번호"
          onChange={this.props.getPwInput}
        />
      </section>
    );
  }
따라서 input의 값이 변경될때마다 input의 값을 받아오는 함수가 실행된다.
💡 Refactoring
1. 구조분해할당 사용 / 두 개의 같은 함수를 하나로 합치기
props를 받아오거나 클래스형 컴포넌트에서의 state 값을 쓸 때 구조 분해 할당을 이용해주면
반복되는 당연한 단어들을 줄여줘서 좀 더 편리하다.
  handleIdInput = e => {
    this.setState({
      inputValue: { ...this.state.inputValue, idValue: e.target.value },
    });
  };
  handlePwInput = e => {
    this.setState({
      inputValue: { ...this.state.inputValue, pwValue: e.target.value },
    });
  };
이 두 개의 함수를 이렇게 줄일 수 있다!
 handleInput = e => {
    const { name, value } = e.target; // 구조분해할당을 이용
    this.setState({
      inputValue: { ...this.state.inputValue, [name]: value },
    });
  };
리액트에서 HTML 폼 엘리먼트는 폼 엘리먼트 자체가 내부 상태를 가지기 때문에,
React의 다른 DOM 엘리먼트와 조금 다르게 동작한다.
예를 들어, 순수한 HTML에서 이 폼은 name을 입력받을수 있다.
input,textarea,select 태그가 있다.
class InputId extends React.Component {
  render() {
  const { getInput } = this.props
    return (
      <section className="inputId">
        <input
          className="loginId"
          type="text"
          placeholder="전화번호, 사용자 이름 또는 이메일"
          onChange={getInput}
          name="idValue"                // name 사용가능
        />
        <input
          className="loginInput"
          type="password"
          placeholder="비밀번호"
          onChange={getInput}
          name="pwValue"                // name 사용가능
        />
      </section>
    );
  }
}
🔑 완성된 코드
✔️ 부모 컴포넌트 Login
import React from 'react';
import InputId from './Components/InputId/InputId';
import Button from './Components/Button/Button';
import './Login.scss';
class Login extends React.Component {
  //
  constructor() {
    super();
    this.state = {
      inputValue: { idValue: '', pwValue: '' },
      isButtonOn: false,
    };
  }
  //
  handleInput = e => {
    const { name, value } = e.target;
    this.setState({
      inputValue: { ...this.state.inputValue, [name]: value },
    });
  };
//
  render() {
    return (
      <div className="loginSection">
        <header>Westagram</header>
        <InputId getInput={this.handleInput} />
        <Button />
        <footer>비밀번호를 잊으셨나요?</footer>
      </div>
    );
  }
}
//
export default Login;
✔️ 자식 컴포넌트 input
import React from 'react';
import './InputId.scss';
//
class InputId extends React.Component {
  render() {
     const { getInput } = this.props
    return (
      <section className="inputId">
        <input
          className="loginId"
          type="text"
          placeholder="전화번호, 사용자 이름 또는 이메일"
          onChange={this.props.getInput}
          name="idValue"
        />
        <input
          className="loginInput"
          type="password"
          placeholder="비밀번호"
          onChange={this.props.getInput}
          name="pwValue"
        />
      </section>
    );
  }
}
//
export default InputId;
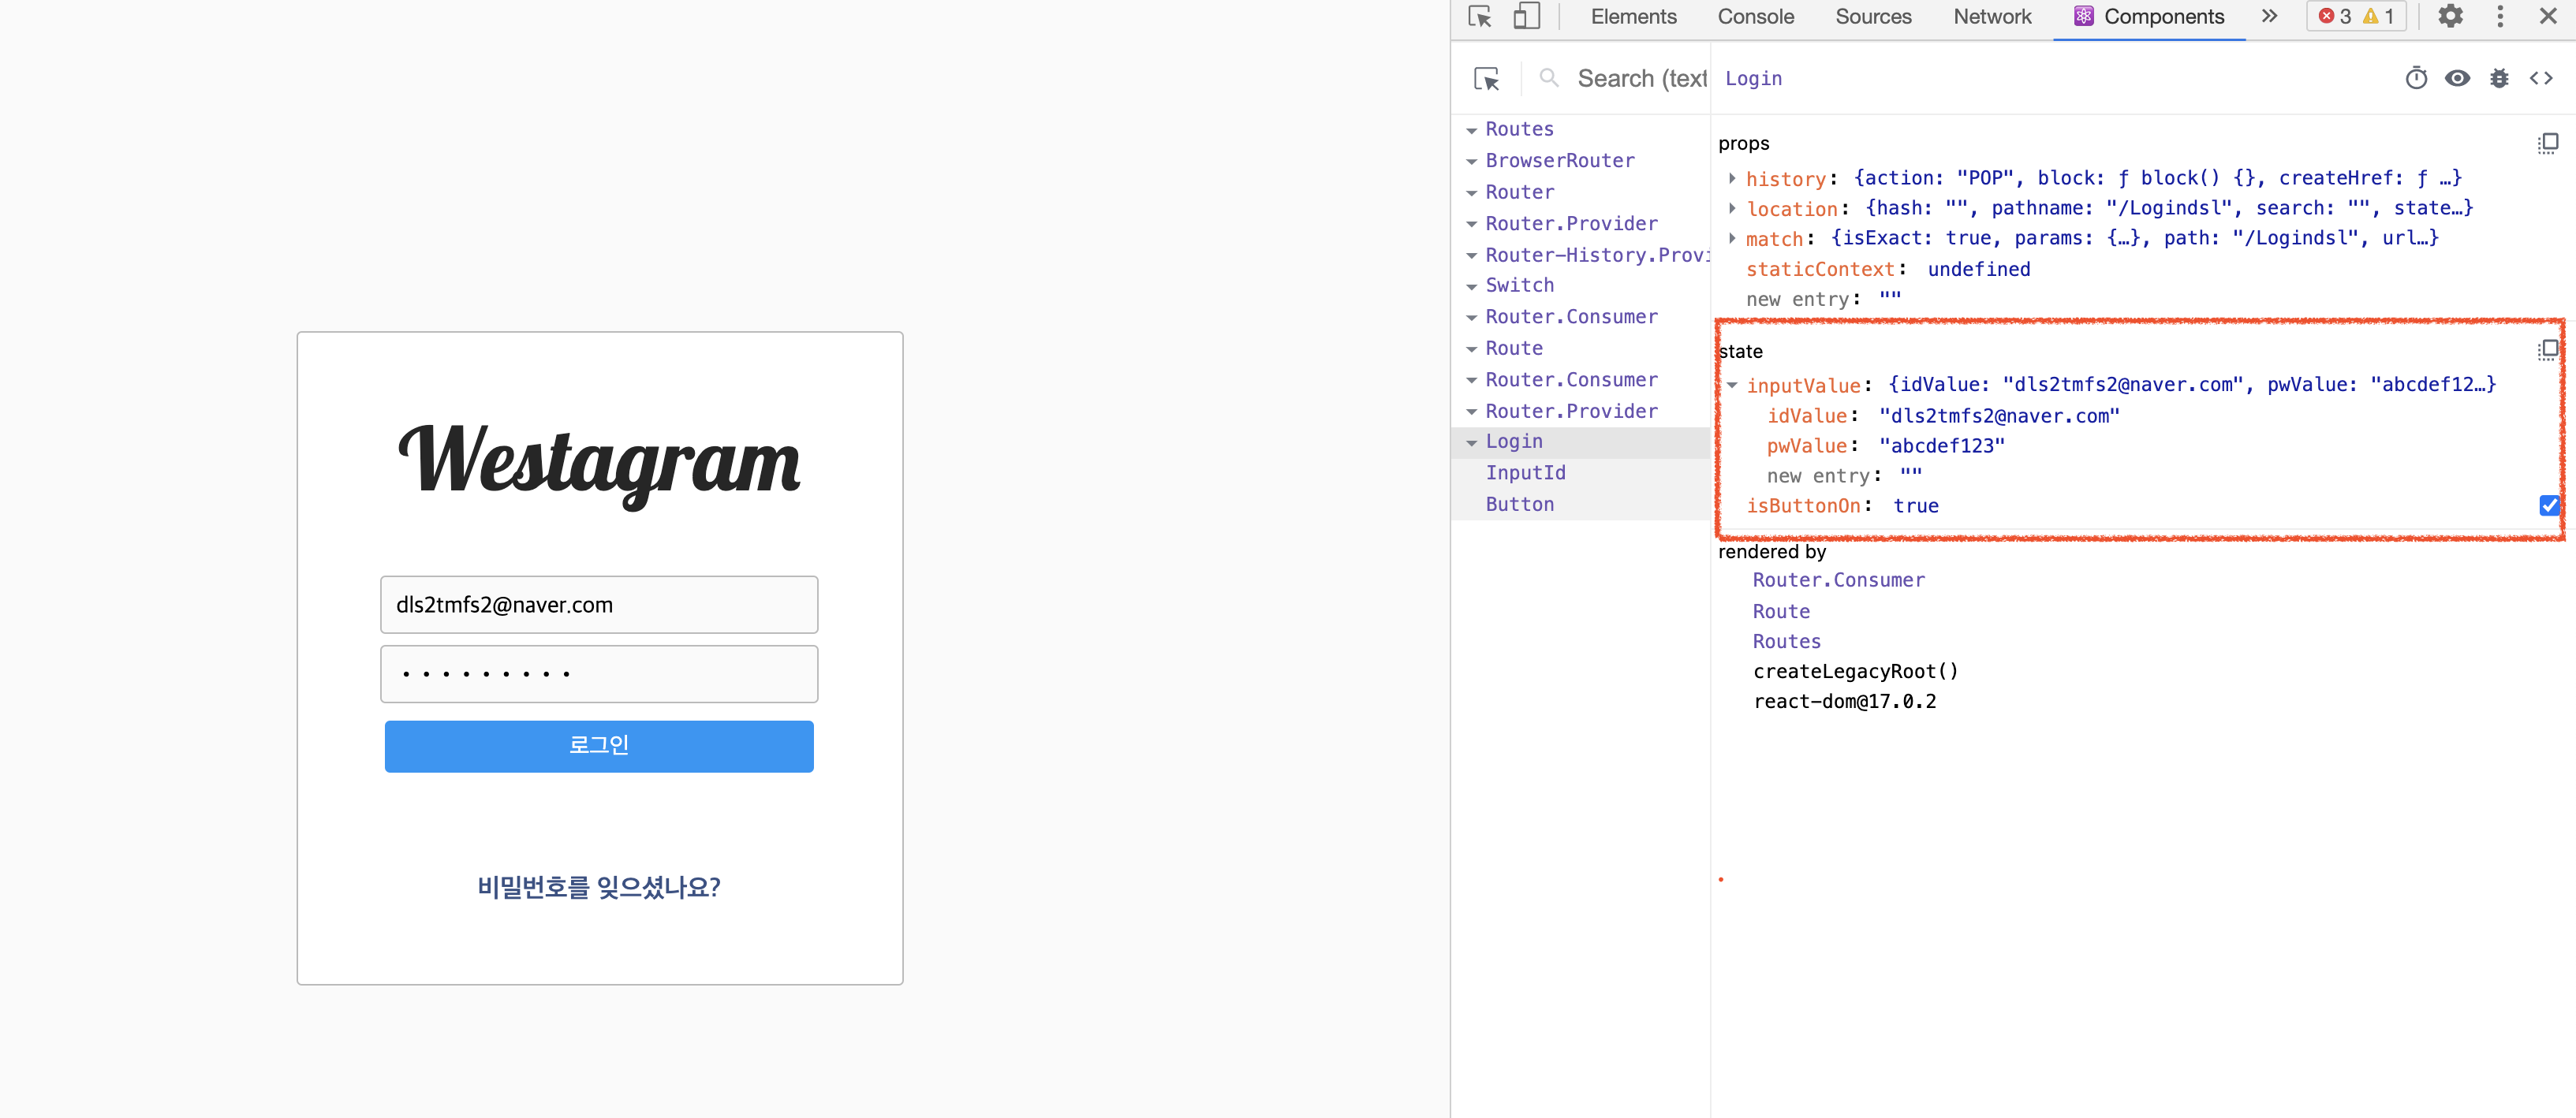
개발자 도구를 열어보면 이렇게 ID input과 PW input에 value값이 잘 받아와지는것을 확인할 수 있다.!