3주차 모각코 목표
- html, css, js js 로 캘린더 웹페이지 제작하기
- 깃헙 페이지 배포하기
- 블로그에 정리하기
피그마로 디자인 틀 잡기
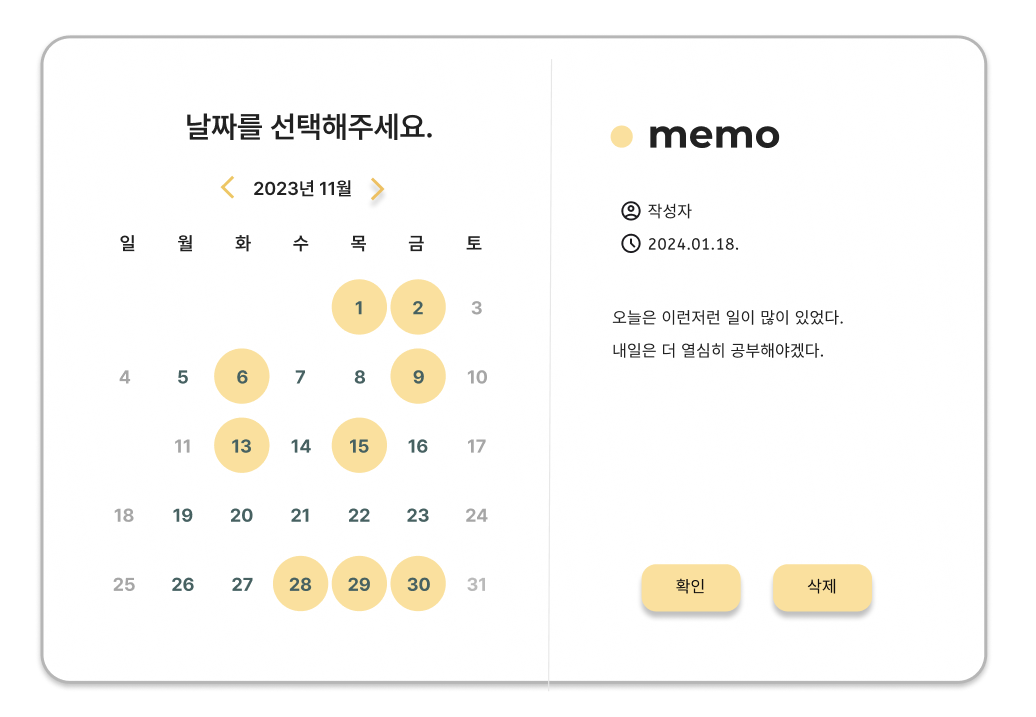
우선 피그마로 디자인 틀을 제작하였다.
노션같은 느낌을 내고 싶어서 아래 사진처럼 만들었다.
날짜가 하나 사라진 건 실수로 삭제했나보다..
구현하기
html, css, js 를 통해 웹 페이지를 제작하였다.
깃헙 구현 링크는 아래에 있다.
https://github.com/aengzu/calendar-webpage
index.html
<!DOCTYPE html>
<html lang="kor">

<head>
    <meta charset="UTF-8">
    <title>캘린더</title>
    <link rel="stylesheet" href="./style/style.css">
    <link rel="stylesheet" href="./style/Font/font.css">
    <!-- Bootstrap CSS -->
    <link href="https://cdn.jsdelivr.net/npm/bootstrap@5.3.2/dist/css/bootstrap.min.css" rel="stylesheet">
    <link rel="stylesheet" href="https://cdnjs.cloudflare.com/ajax/libs/font-awesome/6.5.1/css/all.min.css">
</head>

<body>

    <div class="select-date-prompt">날짜를 선택해주세요.</div>
    <div class="calendar-container p-3">

        <div class="calendar-header">
            <i id="prev-mon" class="fa-solid fa-angle-left fa-xl" style="color: #FFD43B;"></i>
            <span id="curent-mon">2024년 1월</span>
            <i id="next-mon" class="fa-solid fa-angle-right fa-xl" style="color: #FFD43B;"></i>
        </div>

        <div class="weekday-row">
            <div class="weekend">일</div>
            <div class="weekday">월</div>
            <div class="weekday">화</div>
            <div class="weekday">수</div>
            <div class="weekday">목</div>
            <div class="weekday">금</div>
            <div class="weekend">토</div>
        </div>

        <div class="calendar-grid">
            <!-- 달력 날짜는 여기에 표시됩니다 -->
        </div>
    </div>

    <div class="memo-container">
        <div class="memo-title">메모</div>
        <textarea id="memo-input" class="memo-input" style="margin-bottom: 5px;"></textarea>
        <div class="memo-action" style="margin-left: auto; margin-right: auto;">
            <button id="save-memo" class="button save">확인</button>
            <button id="delete-memo" class="button delete">삭제</button>
        </div>
    </div>
    <script src="./script/main.js"></script>
</body>

</html>
font.css
@font-face {
    font-family: 'Pretendard-Regular';
    src: url('https://cdn.jsdelivr.net/gh/Project-Noonnu/noonfonts_2107@1.1/Pretendard-Regular.woff') format('woff');
    font-weight: 400;
    font-style: normal;
}

@font-face {
    font-family: 'Montserrat';
    src: url('./Montserrat/Montserrat-VariableFont_wght.ttf');
    font-weight: 400;
    font-style: bold;
}

body {
    font-family: 'Pretendard-Regular', sans-serif;
}

h1, h2, h3 {
    font-family: 'Montserrat', sans-serif;
}
style.css
/* 일반 요소 스타일링 */
* {
    box-sizing: border-box;
}

body, h1, h2, h3, p {
    margin: 0;
    padding: 0;
}

/* 컨테이너 설정 */
.container {
    display: flex;
    align-items: flex-start;
    position: relative;
}

/* 달력 컨테이너 설정 */
.calendar-container {
    width: 340px;
    border-radius: 20px;
    background-color: white;
    box-shadow: 0 4px 8px 0 rgba(0,0,0,0.2);
    margin: 20px;
    padding: 20px;
}

/* 달력 헤더 스타일링 */
.calendar-header {
    display: flex;
    justify-content: space-between;
    align-items: center;
    padding-bottom: 20px;
}

.calendar-header i {
    color: #FFD43B;
    cursor: pointer;
}

/* "날짜를 선택해주세요" 제목 스타일 */
.select-date-prompt {
    font-size: 20px;
    font-weight: bold; /* 볼드체로 설정 */
    font-family: 'Montserrat', sans-serif; /* 폰트 적용 */
    margin: 20px 0; /* 위아래 여유 공간 추가 */
    padding-left: 110px;
    color: #333; /* 색상 설정 */
}

.weekday-row {
    display: flex;
    justify-content: space-between;
    padding: 10px;
    font-family: 'Pretendard-Regular', sans-serif;
}

.weekday {
    flex: 1;
    text-align: center;
    color: var(#3F6262);
    font-weight: bold;
}
.weekend {
    flex: 1;
    text-align: center;
    font-weight: bold;
    color: var(#212121);
    opacity: 0.4;
}

/* 달력 그리드 스타일링 */
.calendar-grid {
    display: grid;
    grid-template-columns: repeat(7, 1fr);
    gap: 5px;
    padding: 10px;
}

.calendar-day {
    display: flex;
    justify-content: center;
    align-items: center;
    height: 35px;
    width: 35px;
    cursor: pointer;
    border-radius: 50%;

    transition: transform 0.3s ease, background-color 0.3s ease; /* 부드러운 변화를 위한 transition 추가 */
}


/* 마우스 오버 상태의 날짜 스타일 */
.calendar-day:hover {
    width: 35px;
    height: 35px;
    border-radius: 50%;
    background-color: #fbeed0; /* 배경색만 변경 */
}

/* 메모가 있는 날짜에 적용되는 스타일 */
.calendar-day.has-memo {
    width: 35px;
    height: 35px;
    border-radius: 50%;
    background-color: #FFDF94; /* 메모가 있는 날짜는 항상 노란색 배경 */
}

/* 마우스 오버 후 원래 상태로 돌아갈 때의 날짜 스타일 */
.calendar-day:not(:hover).has-memo {
    width: 35px;
    height: 35px;
    border-radius: 50%;
    background-color: #FFDF94; /* 메모가 있는 날짜는 노란색 배경으로 유지 */
}

/* 메모 컨테이너 스타일링 */
.memo-container {
    width: 300px;
    border-radius: 20px;
    background-color: white;
    box-shadow: 0 4px 8px 0 rgba(0,0,0,0.2);
    padding: 20px;
    display: none; /* 처음에는 숨겨져 있습니다. */
    flex-direction: column; /* 세로로 쌓음 */
    position: absolute; /* 절대 위치 */
    top: 0; /* 상단 정렬 */
    left: 360px; /* 컨테이너 오른쪽에 나타납니다. */
    margin-left: 20px;
    padding-top: 10px;
    margin-top: 100px;
}

/* 메모 타이틀 스타일 */
.memo-title {
    text-align: center;
    font-weight: bold; /* 볼드체로 설정 */
    font-family: 'Montserrat', sans-serif; /* 폰트 적용 */
    font-size: 18px; /* 폰트 크기 조정 */
    margin-bottom: 10px;
}
/* 메모 입력 스타일링 */
#memo-input {
    width: 100%;
    height: 150px;
    border: 1px solid #ccc;
    flex-grow: 1; /* 남은 공간을 모두 사용하도록 설정 */
    border-radius: 10px;
    padding: 10px;
    font-family: 'Pretendard-Regular', sans-serif;
    font-size: 16px;
}

/* 메모 액션 (버튼) 컨테이너 스타일 */
.memo-actions {
    display: flex;
    justify-content: center; /* 내부 요소들을 가로 방향으로 중앙 정렬 */
    padding-top: 10px;
    width: 100%; /* 전체 너비를 사용하도록 설정 */
}


/* 버튼 및 링크 스타일링 */
button, a {
    cursor: pointer;
}

.button {
    margin: 5px;
    padding: 6px 12px;
    align-self: center;
    border: none;
    border-radius: 5px;
    background-color: #FFD43B;
    color: white;
    font-family: 'Montserrat', sans-serif;
    font-size: 14px;
    cursor: pointer;
    flex-basis: 100px; /* 버튼의 기본 크기 설정 */
    box-shadow: 0 2px 4px 0 rgba(97, 97, 97, 0.2);
}


/* 스크롤바 스타일링 */
::-webkit-scrollbar {
    width: 5px;
}

::-webkit-scrollbar-thumb {
    background: #ccc;
    border-radius: 10px;
}

::-webkit-scrollbar-thumb:hover {
    background: #aaa;
}
main.js
document.addEventListener('DOMContentLoaded', () => {
    const prevButton = document.getElementById('prev-mon');
    const nextButton = document.getElementById('next-mon');
    const currentMonthDisplay = document.getElementById('curent-mon');
    const calendarGrid = document.querySelector('.calendar-grid');
    const memoContainer = document.querySelector('.memo-container');
    const memoInput = document.getElementById('memo-input');
    const saveButton = document.getElementById('save-memo');
    const deleteButton = document.getElementById('delete-memo');

    // 현재 날짜를 기준으로 달력을 설정한다.
    let currentMonth = new Date();

    // 달력을 렌더링
    const renderCalendar = () => {
        // 달의 첫번째 날과 마지막 날을 구한다.
        const firstDayOfMonth = new Date(currentMonth.getFullYear(), currentMonth.getMonth(), 1);
        const lastDayOfMonth = new Date(currentMonth.getFullYear(), currentMonth.getMonth() + 1, 0);

        // 현재 달의 첫 날이 시작하는 요일의 인덱스를 구함 / 0: 일요일, 1:월요일, 2:화요일, 3:수요일, 4:목요일, 5:금요일, 6:토요일
        const startDay = firstDayOfMonth.getDay();


        // 달력 그리드를 초기화
        calendarGrid.innerHTML = '';

        // 첫 요일 전까지 빈 칸으로 채움.
        // i=0 (일요일) 부터 startDay(첫 요일) 전까지 빈 칸으로 채우는 것
        for (let i = 0; i < startDay; i++) {
            const emptyCell = document.createElement('div');
            emptyCell.classList.add('calendar-day', 'empty');
            calendarGrid.appendChild(emptyCell);
     }

        // 첫날부터 마지막 날까지 날짜 채우기
        for (let day = firstDayOfMonth; day <= lastDayOfMonth; day.setDate(day.getDate() + 1)) {
            const dayElement = document.createElement('div');
            dayElement.classList.add('calendar-day');
            dayElement.textContent = day.getDate();
            dayElement.dataset.date = day.toISOString().split('T')[0];

            // 로컬 스토리지에서 메모를 확인하고 표시
            if (localStorage.getItem(dayElement.dataset.date)) {
                dayElement.classList.add('has-memo');
            }

            // 만약 날짜를 클릭하면 -> 메모패드 열기
            dayElement.addEventListener('click', () => selectDate(dayElement.dataset.date));
            calendarGrid.appendChild(dayElement);
        }

        // 현재 연/월 표시
        currentMonthDisplay.textContent = `${currentMonth.getFullYear()}년 ${currentMonth.getMonth() + 1}월`;
    };


    // 선택한 날짜에 대한 메모 편집 함수
    const selectDate = (dateString) => {
        memoContainer.style.display = 'flex';
        // 메모의 입력란의 값을 현재 메모 dataString 가져온 것으로 설정
        memoInput.value = localStorage.getItem(dateString) || '';
        memoInput.focus();
        // 저장 버튼과 삭제 버튼 클릭시 이벤트 처리
        saveButton.onclick = () => saveMemo(dateString);
        deleteButton.onclick = () => deleteMemo(dateString);
    };

    const saveMemo = (dateString) => {
        localStorage.setItem(dateString, memoInput.value);
        memoContainer.style.display = 'none';
        renderCalendar();
    };

    const deleteMemo = (dateString) => {
        localStorage.removeItem(dateString);
        memoContainer.style.display = 'none';
        renderCalendar();
    };


    // 이전 달 이동할 때 이벤트 처리
    prevButton.addEventListener('click', () => {
        currentMonth.setMonth(currentMonth.getMonth() - 1);
        renderCalendar();
    });


    // 다음 달 이동 시 이벤트 처리
    nextButton.addEventListener('click', () => {
        currentMonth.setMonth(currentMonth.getMonth() + 1);
        renderCalendar();
    });

    renderCalendar();
});
실제 구현 화면 및 깃헙 페이지 배포
구현 화면은 다음과 같다. 실제로 만들다보니 사람과 날짜를 추가하는 데는 어려움이 있어 시간 안에 못할 것 같아서 일단은 이런 형식으로 구현했다.
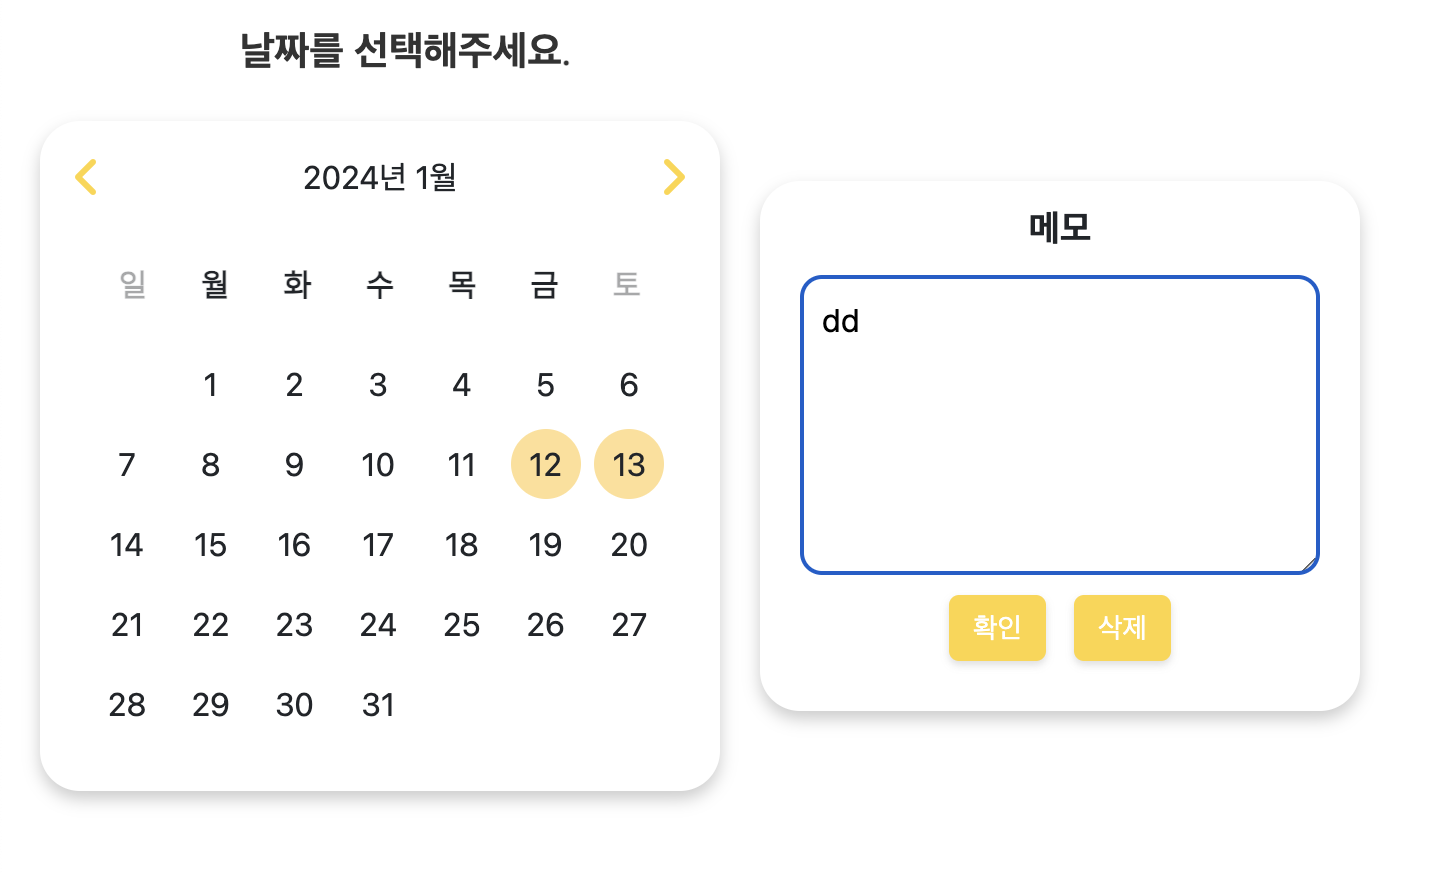
깃헙 페이지를 통해 해당 웹페이지를 배포하였다.
아래 링크에서 확인이 가능하다.

Kotlin, Flutter, AI | Computer Science
공유해주신 소스코드를 활용하여 URL로 공유하는 달력을 만들어봤어요!
https://saramjh.github.io/calendar-sharing-via-URL/