[Docker]
도커는 리눅스의 응용 프로그램들을 프로세스 격리 기술들을 사용해 컨테이너로 실행하고 관리하는 오픈 소스 프로젝트이다. 도커 웹 페이지의 기능을 인용하면 다음과 같다: 도커 컨테이너는 일종의 소프트웨어를 소프트웨어의 실행에 필요한 모든 것을 포함하는 완전한 파일 시스템 안에 감싼다.
- 반가상화
하드웨어 가상화 계층이 없으며 기존의 CPU 안에서 가상화해 별도의 환경을 제공하는 가상머신과 차이가 있다. 컨테이너 기반의 격리 환경을 구축
- 공유 대상: 기존 호스트의 커널/시스템 call
- 격리 대상: app 운용을 위한 프로그램
- 컨테이너 기술
리눅스 커널에서 제공하는 컨테이너 기술
- 컨테이너 안에
격리된가상 공간 환경에서 응용 프로그램을 실행해 외부 환경에 영향을 받지 않음
- 이미지
서비스 운영에 필요한 서버 프로그램, 소스 코드, 컴파일된 실행파일과 일련의 커맨드를 묶은 파일
- 이미지 생성: Dockerfile을 통해 작성하여 Build하는 행위
- 빌드한 이미지를 DockerHub에 배포 및 pull
- 즉, 직접 build할 수도 있고 가져올 수도 있음
- 컨테이너
컨테이너 실행 상태: 빌드된 이미지를 컨테이너에 올려 실행하는 런타임 상태
하나의 이미지로부터 여러개의 컨테이너를 실행시키는 것이 가능
- 레이어
도커는 이미지의 바뀐 부분만을 관리해 효과적으로 빌드하도록 설계됨
기존 이미지에서 변경된 부분에 대해서만 새로 이미지 Layer를 생성
컨테이너에서 실행시 베이스 이미지 Layer와 바뀐 이미지 Layer를 합쳐서 컨테이너에서 실행한다.
docker 설치
$ apt-get install docker -y

Installed:
  containerd-1.7.11-1.amzn2023.0.1.x86_64            docker-25.0.3-1.amzn2023.0.1.x86_64           iptables-libs-1.8.8-3.amzn2023.0.2.x86_64
Complete!
docker 버전 확인
$ docker -v

Docker version 25.0.3, build 4debf41
docker 실행
$ sudo service docker start

Redirecting to /bin/systemctl start docker.service
docker 그룹에 sudo 추가
$ sudo usermod -aG docker ec2-user(인스턴스 재접속 후) hello-world image pull
$ docker run hello-world

Unable to find image 'hello-world:latest' locally
latest: Pulling from library/hello-world
c1ec31eb5944: Pull complete
Digest: sha256:1408fec50309afee38f3535383f5b09419e6dc0925bc69891e79d84cc4cdcec6
Status: Downloaded newer image for hello-world:latest

Hello from Docker!
This message shows that your installation appears to be working correctly.

To generate this message, Docker took the following steps:
 1. The Docker client contacted the Docker daemon.
 2. The Docker daemon pulled the "hello-world" image from the Docker Hub.
    (amd64)
 3. The Docker daemon created a new container from that image which runs the
    executable that produces the output you are currently reading.
 4. The Docker daemon streamed that output to the Docker client, which sent it
    to your terminal.

To try something more ambitious, you can run an Ubuntu container with:
 $ docker run -it ubuntu bash

Share images, automate workflows, and more with a free Docker ID:
 https://hub.docker.com/

For more examples and ideas, visit:
 https://docs.docker.com/get-started/
image 확인
$ docker images

REPOSITORY    TAG       IMAGE ID       CREATED         SIZE
hello-world   latest    d2c94e258dcb   14 months ago   13.3kB
image 상세정보 확인
$ docker inspect d2c94e258dcb[어플리케이션 빌드]
아래의 과정을 수행
- ubuntu image 로드
- 컨테이너 실행
- 레이어 추가
- 이미지 빌드
- commit/dockerhub push
ubuntu image 다운로드
$ docker pull ubuntu:20.04

$ docker images

REPOSITORY    TAG       IMAGE ID       CREATED         SIZE
ubuntu        20.04     5f5250218d28   6 weeks ago     72.8MB
hello-world   latest    d2c94e258dcb   14 months ago   13.3kB
kyuwon-ubuntu 이름으로 컨테이너 실행 후 바로 bash 진입
-i는 상호작용 모드를 활성화하고, -t는 TTY를 할당(표준 입력에 연결된 터미널의 이름을 출력)
$ docker run -it --name kyuwon-ubuntu ubuntu bash

$ docker ps

CONTAINER ID   IMAGE     COMMAND   CREATED          STATUS          PORTS     NAMES
ca1b248d1f1d   ubuntu    "bash"    15 seconds ago   Up 14 seconds             kyuwon-ubuntu
컨테이너 내부에서 apt update/install git
$ (kyuwon-ubuntu)apt-get update
$ (kyuwon-ubuntu)apt install git

$ (kyuwon-ubuntu)exit

$ (ec2 instance)docker ps -a

CONTAINER ID   IMAGE         COMMAND    CREATED             STATUS                         PORTS     NAMES
ca1b248d1f1d   ubuntu        "bash"     27 minutes ago      Exited (0) 23 minutes ago                kyuwon-ubuntu2
2c2615325f5a   ubuntu        "bash"     29 minutes ago      Exited (0) 28 minutes ago                kyuwon-ubuntu
4a0222d877f8   hello-world   "/hello"   58 minutes ago      Exited (0) 58 minutes ago                determined_nightingale
b0e250678292   hello-world   "/hello"   About an hour ago   Exited (0) About an hour ago             sad_varahamihira
kyuwon-ubuntu2 컨테이너를 이미지화
# kyuwon-image 이름에 kyuwon-tag 태그로 이미지 생성
$ docker commit kyuwon-ubuntu2 spider504/kyuwongit:kyuwon-tag
kyuwon-image 이름에 kyuwon-tag 태그로 이미지 생성 확인
# 아직 배포되지는 않은 상태
$ docker images

REPOSITORY            TAG             IMAGE ID       CREATED              SIZE
spider504/kyuwongit   kyuwongit-tag   f98ae86f2bda   About a minute ago   200MB (<<< 이놈을 배포함)
kyuwon-image          kyuwon-tag      f120a5c64717   3 minutes ago        200MB
kyuwon-image          test-tag        4de0bc096071   6 minutes ago        200MB
spider504/kyuwongit   test-tag        f3a1f8437981   12 minutes ago       200MB
ubuntu                latest          35a88802559d   5 weeks ago          78.1MB
ubuntu                20.04           5f5250218d28   6 weeks ago          72.8MB
hello-world           latest          d2c94e258dcb   14 months ago        13.3kB
dockerhub 로그인/push
$ export DOCKHUB_TOKEN={docker access token} <<< .bash_profile에 환경변수로 관리
$ echo $DOCKHUB_TOKEN | docker login -u spider504 --password-stdin <<< 한 명령어의 출력을 다음 명령어의 입력으로 이용

$ docker push spider504/kyuwongit:kyuwongit-tag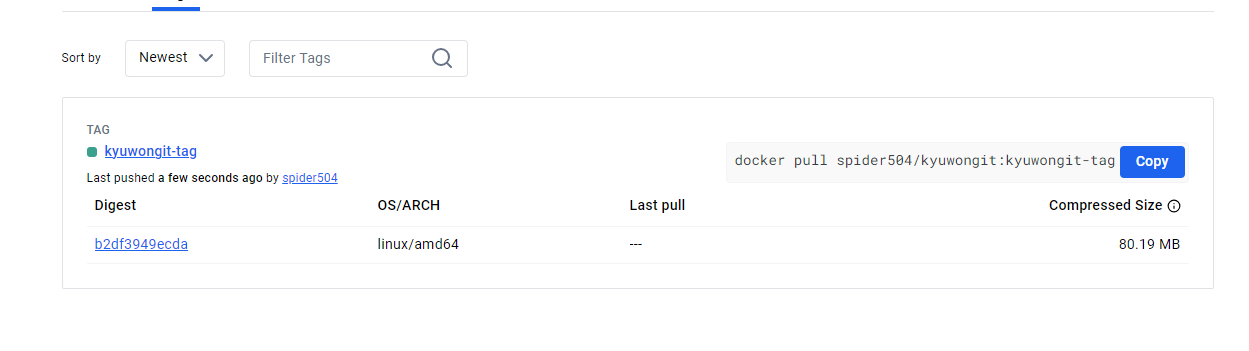
레퍼지토리 명과 태그 맞춰줘야한다!
image 삭제
$ docker rmi --force {Repository}/{tag}image pull
$ docker pull spider504/kyuwongit[Dockerfile]
완성된 이미지를 배포할 수도 있지만, 그 이미지를 만들 수 있는 스크립트인 Dockerfile을 통해 이미지가 설치되기 위한 히스토리를 추적할 수 있으며 수정할 수 있다.
아래 내용을 통해 우분투에 파이썬과 gradio를 설치하고 host의 py파일을 복사해 웹서버를 실행하는 Dockerfile을 만든다.
실제 파일명 Dockerfile로 생성
export DIR_NAME="python-gradio-dockerfile"
mkdir $DIR_NAME && cd $DIR_NAME

$ vi Dockerfile
Dockerfile 생성
- RUN: 빌드에서 수행
- CMD / ENTRYPOINT : 컨테이너를 생성 및 실행시 수행
CMD: 컨테이너를 생성할 때만 실행docker run
ENTRYPOINT: 컨테이너를 시작할 때마다 실행docker start
# ubuntu image로부터
FROM ubuntu:latest
# apt update, python 설치
RUN \
apt-get update && \
apt-get install -y python3
# mkdir && cd
WORKDIR /var/www/html
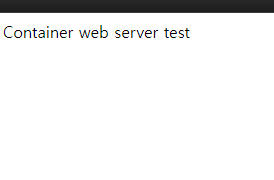
# -u 옵션을 통해 현재 상태와 로그를 화면에 출력
#CMD ["python3","-u","-m","http.server"]
CMD ["echo", "test"]Dockerfile -> Image 빌드
# 레포지토리:태그, dockerfile경로
$ docker build -t python-gradio-image:tag1 .

$ docker images

REPOSITORY            TAG             IMAGE ID       CREATED              SIZE
python-gradio-image   tag1            9b245404a67f   About a minute ago   157MB
Image -> Container 생성
- -d: 백그라운드
- -p: [호스트포트]:[컨테이너포트] 포트포워딩
- -v: [호스트폴더]:[컨테이너폴더] 동기화
$ docker run \
	--name python-gradio-container \
    -d -p 7870:8000 \
    -v ~/html/:/var/www/html \
    python-gradio-image:tag1
{Public IP}:7870
[Commands]
이미지 다운로드 및 컨테이너 실행/진입
$ docker pull ubuntu:20.04
$ docker run -it --name {container name} ubuntu:20.04 bash
컨테이너 -> 이미지 빌드, image name==DockerHub repo name
$ docker commit {container name} {image name}:{tag name}Dockerfile -> 이미지 빌드
$ docker build -t {image name}:{tag name} {Dockerfile 경로}dockerhub push
$ docker push spider504/kyuwongit:kyuwongit-tag이미지 확인
$ docker images이미지 삭제
$ docker rmi {image name}:{tag name}컨테이너 최초실행
- -d: 백그라운드
- -p: {호스트}:{컨테이너} 포트포워딩
- -v: {호스트}:{컨테이너} 디렉토리 동기화
- {이미지명}:{태그명}
- -it, bash: bash쉘 진입
- 백그라운드 실행시 프로그램 실행되지않으면 바로 종료된다.
sleep infinity옵션을 통해 백그라운드 실행시에 프로세스 없어도 종료되지 않게 설정 가능
현재로서는 image==레포지토리로 이해해도 무방
$ docker run \
	--name python-gradio-container \
    -it -d -p 7870:8000 \
    -v ~/html/:/var/www/html \
    image1:tag1 bash
컨테이너 확인
$ docker ps -a컨테이너 삭제
$ docker rm --force {container name}컨테이너 실행
$ ddocker start {container name}컨테이너 접속
$ docker exec -it {container name} /bin/bash작업이 끝난 컨테이너는 image로 빌드해서 push 해놓자 ^^
[URL]
https://sjh9708.tistory.com/23
https://jinjinyang.tistory.com/46