YOLO v8 추론된 결과 화면 표출
이전 글에서 추론까지 완료되었다. 이제 해당 객체를 화면에 적당히 그려넣으면 완성이다.
✔ 1. RectView 생성
우리는 화면에 추론된 객체의 box와 이름 그리고 확률을 보여줄 예정이다. 따라서 화면에 보여줄 view 객체를 생성한다.
- 새로운 RectView 클래스를 생성한다.
class RectView(context: Context, attributeSet: AttributeSet) : View(context, attributeSet) {

}
우선 위와 같이 View를 상속하는 RectView 클래스를 생성한다.
- layout에서 activity_main.xml 파일에 rectView를 그릴 View 코드를 추가한다.
 <    <com.example.yolov8.RectView
        android:id="@+id/rectView"
        android:layout_width="match_parent"
        android:layout_height="match_parent"
        app:layout_constraintBottom_toTopOf="parent"
        app:layout_constraintEnd_toStartOf="parent"
        app:layout_constraintStart_toStartOf="parent"
        app:layout_constraintTop_toTopOf="parent" />
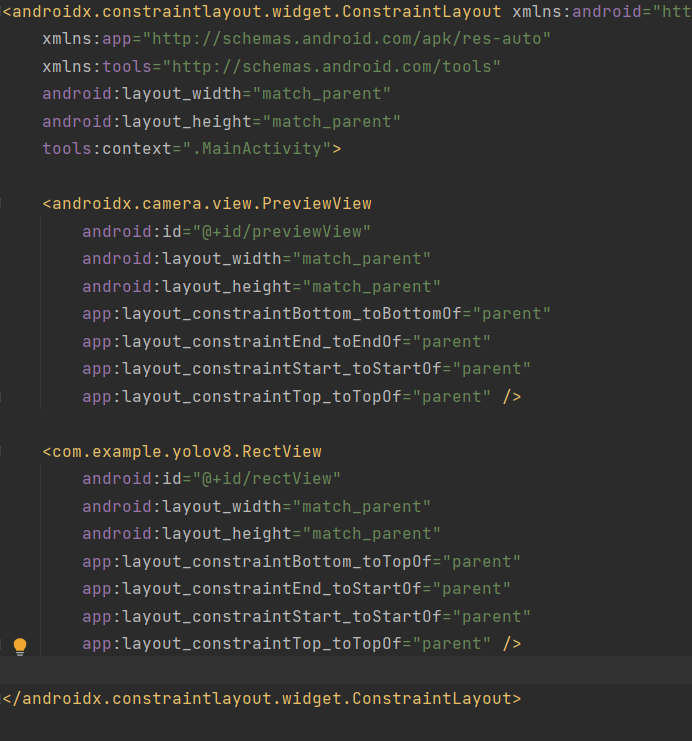
위 사진과 같이 rectView를 추가하면 된다.
- MainActivity 클래스에 rectView를 추가한다.
  	private lateinit var previewView: PreviewView
    private lateinit var rectView: RectView
    private lateinit var ortEnvironment: OrtEnvironment
    private lateinit var session: OrtSession

override fun onCreate(savedInstanceState: Bundle?) {
        super.onCreate(savedInstanceState)
        setContentView(R.layout.activity_main)
        previewView = findViewById(R.id.previewView)
        rectView = findViewById(R.id.rectView)

        // 자동 꺼짐 해제
        window.addFlags(WindowManager.LayoutParams.FLAG_KEEP_SCREEN_ON)

        // 권한 허용
        setPermissions()

        // onnx 파일 && txt 파일 불러오기
        load()

        // 카메라 켜기
        setCamera()
    }
✔ 2. RectView에서 좌표값 수정하기
추론된 결과값에서 나온 좌표값의 기준은 640x640 사진의 화면에서의 좌표값이다. 그러나 실제 화면은 기기마다 다르다. 따라서 좌표값을 화면의 크기에 맞게 수정해줘야 한다.
//RectView class 내부
private lateinit var results: ArrayList<Result>

fun transformRect(results: ArrayList<Result>) {
        // scale 구하기
        val scaleX = width / DataProcess.INPUT_SIZE.toFloat()
        val scaleY = scaleX * 9f / 16f
        val realY = width * 9f / 16f
        val diffY = realY - height

        results.forEach {
            it.rectF.left *= scaleX
            it.rectF.right *= scaleX
            it.rectF.top = it.rectF.top * scaleY - (diffY / 2f)
            it.rectF.bottom = it.rectF.bottom * scaleY - (diffY / 2f)
        }
        this.results = results
}
너비 scale은 현재 화면의 너비 만큼 비례해서 좌표를 변환 시키지만,
높이 scale는 현재 화면이 아닌 실제 비율에 비례해서 좌표를 변환 시킨다. 이 내용은 cameraX의 FILL_CENTER의 원리를 이해해야 한다. 따라서 추후에 이 부분에 대해서 작성하려 한다.
✔ 3. 데이터 라벨링
Result 클래스에는 라벨링된 문자열 값이 아니라 숫자가 들어있다.
따라서 숫자에 매핑된 문자열 값을 가져와야한다. (ex 0 = people)
//RectView 내부
private lateinit var classes: Array<String>

fun setClassLabel(classes: Array<String>) {
        this.classes = classes
}
메인 액티비티에서 assets 안의 txt파일을 불러오고 그 classes 들을 rectview에 전달하면 된다.
//메인 액티비티의 load 메서드에 rectview에 classes를 전달
 private fun load() {
        dataProcess.loadModel() // onnx 모델 불러오기
        dataProcess.loadLabel() // coco txt 파일 불러오기

        ortEnvironment = OrtEnvironment.getEnvironment()
        session = ortEnvironment.createSession(
            this.filesDir.absolutePath.toString() + "/" + DataProcess.FILE_NAME,
            OrtSession.SessionOptions()
        )

        rectView.setClassLabel(dataProcess.classes)
}
✔ 4. 색 지정 및 화면에 표출
80개의 데이터를 적당한 색을 넣는 메서드이다.
   //paint 지정
    private fun findPaint(classIndex: Int): Paint {
        val paint = Paint()
        paint.style = Paint.Style.STROKE    // 빈 사각형 그림
        paint.strokeWidth = 10.0f           // 굵기 10
        paint.strokeCap = Paint.Cap.ROUND   // 끝을 뭉특하게
        paint.strokeJoin = Paint.Join.ROUND // 끝 주위도 뭉특하게
        paint.strokeMiter = 100f            // 뭉특한 정도는 100도

        //임의로 지정한 색상
        paint.color = when (classIndex) {
            0, 45, 18, 19, 22, 30, 42, 43, 44, 61, 71, 72 -> Color.WHITE
            1, 3, 14, 25, 37, 38, 79 -> Color.BLUE
            2, 9, 10, 11, 32, 47, 49, 51, 52 -> Color.RED
            5, 23, 46, 48 -> Color.YELLOW
            6, 13, 34, 35, 36, 54, 59, 60, 73, 77, 78 -> Color.GRAY
            7, 24, 26, 27, 28, 62, 64, 65, 66, 67, 68, 69, 74, 75 -> Color.BLACK
            12, 29, 33, 39, 41, 58, 50 -> Color.GREEN
            15, 16, 17, 20, 21, 31, 40, 55, 57, 63 -> Color.DKGRAY
            70, 76 -> Color.LTGRAY
            else -> Color.DKGRAY
        }
        return paint
}

private val textPaint = Paint().also {
        it.textSize = 60f
        it.color = Color.WHITE
}
색은 다르게 해도 상관없다.
이후 onDraw 메서드를 오버라이딩 해서 그릴 좌표값을 추가한다.
override fun onDraw(canvas: Canvas?) {
        //그림 그리기
        results?.forEach {
            canvas?.drawRect(it.rectF, findPaint(it.classIndex))
            canvas?.drawText(
                classes[it.classIndex] + ", " + round(it.score * 100) + "%",
                it.rectF.left + 10,
                it.rectF.top + 60,
                textPaint
            )
        }
        super.onDraw(canvas)
}
마지막으로 메인 액티비티에서 해당 메서드를 호출하면 완성이다.
private fun imageProcess(imageProxy: ImageProxy) {
        val bitmap = dataProcess.imageToBitmap(imageProxy)
        val floatBuffer = dataProcess.bitmapToFloatBuffer(bitmap)
        val inputName = session.inputNames.iterator().next() // session 이름
        //모델의 요구 입력값 [1 3 640 640] [배치 사이즈, 픽셀(RGB), 너비, 높이], 모델마다 크기는 다를 수 있음.
        val shape = longArrayOf(
            DataProcess.BATCH_SIZE.toLong(),
            DataProcess.PIXEL_SIZE.toLong(),
            DataProcess.INPUT_SIZE.toLong(),
            DataProcess.INPUT_SIZE.toLong()
        )
        val inputTensor = OnnxTensor.createTensor(ortEnvironment, floatBuffer, shape)
        val resultTensor = session.run(Collections.singletonMap(inputName, inputTensor))
        val outputs = resultTensor.get(0).value as Array<*> // [1 84 8400]
        val results = dataProcess.outputsToNPMSPredictions(outputs)

        //화면 표출
        rectView.transformRect(results)
        rectView.invalidate()
}
아래는 예시 사진이다.

아래는 전체 코드이다.
//MainActivity 클래스
import ai.onnxruntime.OnnxTensor
import ai.onnxruntime.OrtEnvironment
import ai.onnxruntime.OrtSession
import android.content.pm.PackageManager
import android.os.Bundle
import android.view.WindowManager
import android.widget.Toast
import androidx.appcompat.app.AppCompatActivity
import androidx.camera.core.*
import androidx.camera.lifecycle.ProcessCameraProvider
import androidx.camera.view.PreviewView
import androidx.core.app.ActivityCompat
import java.util.*
import java.util.concurrent.Executors

class MainActivity : AppCompatActivity() {
    private lateinit var previewView: PreviewView
    private lateinit var rectView: RectView
    private lateinit var ortEnvironment: OrtEnvironment
    private lateinit var session: OrtSession

    private val dataProcess = DataProcess(context = this)

    companion object {
        const val PERMISSION = 1
    }

    override fun onCreate(savedInstanceState: Bundle?) {
        super.onCreate(savedInstanceState)
        setContentView(R.layout.activity_main)
        previewView = findViewById(R.id.previewView)
        rectView = findViewById(R.id.rectView)

        // 자동 꺼짐 해제
        window.addFlags(WindowManager.LayoutParams.FLAG_KEEP_SCREEN_ON)

        // 권한 허용
        setPermissions()

        // onnx 파일 && txt 파일 불러오기
        load()

        // 카메라 켜기
        setCamera()
    }

    private fun setCamera() {
        //카메라 제공 객체
        val processCameraProvider = ProcessCameraProvider.getInstance(this).get()

        //전체 화면
        previewView.scaleType = PreviewView.ScaleType.FILL_CENTER

        // 전면 카메라
        val cameraSelector =
            CameraSelector.Builder().requireLensFacing(CameraSelector.LENS_FACING_BACK).build()

        // 16:9 화면으로 받아옴
        val preview = Preview.Builder().setTargetAspectRatio(AspectRatio.RATIO_16_9).build()

        // preview 에서 받아와서 previewView 에 보여준다.
        preview.setSurfaceProvider(previewView.surfaceProvider)

        //분석 중이면 그 다음 화면이 대기중인 것이 아니라 계속 받아오는 화면으로 새로고침 함. 분석이 끝나면 그 최신 사진을 다시 분석
        val analysis = ImageAnalysis.Builder().setTargetAspectRatio(AspectRatio.RATIO_16_9)
            .setBackpressureStrategy(ImageAnalysis.STRATEGY_KEEP_ONLY_LATEST).build()

        analysis.setAnalyzer(Executors.newSingleThreadExecutor()) {
            imageProcess(it)
            it.close()
        }

        // 카메라의 수명 주기를 메인 액티비티에 귀속
        processCameraProvider.bindToLifecycle(this, cameraSelector, preview, analysis)
    }

    private fun imageProcess(imageProxy: ImageProxy) {
        val bitmap = dataProcess.imageToBitmap(imageProxy)
        val floatBuffer = dataProcess.bitmapToFloatBuffer(bitmap)
        val inputName = session.inputNames.iterator().next() // session 이름
        //모델의 요구 입력값 [1 3 640 640] [배치 사이즈, 픽셀(RGB), 너비, 높이], 모델마다 크기는 다를 수 있음.
        val shape = longArrayOf(
            DataProcess.BATCH_SIZE.toLong(),
            DataProcess.PIXEL_SIZE.toLong(),
            DataProcess.INPUT_SIZE.toLong(),
            DataProcess.INPUT_SIZE.toLong()
        )
        val inputTensor = OnnxTensor.createTensor(ortEnvironment, floatBuffer, shape)
        val resultTensor = session.run(Collections.singletonMap(inputName, inputTensor))
        val outputs = resultTensor.get(0).value as Array<*> // [1 84 8400]
        val results = dataProcess.outputsToNPMSPredictions(outputs)

        //화면 표출
        rectView.transformRect(results)
        rectView.invalidate()
    }

    private fun load() {
        dataProcess.loadModel() // onnx 모델 불러오기
        dataProcess.loadLabel() // coco txt 파일 불러오기

        ortEnvironment = OrtEnvironment.getEnvironment()
        session = ortEnvironment.createSession(
            this.filesDir.absolutePath.toString() + "/" + DataProcess.FILE_NAME,
            OrtSession.SessionOptions()
        )

        rectView.setClassLabel(dataProcess.classes)
    }

    override fun onRequestPermissionsResult(
        requestCode: Int,
        permissions: Array<out String>,
        grantResults: IntArray
    ) {
        if (requestCode == PERMISSION) {
            grantResults.forEach {
                if (it != PackageManager.PERMISSION_GRANTED) {
                    Toast.makeText(this, "권한을 허용하지 않으면 사용할 수 없습니다", Toast.LENGTH_SHORT).show()
                    finish()
                }
            }
        }
        super.onRequestPermissionsResult(requestCode, permissions, grantResults)
    }

    private fun setPermissions() {
        val permissions = ArrayList<String>()
        permissions.add(android.Manifest.permission.CAMERA)

        permissions.forEach {
            if (ActivityCompat.checkSelfPermission(this, it) != PackageManager.PERMISSION_GRANTED) {
                ActivityCompat.requestPermissions(this, permissions.toTypedArray(), PERMISSION)
            }
        }
    }
}
//DataProcess 클래스
import android.content.Context
import android.graphics.Bitmap
import android.graphics.RectF
import androidx.camera.core.ImageProxy
import java.io.BufferedReader
import java.io.File
import java.io.FileOutputStream
import java.io.InputStreamReader
import java.nio.FloatBuffer
import java.util.*
import kotlin.math.max
import kotlin.math.min
class DataProcess(val context: Context) {
lateinit var classes: Array<String>
companion object {
const val BATCH_SIZE = 1
const val INPUT_SIZE = 640
const val PIXEL_SIZE = 3
const val FILE_NAME = "yolov8n.onnx"
const val LABEL_NAME = "yolov8n.txt"
}
fun imageToBitmap(imageProxy: ImageProxy): Bitmap {
val bitmap = imageProxy.toBitmap()
return Bitmap.createScaledBitmap(bitmap, INPUT_SIZE, INPUT_SIZE, true)
}
fun bitmapToFloatBuffer(bitmap: Bitmap): FloatBuffer {
val imageSTD = 255.0f
val buffer = FloatBuffer.allocate(BATCH_SIZE * PIXEL_SIZE * INPUT_SIZE * INPUT_SIZE)
buffer.rewind()
val area = INPUT_SIZE * INPUT_SIZE
val bitmapData = IntArray(area) //한 사진에서 대한 정보, 640x640 사이즈
bitmap.getPixels(
bitmapData,
0,
bitmap.width,
0,
0,
bitmap.width,
bitmap.height
) // 배열에 정보 담기
//배열에서 하나씩 가져와서 buffer 에 담기
for (i in 0 until INPUT_SIZE - 1) {
for (j in 0 until INPUT_SIZE - 1) {
val idx = INPUT_SIZE * i + j
val pixelValue = bitmapData[idx]
// 위에서 부터 차례대로 R 값 추출, G 값 추출, B값 추출 -> 255로 나누어서 0~1 사이로 정규화
buffer.put(idx, ((pixelValue shr 16 and 0xff) / imageSTD))
buffer.put(idx + area, ((pixelValue shr 8 and 0xff) / imageSTD))
buffer.put(idx + area * 2, ((pixelValue and 0xff) / imageSTD))
//원리 bitmap == ARGB 형태의 32bit, R값의 시작은 16bit (16 ~ 23bit 가 R영역), 따라서 16bit 를 쉬프트
//그럼 A값이 사라진 RGB 값인 24bit 가 남는다. 이후 255와 AND 연산을 통해 맨 뒤 8bit 인 R값만 가져오고, 255로 나누어 정규화를 한다.
//다시 8bit 를 쉬프트 하여 R값을 제거한 G,B 값만 남은 곳에 다시 AND 연산, 255 정규화, 다시 반복해서 RGB 값을 buffer 에 담는다.
}
}
buffer.rewind() // position 0
return buffer
}
fun loadModel() {
// onnx 파일 불러오기
val assetManager = context.assets
val outputFile = File(context.filesDir.toString() + "/" + FILE_NAME)
assetManager.open(FILE_NAME).use { inputStream ->
FileOutputStream(outputFile).use { outputStream ->
val buffer = ByteArray(4 * 1024)
var read: Int
while (inputStream.read(buffer).also { read = it } != -1) {
outputStream.write(buffer, 0, read)
}
}
}
}
fun loadLabel() {
// txt 파일 불러오기
BufferedReader(InputStreamReader(context.assets.open(LABEL_NAME))).use { reader ->
var line: String?
val classList = ArrayList<String>()
while (reader.readLine().also { line = it } != null) {
classList.add(line!!)
}
classes = classList.toTypedArray()
}
}
fun outputsToNPMSPredictions(outputs: Array<*>): ArrayList<Result> {
val confidenceThreshold = 0.45f
val results = ArrayList<Result>()
val rows: Int
val cols: Int
(outputs[0] as Array<*>).also {
rows = it.size
cols = (it[0] as FloatArray).size
}
//배열의 형태를 [84 8400] -> [8400 84] 로 변환
val output = Array(cols) { FloatArray(rows) }
for (i in 0 until rows) {
for (j in 0 until cols) {
output[j][i] = ((((outputs[0]) as Array<*>)[i]) as FloatArray)[j]
}
}
for (i in 0 until cols) {
var detectionClass: Int = -1
var maxScore = 0f
val classArray = FloatArray(classes.size)
// label 만 따로 빼서 1차원 배열을 만든다.(0~3은 좌표값임)
System.arraycopy(output[i], 4, classArray, 0, classes.size)
// label 중에서 가장 큰 값을 선정한다.
for (j in classes.indices) {
if (classArray[j] > maxScore) {
detectionClass = j
maxScore = classArray[j]
}
}
//만약 80개의 coco dataset 중 가장 큰 확률값이 특정값을 (현재는 45% 확률) 넘어서면 해당 값을 저장한다.
if (maxScore > confidenceThreshold) {
val xPos = output[i][0]
val yPos = output[i][1]
val width = output[i][2]
val height = output[i][3]
//사각형은 화면 밖으로 나갈 수 없으니 화면을 넘기면 최대 화면 값을 가지게 한다.
val rectF = RectF(
max(0f, xPos - width / 2f),
max(0f, yPos - height / 2f),
min(INPUT_SIZE - 1f, xPos + width / 2f),
min(INPUT_SIZE - 1f, yPos + height / 2f)
)
val result = Result(detectionClass, maxScore, rectF)
results.add(result)
}
}
return nms(results)
}
private fun nms(results: ArrayList<Result>): ArrayList<Result> {
val list = ArrayList<Result>()
for (i in classes.indices) {
//1.클래스 (라벨들) 중에서 가장 높은 확률값을 가졌던 클래스 찾기
val pq = PriorityQueue<Result>(50) { o1, o2 ->
o1.score.compareTo(o2.score)
}
val classResults = results.filter { it.classIndex == i }
pq.addAll(classResults)
//NMS 처리
while (pq.isNotEmpty()) {
// 큐 안에 속한 최대 확률값을 가진 class 저장
val detections = pq.toTypedArray()
val max = detections[0]
list.add(max)
pq.clear()
// 교집합 비율 확인하고 50%넘기면 제거
for (k in 1 until detections.size) {
val detection = detections[k]
val rectF = detection.rectF
val iouThresh = 0.5f
if (boxIOU(max.rectF, rectF) < iouThresh) {
pq.add(detection)
}
}
}
}
return list
}
// 겹치는 비율 (교집합/합집합)
private fun boxIOU(a: RectF, b: RectF): Float {
return boxIntersection(a, b) / boxUnion(a, b)
}
//교집합
private fun boxIntersection(a: RectF, b: RectF): Float {
// x1, x2 == 각 rect 객체의 중심 x or y값, w1, w2 == 각 rect 객체의 넓이 or 높이
val w = overlap(
(a.left + a.right) / 2f, a.right - a.left,
(b.left + b.right) / 2f, b.right - b.left
)
val h = overlap(
(a.top + a.bottom) / 2f, a.bottom - a.top,
(b.top + b.bottom) / 2f, b.bottom - b.top
)
return if (w < 0 || h < 0) 0f else w * h
}
//합집합
private fun boxUnion(a: RectF, b: RectF): Float {
val i: Float = boxIntersection(a, b)
return (a.right - a.left) * (a.bottom - a.top) + (b.right - b.left) * (b.bottom - b.top) - i
}
//서로 겹치는 부분의 길이
private fun overlap(x1: Float, w1: Float, x2: Float, w2: Float): Float {
val l1 = x1 - w1 / 2
val l2 = x2 - w2 / 2
val left = max(l1, l2)
val r1 = x1 + w1 / 2
val r2 = x2 + w2 / 2
val right = min(r1, r2)
return right - left
}
}//RectView 클래스
import android.content.Context
import android.graphics.Canvas
import android.graphics.Color
import android.graphics.Paint
import android.util.AttributeSet
import android.view.View
import kotlin.math.round
class RectView(context: Context, attributeSet: AttributeSet) : View(context, attributeSet) {
private var results: ArrayList<Result>? = null
private lateinit var classes: Array<String>
private val textPaint = Paint().also {
it.textSize = 60f
it.color = Color.WHITE
}
fun transformRect(results: ArrayList<Result>) {
// scale 구하기
val scaleX = width / DataProcess.INPUT_SIZE.toFloat()
val scaleY = scaleX * 9f / 16f
val realY = width * 9f / 16f
val diffY = realY - height
results.forEach {
it.rectF.left *= scaleX
it.rectF.right *= scaleX
it.rectF.top = it.rectF.top * scaleY - (diffY / 2f)
it.rectF.bottom = it.rectF.bottom * scaleY - (diffY / 2f)
}
this.results = results
}
override fun onDraw(canvas: Canvas?) {
//그림 그리기
results?.forEach {
canvas?.drawRect(it.rectF, findPaint(it.classIndex))
canvas?.drawText(
classes[it.classIndex] + ", " + round(it.score * 100) + "%",
it.rectF.left + 10,
it.rectF.top + 60,
textPaint
)
}
super.onDraw(canvas)
}
fun setClassLabel(classes: Array<String>) {
this.classes = classes
}
//paint 지정
private fun findPaint(classIndex: Int): Paint {
val paint = Paint()
paint.style = Paint.Style.STROKE // 빈 사각형 그림
paint.strokeWidth = 10.0f // 굵기 10
paint.strokeCap = Paint.Cap.ROUND // 끝을 뭉특하게
paint.strokeJoin = Paint.Join.ROUND // 끝 주위도 뭉특하게
paint.strokeMiter = 100f // 뭉특한 정도는 100도
//임의로 지정한 색상
paint.color = when (classIndex) {
0, 45, 18, 19, 22, 30, 42, 43, 44, 61, 71, 72 -> Color.WHITE
1, 3, 14, 25, 37, 38, 79 -> Color.BLUE
2, 9, 10, 11, 32, 47, 49, 51, 52 -> Color.RED
5, 23, 46, 48 -> Color.YELLOW
6, 13, 34, 35, 36, 54, 59, 60, 73, 77, 78 -> Color.GRAY
7, 24, 26, 27, 28, 62, 64, 65, 66, 67, 68, 69, 74, 75 -> Color.BLACK
12, 29, 33, 39, 41, 58, 50 -> Color.GREEN
15, 16, 17, 20, 21, 31, 40, 55, 57, 63 -> Color.DKGRAY
70, 76 -> Color.LTGRAY
else -> Color.DKGRAY
}
return paint
}
}//Result 클래스
import android.graphics.RectF
data class Result(val classIndex: Int, val score: Float, val rectF: RectF)
//activity_main.xml 파일, com.example.yolov8.RectView <- 이부분은 자기 파일명에 맞게 바꿔야 한다.
<?xml version="1.0" encoding="utf-8"?>
<androidx.constraintlayout.widget.ConstraintLayout xmlns:android="http://schemas.android.com/apk/res/android"
    xmlns:app="http://schemas.android.com/apk/res-auto"
    xmlns:tools="http://schemas.android.com/tools"
    android:layout_width="match_parent"
    android:layout_height="match_parent"
    tools:context=".MainActivity">

    <androidx.camera.view.PreviewView
        android:id="@+id/previewView"
        android:layout_width="match_parent"
        android:layout_height="match_parent"
        app:layout_constraintBottom_toBottomOf="parent"
        app:layout_constraintEnd_toEndOf="parent"
        app:layout_constraintStart_toStartOf="parent"
        app:layout_constraintTop_toTopOf="parent" />

    <com.example.yolov8.RectView
        android:id="@+id/rectView"
        android:layout_width="match_parent"
        android:layout_height="match_parent"
        app:layout_constraintBottom_toTopOf="parent"
        app:layout_constraintEnd_toStartOf="parent"
        app:layout_constraintStart_toStartOf="parent"
        app:layout_constraintTop_toTopOf="parent" />

</androidx.constraintlayout.widget.ConstraintLayout>
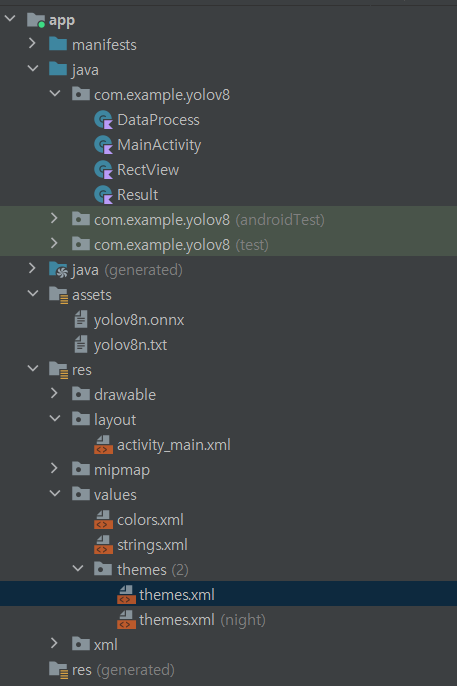
아래는 파일명 사진이다.
아래는 깃허브 주소다.
https://github.com/Yurve/YOLOv8_Android_coco
지금까지 글을 정리하자면 아래와 같다.
1편 : 카메라에서 사진을 받아오고 화면에 보여주는 코드
2편 : 가로모드, 액션바 제거, 사진의 RGB값을 버퍼에 담는 등 추론에 필요한 데이터 전처리 코드
3편 : YOLOv8n.pt -> YOLOv8.onnx 변환
4편 : 추론 코드
5편 : 화면에 표출 코드
이 글은 사전 학습된 v8.pt 파일을 썼지만 직접 학습을 시키고 해당 모델을 onnx로 변환하고 사용해도 무방하다.

18개의 댓글

안녕하세요. 정말 좋은 글 잘 읽었습니다.
혹시 tensorflow-lite나 pytorch mobile이 아니고, onnxruntime을 활용하신 이유가 있을까요?
제가 안드로이드에서 ai inference를 해본 경험이 없어서,, 단순히 궁금해서 여쭈어봅니다!
- real-time inference는 잘 되나요?
좋은 글 감사합니다.! 구조를 이해하는데 정말 큰 도움이 되었습니다.