👨💻 Invoke
-
Invoke(string methodName, float time): 지정된 시간(time) 후에 지정된 메서드(methodName)를 실행. -
methodName: 실행할 메서드의 이름을 문자열로 지정한다. -
time: 메서드를 실행할 시간을 초 단위로 지정한다.
// Invoke 예시
using UnityEngine;

public class ExampleScript : MonoBehaviour
{
    private void Start()
    {
        Invoke("DelayedMethod", 2.0f);
    }

    private void DelayedMethod()
    {
        Debug.Log("This method is called after 2 seconds.");
    }
}👨💻 Invoke Repeating
-
InvokeRepeating(string methodName, float time, float repeatRate): 지정된 시간(time) 후에 지정된 메서드(methodName)를 주기적으로 반복해서 실행합니다. -
methodName: 실행할 메서드의 이름을 문자열로 지정합니다. -
time: 메서드를 처음 실행할 때까지의 시간을 초 단위로 지정합니다 -
.
repeatRate: 메서드를 반복해서 실행할 주기를 초 단위로 지정합니다.
//  InvokeReapting() 예시
using UnityEngine;

public class ExampleScript : MonoBehaviour
{
    private void Start()
    {
        InvokeRepeating("RepeatingMethod", 2.0f, 3.0f);
    }

    private void RepeatingMethod()
    {
        Debug.Log("This method is called every 3 seconds after 2 seconds delay.");
    }
}
👨💻 TryGetComponent
TryGetComponent는 Unity에서 사용하는 메서드로, 게임 오브젝트의 컴포넌트를 가져오는 기능을 제공한다. 이 메서드를 사용하면 특정 컴포넌트가 게임 오브젝트에 연결되어 있는지 확인하고, 연결되어 있다면 해당 컴포넌트를 가져올 수 있다.
TryGetComponent 메서드의 형식 :
public bool TryGetComponent<T>(out T component) where T : Component;
- T : 가져오려는 컴포넌트의 타입. MonoBehaviour를 상속한 컴포넌트는 모두 사용 가능하다.
- component : 컴포넌트를 가져올 때 사용되는 out 매개변수.
// TryGetComponent의 예시
using UnityEngine;

public class ExampleScript : MonoBehaviour
{
    private void Start()
    {
        // 게임 오브젝트에 Rigidbody 컴포넌트가 있는지 확인하고 가져옵니다.
        Rigidbody rb;
        if (TryGetComponent<Rigidbody>(out rb))
        {
            // Rigidbody 컴포넌트가 있다면 해당 컴포넌트로 원하는 동작을 수행합니다.
            rb.AddForce(Vector3.up * 100f);
        }
        else
        {
            // Rigidbody 컴포넌트가 없다면 다른 처리를 수행합니다.
            Debug.Log("Rigidbody component not found.");
        }
    }
}
🔥 CampFire 만들기
빈 오브젝트를 만들고 CampFire로 이름을 변경해준다. 그 후, 준비된 CampFire의 prefab을 그 밑에 추가해준다.
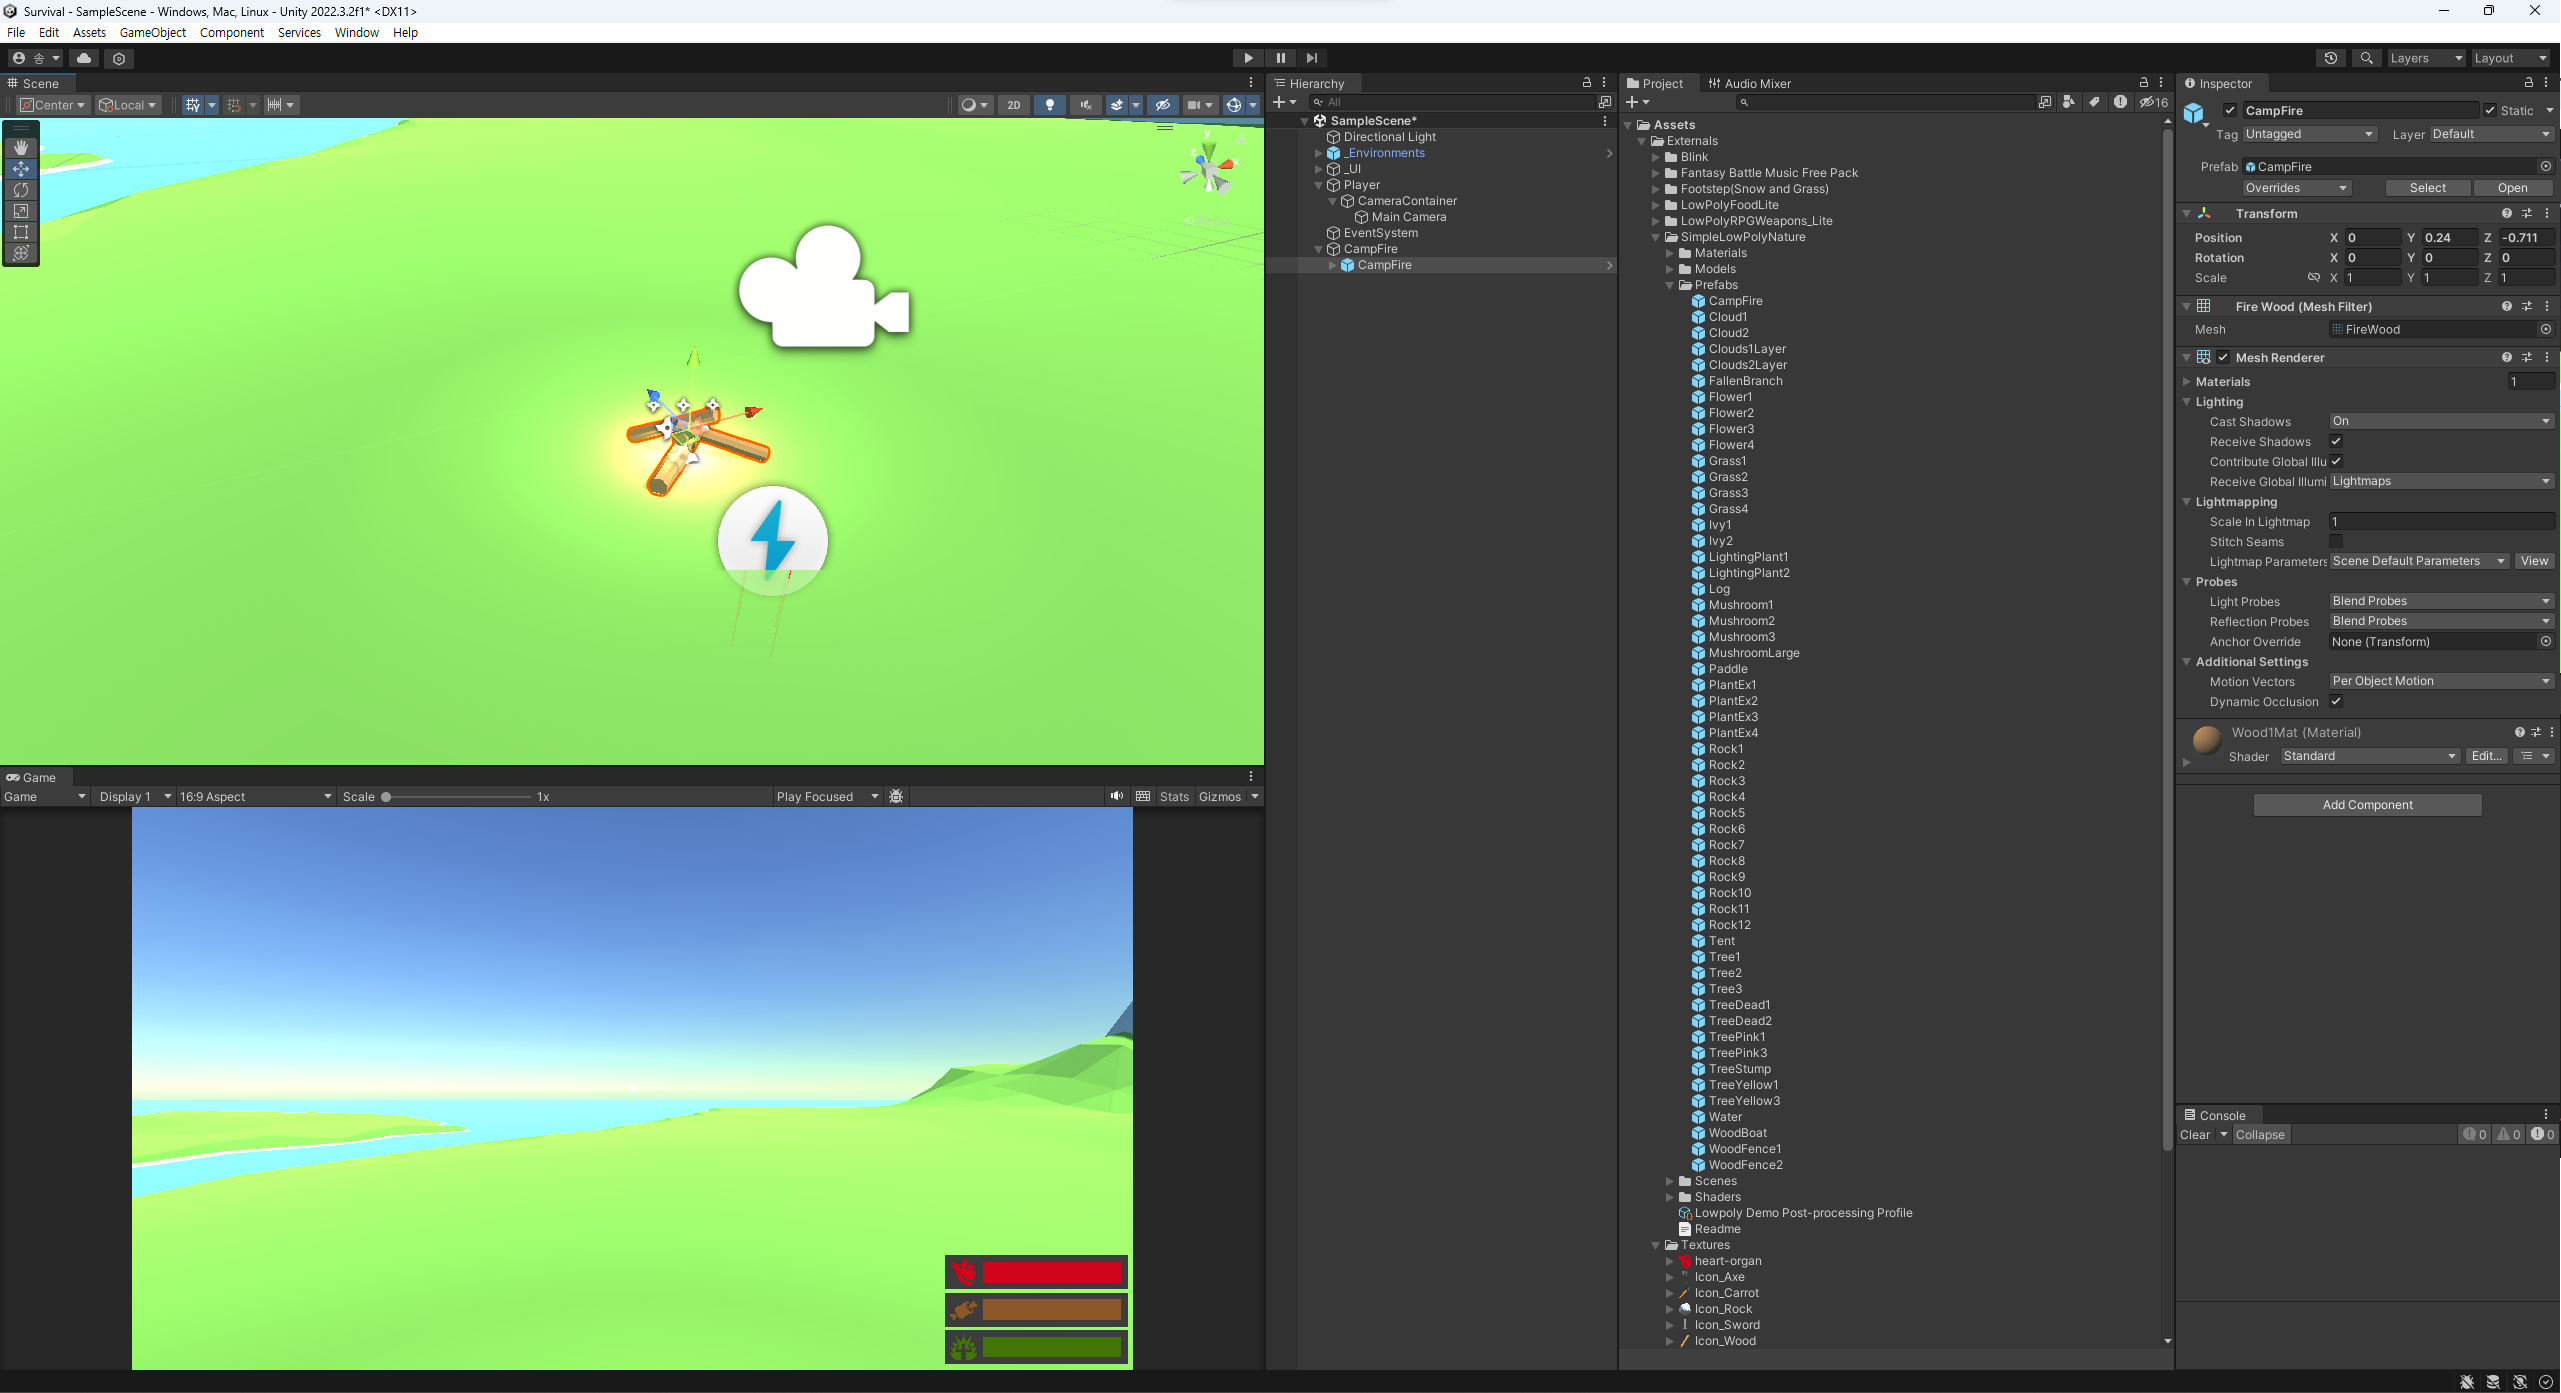
생성된 prefab에서 Contribute Global Illumination을 꺼준다.
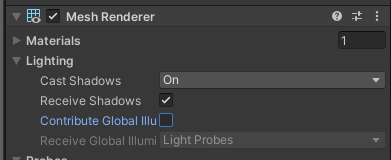
Contribute Global Illumination
해당 옵션이 켜져있을 경우, 해당 오브젝트가 주변의 다른 Lightmap이 적용되어 있는 오브젝트들에 영향을 끼치게 된다. 이 옵션을 키게 되면 밑의 Receive Global Illumination이 활성화되는데, 여기서 해당 오브젝트를 LightMap으로 설정하거나 Light Probes로 설정할 수 있게 된다. Receive가 켜져 있을 경우, 해당 오브젝트는 주변의 다른 오브젝트들에 의해 외관이 변경되도록 설정할 수 있다.
확인해보기
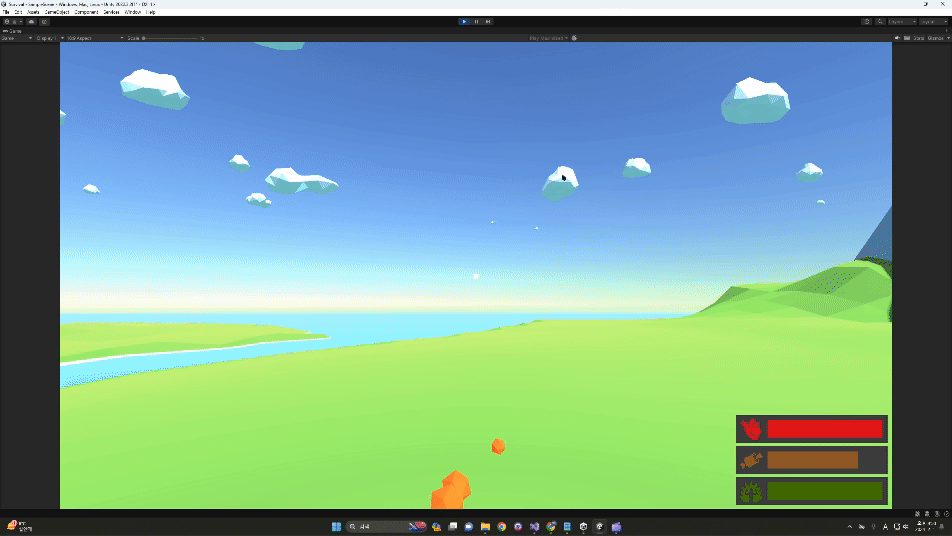
이제 불 위에 있으면 데미지를 받도록 설정해보자!
🤕 데미지 처리하기
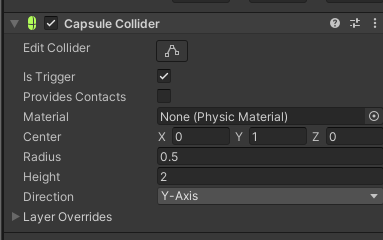
Capsule Collider 추가하기
Capsule Collider를 추가하여 아래와 같이 값을 변경해주자.
Is Trigger를 켜서 불과 충돌하지 않고 지나가지도록 변경하기!
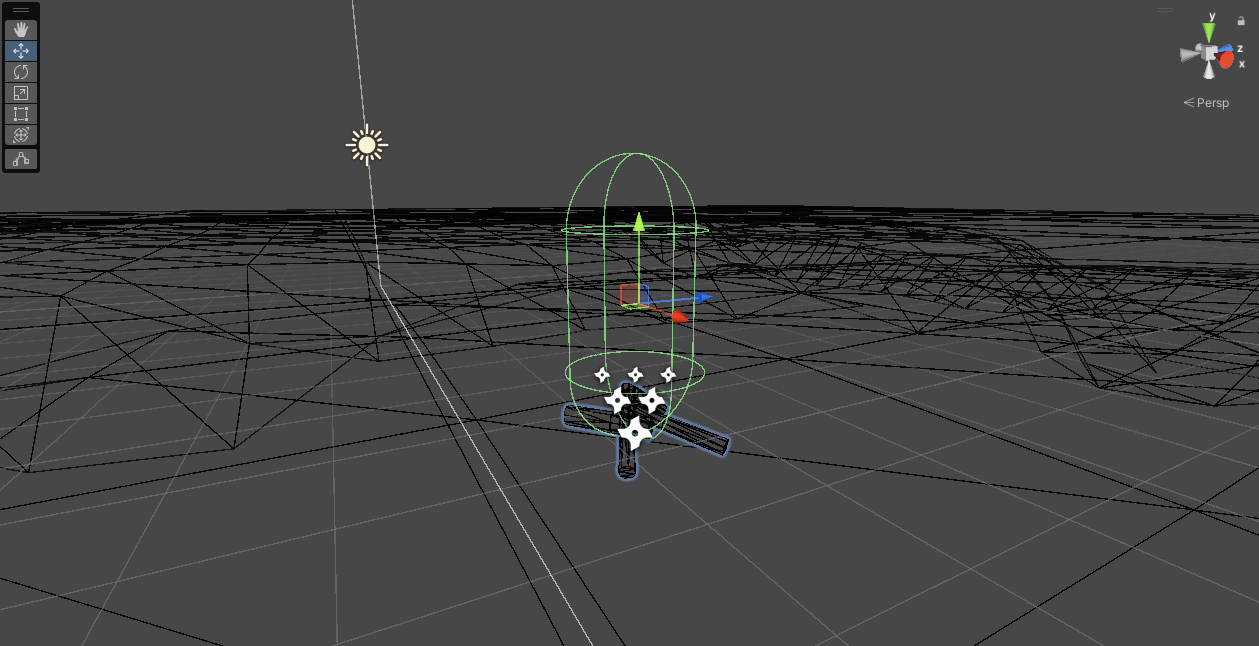
Wireframe으로 변경하여 Collider가 잘 적용된 것을 확인해보자!
CampFire.cs
CampFire.cs를 추가하여 CampFire에 추가해주자.
public class CampFire : MonoBehaviour
{
    public int damage;
    public float damageRate;

    private List<IDamagable> thingsToDamage = new List<IDamagable>();

    private void Start()
    {
        // DealDamage를 바로 실행해서 damageRate 초마다 반복 실행한다.
        InvokeRepeating("DealDamage", 0, damageRate);
    }

    void DealDamage()
    {
        // DealDamage 동작 시 thingsToDamage 리스트에 있는 모든 객체에게 데미지를 준다.
        for (int i = 0; i < thingsToDamage.Count; i++)
        {
            thingsToDamage[i].TakePhysicalDamage(damage);
        }
    }

    private void OnTriggerEnter(Collider other)
    {
        // TryGetComponent를 통해 부딪힌 GameObject에서 IDamageable을 찾아온다면 true를 반환하고 out으로 damagable로 컴포넌트를 넘겨준다.
        // 만약 null일 경우 false를 반환한다.
        if (other.gameObject.TryGetComponent(out IDamagable damagable))
        {
            thingsToDamage.Add(damagable);
        }
    }

    private void OnTriggerExit(Collider other)
    {
        // TryGetComponent를 통해 부딪힌 GameObject에서 IDamageable을 찾아온다면 true를 반환하고 out으로 damagable로 컴포넌트를 넘겨준다.
        // 만약 null일 경우 false를 반환한다.
        if (other.gameObject.TryGetComponent(out IDamagable damagable))
        {
            thingsToDamage.Remove(damagable);
        }
    }
}
코드 내용 기록하기
CampFire에 Collider를 지닌 어떤 GameObject가 충돌을 하여 OnTriggerEnter가 동작하게 되면, 충돌한 GameObject의 컴포넌트 중 IDamagable을 상속받는 컴포넌트가 있는지 확인 후, 있으면 가져와서 thingsToDamage 리스트에 추가한다. 이후, 부딪힌 GameObject가 thingsToDamage 리스트에 포함되어 있는 동안은 데미지를 가하다가, OnTriggerExit을 통해 CampFire에서 벗어나게 되면 리스트에서 제거가 되는 방식이다.
🤕 DamageIndicator 수정하기
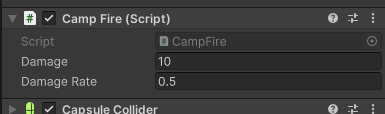
우선 Unity로 돌아와서 CampFire에서 값들을 변경해주자.
이후, Main Camera에서 Clipping Planes의 Near 값을 0.01로 변경해준다.
Clipping Planes는 카메라가 볼 수 있는 거리를 의미한다.

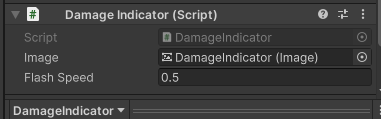
DamageIndicator.cs를 만들어서 작성해보자.

using UnityEngine;
using UnityEngine.UI;

public class DamageIndicator : MonoBehaviour
{
    public Image image;
    public float flashSpeed;

    private Coroutine coroutine;

    public void Flash()
    {
        // coroutine != null : 코루틴을 이미 동작한 적이 있다면
        if(coroutine != null)
        {
            StopCoroutine(coroutine);
        }

        image.enabled = true;
        image.color = Color.red;
        coroutine = StartCoroutine(FadeAway());
    }

    private IEnumerator FadeAway()
    {
        // DamageIndicator 이미지의 알파값을 시간이 지남에 따라 0으로 변경, enable = false로 변경하기.

        float startAlpha = 0.3f;
        float a = startAlpha;

        // 이미지가 투명해지기 전까지
        while(a > 0.0f)
        {
            // 이미지의 알파값을 계속해서 줄인다.
            a -= (startAlpha / flashSpeed) * Time.deltaTime;
            image.color = new Color(1, 0, 0, a);     // image.color = new Color(1, 0, 0, a); : 색은 빨간색이나 알파값이 점점 감소한다.
            yield return null;
        }

        image.enabled = false;
    }
}
이후 DamageIndicator에게 스크립트를 추가해준다.
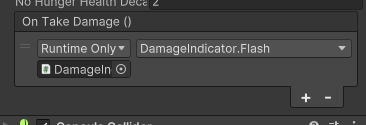
그 다음에 Player의 Player Conditions에서 우리가 만들어 놓은 OnTakeDamage 이벤트에 Flash()를 추가해준다.
확인해보기

체력이 닳으면서 화면 또한 점멸하는 것을 확인할 수 있다. 또한, 잘 보이지는 않지만 체력이 0이 되면 좌측 하단에 Player Die! 로그가 뜨는 것을 확인할 수 있다.