Email 회원 가입, 로그인 기능 구현
구현할 앱
프로젝트 구조

UI
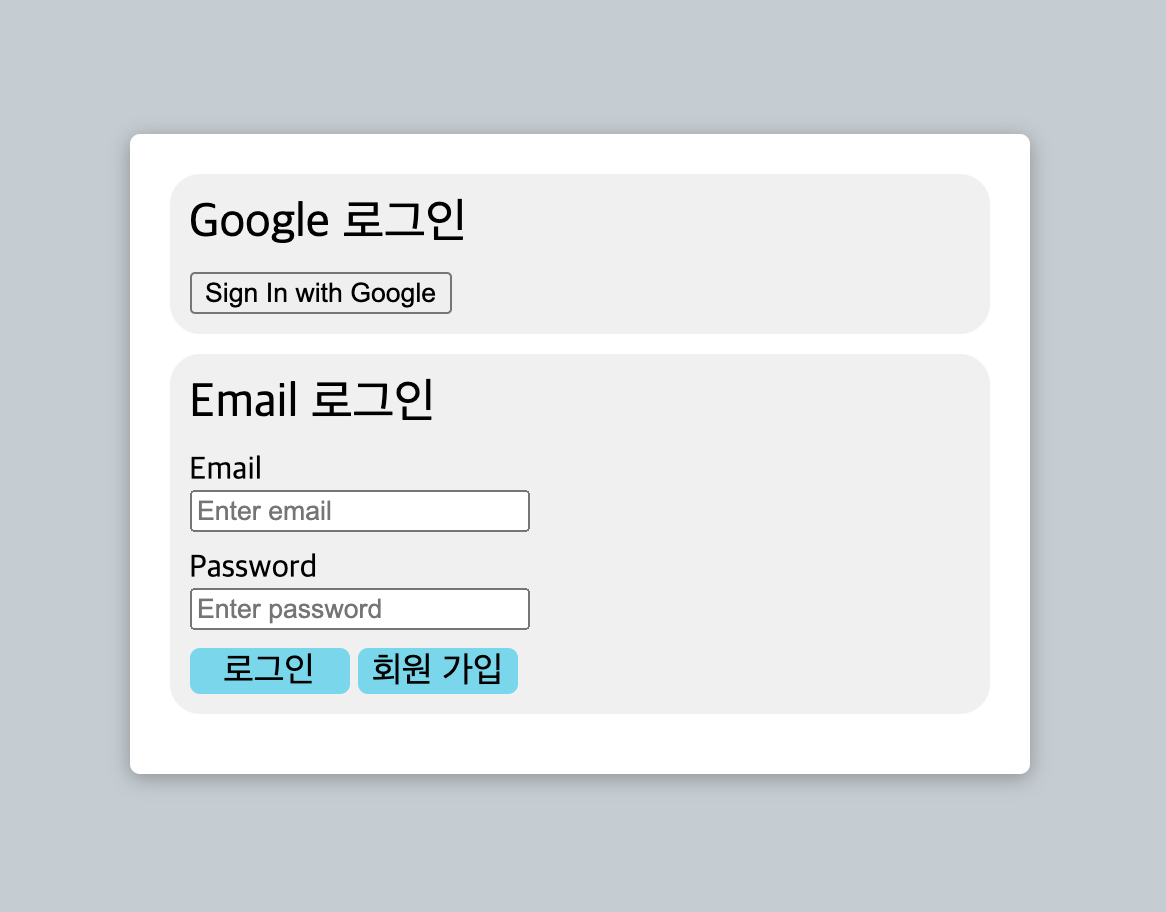
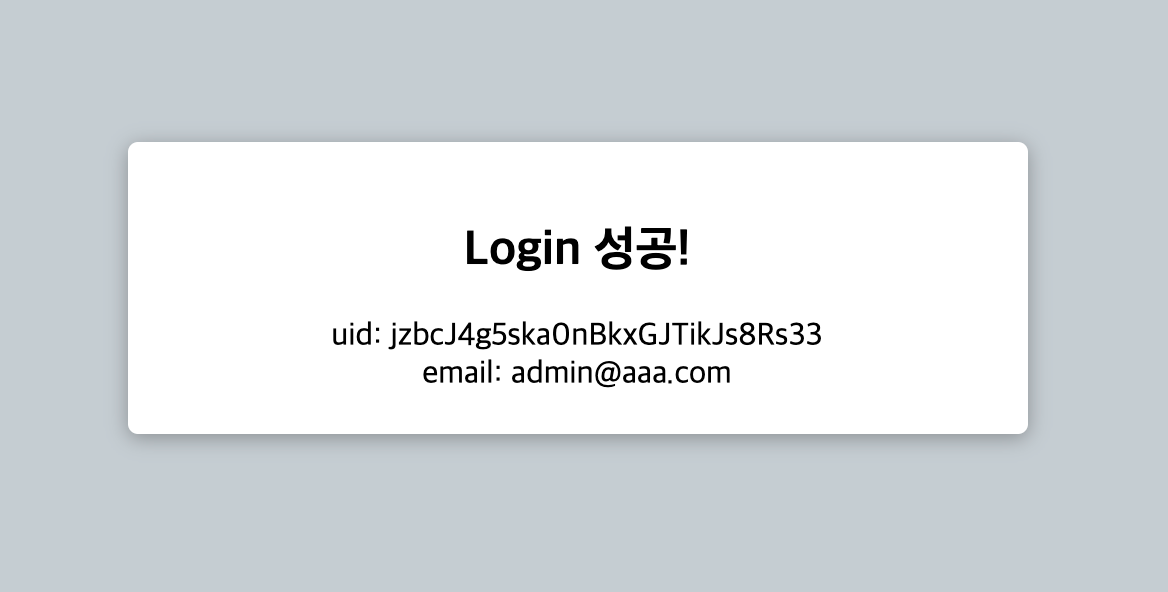
간단한 로그인 UI가 제공되며 로그인 성공시 로그인한 이메일과 uid를 보여줍니다.

이메일과 패스워드를 작성한 후 각각의 버튼을 누르면 로그인과 회원가입을 합니다.

로그인에 성공하면 고유한 uid와 로그인한 email을 보여줍니다.
Email 로그인, 가입 구현
직접 email과 password를 입력해서 회원가입과 로그인하는 방법을 알아보겠습니다.
로그인 기능을 위한 라이브러리를 import 해줍니다.
//firebase.js
 import { initializeApp } from "https://www.gstatic.com/firebasejs/9.2.0/firebase-app.js";
import {
  getAuth,// authentication 설정
  signInWithPopup, //google 로그인을 팝업창에 띄우기 위해
  GoogleAuthProvider, //google login 기능
  signInWithEmailAndPassword,// email 로그인
  createUserWithEmailAndPassword, //email 회원가입
} from 'https://www.gstatic.com/firebasejs/9.2.0/firebase-auth.js';

// const firebaseConfig
//...

// Initialize Firebase
const app = initializeApp(firebaseConfig);

// auth 설정 필수!!
const auth = getAuth();

//Email 로그인
export const signupEmail = (email, password) => {
  return createUserWithEmailAndPassword(auth, email, password);
};

//Email 회원가입
export const loginEmail = (email, password) => {
  return signInWithEmailAndPassword(auth, email, password);
};
이렇게 작성하면 끝입니다. 이후 메인 로직을 담당하는 곳에서 임포트해서 사용하면 됩니다.
//script.js
import { loginEmail, signupEmail } from './firebase.js';
const buttons = document.getElementById('buttons');

//Email 로그인, 회원가입 구현
buttons.addEventListener('click', (e) => {
  e.preventDefault();
  if (e.target.id == 'signin') {
    loginEmail(email.value, pw.value).then((result) => {
      console.log(result);
      const user = result.user;
      loginSuccess(user.email, user.uid);
    });
  } else if (e.target.id == 'signup') {
    signupEmail(email.value, password.value) //
      .then((result) => {
        const user = result.user;
        loginSuccess(user.email, user.uid);
      })
      .catch((error) => console.log(error));
  }
});
//로그인 성공시 UI 변경
const loginSuccess = (email, uid) => {
  const login_area = document.getElementById('login-area');
  login_area.innerHTML = `<h2>Login 성공!</h2><div>uid: ${uid}</div><div>email: ${email}</div>`;
};
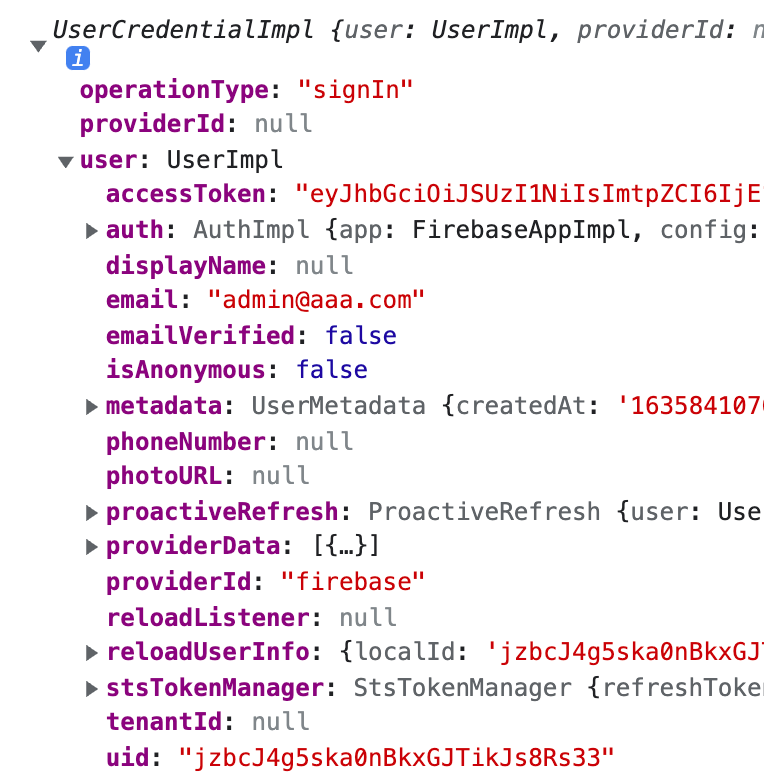
firebase 로그인 함수가 리턴하는 프로미스 객체는 다음과 같은 결과를 갖고있습니다.

이 중 user안의 email과 uid를 활용해보았습니다.
회원가입을 할 땐 createUserWithEmailAndPassword 함수를 사용하는데 계정을 생성하고 바로 자동으로 로그인으로 넘어갑니다. 회원가입하고 바로 로그인됩니다.
Google 로그인 구현
구글 로그인 코드도 추가합니다.
//firebase.js
 import { initializeApp } from "https://www.gstatic.com/firebasejs/9.2.0/firebase-app.js";
import {
  getAuth,// authentication 설정
  signInWithPopup, //google 로그인을 팝업창에 띄우기 위해
  GoogleAuthProvider, //google login 기능
  signInWithEmailAndPassword,// email 로그인
  createUserWithEmailAndPassword, //email 회원가입
} from 'https://www.gstatic.com/firebasejs/9.2.0/firebase-auth.js';

// const firebaseConfig
//...

// Initialize Firebase
const app = initializeApp(firebaseConfig);

// auth 설정 필수!!
const auth = getAuth();

//...

//Google 로그인
const provider = new GoogleAuthProvider();
export const loginGoogle = () => {
  return signInWithPopup(auth, provider);
};
메인 코드에서도 동일하게 import해와서 설정해주면 끝입니다.
//script.js
import { loginEmail, signupEmail,loginGoogle } from './firebase.js';
const buttons = document.getElementById('buttons');

//Email 로그인, 회원가입 구현
//...

//Google 로그인
google.addEventListener('click', (e) => {
  loginGoogle().then((result) => {
    console.log(result);
    const user = result.user;
    loginSuccess(user.email, user.uid);
  });
});

//로그인 성공시 UI 변경
const loginSuccess = (email, uid) => {
  const login_area = document.getElementById('login-area');
  login_area.innerHTML = `<h2>Login 성공!</h2><div>uid: ${uid}</div><div>email: ${email}</div>`;
};
등록된 사용자 확인

firebase 프로젝트에서 다시 Authentication을 확인해보면 등록된 유저들이 보입니다.
간단하게 firebase 로그인 기능을 구현해 보았습니다. 부족하거나 궁금하신분은 댓글주세요.
