
소개
공식문서에 나와있는 내용을 참고하면서 하겠습니다.
구현
1. 의존성 주입
프로젝트를 생성하면 기본적인 의존성은 다 주입된 상태여서 따로 해줄 작업이 없지만 만약 의존성주입이 안되있다면 공식사이트의 안내에 따라 주입해주면 됩니다.
- 프로젝트 레벨의 build.gradle
  allprojects {
    repositories {
      google()
      jcenter()
    }
}- 모듈 레벨의 build.gradle
 dependencies {
    // ...
    implementation 'com.google.android.material:material:<version>'
    // ...
  }
2. 메뉴에 들어갈 item정의
우선 리소스 타입이 Menu인 레이아웃을 생성합니다.
1. new -> androidResourceFile
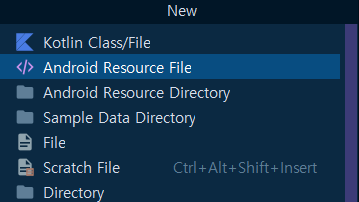
2. ResourceType = Menu
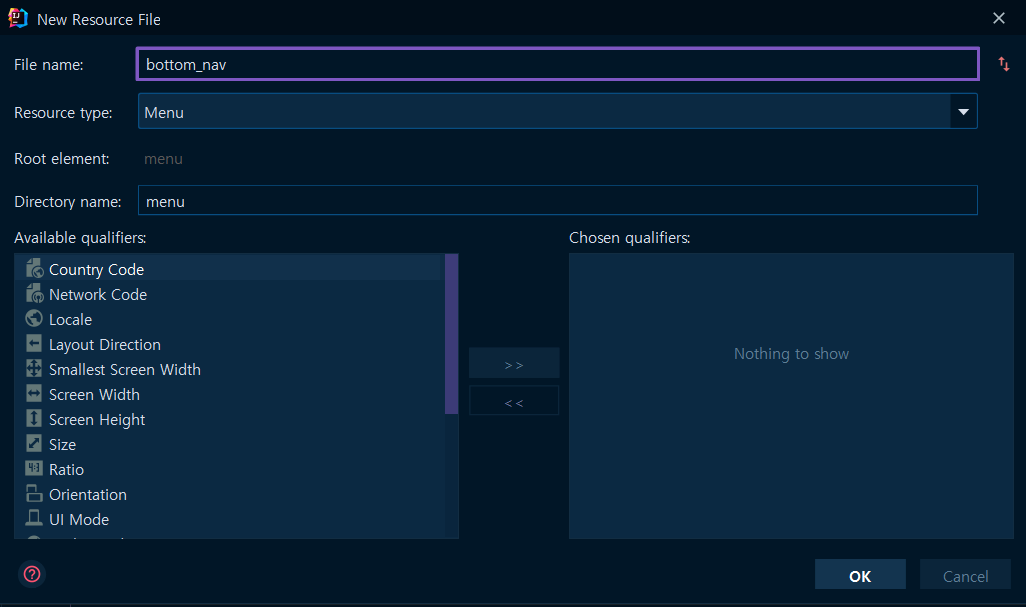
생성후 메뉴 갯수에 따라 item을 추가합니다..
Material Icons
<?xml version="1.0" encoding="utf-8"?>
<menu xmlns:android="http://schemas.android.com/apk/res/android">
    <item
        android:id="@+id/reserve"
        android:title="예약"
        android:icon="@drawable/baseline_book_24"
    />
    <item
            android:id="@+id/search"
            android:title="조회"
            android:icon="@drawable/baseline_search_24"
            />
    <item
            android:id="@+id/setting"
            android:title="설정"
            android:icon="@drawable/baseline_settings_24"
            />
</menu>
3. BottomNavigationView가 들어갈 Layout정의
<?xml version="1.0" encoding="utf-8"?>
<androidx.constraintlayout.widget.ConstraintLayout
        xmlns:android="http://schemas.android.com/apk/res/android"
        xmlns:tools="http://schemas.android.com/tools"
        xmlns:app="http://schemas.android.com/apk/res-auto"
        android:layout_width="match_parent"
        android:layout_height="match_parent"
        tools:context=".MainActivity">

    <FrameLayout
            android:id="@+id/bottom_nav_frame"
            android:layout_width="match_parent"
            android:layout_height="match_parent"
            app:layout_constraintStart_toStartOf="parent"
            app:layout_constraintEnd_toEndOf="parent"
            app:layout_constraintTop_toTopOf="parent"
            app:layout_constraintBottom_toTopOf="parent">

        <com.google.android.material.bottomnavigation.BottomNavigationView
                android:id="@+id/bottomNavigationView"
                android:layout_gravity="bottom"
                android:layout_width="match_parent"
                android:layout_height="wrap_content"
                app:layout_constraintStart_toStartOf="parent"
                app:layout_constraintEnd_toEndOf="parent"
                app:menu="@menu/bottom_navigation_menu"
                app:layout_constraintBottom_toBottomOf="parent"
                />
    </FrameLayout>
Fragment가 위치할 FrameLayout을 정의하고 BottomNavigationView를 정의합니다.
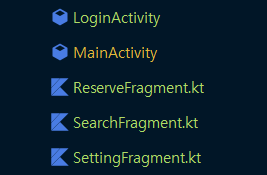
4. Fragment추가
네비 메뉴 이동을 보기위해서 Fragment 3개를 만들어줍니다.
화면 전환을 위해 replaceFragment()함수를 정의해줍니다.
    private fun replaceFragment(fragment: Fragment){
        val fragmentTransaction = supportFragmentManager.beginTransaction()
        fragmentTransaction.replace(R.id.bottom_nav_frame, fragment)
        fragmentTransaction.commit()
    }
그리고 BottomNavigationView가 정의되있는 Activity에 이벤트를 정의해줍니다.
        replaceFragment(ReserveFragment())
        view.bottomNavigationView.setOnItemSelectedListener { item ->
            when(item.itemId){
                R.id.reserve -> {
                    replaceFragment(ReserveFragment())
                    true
                }
                R.id.search -> {
                    replaceFragment(SearchFragment())
                    true
                }
                R.id.setting -> {
                    replaceFragment(SettingFragment())
                    true
                }
                else -> false
            }
        }
전체코드
  package com.example.user_client

  import android.content.Intent
  import androidx.appcompat.app.AppCompatActivity
  import android.os.Bundle
  import androidx.fragment.app.Fragment
  import com.example.user_client.databinding.ActivityMainBinding

  class MainActivity : AppCompatActivity() {
      private var binding:ActivityMainBinding? = null
      private val view get() = binding!!

      override fun onCreate(savedInstanceState: Bundle?) {
          super.onCreate(savedInstanceState)
          binding = ActivityMainBinding.inflate(layoutInflater)
          setContentView(view.root)

          replaceFragment(ReserveFragment())
          view.bottomNavigationView.setOnItemSelectedListener { item ->
              when(item.itemId){
                  R.id.reserve -> {
                      replaceFragment(ReserveFragment())
                      true
                  }
                  R.id.search -> {
                      replaceFragment(SearchFragment())
                      true
                  }
                  R.id.setting -> {
                      replaceFragment(SettingFragment())
                      true
                  }
                  else -> false
              }
          }
      }

      private fun replaceFragment(fragment: Fragment){
          val fragmentTransaction = supportFragmentManager.beginTransaction()
          fragmentTransaction.replace(R.id.bottom_nav_frame, fragment)
          fragmentTransaction.commit()
      }
  }
결과


레모네이드 커피