
1. context API
상태를 전역적으로 관리하기 위해 사용하는 기술으로, props drilling을 완화하기 위한 목적으로서는 Redux, MobX를 대체할 수 있다.
Redux와 같은 전역 상태 관리 라이브러리를 사용하는 것은 설치 시 용량이 증가하기 때문에 위에서 언급한 것 처럼 단지 props drilling, props depth를 줄이기 위한 목적으로 전역 상태 관리가 필요하다면 가볍게 context API를 많이 사용한다고 한다.
context API에 대한 자세한 내용은 저번에 포스팅 했기 때문에 여기서 다루지는 않겠다. context API에 대한 포스팅은 아래 링크를 들어가면 된다.
https://velog.io/@apro_xo/React.js-context-APIFeat.-useContext
2. context API + useReducer
context API가 많이 사용된다고 하였는데, 어떤 방식으로 많이 사용되는가에 대해서 알아보니, context API와 useReducer를 합친 형태로 많이 사용한다고 한다.
useReducer에 대한 자세한 내용은 아래의 링크를 들어가면 된다.
3. context API + useReducer 코드
3-1. 디렉토리 구조
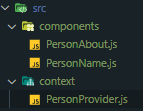
context를 사용할 일반 컴포넌트 파일은 components 디렉토리에,
context를 관리할 파일은 context 디렉토리에 넣었다.
3-2. 코드
- src/context/PersonProvider.js
import React, { createContext, useReducer } from 'react';

const SET_NAME = 'SET_NAME';
const SET_AGE = 'SET_AGE';


export const personContext = createContext();

const initData = {
    name:'홍길동',
    age:'미상'
}

const reducer = (state, action) => {
    switch(action.type)
    {
        case SET_NAME:
            return {
                ...state,
                name : action.data
            }


        case SET_AGE:
            return{
                ...state,
                age: action.data
            }
    }
}


const PersonProvider = ({ children }) => {

    const [data, contextDispatch] = useReducer(reducer, initData);

    const value = {
        state: { data },
        actions: {contextDispatch}
    }


    return(
        <personContext.Provider value = {value}>{ children }
      </personContext.Provider>
    )
}

export default PersonProvider;
createContext()를 사용하여 context를 만들어 export로 내보내준다.
기존의 context API를 사용할 때는 useReducer hook을 사용하지 않았기 때문에, 리듀서 함수를 만들 필요가 없었고 useState를 이용하여 변수와 setting 함수를 각각 state, actions에 넘겨주었는데, 위의 코드는 useReducer를 사용하기 때문에 살짝 다른 것을 알 수 있다.
- src/app.js
import React from 'react';
import PersonProvider from './context/PersonProvider';
import PersonAbout from './components/PersonAbout';
import PersonName from './components/PersonName';

function App() {
  return (
    <div className="App">
      <PersonProvider>
        <PersonName/>
        <PersonAbout/>
      </PersonProvider>
    </div>
  );
}

export default App;
app.js는 context API만 사용했을 때와 동일하다.
provider로 context를 사용할 컴포넌트를 감싸 children으로 만들어 버리면 된다.
- src/PersonName.jsx
import React, { useContext } from 'react';
import { personContext } from '../context/PersonProvider';


const PersonName = () => {
    const context = useContext(personContext);

    const change = () => {
        context.actions
          .contextDispatch({type: 'SET_NAME', data:'홍길동 멍청이'});
    }


    return(
        <div className='PersonName'>
            {context.state.data.name}
            <button onClick={change}>change</button>
        </div>

    )
}


export default PersonName;
useContext를 이용하여 context를 가져오는 것 까지는 동일하나 actions에서 dispatch를 사용한다는 것이 일반적인 context API를 사용하는 방식과 조금 다르다는 것을 알 수 있다.
- src/PersonAbout.jsx
import React, {useContext} from 'react';
import { personContext } from '../context/PersonProvider';


const PersonAbout = () => {
    const context = useContext(personContext);

    const change = () => {
        context.actions.contextDispatch({type:'SET_AGE', data:'50'});
    }

    return(
        <div className='PersonAbout'>
            나이 : {context.state.data.age}
            <button onClick={change}>change</button>
        </div>
    )
}

export default PersonAbout;
PersonName.jsx와 같은 방식으로 context API를 사용하고 있다.
4. 결론
위의 코드에서는 단순히 state값을 setting하는 함수로 이루어져 있어 로직이 간단하지만, 로직이 복잡한 함수, 코드의 길이가 긴 함수는 useReducer를 사용하지 않으면 Provider 함수 내에 구현해야하기 때문에 매우 복잡할 것이다.
useReducer를 사용하면 함수의 로직을 바깥으로 뺄 수 있다는 장점이 있어 함수context API와 useReducer를 함께 사용함으로써 코드가 훨씬 더 간결하다는 것을 알 수 있었다.