오늘 공부한 것
- JWT로 로그인 구현
- Thymeleaf form과 controller 상호작용
JWT
- JWT란? 사용자를 인증&식별하기 위한 Json Web Token
- JWT 구조
AAAA.BBBB.CCCC HEADER.PAYLOAD.SIGNATURE- Header: 사용하는 key,토큰 유형,서명 암호화 알고리즘
- Payload: 사용할 정보 조각(Claim), key:value 형태
- 토큰 발급자, 토큰 제목, 토큰 발급 시간, 토큰 만료 시간, 권한 - SIGNATURE: 헤더+페이로드 & 서버가 갖고 있는 유일한 KEY값을 합쳐서 Header에서 정의한 알고리즘으로 암호화
JWT를 로그인에 적용
appilcation.yml
	jwt:
  		token:
secret: ${LOCAL_SECRET_KEY}-
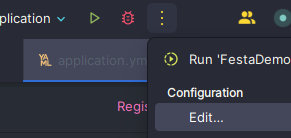
application의 edit기능을 이용하여 다음과 같이 환경변수를 등록합니다.
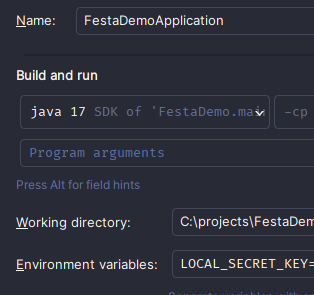
-
UserService클래스private final EncrypterConfig encrypterConfig; private final BCryptPasswordEncoder encoder; @Value("${jwt.token.secret}") private String secretKey; public String join(UserJoinRequest joinRequest){ User joinUser=userRepository.save(joinRequest.toEntity(encrypterConfig.encodePassword().encode(joinRequest.getPassword()))); } public String login(UserLoginRequest loginRequest){ if(!encoder.matches(loginRequest.getPassword(),findUser.get().getPassword()))//encoder사용해서 암호화된 키 비교 }- encoder이용해서 키 비교
Thymeleaf와 Controller ✅
우선 내가 사용하려던 기능을 정리해보겠다.
1. 사용자가 키워드를 입력하면
2. 해당 keyword를 담은 url이 열린다.
3. keyword와 연관된 내용이 출력된다.
Thymeleaf
 <form th:action="@{/festival/keyword}" method="post">
        <div>
            <label th:for="keyword">키워드 입력: </label>
            <label>
                <input type="text" th:id="keyword" th:name="keyword" placeholder="검색하고 싶은 키워드를 입력하세요">
            </label>
            <button type="submit">검색</button>
        </div>
    </form>

<h2 th:text="'form 에서 넘어온 값:' + ${word} + '입니다.'"></h2>
        <div th:if="${festaList!=null}">
            <h3 th:utext="${msg}"></h3>
            <ul>
                <li th:each="festa:${festaList.festas}">
                    <p th:text="${festa.title}"></p>
                    <p th:if="${festa.tel!=null}" th:text="${festa.tel}"></p>
                    <p th:if="${festa.addr1!=null}" th:text="${festa.addr1}"></p>
                    <div th:if="${festa.firstimage!=null}">
                        <img th:src="${festa.firstimage}" />
                    </div>
                    <!-- 필요한 다른 필드들 추가 -->
                </li>
            </ul>
        </div>
        <div th:if="${festaList == null || festaList.festas == null || festaList.festas.empty}">
            <p>검색 결과가 없습니다.</p>
        </div>
코드
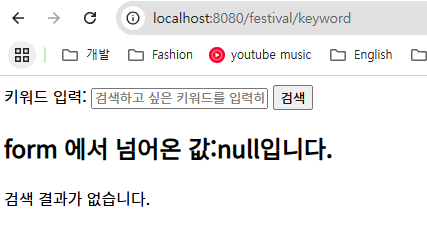
- 기본 화면
@GetMapping("/keyword")
public String keywordPage(){
    return "searchkeyword";
   }
    ```
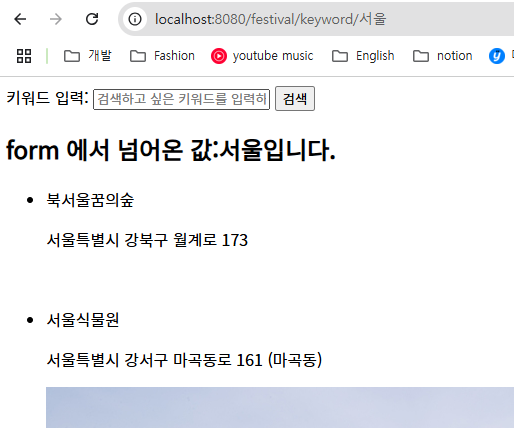
- 화면
- search 결과 화면
    @GetMapping("/keyword/{word}")
    public String resultkeyword(@PathVariable(value="word", required=false) String word,Model model) throws UnsupportedEncodingException, JsonProcessingException {

            if (word!=null) {
                FestaListResponse allbykeyword = festaService.findByKeyword(word);
                ObjectMapper objectMapper = new ObjectMapper();
                String json = objectMapper.writeValueAsString(allbykeyword);
                WrapperResponse wrapperResponse = objectMapper.readValue(json, WrapperResponse.class);
                model.addAttribute("festaList", wrapperResponse);
            }

            return "searchkeyword";
}- 결과
- keyword PostMapping!
    @PostMapping("/keyword")
    public String formkeywordSend(@RequestParam(value="keyword" , required=false) String keyword, RedirectAttributes redirectAttributes)
    {
        redirectAttributes.addAttribute("word",keyword);
        return "redirect:keyword/{word}";
}- 입력하고 검색버튼을 누르면
@GetMapping("/keyword/{word}")실행됩니다. redirectAttribute의 addAttribute를 이용해서 word를 바인딩해줍니다!

오늘은 검색기능과 jwt에 대해 구현해본 하루였다!
공부할수록 공부할 게 많아지는 듯 하다.
참고하는 자료가 오래된 게 아닌데도 더이상 지원하지 않는다고 .... is deprecated와 같은 문구를 보면 😮!!
하지만 그래도 구글에 검색해보면 고마운 분들이 해결방법을 알려준다.
내가 선호하는 해결방식은 구글 -> AI 이다.구글에서 해결안되면 AI로 넘어가기!
정석적인 방식으로 학습하는 게 더 기억에 남고 이해가 잘된다. 중요한 건 나중에 비슷한 문제에 직면할 때에 아이디어가 잘 떠오르는 것 같다.