전대위키 프로젝트를 베타테스트 하던 중, 피드백을 받게 됐다.
문서 하나 작성한 다음에 수정하고 다시 저장했는데 편집 기록이 반영되지 않아요
이 문제는 여러명이 동시에 하나의 문서를 수정하면 반영이 안되는 것임을 알게 되었다.
따라서 우리팀은 웹소켓을 적용해보기로 했다! (마침 해보고 싶었던 기능이라 바로 승낙했던 것 같다.)
실시간 채팅이 아닌데 왜 동시성 제어에 웹소켓을 적용할까?
A라는 사용자가 문서를 수정하려고 접근하면, 서버는 이 사용자의 상태를 저장한다.
B라는 또 다른 사용자는 수정에 접근자체가 불가능하다. 만약 접근불가 상태라면, 400에러를 띄운다.
이 과정에서 사용자의 상태가 실시간으로 공유된다는 점, 즉 사용자끼리의 충돌을 실시간으로 감지하여 동시성을 제어할 수 있기 때문에 웹소켓을 적용했다.
라이브러리는 stomp.js를 사용했다.
웹소켓 구현기
1. STOMP Client 생성
import * as StompJs from "@stomp/stompjs";

export const client = new StompJs.Client({
  brokerURL: "ws://{server 주소}/api/connect",
  debug: (str) => {
    console.log(str);
  },
  reconnectDelay: 5000,
  heartbeatIncoming: 4000,
  heartbeatOutgoing: 4000,
});
stomp 서버는 기존의 http가 아닌 ws://를 사용한다. (만약 https라면 wss://)
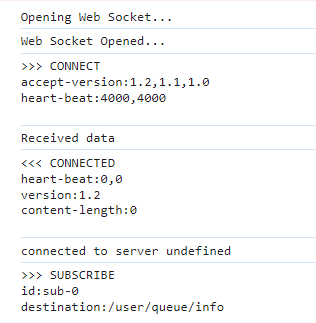
brokerURL을 설정해주고 debug를 통해 콘솔을 찍어주면, 아래 사진처럼 웹소켓 open, connect, subscribe, send 등의 로그를 확인할 수 있다.
connectHeaders 옵션을 추가하면, 로그인 정보를 통해 접근을 제어할 수 있다.
reconnectDelay는 5초마다 재연결을 한다.
heartbeatIncoming은 4초마다 클라이언트가 서버로부터 heartbeat 메시지를 수신한다.
heartbeatOutgoing은 4초마다 클라이언트가 서버로 heartbeat 메시지를 송신한다.
2. 편집 접근여부에 따라 client의 상태를 변경한다.
  const [stomp, setStomp] = useState(null);

  useEffect(() => {
    if (isEdit) {
      client.activate();
      setStomp(client);

      client.onConnect = () => {
        client.subscribe("/user/queue/info", () => {});
      };
    }

    return () => disconnect();
  }, [isEdit]);
이 프로젝트에선 isEdit 상태로 편집상태를 관리한다.
만약 편집에 접근하면, client를 activate 시키고, client를 stomp라는 상태에 저장한다.
그리고 client가 서버에 성공적으로 연결되면, subscribe api를 호출한다.
subscribe는 해당 문서를 구독하는 것이다. (필자는 사용자가 편집하려는 문서와 연결관계를 생성하는 것으로 이해했다.)
컴포넌트가 언마운트되면 클린업함수로 disconnect를 호출한다.
disconnect 함수는 아래와 같이 구현했다.
  const disconnect = () => {
    if (stomp?.connected) {
      stomp.deactivate();
    }
  };
상태로 저장한 stomp가 연결된 상태라면 비활성화시킨다.
3. 변경 후 서버로 전달하기 위해 publish 함수를 구현한다.
  const publish = (docsId) => {
    if (stomp?.connected) {
      stomp.publish({
        destination: "/app/info",
        body: JSON.stringify({ docsId, memberId }),
      });
    }
  };
publish 함수는 클라이언트가 서버로 메시지를 전송하기 위해 사용한다.
destination에는 publish의 api를, body에는 전송할 메시지를 문자열 형태로 작성한다.
4. 컴포넌트에서 사용해보자!
위의 코드들을 커스텀훅으로 구현했고, 이제 컴포넌트에서 사용해보자.
이 웹소켓이 적용되어야 할 컴포넌트는 두개이다.
 |  |
|---|
 |  |
|---|
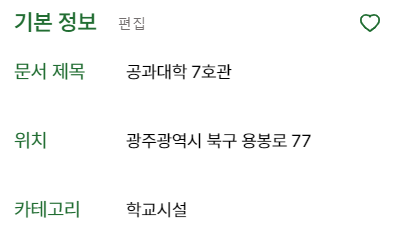
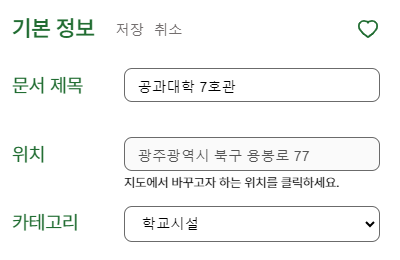
전대위키 프로젝트의 문서에는, 기본정보란과 내용란이 있고 각각 편집이 가능하다.
기본정보 컴포넌트 (Basic.jsx)
  const { publish } = useWebSocket(isEdit);

  const handleSaveClick = () => { // 저장버튼을 클릭했을 때 (편집을 빠져나올 때)
	// ...

    publish(docsId); // publish 함수를 호출한다.
    mutationBasicModify(getValues(), { // 기존의 post 요청을 보내는 함수(mutation)를 호출한다. (기본정보 편집 요청)
      onSuccess: () => {
		//...
      },
    });
  };
내용 컴포넌트 (Content.jsx)
  const { publish } = useWebSocket(isEditContent);

  const handleSaveClick = () => { // 저장버튼을 클릭했을 때 (편집을 빠져나올 때)
    setIsEditContent(false);

    publish(id); // publish 함수를 호출한다.
    mutationContentModify( // 기존의 post 요청을 보내는 함수(mutation)를 호출한다. (내용 편집 요청)
      { docs_id: id, docsContent: contentValue },
      {
        onSuccess: // ...
      }
    );
  };
전체 코드
stomp.js
import * as StompJs from "@stomp/stompjs";

export const client = new StompJs.Client({
  brokerURL: "ws://3.12.77.172:8080/api/connect",
  debug: (str) => {
    console.log(str);
  },
  reconnectDelay: 5000,
  heartbeatIncoming: 4000,
  heartbeatOutgoing: 4000,
});
useWebSocket.js
import { client } from "@/services/stomp";
import { useEffect, useState } from "react";
import { useSelector } from "react-redux";

export const useWebSocket = (isEdit) => {
  const [stomp, setStomp] = useState(null);
  const { memberId } = useSelector((state) => state.user);

  const disconnect = () => {
    if (stomp?.connected) {
      stomp.deactivate();
    }
  };

  const publish = (docsId) => {
    if (stomp?.connected) {
      stomp.publish({
        destination: "/app/info",
        body: JSON.stringify({ docsId, memberId }),
      });
    }
  };

  useEffect(() => {
    if (isEdit) {
      client.activate();
      setStomp(client);

      client.onConnect = () => {
        client.subscribe("/user/queue/info", () => {});
      };
    }

    return () => disconnect();
  }, [isEdit]);

  return { publish };
};
레퍼런스

왕 멋지당 넘 머싯서요!!!!!!❣️