해당 글의 내용은 제가 실제 프로젝트에 유니티 프로젝트를 적용 시킨 방법입니다.
해당 글의 내용이 무조건적인 정답은 아니니, 참고용으로 간단히 봐주시면 감사드리겠습니다!
패키지 설정
- 깃허브
https://github.com/juicycleff/flutter-unity-view-widget
- pub.dev
flutter_unity_widget | Flutter Package
Unity Hub 설치
NDK 설치
NDK 다운로드 | Android NDK | Android Developers
🚨 NDK 설치 후 발생할 수 있는 오류 사항
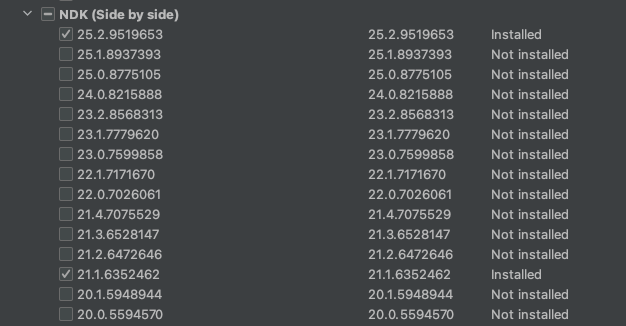
ndk had version [21.3.6528147] which disagrees with android.ndkversion [21.1.6352462]
-> 설치 되어 있는 NDK 버전과 Unity Project 내 NDK 버전이 알맞지 않아 발생한 버전 충돌 오류입니다.
해결방법
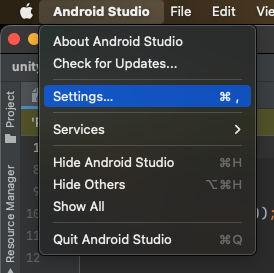
- Android Studio 열기
- Unity Project가 추가 되어 있는 Flutter Project 버전 열기
- Android Studio → Settings 클릭
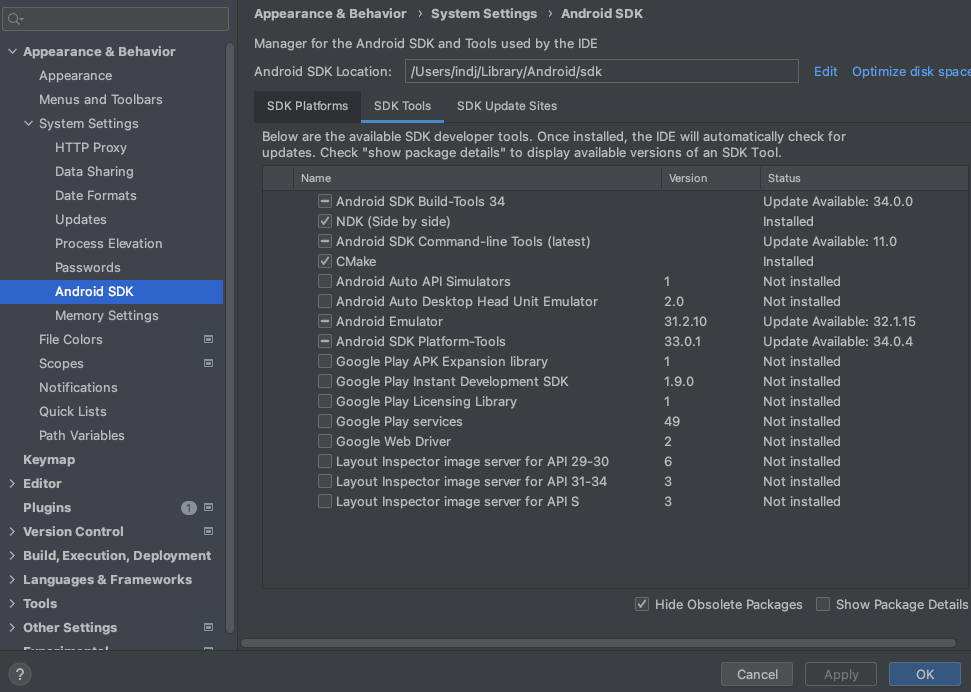
- Android SDK → SDK Tools → (오른쪽 하단) Show Package Details 체크
- NDK (Side by side) 열기 후, 권장하는 버전 설치 및 충돌된 버전 삭제
Unity Hub 설치
- Import 하려는 Unity 프로젝트와 알맞은 설치 파일이 있는지 확인

- 해당 설치 파일이 없다면 Android, iOS Build Support 설치 진행

Flutter 프로젝트 설정
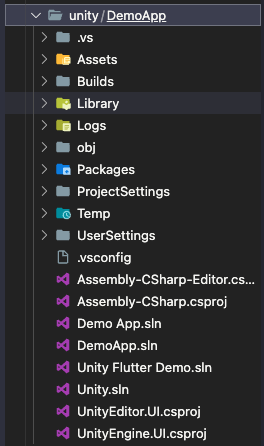
- Unity Widget를 추가하고자 하는 프로젝트 내 unity 폴더 생성
- 해당 폴더 안에 Unity Project 추가
-
Unity Hub → Projects → 오른쪽 상단 [Open] 버튼 클릭
-
Flutter 프로젝트 내에 추가된 Unity Project 열기
- 해당 화면이 뜬다면 성공적으로 Unity Project가 열림
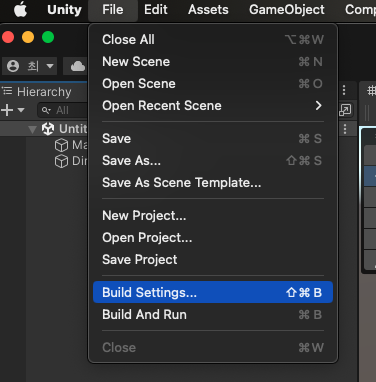
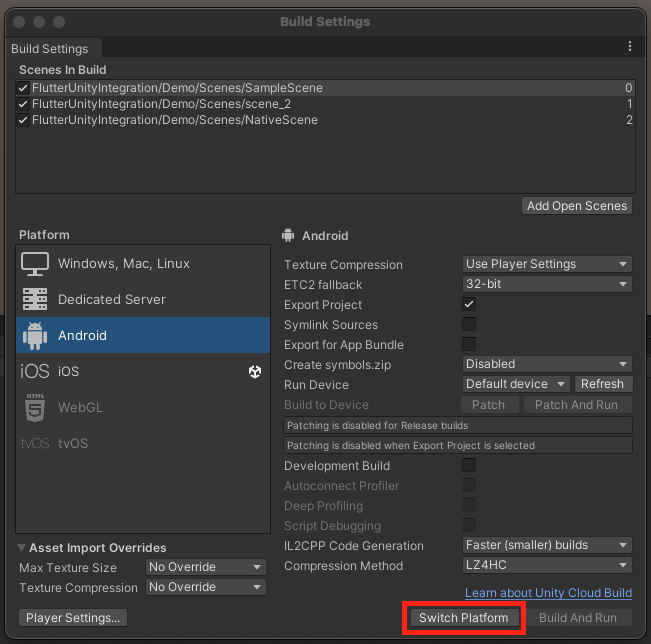
Unity Build Setting
- 상단 메뉴바 → File → Build Settings 클릭
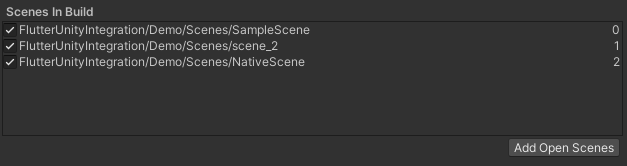
- Scenes 추가
- Platform → Android 클릭
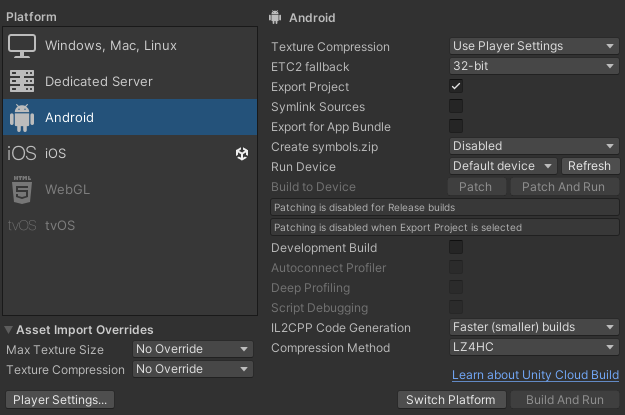
- Export Project 체크
- Compression Method [L74HC] 선택
- Platform → iOS 클릭
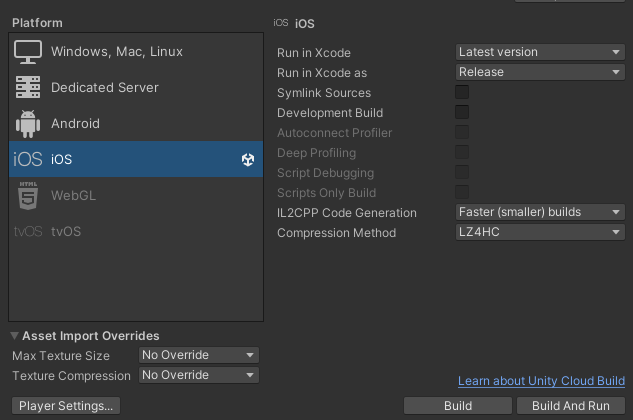
- Compression Method [L74HC] 선택
Unity Player Setting
- Build Settings → 왼쪽 하단 Player Settings… 클릭

- Android, iOS 탭 확인
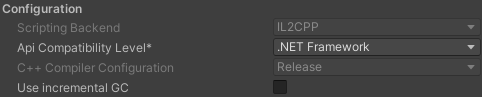
- Android → Other Settings → Configuration → Scripting Backend → IL2CPP 선택

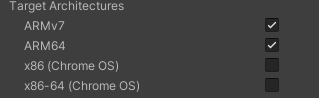
- Target Architectures → ARMv7과 ARM64 체크
- iOS → Other Settings → Configuration → Scripting Backend → IL2CPP 확인
- Target SDK → Device SDK 선택

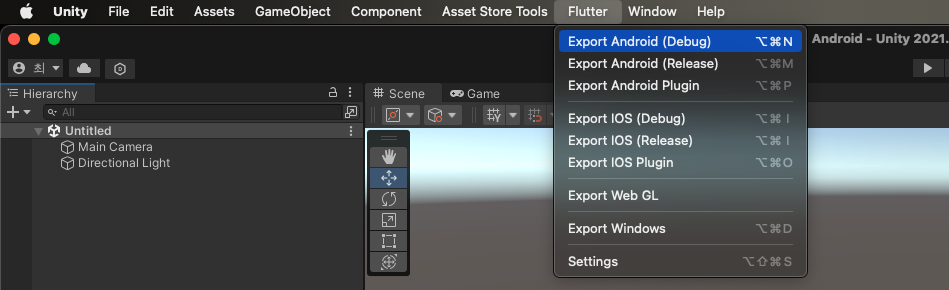
Unity Project Export
- Export 하려는 OS 환경 선택
- 오른쪽 하단 [Switch Platorm] 클릭
- 상단바 내 Flutter → Export Android (Debug) 클릭
Android Project Setting
-
android → settings.gradle 코드 추가
include ":unityLibrary" project(":unityLibrary").projectDir = file("./unityLibrary") -
android → app → build.gradle 코드 추가
dependencies { implementation project(':unityLibrary') } -
android → app → src → main → AndroidManifest.xml 코드 추가
<activity android:name="com.xraph.plugin.flutter_unity_widget.OverrideUnityActivity" android:theme="@style/UnityThemeSelector" android:screenOrientation="fullSensor" android:launchMode="singleTask" android:configChanges="mcc|mnc|locale|touchscreen|keyboard|keyboardHidden|navigation|orientation|screenLayout|uiMode|screenSize|smallestScreenSize|fontScale|layoutDirection|density" android:hardwareAccelerated="false" android:process=":Unity"> <meta-data android:name="com.xraph.plugin.flutter_unity_widget.OverrideUnityActivity" android:value="true" /> </activity> -
android → local.properties NDK 경로 추가
ndk.dir=/Applications/Unity/Hub/Editor/2021.3.22f1/PlaybackEngines/AndroidPlayer/NDK
iOS Project Setting
Xcode Setting
- Xcode 열기
- 파일 작업 창 내에서 우클릭 → [Add Files to “Runner”…] 클릭
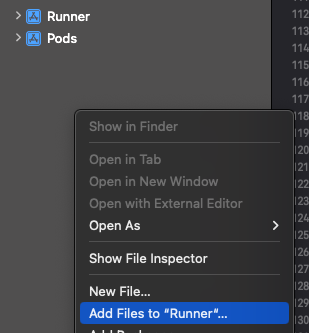
- iOS → UnityLibrary → Unity-iPhone.xcodeproj 오른쪽 하단 [Add] 클릭
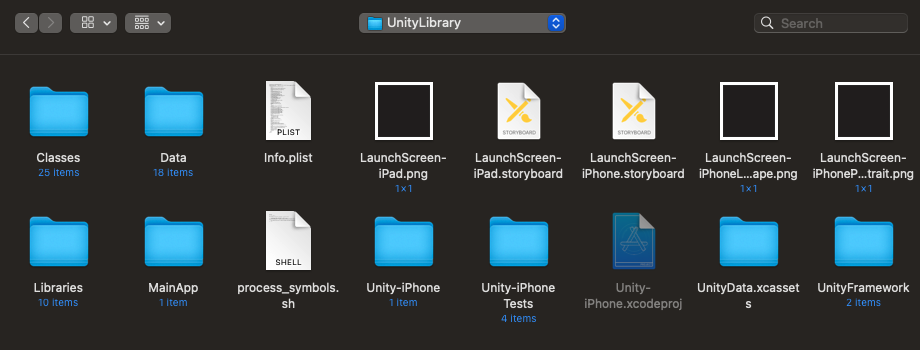
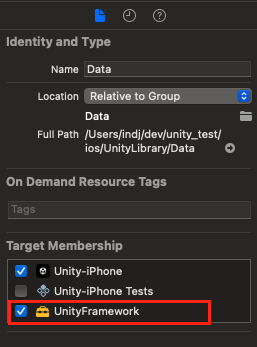
- Unity-iPhone 하위 폴더 Data 클릭
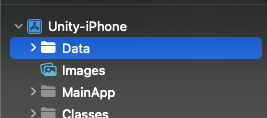
- 우측 창에서 Target Membership → UnityFramework 체크
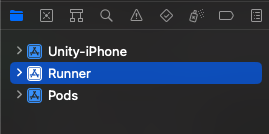
- Runner 클릭
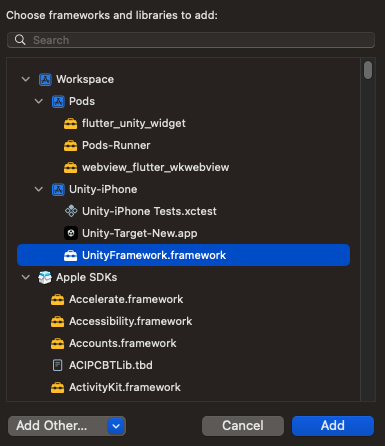
- General → Framworks, Libraries, and Embedded Content 섹션 안 [+] 클릭

- Workspace → Unity-iPhone → UnityFramework.framework 선택 후 우측 하단 [Add] 클릭
iOS Build File Setting
-
ios → Runner → AppDelegate.swift 코드 추가
import UIKit import Flutter import flutter_unitywidget class AppDelegate: FlutterAppDelegate { override func application( _ application: UIApplication, didFinishLaunchingWithOptions launchOptions: [UIApplication.LaunchOptionsKey: Any]?) -> Bool { **InitUnityIntegrationWithOptions(argc: CommandLine.argc, argv: CommandLine.unsafeArgv, launchOptions)** GeneratedPluginRegistrant.register(with: self) return super.application(application, didFinishLaunchingWithOptions: launchOptions) } } -
ios → Runner → Info.plist 코드 추가
<dict>
	<key>io.flutter.embedded_views_preview</key>
	<string>YES</string>
</dict>
🚨 iOS에서 발생할 수 있는 오류 사항
Value of type 'UnityAppController' has no member 'unityMessageHandler'
-
ios → UnityLibrary → Classes -> UnityAppController.mm 이동
-
(void)application:(UIApplication*)application handleEventsForBackgroundURLSession:(nonnull NSString ...밑 코드 추가extern "C" void OnUnityMessage(const char* message) { if (GetAppController().unityMessageHandler) { GetAppController().unityMessageHandler(message); } } extern "C" void OnUnitySceneLoaded(const char* name, const int* buildIndex, const bool* isLoaded, const bool* IsValid) { if (GetAppController().unitySceneLoadedHandler) { GetAppController().unitySceneLoadedHandler(name, buildIndex, isLoaded, IsValid); } } -
ios → UnityLibrary → Classes -> UnityAppController.h 이동
-
@property (nonatomic, copy) void (^quitHandler)(void);밑 코드 추가@property (nonatomic, copy) void(^unitySceneLoadedHandler)(const char* name, const int* buildIndex, const bool* isLoaded, const bool* IsValid); @property (nonatomic, copy) void(^unityMessageHandler)(const char* message);**
