1. 미니 프로젝트
😵 트러블 슈팅
1) 오토레이아웃 문제
⚠️ 문제: 한 객체 추가 시 다른 객체들이 보이지 않는 현상 발생
NSLayoutConstraint.activate([
	profileImage.widthAnchor.constraint(equalToConstant: (profileImage.image?.size.width ?? 0) * 1.1),
	profileImage.heightAnchor.constraint(equalToConstant: (profileImage.image?.size.height ?? 0) * 1.1),
	profileImage.leadingAnchor.constraint(equalTo: view.leadingAnchor, constant: -(view.frame.width * 0.1)),
	profileImage.bottomAnchor.constraint(equalTo: view.bottomAnchor),

	labelSet.bottomAnchor.constraint(equalTo: profileImage.topAnchor, constant: -10),
	labelSet.centerXAnchor.constraint(equalTo: profileImage.centerXAnchor, constant: -(profileImage.frame.width / 2 * 0.15)),

	ButtonSetBackgroundView.bottomAnchor.constraint(equalTo: labelSet.bottomAnchor),
	ButtonSetBackgroundView.leadingAnchor.constraint(equalTo: labelSet.trailingAnchor, constant: 40),
	ButtonSetBackgroundView.widthAnchor.constraint(equalToConstant: 100),
	ButtonSetBackgroundView.heightAnchor.constraint(equalToConstant: 80),

	characterBackgroundView.topAnchor.constraint(equalTo: view.safeAreaLayoutGuide.topAnchor, constant: view.frame.height * 0.05),
	characterBackgroundView.leadingAnchor.constraint(equalTo: view.safeAreaLayoutGuide.leadingAnchor, constant: view.frame.width * 0.05),
	characterBackgroundView.trailingAnchor.constraint(equalTo: view.safeAreaLayoutGuide.trailingAnchor, constant: -(view.frame.width * 0.05)),
	characterBackgroundView.bottomAnchor.constraint(equalTo: labelSet.topAnchor, constant: -20)
])
→ ButtonSetBackgroundView 오토레이아웃 삽입 시 profileImage와 labelSet이 보이지 않는 현상 발생
❗️원인: 오토레이아웃 기준을 (아직 잡히지 않은) frame으로 잡았기 때문
(profileImage.image?.size.width ?? 0) * 1.1
constant: -(view.frame.width * 0.1)
constant: -(profileImage.frame.width / 2 * 0.15)NSLayoutConstraint.activate시점
→frame은 아직 0
→image.size= 있을 수도 없고, 있어도 동적 대응이 불가함
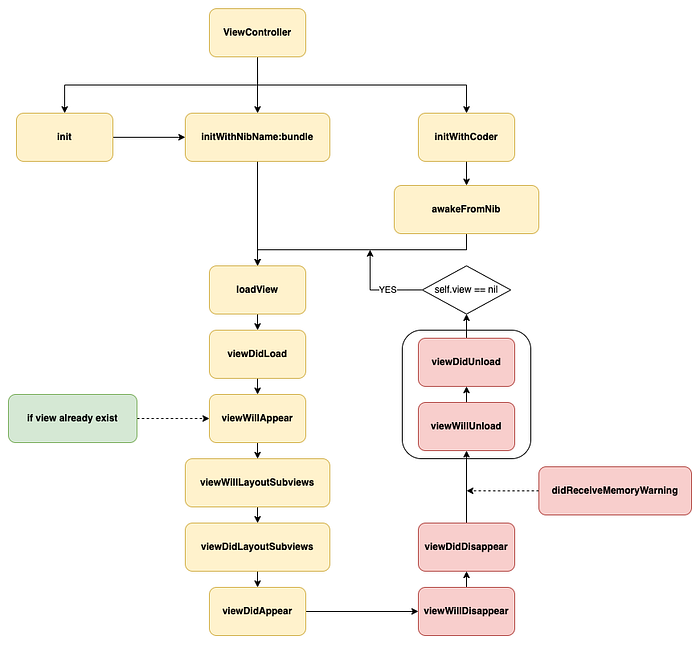
출처: UIViewController Lifecycle
viewWillLayoutSubViews: 레이아웃 구성 직전 → 오토 레이아웃 구성 →viewDidLayoutSubviews: 레이아웃 구성 완료
➡︎viewDidLayoutSubviews부터는frame이 확정되었으므로 사용 가능
✅ 해결 방안
가. 이미지 크기 변형
profileImage.widthAnchor.constraint(
	equalToConstant:(profileImage.image?.size.width ?? 0) * 1.1
    )
→ profileImage의 크기를 1.1배로 키우고 싶었음
⇒ 레이아웃이 결정된 viewDidLayoutSubviews 시점에 transform을 활용해 변경
    override func viewDidLayoutSubviews() {
        profileImage.contentMode = .scaleAspectFit
        profileImage.transform = CGAffineTransform(scaleX: 1.1, y: 1.1)
    }
➡︎ CGAffineTransform는 좌표를 통해 이미지를 변경시킴
: x와 y 좌표를 1.1배씩 옮겨 이미지의 크기를 확대
나. 넓이에 비례한 여백 남기기
→ 레이아웃 가이드를 활용하여 해결
func setUI() {
	...
    let insetGuide = UILayoutGuide() // 여백 가이드
    view.addLayoutGuide(insetGuide)

    NSLayoutConstraint.activate([
    	insetGuide.widthAnchor.constraint(equalTo: view.safeAreaLayoutGuide.widthAnchor, multiplier: 0.9),
        insetGuide.heightAnchor.constraint(equalTo: view.safeAreaLayoutGuide.heightAnchor, multiplier: 0.9),

        insetGuide.centerXAnchor.constraint(equalTo: view.safeAreaLayoutGuide.centerXAnchor),
        insetGuide.centerYAnchor.constraint(equalTo: view.safeAreaLayoutGuide.centerYAnchor)
    ])

   ...

   characterView.translatesAutoresizingMaskIntoConstraints = false

   NSLayoutConstraints.activate([
   		characterView.topAnchor.constraint(equalTo: insetGuide.topAnchor),
        characterView.leadingAnchor.constraint(equalTo: insetGuide.leadingAnchor),
        characterView.trailingAnchor.constraint(equalTo: insetGuide.trailingAnchor),
        characterView.bottomAnchor.constraint(equalTo: myLabelSet.topAnchor, constant: -20),
   ])

}UILayoutGuide(): UI를 잡기 위한 가이드 - 실제 화면에는 보이지 않음
→safeArea도 레이아웃 가이드의 일종!
⇒ insetGuide의 크기를 전체 view의 90%로 잡아주고, 위에 올릴 view들을 insetGuide에 맞추면 각 너비의 5%만큼의 여백을 둘 수 있음
다. 상수 쓰기
→ 레이아웃가이드를 활용하여 비율을 사용하기에는 활용하는 코드도 거의 없고(1곳) 구현하기 복잡해질 것 같아 상수로 변경
func setUI() {
	...

    NSLayoutConstraint.activate([
    	myLabelSet.bottomAnchor.constraint(equalTo: profileImage.topAnchor, constant: -24)
        myLabelSet.centerXAnchor.constraint(equalTo: profileImage.centerXAnchor, constant: -15)
    ])
}
2) 커스텀 UIAlertController 문제
⚠️ 문제: 커스텀 UIAlertController 알람창에서 이미지가 잘림
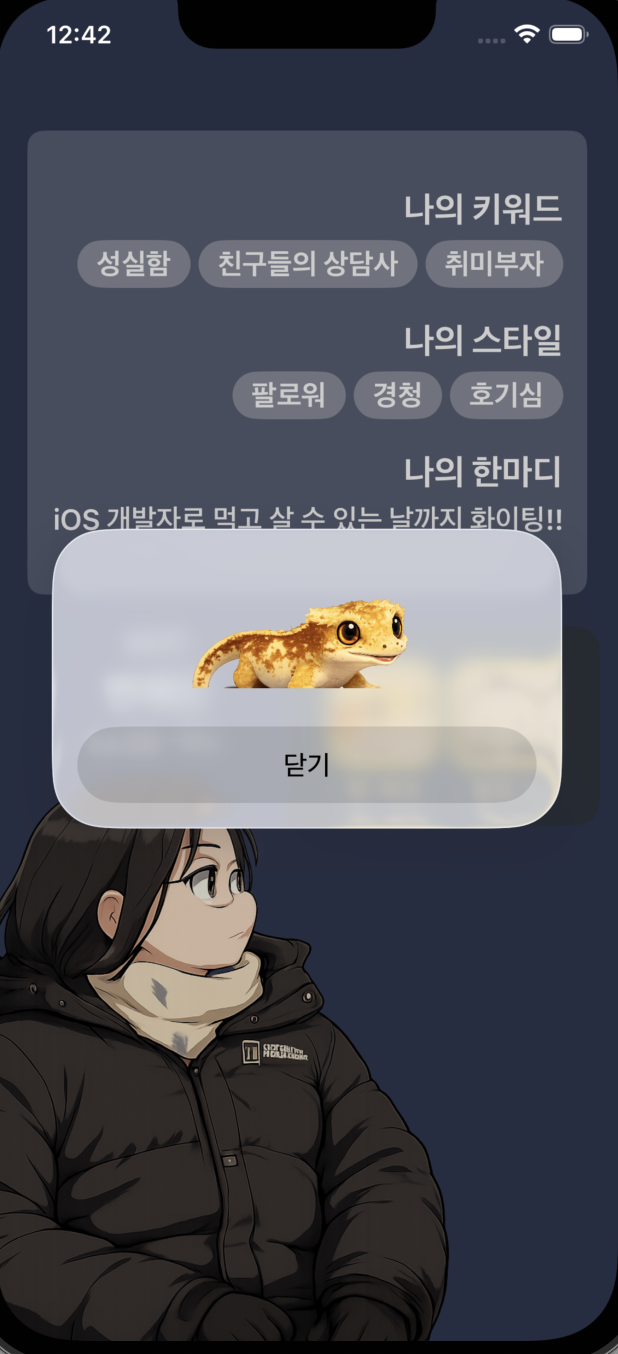
→ 사진과 같이 알람창 내부에서 전체 이미지가 나오지 않고 잘리는 현상 발생
❗️원인: 이미지를 제공하는 ViewController의 크기가 제공되지 않았기 때문
→ UIAlertController는 오토 레이아웃으로 높이를 계산하지 않음
let alert = UIAlertController(title: nil, message: nil, preferredStyle: .default)
let img = ImgViewController() // 내부에서 오토레이아웃으로 view 레이아웃 설정
alert.setValue(img, forKey: "contentViewController")
⇒ contentViewController로 제공한 img의 크기를 정하지 않고 오토레이아웃으로만 설정하기 때문에 UIAlertController는 해당 부분의 레이아웃 크기를 기본값으로 설정함
➡︎ contentViewController.preferredContentSize가 필요했음
💡custom UIAlertController 만들기
alert.setValue(_ value, forKey:)를 활용
→title밑에contentViewController가 들어가기 때문에 커스텀 viewController를 생성하여 알람창에 들어갈 내용을 사용자화할 수 있음!
✅ 해결 방안
새로운 PetCardViewController()를 생성하여 present 하였음
→ 기존에 UIAlertController를 사용하려 했던 이유는 신규 ViewController를 생성하기에는 시간이 소요되어 간단히 구현하려 했기 때문
⇒ 이미 ImgViewController를 생성했으니 (오류 발생 + 본래 용도 아님)인 UIAlertController를 사용할 이유가 없음
@objc func petButtonPushed() {
        let vc = PetCardViewController()
        vc.modalPresentationStyle = .overFullScreen
        vc.modalTransitionStyle = .crossDissolve
        present(vc, animated: true)
    }
➡︎ ImgViewController를 활용한 PetCardViewController 생성하여 해결
📝 새로 알게된 것
1) SafariServices 프레임워크
SafariServices를 활용하면 따로WebView를 사용하지 않고 간단하게 웹사이트를 띄울 수 있다.
활용 코드
import UIKit
import SafariServices

class ViewController: UIViewcontroller {

	...

	@objc func blogButtonPushed() {
    	let url = URL(string: "https://velog.io/@bambu113/posts")
        let blogSafariView: SFSafariViewController = SFSafariViewController(url: url!)
        self.present(blogSafariView, animate: true, completion: nil)
    }

    ...
}
→ 매우 간단하게 웹사이트를 띄울 수 있다!
참고: [iOS] iOS에서 링크로 웹사이트 연결하기 - 보라봉님 tistroy
2) git GUI 툴
-
github Desktop / source Tree 2가지를 사용해봄
→ 그래프를 볼 수 있다는 이점에서 소스트리를 계속해서 사용해보려 한다. -
git 특강으로 직접 merge / push 등의 실습 진행