mylist-boot/src/main/resources/static/member/signin.html
세션을 사용하는 request handler
90-MyList프로젝트2 / 61 페이지
클라이언트가 보낸 세션ID로 이전에 생성한 세션 객체를 찾는다.
메서드를 호출한 Spring Boot가 HttpSession 객체를 생성해서 호출할 때 파라미터로 넘겨준다.
무효한 세션이면 Spring Boot가 새로 세션 객체를 만들어서 request handler 파라미터에 넘겨준다
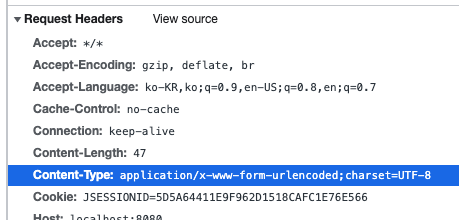
응답할 때 응답 헤더에 담아서 세션ID를 알려준다. (Set-Cookie)
서버에서 생성한 세션ID
세션ID는 웹브라우저에서 생성하는 게 아니라 서버에서 생성하는 거
세션을 새로 만든 게 아니면 응답할 때 세션ID를 리턴할 필요가 없다
새로 만들었을 때만 응답 헤더에 포함된다
이름(개념)
구조도
흐름(과정)
아직 구체적으로 머리로 그려지지 않으니까 머리에 20~30%만 남음
세션ID는 웹브라우저에서 생성하는 게 아니라 서버에서 생성하는 거
이름=값&이름=값
new URLSearchParams(fd)
    fetch("/member/signup", { // 비동기 방식으로 서버에 요청을 보낸다.
        method: "POST",
        body: new URLSearchParams(fd)
      })
http://localhost:8080/member/form.html
// MemberController

  @RequestMapping("/member/signin")
  public Object signin(String email, String password) {
    return memberService.get(email, password);
  }
get 추가
// MemberService

public interface MemberService {

  int add(Member member);

  Member get(String email, String password);
}
구현하지 않은 추상메서드
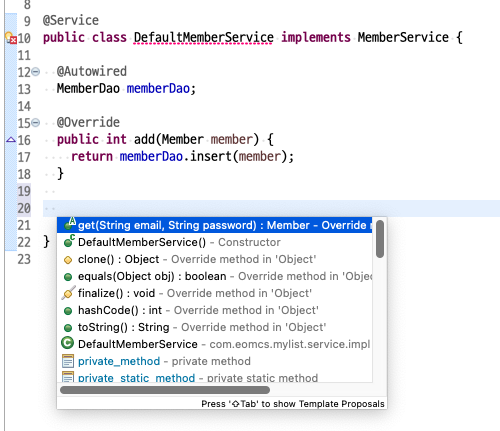
@Override
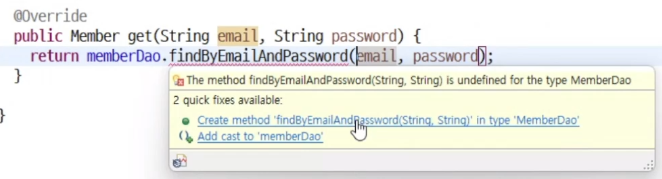
public Member get(String email, String password) {
return memberDao.findByEmailAndPassword(email, password);
}파라미터 값을 2개 넘길 때는 각각 파라미터 이름을
SQL Mapper에서 사용할 파라미터 이름을 정해주어야 한다
MemberDao에 findByEmailAndPassword 메서드 만들어야 됨
마우스 갖다대면 나온다 Create method
@Param("email") String email
SQL Mapper에서 이 파라미터 값을 "email" 이라는 이름으로 꺼내라는 거
@Param("password") String password
SQL Mapper에서 이 파라미터 값을 "password" 라는 이름으로 꺼내라는 거
파라미터 값을 2개를 넘길 건데 이 값은 "email"이라는 이름으로 꺼내고, 이 값은 "password"라는 이름으로 꺼내라
@Param을 사용하여 SQL Mapper에서 사용할 이름 지정
변수명이랑 보통은 같게 한다
public interface MemberDao {

  int insert(Member member);

  Member findByEmailAndPassword(@Param("email") String email, @Param("password") String password);
MemberDao.xml
password 까지는 필요 없음
where email=#{email}
findByEmailAndPassword 메서드가 호출될 때 넘어오는 파라미터 값
@Param("email")
"email"이라는 이름으로 지정했으니까 email로 적어준다
password=password(#{password})
인코딩한 값과 비교해야 된다
먼저 sql문 확인해보기
select
  no,
  name,
  email
from
  ml_member
where
  email='user2@test.com' and password=password('2222');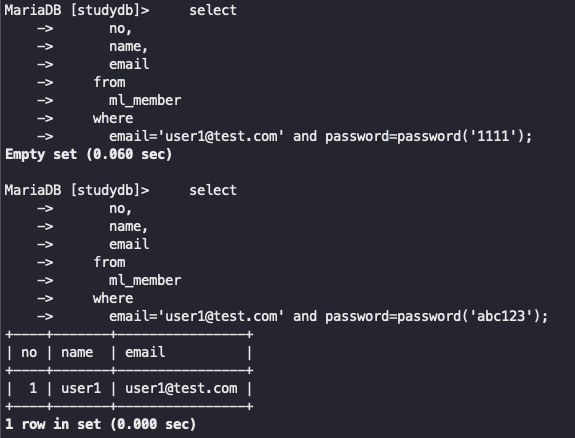
resultMap 결과를 담을 때 규칙
이 규칙에 따라서 member 객체에 담아라
<resultMap type="member" id="memberMap">
  <resultMap type="member" id="memberMap">
    <id column="no" property="no"/>
    <result column="name" property="name"/>
    <result column="email" property="email"/>
    <result column="regist_date" property="registDate"/>
</resultMap> <select id="findByEmailAndPassword" resultMap="memberMap">
select
no,
name,
email
from
ml_member
where
email=#{email} and password=password(#{password})
</select>http://localhost:8080/member/signin.html
http://localhost:8080/member/signin?email=user1@test.com&password=abc123
암호가 일치하면 member 정보가 넘어온다

암호가 일치하지 않을 때 서버에서 빈 문자열 리턴

json 형식으로 바꾸기
    fetch("/member/signin", { // 비동기 방식으로 서버에 요청을 보낸다.
        method: "POST",
        body: new URLSearchParams(fd)
      })
      .then(function(response) {
        return response.json();
      })
      .then(function(obj) {
        console.log(obj);
        window.alert("로그인 성공");
      });
넘어온 게 빈 문자열이면 window.alert("로그인 실패!");
fetch("/member/signin", { // 비동기 방식으로 서버에 요청을 보낸다.
method: "POST",
body: new URLSearchParams(fd)
})
.then(function(response) {
return response.json();
})
.then(function(obj) {
if (obj == "") {
window.alert("로그인 실패!");
} else {
window.alert(obj.name + "님 환영합니다!");
}
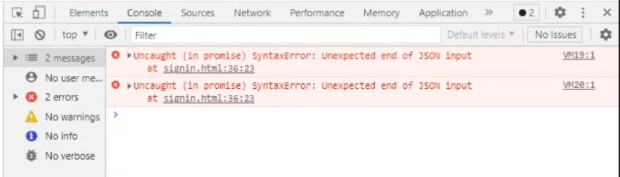
});로그인 실패가 안 나온다...
member에서 리턴할 때 무조건 리턴하지 말고
Member 객체에 담아서
  @RequestMapping("/member/signin")
  public Object signin(String email, String password) {
    Member loginUser = memberService.get(email, password);
    if (loginUser == null) {
      return "";
    } else {
      return loginUser;
    }
  }
json을 일반 문자열로 보내면 안 되네... null을 보내도 안 되네
실패했으면 "fail"
성공하면 "success" 보내는 걸로 하기
  @RequestMapping("/member/signin")
  public Object signin(String email, String password) {
    Member loginUser = memberService.get(email, password);
    if (loginUser == null) {
      return "fail";
    }

    return "success";
}response.text()로 바꾸기
success를 앞에 두기
로그인 성공하면 index.html로 가게 한다
fetch("/member/signin", { // 비동기 방식으로 서버에 요청을 보낸다.
method: "POST",
body: new URLSearchParams(fd)
})
.then(function(response) {
return response.text();
})
.then(function(text) {
if (text == "success") {
location.href = "../index.html";
} else {
window.alert("로그인 실패!");
}
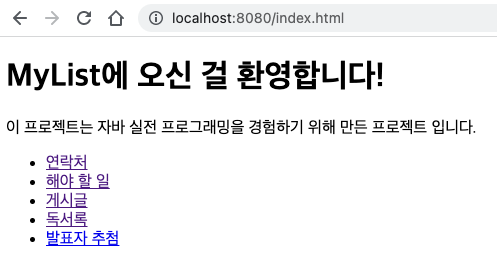
});로그인 성공해서 index.html로 이동함
로그인에 성공하면 그 사람의 로그인 정보를 서버쪽에서 계속 사용해야 함
파라미터에 HttpSession session 추가
session.setAttribute("loginUser", loginUser);
  @RequestMapping("/member/signin")
  public Object signin(String email, String password, HttpSession session) {
    Member loginUser = memberService.get(email, password);
    if (loginUser == null) {
      return "fail";
    }

    // 로그인이 성공하면,
    // 다른 요청을 처리할 때 로그인 회원의 정보를 사용할 수 있도록 세션에 보관한다.
    session.setAttribute("loginUser", loginUser);

    return "success";
  }
DAO 구현체가 사용할 SQL Mapper 파일의 위치는 인터페이스의 패키지 경로 및 이름과 일치해야 한다.
SQL Mapper 파일 이름이랑 인터페이스 이름하고 똑같아야 함 (MemberDao.xml)
http://localhost:8080/member/signin.html
<form name="form1">
이메일: <input name="email" type="email"><br>
암호: <input name="password" type="password"><br>
<div>
  <button id="x-add-btn">로그인</button>
  <button id="x-cancel-btn" type="button">취소</button>
</div>
<div>
  <a href="form.html">회원가입</a>
</div>
</form> @RequestMapping("/member/signup")
public Object signup(Member member) {
if (memberService.add(member) == 1) {
return "success";
} else {
return "fail";
}
}// form.html
fetch("/member/signup", { // 비동기 방식으로 서버에 요청을 보낸다.
method: "POST",
body: new URLSearchParams(fd)
})
.then(function(response) {
return response.text();
})
.then(function(text) {
if (text == "success") {
location.href = "signin.html";
} else {
window.alert("회원가입 실패!");
}
});
return false;
};
document.querySelector("#x-cancel-btn").onclick = function() {
window.location.href = "../index.html";
};3단계 - 상단 메뉴바를 추가한다.
/src/main/resources/static/index.html 페이지 변경
// index.html

  <style>
    #header {
      background-color: navy;
      color: white;
      height: 50px;
      display: flex;
      align-items: center;
    }
</style>
</head>
<body>
<div id="header">
  MyList
  <button id="login-btn" type="button">로그인</button>
  <button id="logout-btn" type="button">로그아웃</button>
</div>fetch("/member/getLoginUser").then(function(response) {
return response.json();
}).then(function(result) {
console.log(result);
}); @RequestMapping("/member/getLoginUser")
public Object getLoginUser(HttpSession session) {
if (memberService.add(member) == 1) {
return "success";
} else {
return "fail";
}
}도메인 객체 하나 추가하겠음
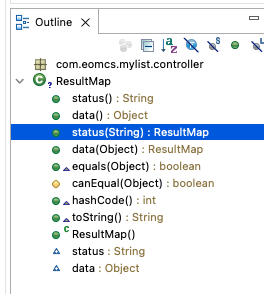
com.eomcs.mylist.controller.ResultMap
final 붙이기
package com.eomcs.mylist.controller;

import lombok.Data;

@Data
public class ResultMap {
  final String status;
  final Object data;
}
@NoArgsConstructor(force = true)
@RequiredArgsConstructor
final이 붙은 필드는 무조건 처음에 초기화시켜야 된다.
package com.eomcs.mylist.controller;

import lombok.Data;

@Data
@NoArgsConstructor(force = true) // 기본 생성자를 무조건 만들게 한다.
@RequiredArgsConstructor // final이 붙은 필드의 값을 파라미터로 받는 생성자를 만들게 한다.
public class ResultMap {
  final String status;
  final Object data;
}
@NoArgsConstructor(force = true) 때문에 생긴 생성자 ↓
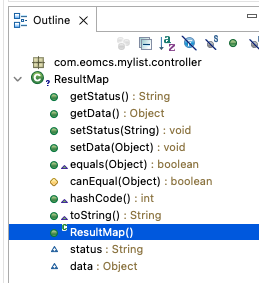
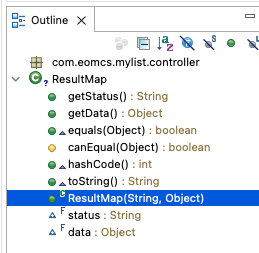
@RequiredArgsConstructor 때문에 생긴 생성자 ↓
@RequiredArgsConstructor 필수 아규먼트
final이 붙은 필드에 대해서 자동으로 생성자가 만들어진다
package com.eomcs.mylist.controller;

import lombok.Data;
import lombok.NoArgsConstructor;
import lombok.RequiredArgsConstructor;

@Data
@NoArgsConstructor(force = true) // 기본 생성자를 무조건 만들게 한다.
@RequiredArgsConstructor // final이 붙은 필드의 값을 파라미터로 받는 생성자를 만들게 한다.
public class ResultMap {
  final String status;
  final Object data;
}
새로 만든 도메인 ResultMap을 MemberController에서 사용한다
@RequestMapping("/member/getLoginUser")
public Object getLoginUser(HttpSession session) {
Object data = session.getAttribute("loginUser");
if (data != null) {
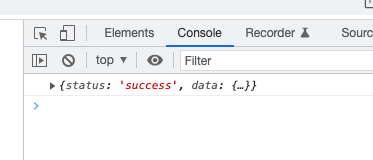
return new ResultMap("success", data);
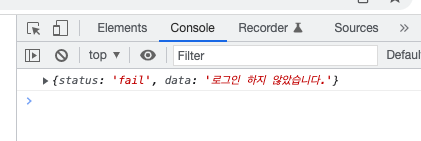
} else {
return new ResultMap("fail", "로그인 하지 않았습니다.");
}
}8단계 - 로그인 사용자 정보를 조회한다.
• com.eomcs.mylist.controller.ResultMap 클래스 추가
‐ JSON 형식의 데이터를 리턴할 때 사용할 클래스
‐ 작업 성공 유무와 결과를 저장한다.
• MemberController 클래스 변경
‐ getLoginUser() 메서드 추가
http://localhost:8080/member/signin.html
return new ResultMap("success", data);
생성자를 통해서 값을 설정하는 방법이 그럴 듯 해보이지만
생성자에서 첫 번째 값이 뭘 의미하고 두 번째 값이 뭘 의미하는지
직관적으로 와닿지 않는다
그래서 setter 메서드를 사용한다
com.eomcs.mylist.controller.ResultMap 도메인 수정하기
final 지우기
애노테이션 지우기
package com.eomcs.mylist.controller;
import lombok.Data;
@Data
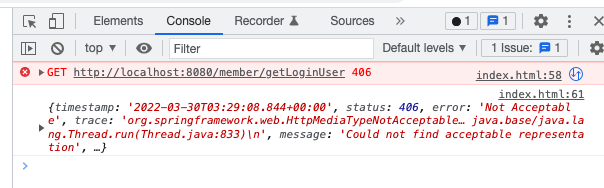
public class ResultMap {
String status;
Object data;
}chaining 체이닝 방식으로 호출하려고 하는데
세터의 리턴값이 void 이다

lombok setter return this 검색
lombok setter Chaining
https://hsoo3289.tistory.com/6
@Accessor(fluent = true)
⇒ set, get 없이 프로퍼티 이름으로 쓸 수 있게 해준다.
⇒ setter에서 this를 return 한다
@Accessor(chain = true)
⇒ setter 에서 this를 return 한다
세터의 리턴값이 void 이다
@Accessor(fluent = true)
세터 게터 메서드 이름이 필드 이름과 같아졌다
앞에 set, get 접두사가 빠지고 그냥 필드 이름이 됨
세터의 리턴 타입도 ResultMap
요즘 세터 게터 앞에 접두사 set, get 안 붙이는 걸 선호하기도 함
접두어(get/set)를 붙이는 경우도 있고 없는 경우도 있음
@Accessors(fluent = true) 하면 필드 이름과 같게 만들어진다
외부에서 변수에 함부로 접근 못 하게 private로 만든다
세터를 통해서만 접근할 수 있게 private로 만든다
package com.eomcs.mylist.controller;

import lombok.Data;
import lombok.experimental.Accessors;

@Data
@Accessors(fluent = true)
public class ResultMap {
  private String status;
  private Object data;
}
return new ResultMap().status("success").data(member);
status는 이 값이고 data는 이 값이다
훨씬 직관적이다.
한 눈에 알아보기가 쉽다. 그래서 이 방법을 쓰는 거
@RequestMapping("/member/getLoginUser")
public Object getLoginUser(HttpSession session) {
Object member = session.getAttribute("loginUser");
if (member != null) {
return new ResultMap().status("success").data(member);
} else {
return new ResultMap().status("fail").data("로그인 하지 않았습니다.");
}
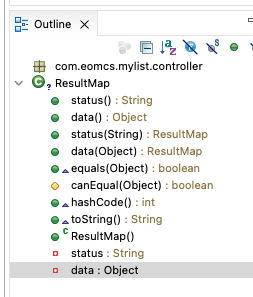
}에러 남..
406 Not Acceptable
json 하고 충돌 일어남
get, set으로 시작하는 메서드인 경우만 게터 세터로 인식한다
객체를 json 데이터로 바꾸는 쪽에서 못 바꿈
스프링 부트에서 자바 객체를 JSON 데이터로 바꿀 때 get, set 메서드를 찾는다
근데 지금 get, set을 없애버려서 에러 남
get, set 으로 시작하는 수밖에 없음
다만 set 메서드의 리턴 값을 ResultMap으로 한다
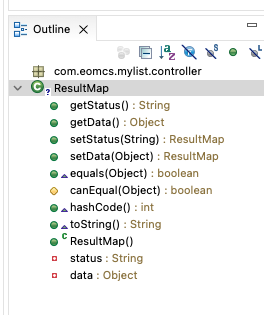
@Accessors(fluent = true) 빼기
@Accessors(chain = true) 로 변경하기
  @RequestMapping("/member/getLoginUser")
  public Object getLoginUser(HttpSession session) {
    Object member = session.getAttribute("loginUser");
    if (member != null) {
      return new ResultMap()
          .setStatus("success")
          .setData(member);
    } else {
      return new ResultMap()
          .setStatus("fail")
          .setData("로그인 하지 않았습니다.");
    }
  }
이제 에러 안 나고 제대로 나옴
로그인 안 한 경우
로그인 한 경우
문자열 같은 경우, 직접 입력하면 오타가 날 수도 있음
상수로 정의해놓기
ResultMap 도메인 가기
public static final String SUCCESS = "success";
public static final String FAIL = "fail";
package com.eomcs.mylist.controller;

import lombok.Data;
import lombok.experimental.Accessors;

@Data
@Accessors(chain = true)
public class ResultMap {
  public static final String SUCCESS = "success";
  public static final String FAIL = "fail";
  private String status;
  private Object data;
}
setStatus(ResultMap.SUCCESS)
setStatus(ResultMap.FAIL)
  @RequestMapping("/member/getLoginUser")
  public Object getLoginUser(HttpSession session) {
    Object member = session.getAttribute("loginUser");
    if (member != null) {
      return new ResultMap()
          .setStatus(ResultMap.SUCCESS)
          .setData(member);
    } else {
      return new ResultMap()
          .setStatus(ResultMap.FAIL)
          .setData("로그인 하지 않았습니다.");
    }
  }
상수 import 하기

import 하면 앞에 클래스 이름 적지 않아도 됨
코드가 간결해짐
setStatus(SUCCESS)
setStatus(FAIL)
  @RequestMapping("/member/getLoginUser")
  public Object getLoginUser(HttpSession session) {
    Object member = session.getAttribute("loginUser");
    if (member != null) {
      return new ResultMap()
          .setStatus(SUCCESS)
          .setData(member);
    } else {
      return new ResultMap()
          .setStatus(FAIL)
          .setData("로그인 하지 않았습니다.");
    }
  }
span 태그 추가하기
<div id="header">
  <span id="app-title">MyList</span>
  <span id="user-name"></span>
  <button id="login-btn" type="button">로그인</button>
  <button id="logout-btn" type="button">로그아웃</button>
</div>
span 태그에 data.name 넣기
<script type="text/javascript">
  fetch("/member/getLoginUser").then(function(response) {
	  return response.json();
  }).then(function(result) {
	  document.querySelector("#user-name").innerHTML = result.data.name;
  });
</script>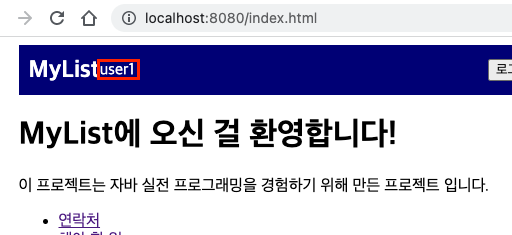
로그인 하기 전에는 로그인 버튼만 보이게 하고
로그인에 성공하면 로그인 버튼 대신 사용자 이름이 보이게 한다
  var el = document.querySelectorAll(".login");
  for (var e of el) {
	  e.style.display = ""
  }

  var el = document.querySelectorAll(".not login");
  for (var e of el) {
	  e.style.display = "none"
  }
로그인 성공하면 유저 이름이랑 로그아웃 버튼을 보이게 한다

함수로 정의한다
  function css(selector, name, value) {
	  var el = document.querySelectorAll(selector);
	  for (var e of el) {
	    e.style[name] = value;
	  }
  }
함수를 호출한다. 코드가 간결하게 바뀐다.
css(".login", "display", "none");

fetch("/member/getLoginUser").then(function(response) {
  return response.json();
}).then(function(result) {
  if (result.status == "success") {
    document.querySelector("#user-name").innerHTML = result.data.name;
    css(".login", "display", "");
    css(".not-login", "display", "none");
  }
});
jQuery 사용하는 이유
코드가 간결해진다.
브라우저에 맞춰서 해당되는 기능이 동작하도록 코딩되어 있다.
크로스 브라우징 지원
9단계 - 로그아웃 기능을 추가한다.
로그아웃은 Controller만 바꾸면 됨
signout() 메서드 추가
HttpSession 달라고 한다
무조건 success
  @RequestMapping("/member/signout")
  public Object signout(HttpSession session) {
    session.invalidate();
    return new ResultMap().setStatus(SUCCESS);
  }
http://localhost:8080/member/signout
화면이 바뀌지 않도록 fetch를 사용한다
signout 실행하고 then 서버에서 응답이 올 거임
어차피 signout은 무조건 성공
세션이 있든 없든 invalidate 한다
서버에서 응답이 오면 무조건 location.href = "/index.html"
현재 페이지를 다시 리프레시 해도 된다
  document.querySelector("#logout-btn").onclick = function() {
	  fetch("/member/signout").then(function(response) {
		  location.href = "/index.html"
		});
  }
18.2 세션과 쿠키의 활용: 세션 활용하기
로그인과 세션을 활용하여 사용자별로 데이터 처리하기
1단계 - 게시글 테이블에 작성자 정보를 추가한다.
alter table ml_board
  add column writer int not null,
  add constraint ml_board_fk foreign key (writer) references ml_member(no);
기존 데이터가 있으면 not null 컬럼은 나중에 추가 불가
먼저 기존 데이터 다 지우기
delete from ml_board;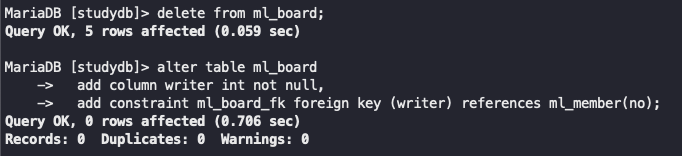
세 단계에 거쳐서 하는 방법도 있음
null 허용하고 값 넣고 다시 not null로 바꾸는 건 가능
2단계 - 게시글을 다루는 도메인 클래스에 회원 번호를 담는 필드를 추가한다.
Board 클래스 변경하기
@Data
public class Board {
  int no;
  String title;
  String content;
  int viewCount;
  java.sql.Date createdDate;
  int writer;
}
게시글 입력 시 작성자 번호를 입력하도록 SQL Mapper 파일을 변경한다
3단계 - 게시글 데이터를 다룰 때 작성자 번호도 함께 다룬다.
4단계 - 게시글 입력할 때 로그인 사용자 번호를 추가한다.
세션에서 유저 정보를 꺼내야 한다.
로그인 한 사용자만이 insert 할 수 있다
  @RequestMapping("/board/add")
  public Object add(Board board, HttpSession session) {
    Member member = (Member) session.getAttribute("loginUser");
    if (member == null) {
      return new ResultMap().setStatus(FAIL).setData("로그인 하지 않았습니다.");
    }
    board.setWriter(member.getNo());
    boardService.add(board);
    return new ResultMap().setStatus(SUCCESS);
  }
로그인 한 사용자만이 update 할 수 있고, delete 할 수 있다
↓ 이 코드 집어넣고 파라미터에 HttpSession session 추가하기
    Member member = (Member) session.getAttribute("loginUser");
    if (member == null) {
      return new ResultMap().setStatus(FAIL).setData("로그인 하지 않았습니다.");
}board.setWriter(member.getNo());자기가 쓴 글만 가능
조건 추가
and writer=#{writer}
  <update id="update" parameterType="Board">
    update ml_board set
      title=#{title},
      content=#{content}
    where
      board_no=#{no} and writer=#{writer}
  </update>
com.eomcs.mylist.service.BoardService 인터페이스 변경
int delete(int no); → int delete(Board board);
서비스 구현체도 바꿔준다
com.eomcs.mylist.service.impl.DefaultBoardService 클래스 변경
BoardService가 사용하는 Dao도 바꿔줘야 한다
com.eomcs.mylist.dao.BoardDao 인터페이스 변경
int delete(int no); → int delete(Board board);
/src/main/resources/com/eomcs/mylist/dao/BoardDao.xml 파일 변경
parameterType="board"로 변경하기
  <delete id="delete" parameterType="board">
    delete from ml_board
    where board_no=#{no} and writer=#{writer}
  </delete>
프론트엔드 개발 실습
1단계 - 게시글에 로그인 사용자 정보를 적용한다.
/src/main/resources/static/board/form.html 페이지 변경
로그인 하지 않았을 경우 로그인 페이지로 이동시킨다.
세션에서 유저 번호를 가져온다
두 가지 방법이 있음
게시글 작성자를 일일이 sql에서 받는 방법이 있고
게시글의 작성자가 이미 누구인지 알고 있다면 비교해서 데이터베이스까지 안 가고 비교해서 그 작성자가 맞냐 안 맞냐 따져서 하는 방법이 있다
/src/main/resources/static/board/index.html 페이지 변경
게시글 정보를 출력할 때 작성자 이름도 함께 출력한다.
<th>작성자</th> 추가
<td>${board.writer}</td>작성자 번호가 나온다...
바꿔줘야 됨
5단계 - 게시글 조회할 때 로그인 사용자의 이름을 함께 조회한다.
- com.eomcs.mylist.domain.Board 클래스 변경
:writer필드의 타입을int대신에Member로 교체한다.
int writer; → Member writer;
@Data
public class Board {
  int no;
  String title;
  String content;
  int viewCount;
  java.sql.Date createdDate;
  Member writer;
}- /src/main/resources/com/eomcs/mylist/dao/BoardDao.xml 파일 변경
:<resultMap>에 Member 객체를 가져오는 코드를 추가
association 사용
https://mybatis.org/mybatis-3/sqlmap-xml.html
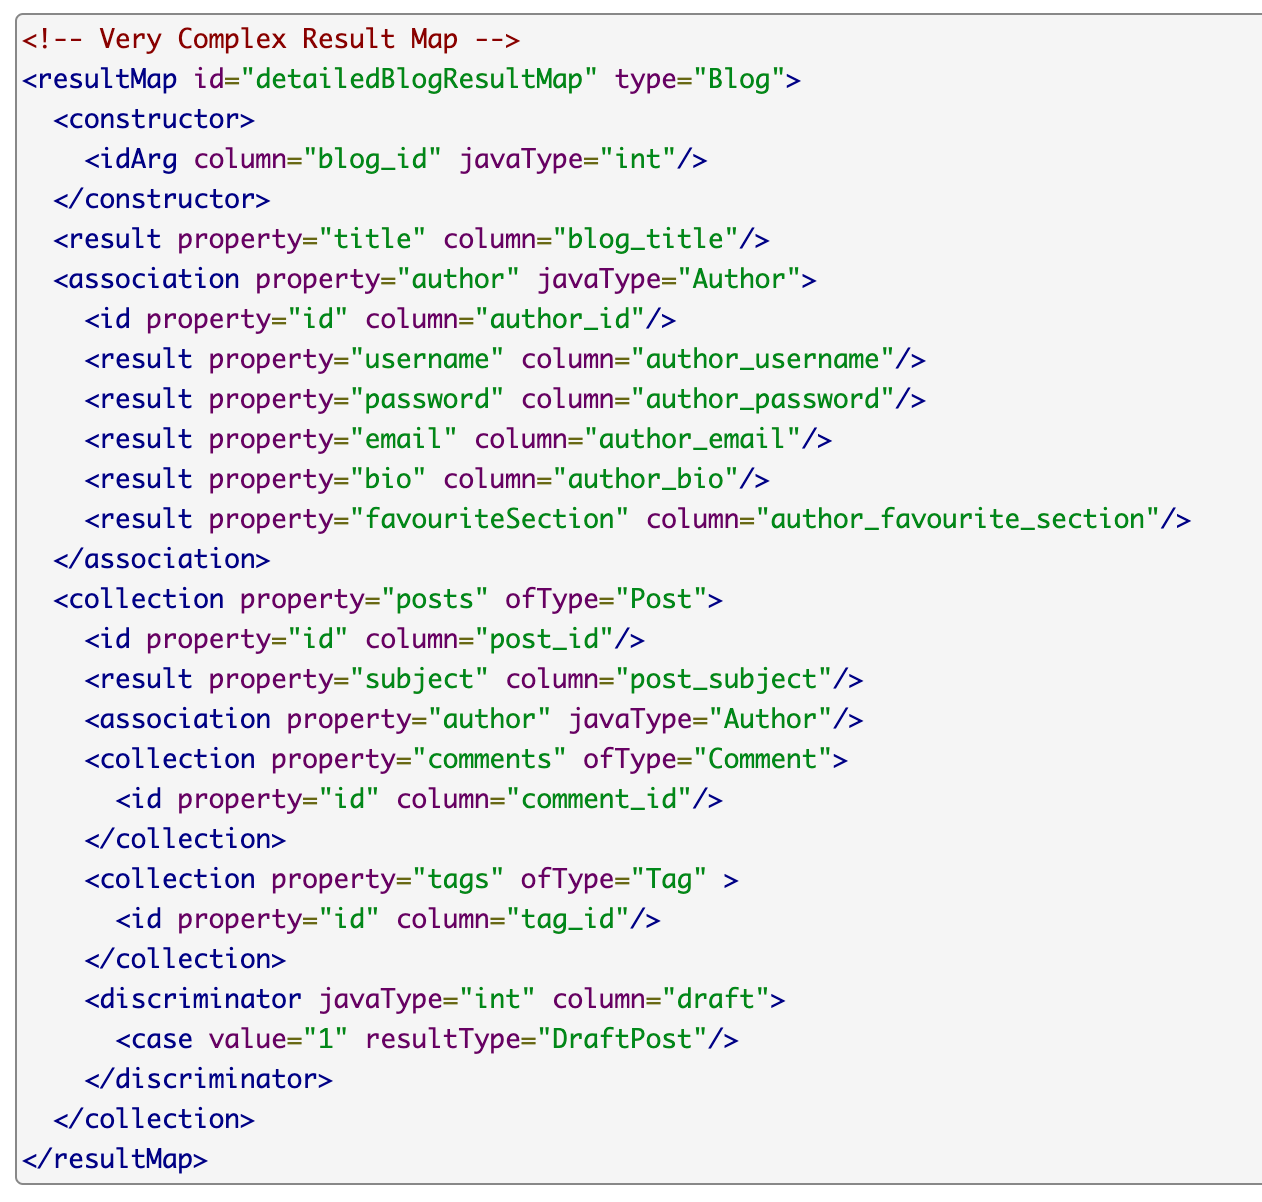
<association> ← 1:1 관계의 테이블을 join 할 때 사용
  <!-- 테이블의 컬럼과 객체 필드를 연결한다. -->
  <resultMap type="board" id="boardMap">
    <id column="board_no" property="no"/>
    <result column="title" property="title"/>
    <result column="content" property="content"/>
    <result column="created_date" property="createdDate"/>
    <result column="view_count" property="viewCount"/>

    <association property="writer" javaType="member">
      <id column="no" property="no"/>
      <result column="name" property="name"/>
    </association>
  </resultMap>
↓ no 컬럼 값은 member 객체의 no 라는 필드에 저장해라
↓ name 컬럼 값은 member 객체의 name 이라는 필드에 저장해라
    <association property="writer" javaType="member">
      <id column="no" property="no"/>
      <result column="name" property="name"/>
    </association>
저번 시간에는 ContactDao.xml에서 <collection>을 써서
연락처 테이블과 전화번호 테이블을 join 했었다
<collection> ← 1:M 관계의 테이블을 join 할 때 사용
findAll, findByNo SQL문 변경: ml_member 테이블과 조인한다.
<select id="findAll" resultMap="boardMap">
select
b.board_no,
b.title,
b.created_date,
b.view_count,
m.no,
m.name
from
ml_board b
inner join ml_member m on (b.writer = m.no)
order by
b.board_no desc
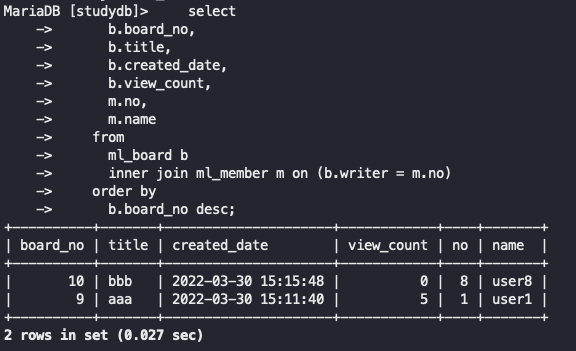
</select>그대로 복사해서 sql문이 올바른지 확인한다.
    select
      b.board_no,
      b.title,
      b.created_date,
      b.view_count,
      m.no,
      m.name
    from
      ml_board b
      inner join ml_member m on (b.writer = m.no)
    order by
      b.board_no desc;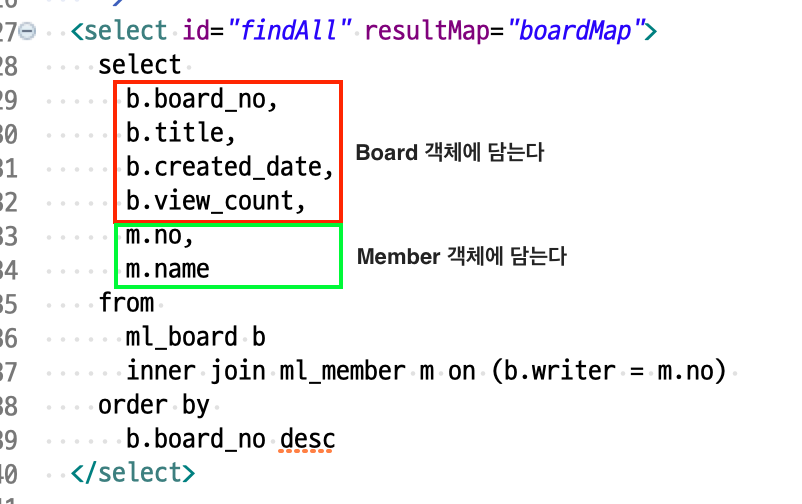
잘 나온다
게시글과 작성자
90-MyList프로젝트2 / 67 페이지
🔹 테이블 관계 (ER-Diagram)
ml_board
ml_member
한 명의 멤버는 0개 이상의 게시글을 쓸 수 있다.
🔹 자바 객체 관계 (UML Class Diagram)
Board 객체
Member 클래스
Board 객체는 (writer 라는 이름으로) Member 객체 1개를 포함한다.
Class Diagram에 따라 소스코드를 표현한 게 ↓
Board 안에 Member를 포함하고 있다
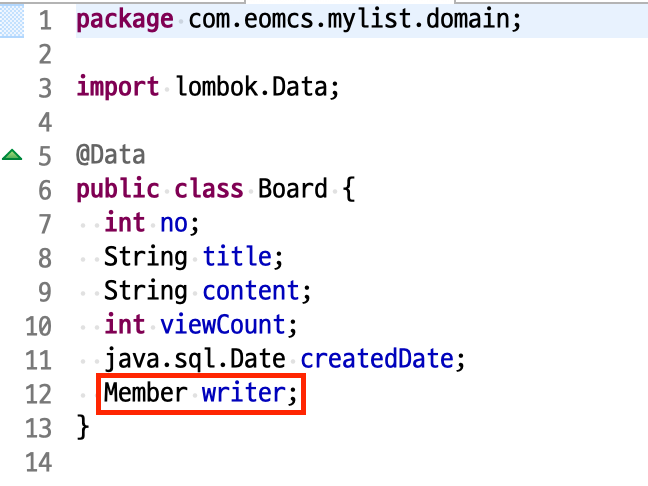
Board 안에 Member를 포함하고 있다
  <select id="findByNo" resultMap="boardMap" parameterType="int">
    select
      b.board_no,
      b.title,
      b.content,
      b.created_date,
      b.view_count,
      m.no,
      m.name
    from
      ml_board b
      inner join ml_member m on (b.writer = m.no)
    where
      b.board_no=#{no}
  </select>
이제 writer는 int가 아님. (Member로 바꿨음)
Board 객체 안에 들어 있는 writer 객체의 no (writer.no)
writer → writer.no
<insert>, <update>, <delete> SQL문 변경: writer 필드의 타입이 int에서 Member 변경된 것을 적용한다.
BoardController 클래스 변경
add(), update(), delete() 메서드 변경
번호가 아니라 Member 객체를 담는다
member.getNo() → member
localhost:8080/board/list
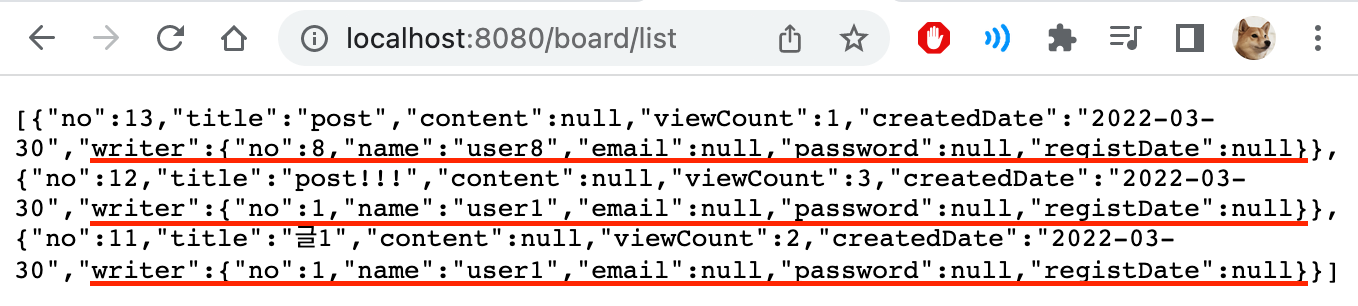
board 객체 안에 writer 객체가 들어 있다
http://localhost:8080/board/get?no=12

${board.writer} → ${board.writer.name}
board 객체에 writer 라는 필드가 Member 객체이다
writer 객체의 name 필드
페이지 컨트롤러에서 결과를 리턴할 때 예전처럼 텍스트로 리턴하지 않고
항상 ResultMap에 담아서 성공 실패 여부를 리턴하자