웹 페이지의 HTML을 가져와서 파일로 저장하기
크롤링: 웹 페이지를 가져오고 파일로 저장
전처리: 데이터 가공
시각화: 데이터로 그래프를 그린다
실무에서는 시간과 노력을 절약하기 위해 패키지를 주로 사용
가져올 HTML 확인하기
웹 페이지에서 검사(inspect) 실행
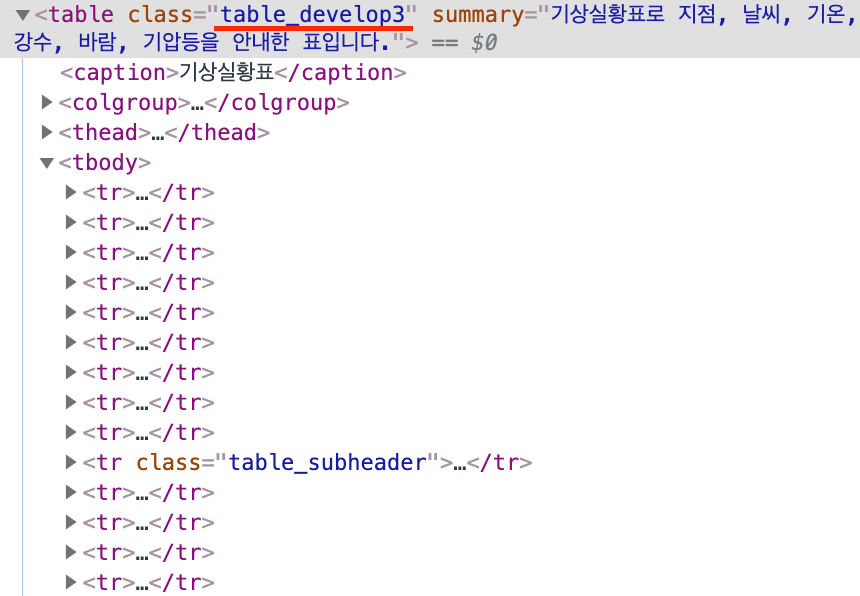
표 전체를 가져오기로 한다.
table 👈 표
tr 👈 행
td 👈 열
한 줄에 열이 세 개 있는 것 ⬇️
    <table>
      <tr>
        <td></td>
        <td></td>
        <td></td>
      </tr>
    </table>
class명이 'table_develop3'인 table 태그를 가져오기로 한다.
HTML 파싱
텍스트 형태의 HTML 코드를 분석해서 객체로 만든 뒤 검색하거나 편집할 수 있도록 만드는 작업
bs4는 BeautifulSoup 라이브러리이고 HTML 코드를 파싱하는데 사용한다.
import requests  # 웹 페이지의 HTML을 가져오는 모듈
from bs4 import BeautifulSoup  # HTML을 파싱하는 모듈

# 웹 페이지를 가져온 뒤 객체로 만든다.
result = requests.get('https://pythondojang.bitbucket.io/weather/observation/currentweather.html')
print(result)

👉 <Response [200]>
파이썬의 html.parser 모듈을 사용해서 파싱하도록 설정한다.
response.content
import requests
from bs4 import BeautifulSoup

# 웹 페이지를 가져온 뒤 Beautifulsoup 객체로 만든다.
response = requests.get('https://pythondojang.bitbucket.io/weather/observation/currentweather.html')  # URL에 대한 응답 개체가 result로 나온다.
soup = BeautifulSoup(response.content, 'html.parser')
print(result.content)
response.text
import requests
from bs4 import BeautifulSoup

response = requests.get('https://pythondojang.bitbucket.io/weather/observation/currentweather.html')
soup = BeautifulSoup(response.text, 'html.parser')
print(result.text)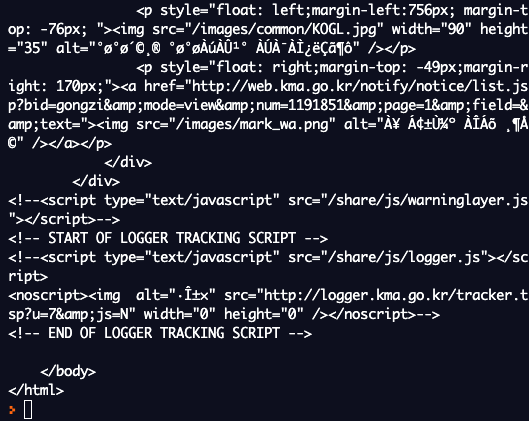
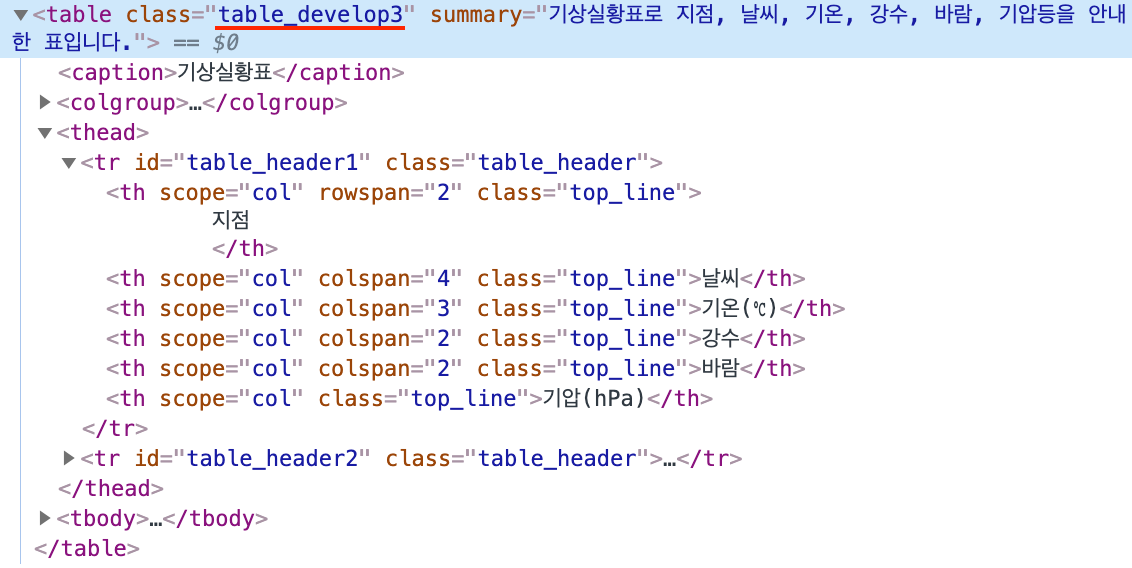
이제 BeautifulSoup 클래스로 만든 soup 객체로 태그를 찾는다.
import requests
from bs4 import BeautifulSoup

response = requests.get('https://pythondojang.bitbucket.io/weather/observation/currentweather.html')
soup = BeautifulSoup(response.content, 'html.parser')

table = soup.find('table', {'class': 'table_develop3'})
데이터를 저장할 빈 리스트를 생성한다.
data = []
for문(반복문) 모든 tr 태그를 찾아서 반복한다. (tr 👈 행)
한 줄씩 반복된다.
for tr in table.find_all('tr'):
find_all은 해당되는 모든 태그들을 '리스트'로 반환하기 때문에 for문으로 사용할 수 있다.
tr(행) 태그 안에 있는 td(열) 태그를 모두 찾아서 리스트로 반환해준다.
tr.find_all('td')
tr(행) 한 줄 안에 있는 td(열) 태그를 모두 찾아서 리스트로 반환해준다.
tds = tr.find_all('td')
for문으로 tds의 요소들을 반복해서 td(열)를 하나씩 대입한다.
for td in tds:
td(열) 태그에 a 라는 태그가 있는지 확인한다. (지점에 있음)
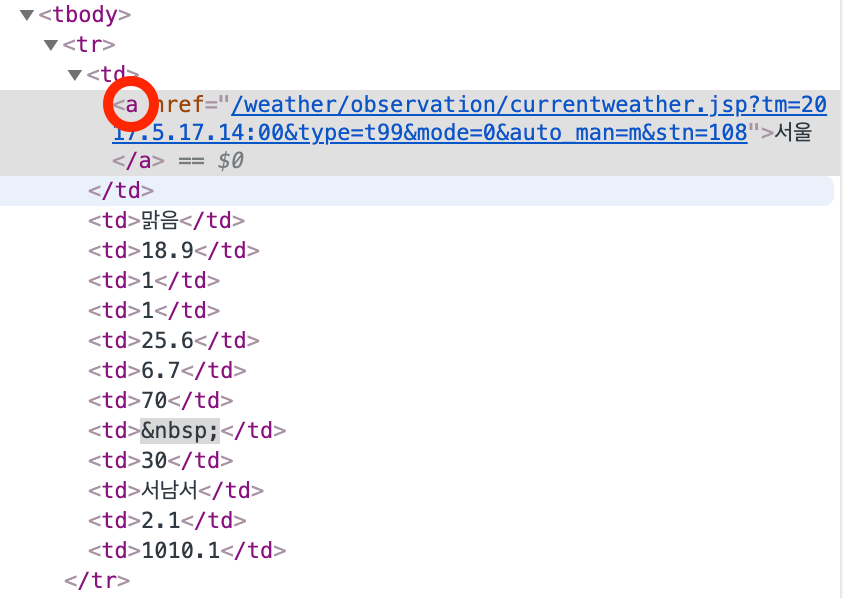
if td.find('a'):
td(열) 태그 안에 a 라는 태그가 있으면 a 태그의 텍스트를 가져온다. (지점을 가져온다)

point = td.find('a').text
리스트 인덱싱으로 여섯 번째 열에 있는 현재기온을 가져온다. (파이썬은 0부터 숫자를 센다)
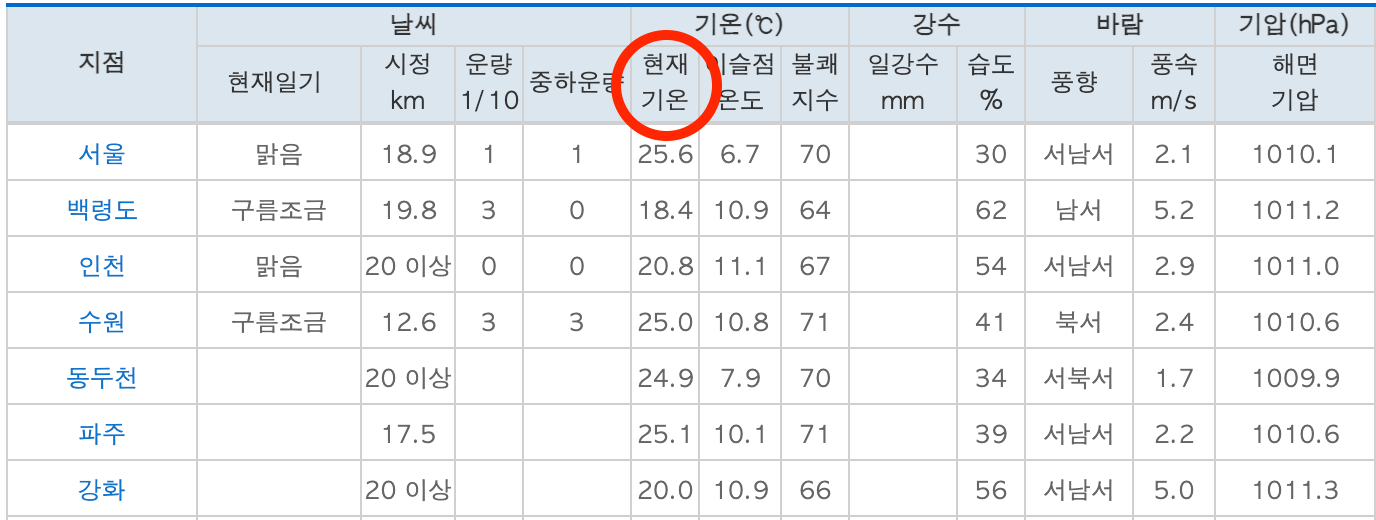
temperature = tds[5].text
마찬가지로 열 번째 열에 있는 습도를 가져온다. (파이썬은 0부터 숫자를 센다)
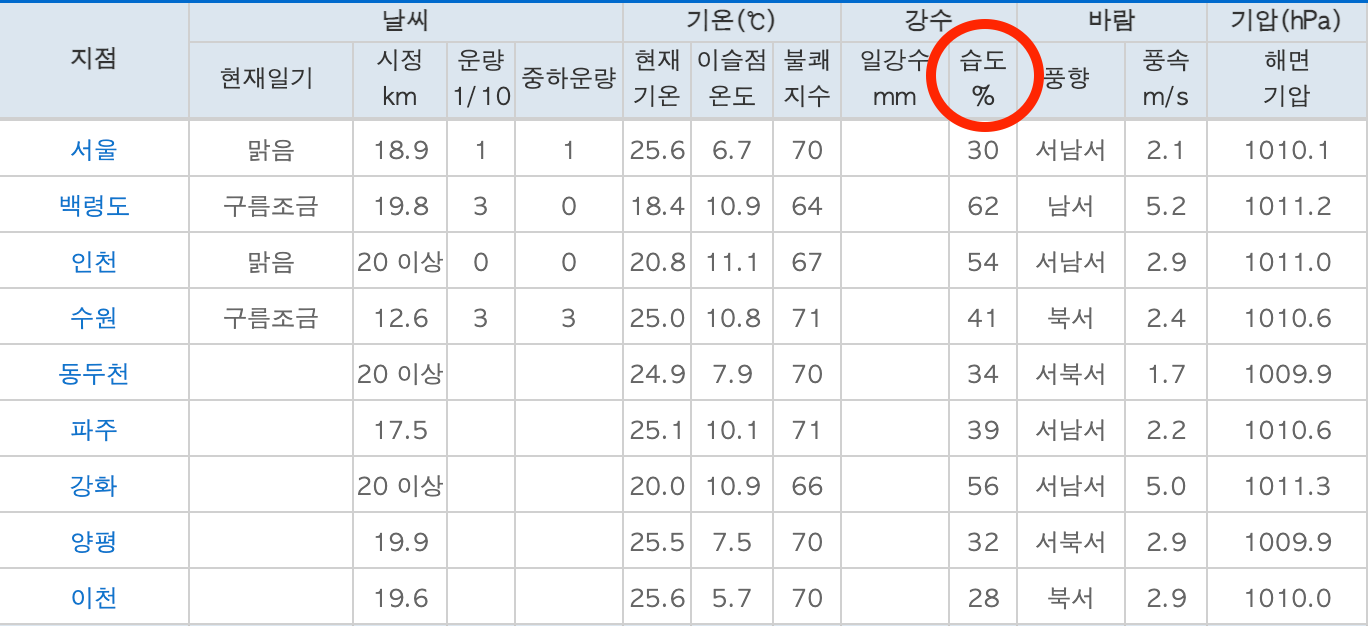
humidity = tds[9].text
아까 만든 빈 리스트에 append 함수를 써서 요소를 추가해준다.
data.append([point, temperature, humidity])
import requests
from bs4 import BeautifulSoup

response = requests.get(
    'https://pythondojang.bitbucket.io/weather/observation/currentweather.html'
)
soup = BeautifulSoup(response.content, 'html.parser')

table = soup.find('table', {'class': 'table_develop3'})
data = []  # 데이터를 저장할 빈 리스트 생성
for tr in table.find_all('tr'):
    tds = tr.find_all('td')

    for td in tds:
        if td.find('a'):
            point = td.find('a').text
            temperature = tds[5].text
            humidity = tds[9].text
            data.append([point, temperature, humidity])

print(data)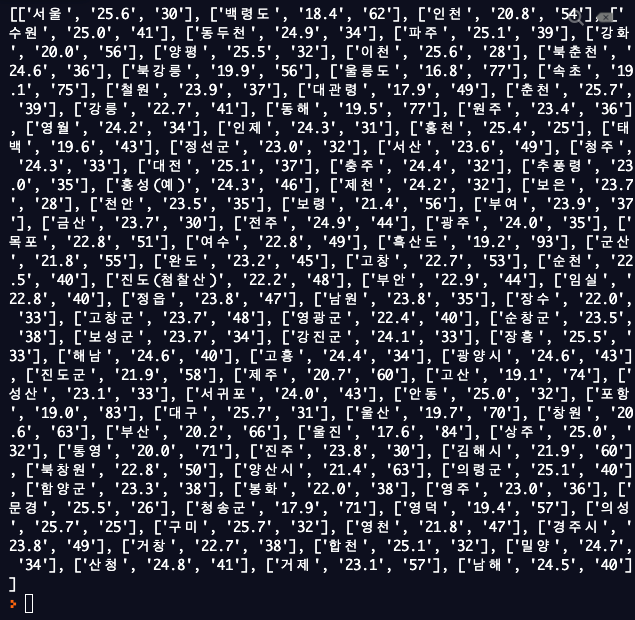
데이터를 csv 파일에 저장하기
csv 파일은 Comma-separated values의 약자인데 각 컬럼을 ,(콤마)로 구분해서 표현한다고 해서 csv라고 부른다.
'weather.csv' 파일을 w(쓰기 모드)로 열기
with open('weather.csv', 'w') as file:
write 함수 사용하여 첫 번째 행에 컬럼 이름 추가 (항목이름)
file.write('point,temperature,humidity\n')
for문 사용하여 지점 하나씩 읽어온다.
for i in data:
write 함수 사용하여 내용입력
file.write('{0},{1},{2}\n'.format(i[0], i[1], i[2]))
with open('weather.csv', 'w') as file:
    file.write('point,temperature,humidity\n')
    for i in data:
        file.write('{0},{1},{2}\n'.format(i[0], i[1], i[2]))
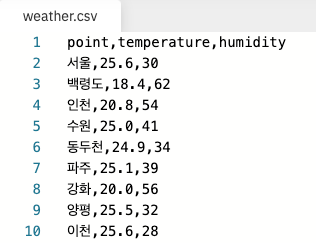
weather.csv 파일이 생성된 것을 볼 수 있다.

파일을 클릭해서 확인해보면 내용이 잘 들어가 있다.
