React Native - Create, Read
import { StatusBar } from "expo-status-bar";
import { useState } from "react";
import { Button, StyleSheet, Text, TextInput, View } from "react-native";
import uuid from "react-native-uuid";

export default function App() {
  const [inputText, setInputText] = useState("");
  const [todoList, setTodoList] = useState([]);

  // 입력값 가져오기
  const handleInputText = (inputText) => {
    setInputText(inputText);
  };
  // Add goal버튼을 누를때 실행
  const handleAddTodo = () => {
    // setTodoList([...todoList, inputText])
    setTodoList((todoList) => [...todoList, inputText]);
  };

  return (
    <View style={styles.container}>
      <View>
        <TextInput
          placeholder="your goal"
          style={styles.input}
          onChangeText={handleInputText}
        ></TextInput>
        <Button title="Add goal" onPress={handleAddTodo}></Button>
      </View>
      <View style={styles.line}></View>
      <View>
        {todoList.map((item) => {
          return (
            // ios에서는 Text태그에 직접적으로 넣은 스타일은 적용되지않으므로
            View태그로 다시 감싸준다
            <View style={styles.todoItem} key={uuid.v4()}>
              <Text style={{ color: "white" }}>{item}</Text>
            </View>
          );
        })}
      </View>
      <StatusBar style="auto" />
    </View>
  );
}

const styles = StyleSheet.create({
  container: {
    flex: 1,
    backgroundColor: "#fff",
    alignItems: "center",
    justifyContent: "center",
  },
  line: {
    width: "80%",
    height: 1,
    backgroundColor: "#333",
    marginVertical: 20,
  },
  input: {
    width: 200,
    height: 40,
    borderWidth: 1,
    borderColor: "#333",
    marginVertical: 20,
    paddingHorizontal: 10,
    borderRadius: 5,
  },
  todoItem: {
    width: 300,
    height: 40,
    backgroundColor: "#7326F0",
    borderRadius: 5,
    marginVertical: 5,
    padding: 10,
  },
});
주의할 것
1. onClick이 아닌 onPress를 사용한다
(모바일에는 클릭이 없음)
2. onChangeText나 onPress 등 이벤트에 함수를 넣을때는 ()를 빼야한다
(괄호를 추가하면 코드를 평가하고 파싱하는 즉시 함수를 실행시키게 됨 → UI 렌더링이 완료되기전에 함수가 실행되어 버린다)
3. ScrollView 대신 FlatList를 쓸 수도 있다.
ScrollView의 경우 모든 항목을 렌더링하기때문에 앱이 무거워진다는 단점이 있는데 FlatList는 화면에 보이는 항목만 렌더링하고 화면밖의 항목은 사용자가 스크롤해야 비로소 렌더링되기때문에 보다 효율적으로 관리하는 것이 가능하다.
미리보기
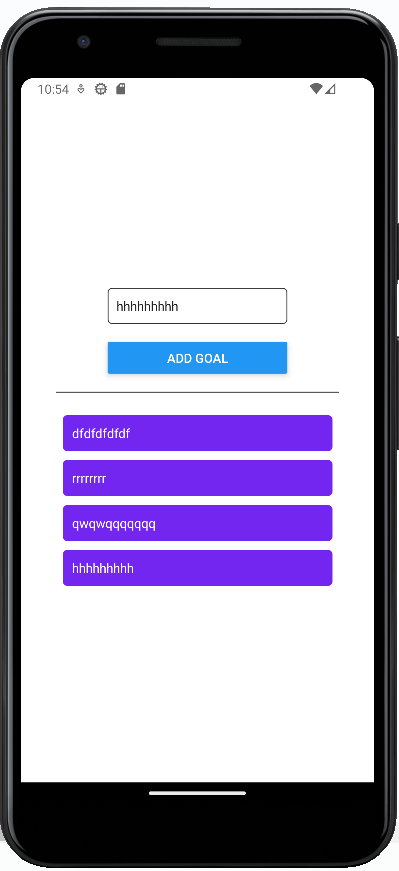

v_v