1) DOM 이란?
1) DOM 개요
Document Object Model
- The DOM is a Javascript representaiton of a webpage.
- It's your JS "Window" into the contents of a webpage.
- It's just a bunch of objects that you can interact with via JS.
2) getElementByID
3) getElementsByTagName & className
1) getElementsByTagName
const allImages = document.getElementsByTagName('img')

for (let img of allImages) {
    console.log(img.src)
}

//이미지 출처 주소를 알수있음 (src)

2) getElementsByclassName
const squareImages = document.getElementsByClassName('square')

for(let i of squareImages) {
    img.src = '';
}

4) querySelector & querySelectorAll
ALL-IN-ONE method to select a single element.
//<p> 태그안에 존재하는 anchor 태그 조회
const links = document.querySelectorAll('p a');
for ( let link of links) {
    console.log(link.href);
}
5) innerHTML, textContent & innerText
- textContent 는 텍스트에 적용된 효과까지 전부 보여주는 반면 innerText는 효과가 적용된 뒤의 모습을 보여준다.


- innerText는 입력한 text 그대로 반영이되며 태그의 효과까지 적용시키려면 innerHTML을 사용하자.
6) 속성(Attributes)

getAttribute

setAttribute

Manipulating Attributes Practice
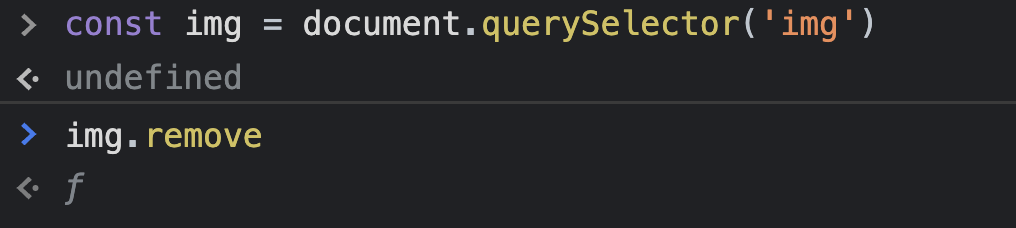
const img = document.querySelector('img');
img.setAttribute('src', 'https://devsprouthosting.com/images/chicken.jpg')
img.alt = 'chicken'
7) 스타일 변경하기
방법 1
-
Point : 1) 스타일적용시 속성에 '-'가 아닌 카멜케이스 사용 (ex.fontSize)
2) 스타일적용시 value값에는 항상 '' 사용 (문자열만)-> 선호되는 방법은 아님.
Magical Forest Circle Exercise
const div = document.querySelector('#container');
const img = document.querySelector('img');
div.style.textAlign = 'center'
img.style.width = '150px'
img.style.borderRadius = '50%'
Rainbow Text Excercise
const colors = ['red', 'orange', 'yellow', 'green', 'blue', 'indigo', 'violet'];

//YOU CODE GOES HERE:
const ele = document.querySelectorAll('span');
for(let element of colors) {
    ele[0].style.color = 'red'
    ele[1].style.color = 'orange'
    ele[2].style.color = 'yellow'
    ele[3].style.color = 'green'
    ele[4].style.color = 'blue'
    ele[5].style.color = 'indigo'
    ele[6].style.color = 'violet'
}
8) ClassList


toggle
-> 손쉽게 class 추가/제거 할 수 있음.
ClassList Practice
const li = document.querySelectorAll('li');

for (let ele of li) {
    ele.classList.toggle('highlight')
}
9) 계층 이동
ParentElement
nextElementSibling


previousElementSibling

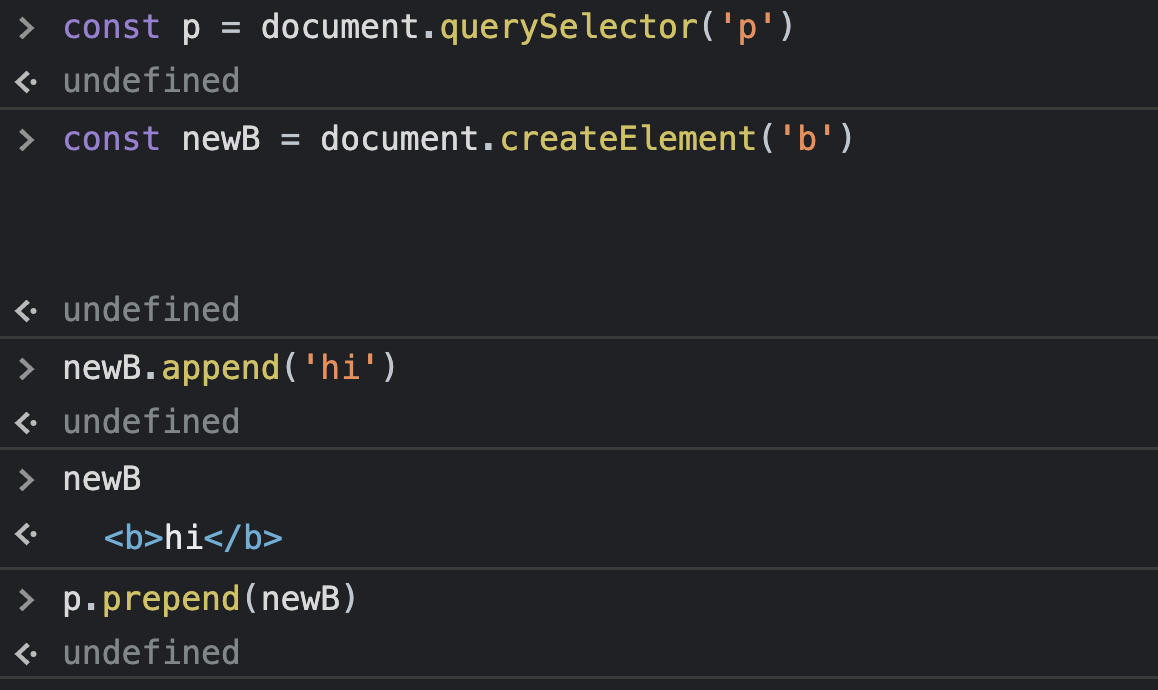
10) Append & AppendChild
AppendChild
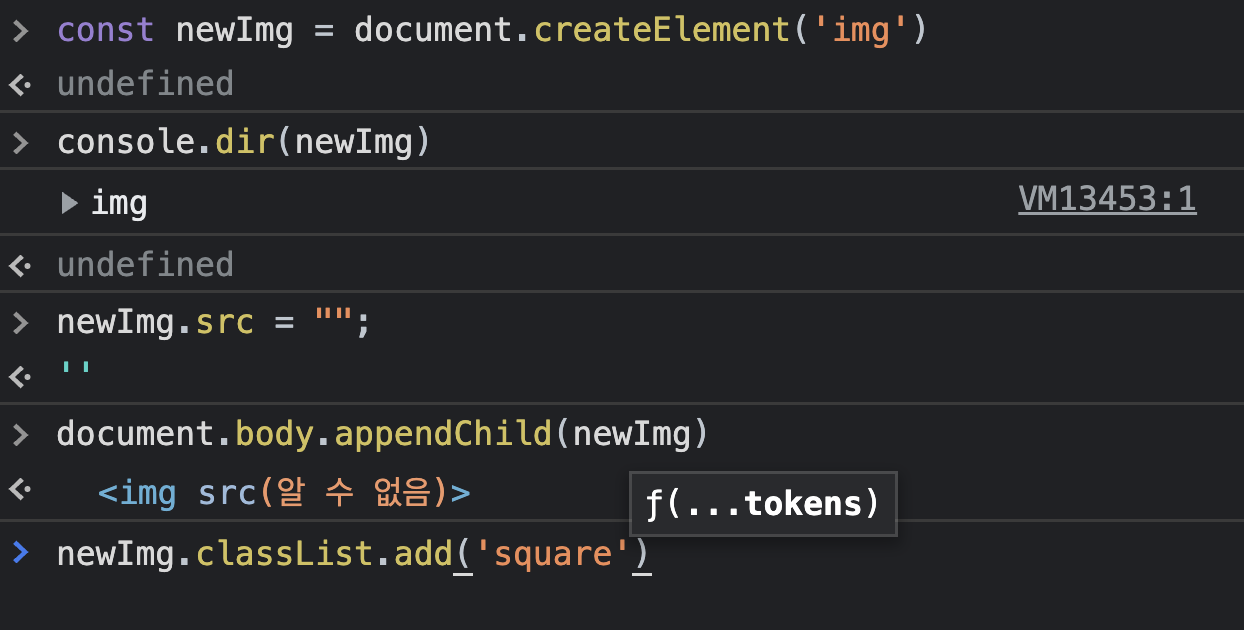

Append (맨 끝에 추가됨)

prepend
insertAdjacentElement

100 Button Insanity Exercise
const container = document.querySelector('#container')

for(let i = 0; i<=99; i++) {
    const button = document.createElement('button');
    button.innerText = 'HEY'
    container.appendChild(button)

}
11) removeChild & remove

better way (remove)
12) 포켓몬 게임 데모
const container = document.querySelector('#container')
const baseURL = 'https://raw.githubusercontent.com/PokeAPI/sprites/master/sprites/pokemon/';


for (let i =0; i<10; i++){
    const pokemon = document.querySelector('div') //div
    pokemon.classList.add('pokemon') //div에 pokemon 클래스명 추가
    const label  = document.querySelector('span')
    label.innerText = `#${i}` //네이밍
    const newImg = document.createElement('img')
    newImg.src = `${baseURL}${i}.png`
    pokemon.appendChild(newImg)  //div태그 자식 추가
    pokemon.appendChild(label) //div태그 자식 추가
    container.appendChild(pokemon); //container => div의 부모

}

// <div>
     //<img>
     	//<span> ...
2) 잃어버린 퍼즐 한 조각: DOM 이벤트
1) 이벤트
EVENTS
- Responding to user inputs and actions !
2) 온클릭(Onclick) 속성
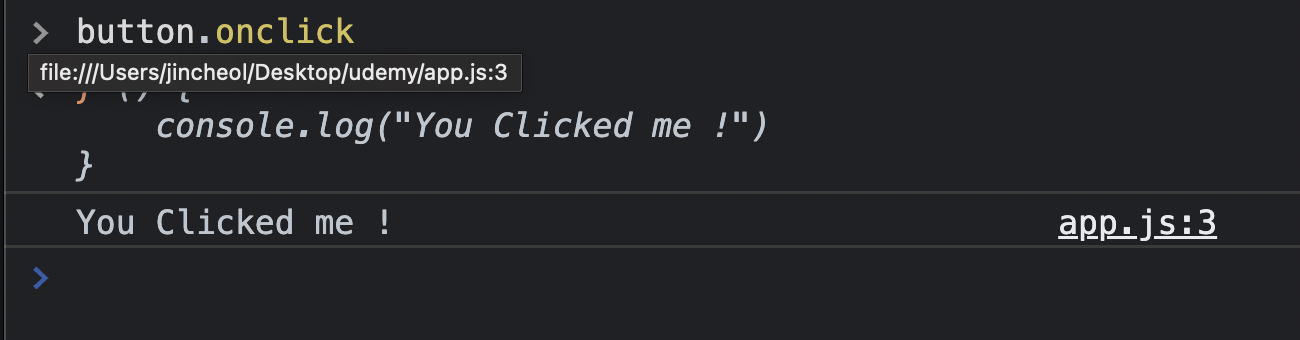
const button = document.querySelector('#v2')
button.onclick = function() {
    console.log("You Clicked me !")
}
function scream() {
    console.log("AHHHAAHAHHA")
}

button.onmouseenter = scream;

//함수를 '호출'하는것이 아닌 해당 객체상의 특성으로 설정하는 것 뿐임.
3) addEventListener
<함수설정>
1)
button.addEventListener("click", function() {
    alert("clikc!")
})

<함수로 적용>
2)
function scream() {
    alert("AHAHHA!!")

}
button.addEventListener("click", scream);
Click Events Exercise
const hello = document.querySelector('#hello');
const goodbye = document.querySelector('#goodbye')

hello.addEventListener("click", function() {
    console.log("hello")
})

goodbye.addEventListener("click" , function() {
    console.log("goodbye");

})
4) 랜덤 컬러 출력
const button = document.querySelector('button');
const h1 = document.querySelector('h1');
const r = Math.floor(Math.random() * 256) + 1;
const g = Math.floor(Math.random() * 256) + 1;
const b = Math.floor(Math.random() * 256) + 1;

button.addEventListener("click", function(){
    if(r + g + b < 100) {
        h1.style.color = 'white';
    } else {
        h1.style.color = 'black';
    }
    const newColor = makeRandomColor();
    document.body.style.backgroundColor = newColor;
    h1.innerText = newColor;
})


const makeRandomColor = () => {
    const r = Math.floor(Math.random() * 256) + 1;
    const g = Math.floor(Math.random() * 256) + 1;
    const b = Math.floor(Math.random() * 256) + 1;
    return  `rgb(${r},${g},${b})`
}
5) 이벤트와 'this'라는 키워드
const makeRandomColor = () => {
const r = Math.floor(Math.random() * 256) + 1;
const g = Math.floor(Math.random() * 256) + 1;
const b = Math.floor(Math.random() * 256) + 1;
return `rgb(${r},${g},${b})`
}
const buttons = document.querySelectorAll('button');
const h1s = document.querySelectorAll('h1');
for (let button of buttons) {
this.addEventListener('click', function() {
this.style.backgroundColor = makeRandomColor();
})
}
for (let h1 of h1s) {
this.style.backgroundColor = makeRandomColor();
this.style.color = makeRandomColor();
}
function colorize() {
this.addEventListener("click", function() {
this.style.backgroundColor = makeRandomColor();
this.style.color = makeRandomColor();
})
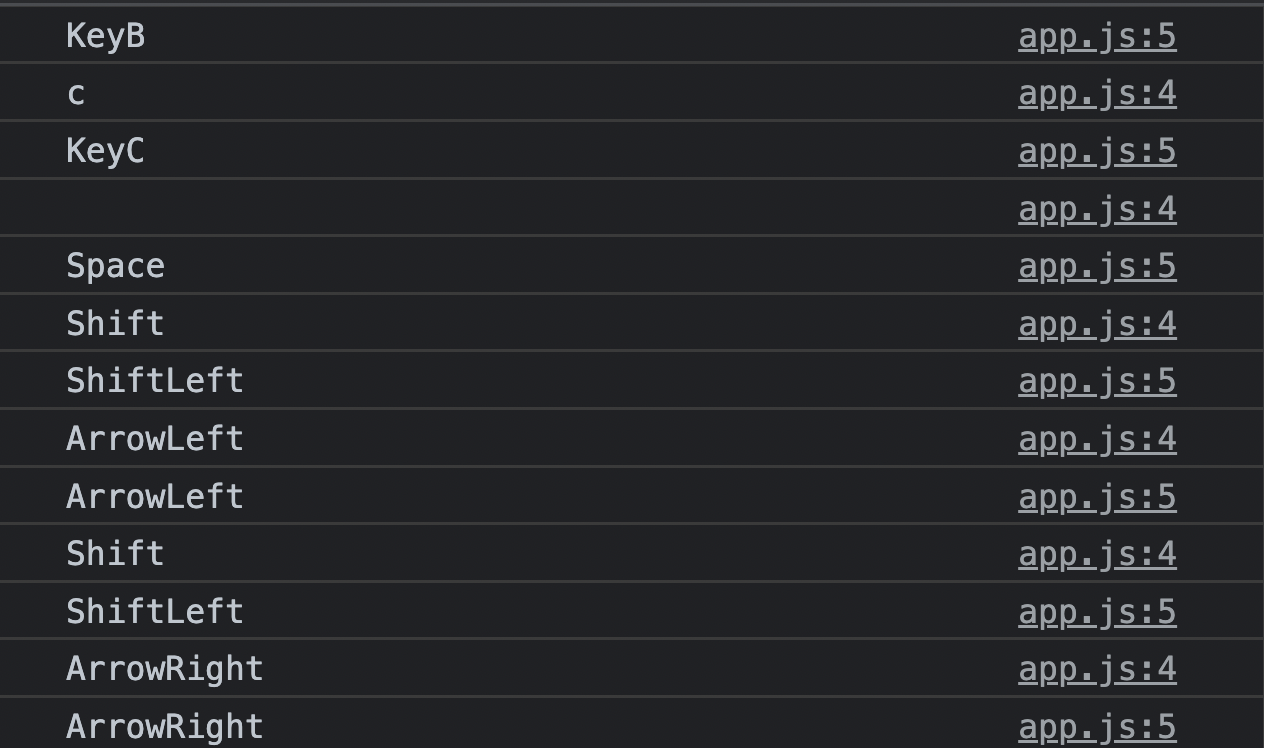
}6) 키보드 이벤트와 이벤트 객체
이벤트 객체는 모든 이벤트 핸들러에 엑세스하며 자동으로 전달된다.(매게변수: event, evt, e)
const input = document.querySelector('input');
input.addEventListener('keydown', function(e){
    console.log(e.key)
    console.log(e.code)
})- key: 키보드 내에 존재하는 실질적인 key 자체 (글자나 문자) - 키보드자판을 눌러 생성되는 최종 값.
- code: 키보드 내에서의 실제 '위치'
7) 폼 이벤트(From Events) 와 PreventDefault
const tweetForm = document.querySelector('#tweetForm') //form 아이디명
const container = document.querySelector('#tweets') // ul 아이디명

//submit 할때 실행되는 함수
tweetForm.addEventListener('submit', function(e) {

   e.preventDefault(); //이벤트(form의 action)의 기본동작을 실행못하게함
   const usernameInput =  tweetForm.elements.username; //form의 element(input태그)의 username(input에 부여된 id 값)
   const tweetInput =  tweetForm.elements.tweet; //tweet은 id로 부여된 이름임.
   addTweet(username.value, tweet.value);
   usernameInput.value = ' '; // username 입력 후 입력창 초기화
   tweetInput.value = ' '; // tweet 입력후 입력창 초기화

 })


const addTweet = (username, tweet) => {
    const newTweet = document.createElement('li')
    const bTag = document.createElement('b') //볼드체 추가
    bTag.append(usernameInput); //username에 볼드체 추가
    newTweet.append(bTag) //li에 볼드체태그 적용된 username 추가
    newTweet.append(`- ${tweetInput}`)
    container.append(newTweet); //ul에 li 추가
}
elements 는 순서대로 정렬된 '집합' 입력에 name을 부여하면 각 입력에 name으로 access 가능
Ex) tweetForm.elements.(username/tweet) , ( ) 안은 내가 접근하고 싶은 값.
8) 입력과 변경 이벤트
실시간으로 내가 입력한 값이 브라우저에 나타나게 만듦.
const input = document.querySelector('input');
const h1 = document.querySelector('h1');


input.addEventListener('input', function(e){
    h1.innerText = input.value;
})

Input Event Exercise
const input = document.querySelector('input')
const h1 = document.querySelector('h1');

input.addEventListener('input', function(e){
    h1.innerText = `Welcome, ${input.value}`
    let inputValue = input.value
    if (inputValue === '') {
        h1.innerText = "Enter Your Username"
    }
})
9) 이벤트 위임
이벤트 위임은 이벤트 수신기가 추가된 시점에 페이지에 없었던 요소를 다루어야 하는 상황에 적용.
const lis = document.querySelectorAll('li')
for (let li of lis) {
    li.addEventListener('click', function(e){
        li.remove();
    })
}- 상기코드처럼 tweet 된 코멘트들을 추후에 삭제하기 위해 함수설정을 해주었으나 기존의 html에 존재하는 li만 삭제할 수 있을뿐 추후에 추가적으로 달린 코멘트는 click해도 사라지지 않는다 이때 필요한게 이벤트 '위임' 이다.
const container = document.querySelector('#tweets') // ul 아이디

//이벤트 위임은 목표 요소의 '부모'요소에 적용을 시켜주는것 (li의 부모요소인 ul)
container.addEventListener('click', function(e){
    e.target.nodeName === 'LI" && e.target.remove();
})
"target" 속성 사용 !! - traget 이 'li'로 되어있으므로 li 를 눌렀을 때 remove가 가능한것. 추가적으로 nodeName 속성으로 내가 이벤트를 적용시키려는 태그가 맞는지 확인하고 메소드를 적용시켜주는것이 좋음(nodeName)
3) 비동기식 Javascript
1) 콜 스택(call stack)
The mechanism the JS interpreter uses to keep track of its place in a script that calls multiple functions. How JS "knows" what function is currently being run and what functions are called from within that function, etc.
HOW IT WORKS
-
when a script calls a function, the interpreter adds it to the call stack and then starts carrying out the function.
-
Any functions that are called by that function are added to the call stack further up, and run where their calls are reached
-
when the current function is finished, the interpreter takes it off the stack and resumes execution where it left off in the last code listing.
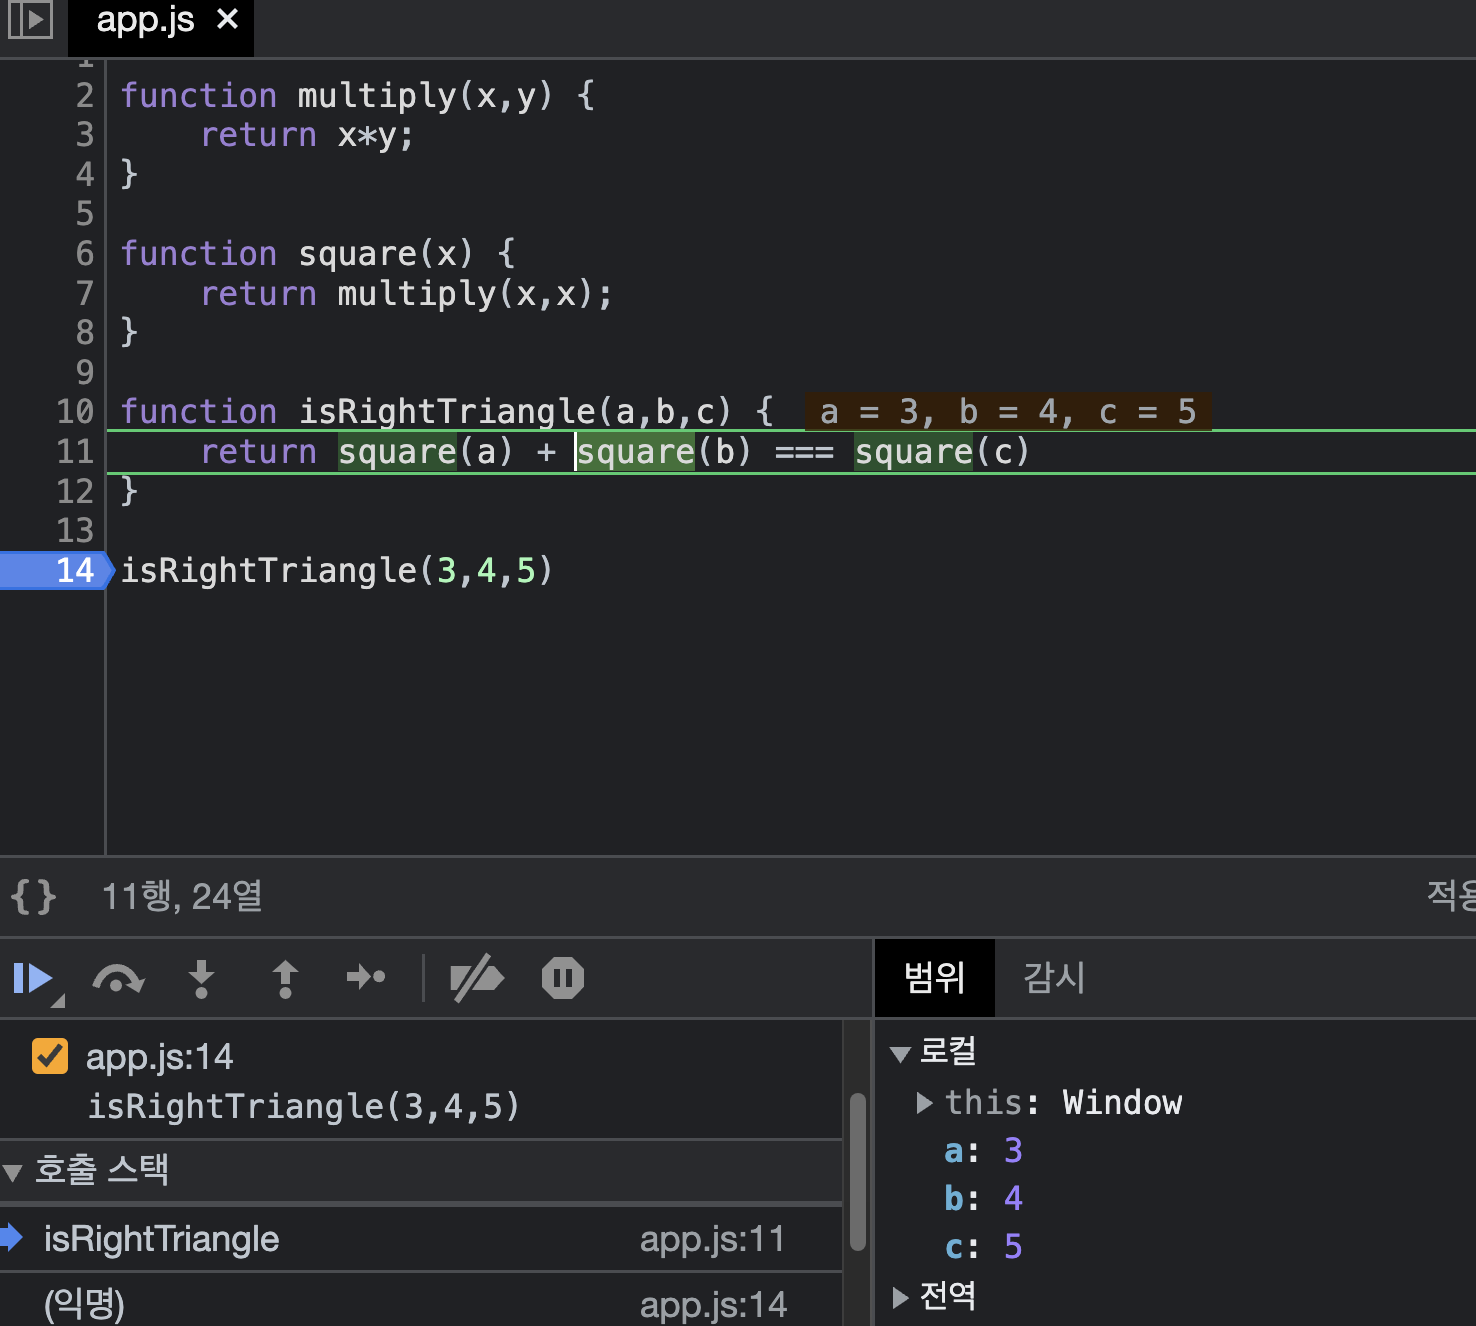
Ex)

const multiply = (x,y) => x*y;

const square = (x)  => multiply(x,x);

const isRightTriangle = (a,b,c) => {
    return square(a) + square(b) === square(c)
};- 1) isRightTriangle 함수가 처음으로 실행됨.
- 2) square 함수가 실행됨.
- 3) multiply 함수 실행됨
- 4) 이후로 새로운 함수가 호출될게 없음 따라서 multiply 함수가 제거됨
- 5) square은 mulitply 함수의 결과값을 갖게됨
- 6) isRightTriangle 함수는 sqaure(a)인 첫번째 작은덩어리의 값을 갖게됨.
- 7) square(b)에서 반복
- 8) square(a) + square(b) 의 결과를 square(c)와 비교
-
1)
-
2)

-
3)

-
4)

-
5)

2) WebAPI 와 단일스레드
console.log("Sending request to server!")  - 1)
setTimeout(() => {console.log("Here is your data for the server...")}, 3000) - 2)
console.log("I AM AT THE END OF THE FILE!") -3)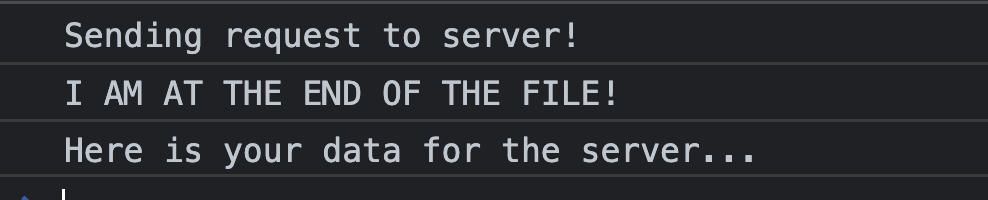
1,2,3순서대로 출력을 해야할 것 같지만 JS는 1,3,2순서대로 출력
- 브라우저는 JS로 작성되는것이 아니라 대게 C++같은 언어로 작성되므로 JS가 할 수 없는것들은 브라우저에게 떠너김 (requset , setTimeout)
- 웹 브라우저에는 Web APIs가 존재 (JS에서 호출해서 브라우저로 전달 - 나는(JS) 이거 못해!)
- 브라우저가 할 일을 마치면 콜스택에 추가
3) Callback
콜백함수: 파라미터로 함수를 전달하는 함수
콜백함수란 파라미터로 함수를 전달받아 함수의 '내부'에서 실행하는 함수이다.
- 목적: 비동기 방식으로 작성된 함수를 동기 처리 하기 위해 주로 사용한다.
비동기 처리를 기본으로 하면서도 일부 구간에서 순차적인 처리가 필요할 수도 있기 때문이다. 다르게 말하면 독립적으로 수행되는 작업도 있는 반면 응답을 받은 이후 처리되어야 하는 종속적인 작업도 있을 수 있으므로 그에 대한 대응 방법이 필요한것.
//newcolor로 변신한다. delay를 두면서 그리고 (callback)함수를 실행한다.
const delayedColorChange = (newcolor, delay, callback) => {
    setTimeout(() => {
        document.body.style.backgroundColor = newcolor;
        callback();
    }, delay)
}


delayedColorChange('olive', 1000, () => {
    delayedColorChange('blue', 1000, () => {
        delayedColorChange('pink', 1000, () => {
            delayedColorChange('magenta', 1000, () => {
                delayedColorChange('green', 1000, () => {

                })
            })
        })
    })
});
//해당 함수가 실행될때/안될때를 나눠주기위한 콜백함수의 중첩
searchMoviesAPI('amadeus', () =>{
saveToMyDB(moveis, () => {
//if it works, run this
}, () =>{
//if it doesnt work, run this
})
}, () => {
//if API is down, or request failed
})4) callback을 사용한 fakerequest
Enter Promises
-
A promise is an object representing the eventual completion or failure of an asynchornous operation.
-
A promise is a " returned object " to which you attach callbacks, instead of passing callbacks into a function.
// THE CALLBACK VERSION
const fakeRequestCallback = (url, success, failure) => {
    const delay = Math.floor(Math.random() * 4500) + 500;
    setTimeout(() => {
        if (delay > 4000) {
            failure('Connection Timeout :(')
        } else {
            success(`Here is your fake data from ${url}`)
        }
    }, delay)
}
// THE PROMISE VERSION
const fakeRequestPromise = (url) => {
    return new Promise((resolve, reject) => {
        const delay = Math.floor(Math.random() * (4500)) + 500;
        setTimeout(() => {
            if (delay > 4000) {
                reject('Connection Timeout :(')
            } else {
                resolve(`Here is your fake data from ${url}`)
            }
        }, delay)
    })
}
then/catch (then은 promise객체를 반환할 때 마다 불려지는 메소드)
// THE CLEANEST OPTION WITH THEN/CATCH
// RETURN A PROMISE FROM .THEN() CALLBACK SO WE CAN CHAIN!
fakeRequestPromise('yelp.com/api/coffee/page1')
    .then((data) => {
        console.log("IT WORKED!!!!!! (page1)")
        console.log(data)
        return fakeRequestPromise('yelp.com/api/coffee/page2')
    })
    .then((data) => {
        console.log("IT WORKED!!!!!! (page2)")
        console.log(data)
        return fakeRequestPromise('yelp.com/api/coffee/page3')
    })
    .then((data) => {
        console.log("IT WORKED!!!!!! (page3)")
        console.log(data)
    })
    .catch((err) => {
        console.log("OH NO, A REQUEST FAILED!!!")
        console.log(err)
})- then 메소드가 위에서부터 차례로 실행됨 보다 위에 있는 것이 실행되지 않으면 밑의 then은 실행되지 않는다.
5) 나만의 Promises 만들기
const fakeRequset = (url) => {
  return new Promise((resolve, reject) => {
      setTimeout(() => {
          resolve();

        },1000)
  })
}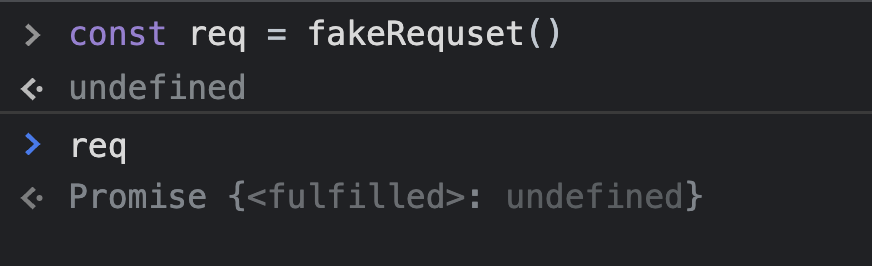
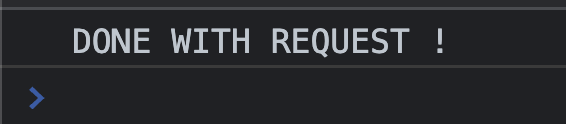
fakeRequset('/dogs/1')
.then(() => {
    console.log("DONE WITH REQUEST !")

})
const fakeRequset = (url) => {
  return new Promise((resolve, reject) => {
      const rand = Math.random();
      setTimeout(() => {
          if(rand < 0.7) {
          resolve("YOUR FAKE DATA HERE !");
        } else {
            reject('REQUEST ERROR !!');
        }


        },1000)
  })
}

fakeRequset('/dogs/1')
.then((data) => {
    console.log("DONE WITH REQUEST !")
    console.log("data is: ", data )

})
.catch((err) => {
    console.log("OH NO!", err)
})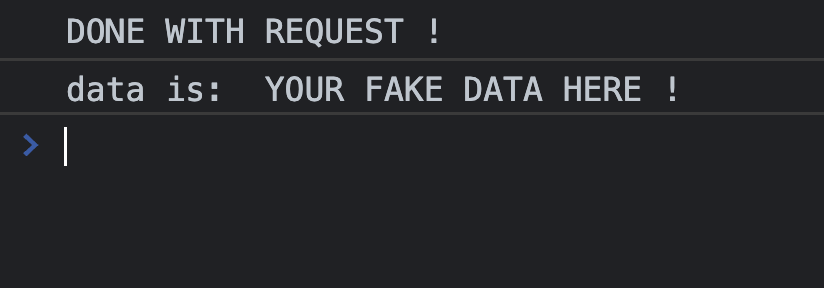
- .then(data)에서 파라미터인 'data'는 reslove가 실행됬을때 반환값을 매개변수로 받는다.
//reject 은 필요없으니 기재 할 필요 없음
const changeNewColor = (newcolor,sec) => {
    return new Promise((resolve, reject) => {
        setTimeout(() => {
            document.body.style.bacgroundColor = newcolor
            resolve();
        }, sec)
    })
}

changeNewColor('pink', 1000)
//changeNewColor함수가 실행되면 그 밑의 then 메소드 실행 그 다음 실행....
    .then(() => changeNewColor('orange',1000))
    .then(() => changeNewColor('olive',1000))
    .then(() => changeNewColor('blue',1000))
    .then(() => changeNewColor('green',1000))
6) 비동기 키워드
Async Functions
- A newer and cleaner syntax for working with async code !
Syntax "makeup" for promises
1) Async
- Async functions always return a promise.
- If the function returns a value, the promise will be resolved with that value.
- If the function throw an exception, the promise will be rejected.
함수 앞에 async를 입력해서 비동기 함수로 선언하면 자동으로 promise를 반환
async function hello() {

}
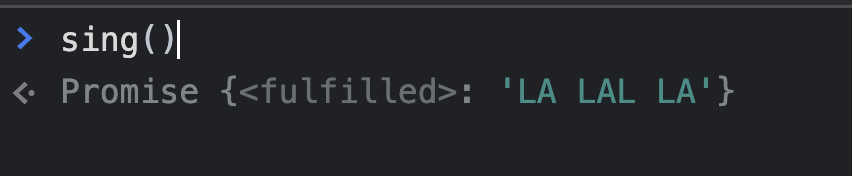
 const sing = async() => {
     return 'LA LAL LA'
 }
const sing = async() => {
return 'LA LAL LA'
}
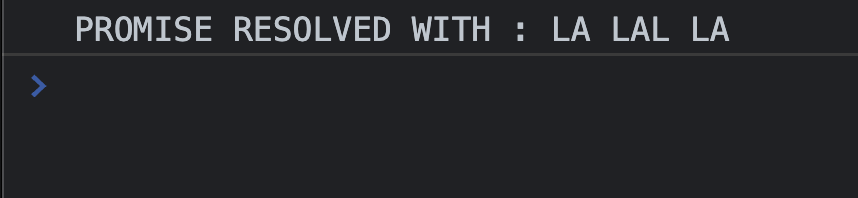
sing().then((data) => {
console.log("PROMISE RESOLVED WITH :" , data)
})
//오류를 던져서(throw) 실행한 promise
const sing = async() => {
    throw "UH OH"
     return 'LA LAL LA'
 }


//오류를 던졌으므로 catch메소드가 실행됨.

 sing()
 .then((data) => {
  })
 .catch((err) => {
    console.log("OH NO, PROMISE REJECTED")
    console.log(err)
}) 
const login = async (username, password) => {
   if(!username || !password) throw 'Missing Credentials'
   if(password === 'abcd123!') return 'WELCOME!'
   throw 'Invalid Password'
}

login('Tony')
.then((msg) => {
   console.log("LOGGD IN !")
   console.log(msg);

})
.catch((err) => {
   console.log("ERROR!!!")
   console.log(err);
})
const login = async (username, password) => {
if(!username || !password) throw 'Missing Credentials'
if(password === 'abcd123!') return 'WELCOME!'
throw 'Invalid Password'
}
//password 를 입력하지 않았을 때
login('Tony')
.then((msg) => {
console.log("LOGGD IN !")
console.log(msg);
})
.catch((err) => {
console.log("ERROR!!!")
console.log(err);
})
- 매개변수에 password를 입력하지 않았으므로 if(!username || !password) throw 'Missing Credentials' 코드가 실행된다.
2) Await
promise가 해결될 때까지 실행을 멈추는 키워드
- we can only use the await keyword inside of functions declared with async.
- await will pause the execution of the function, waiting for a promise to be resolved
const delayedColorChange = (color,delay) => {
    return new Promise((resolve, reject) => {
        setTimeout(() => {
            document.body.style.backgroundColor = color;
            resolve();
        }, delay);
    })
}

delayedColorChange('red', 1000)
    .then(() => delayedColorChange('orange',1000))
    .then(() => delayedColorChange('yellow',1000))
    .then(() => delayedColorChange('green',1000))
    .then(() => delayedColorChange('blue',1000))
    .then(() => delayedColorChange('indigo',1000))
    .then(() => delayedColorChange('violet',1000))


async function rainbow()  {
  await  delayedColorChange('red', 1000);
  await  delayedColorChange('orange', 1000);
  await  delayedColorChange('yellow', 1000);
  await  delayedColorChange('blue', 1000);
  await  delayedColorChange('indigo', 1000);
  await  delayedColorChange('violet', 1000);

}- async 비동기 함수와 await 메소드는 한 세트
- then 메소드 대신 awiat 함수를 사용.
- await 을 사용하지 않으면 시간차이를 두고 실행되어야 할 함수들이 충돌을 일으킴
- await을 써줌으로써 정해진 딜레이 시간만큼의 간격을 두고 함수 실행이 가능해짐.
3) 비동기 함수의 오류 처리하기
async function makeTwoRequests() {
    try {
    let data1  = await fakeRequest('/page1');
    console.log(data1)
    let data2 = await fakeRequest('/page2');
    console.log(data2)
    } catch (err) {
    console.log("CAUGHT AN ERROR!")
    console.log9("error is: " , err)
   }
}- try 의 내용을 실행하고 오류 발생시, catch 키워드의 내용을 출력한다.