
Vue를 공부해보자.
해커뉴스라는 홈페이지를 카피해볼 예정이다.
데이터는 Hacker-News의 api를 받아서 할예정이다.
Hacker-News api github 주소이다.
https://github.com/tastejs/hacker-news-pwas/blob/master/docs/api.md
1.vue 설정
Vue기본설정을 해보자.
vscode를 사용해서 진행을 할 예정이다.
vscode에서 기본설정이 되어있다는 가정하에 진행하도록 하겠다.
일단 프로젝트를 만들어주자.
터미널에 다음과 같이 입력하자
vue create hacker-news <- 입력
(base) ~/vueeeeeee vue create hacker-news
Vue CLI v4.5.12
┌───────────────────────────────────────────┐
│ │
│ New version available 4.5.12 → 4.5.13 │
│ Run npm i -g @vue/cli to update! │
│ │
└───────────────────────────────────────────┘
? Please pick a preset: Default ([Vue 2] babel, eslint)
Vue CLI v4.5.12
✨ Creating project in /home/song/vueeeeeee/hacker-news.
🗃 Initializing git repository...
⚙️ Installing CLI plugins. This might take a while...
added 1273 packages, and audited 1274 packages in 16s
70 packages are looking for funding
run `npm fund` for details
45 moderate severity vulnerabilities
To address issues that do not require attention, run:
npm audit fix
To address all issues (including breaking changes), run:
npm audit fix --force
Run `npm audit` for details.
🚀 Invoking generators...
📦 Installing additional dependencies...
added 77 packages, and audited 1351 packages in 9s
77 packages are looking for funding
run `npm fund` for details
45 moderate severity vulnerabilities
To address issues that do not require attention, run:
npm audit fix
To address all issues (including breaking changes), run:
npm audit fix --force
Run `npm audit` for details.
⚓ Running completion hooks...
📄 Generating README.md...
🎉 Successfully created project hacker-news.
👉 Get started with the following commands:
$ cd hacker-news
$ npm run serve
만든 폴더에 들어가서 다음과 같이 입력하면 서버가 실행된다.
(base) ~/vueeeeeee/hacker-news master npm run serve
> hacker-news@0.1.0 serve
> vue-cli-service serve
INFO Starting development server...
98% after emitting CopyPlugin
DONE Compiled successfully in 2054ms 오후 5:18:23
App running at:
- Local: http://localhost:8080/
- Network: http://10.153.3.167:8080/
Note that the development build is not optimized.
To create a production build, run npm run build.
들어가지면 성공!
2.Router설정
News, Ask, Jobs, Datail page, User page까지 총 5개의 페이지를 구현할 예정이다.
일단 라우터를 추가해주자
npm i vue-router --save위 명령어를 입력하면 라우터 설정이되고
package.json을 보면
  "dependencies": {
    "core-js": "^3.6.5",
    "vue": "^2.6.11",
    "vue-router": "^3.5.1"  <--- 추가
  },
위 와 같이 vue-router이 추가가 된다.
추가가 됐으면 설정을 해주는 방법은 src폴더 밑에 routes란 폴더를 만들고
그 밑에 index.js를 만들고 설정을 해주자.
import Vue from 'vue';
import VueRouter from 'vue-router';
import NewsView from '../views/NewsView.vue';
import AskView from '../views/AskView.vue';
import JobsView from '../views/JobsView.vue';

Vue.use(VueRouter);

export const router = new VueRouter({
    routes: [
        // path : url 주소
        // component : url 주소로 갔을 때 표시 될 컴포넌트
        {
            path: '/news',
            component: NewsView,
        },
        {
            path: '/ask',
            component: AskView,
        },
        {
            path: '/jobs',
            component: JobsView,
        },
    ]
});
그리고 src 밑에 views폴더를 만들고 AskView.vue, JobsView.vue, NewsView.vue를 만들고
다음과 같이 각 파일에 다음과 같이 입력해주자.
<template>
  <div>
      ask <-- 파일명에 맞게 입력
  </div>
</template>

<script>
export default {

}
</script>

<style>

</style>
vscode플러그인 Vetur를 설치하면 vue입력후 탭을 누르면 자동완성된다.
타자가 1000타이상 나오지 않는이상 설치 추천.. 1000타 이상 나와도 설치하세요 ^^

그리고 main.js에 router을 추가해주자.
상단에
import { router } from './routes/index.js';

하단에
new Vue({
  render: h => h(App),
  router,      <--- 추가
}).$mount('#app')
여기까지 하고 App.vue파일을 아래와 같이 수정한다
<template>
  <div id="app">
    <router-view></router-view> <---
  </div>
</template>

<script>
export default {
}
</script>
수정후 vue run serve명령어로 실행시킨다음
news페이지에 접속을해보자.
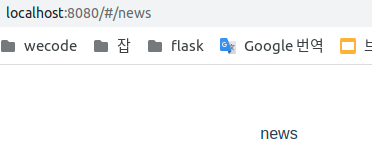
1부 끝