Tailwind CSS에서 custom color를 설정하는 방법을 알아보겠습니다. 급하신 분들은 맨 마지막 최종 해결법만 보시고 따라하시면 됩니다.
Tailwind CSS는 기본적으로 'red', 'blue', 'gray' 등과 같은 색상을 제공한다. 그리고 text-red-800, bg-blue-100 과 같이 적용할 대상과 정도를 설정하여 사용이 가능하다
    <div className="bg-yellow-200">
      <h1 className="text-green-500">안녕하세요</h1>
    </div>
코드 예시

렌더링 결과
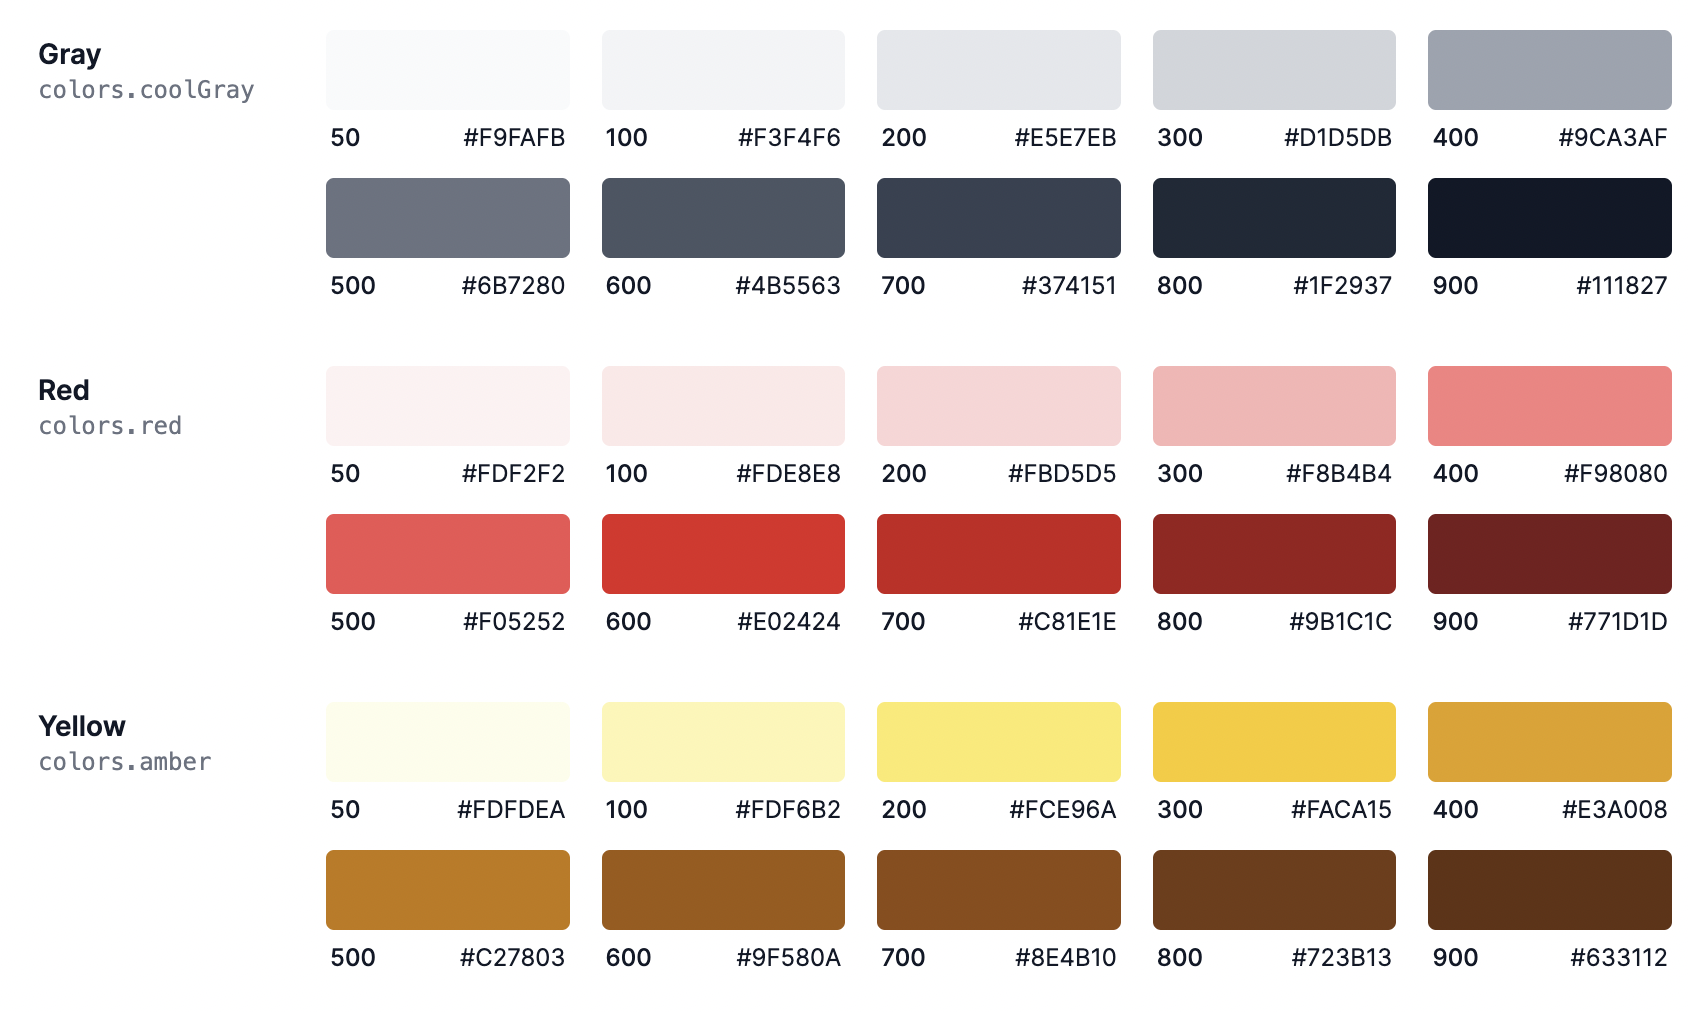
https://flowbite.com/docs/customize/colors/ 에서 더 많은 기본 색상을 확인할 수 있다.
그렇다면 이러한 기본 색상 외에 직접 색상을 설정하고 사용하려면 어떻게 해야할까?

현재 진행중인 프로젝트의 메인 컬러인 형광 녹색(#00FF7F)을 테일윈드 CSS 코드로 사용하고자 한다.
https://tailwindcss.com/docs/customizing-colors
먼저 테일윈드 공식 도큐멘트를 살펴보았다.
위와 같이 tailwind.config.js 파일 설정을 통해 커스텀 색상을 지정할 수 있다고 한다.
// tailwind.config.js
module.exports = {
  content: ['./src/**/*.{js,jsx,ts,tsx}'],
  theme: {
    colors: {
      'my-color': '#00FF7F',
    },
  },
  plugins: [],
};
따라서 위와 같이 tailwind.config.js 파일을 설정하고
<div>
  <h1 className="text-my-color">링클립</h1>
</div>
렌더링할 컴포넌트 코드를 위와 같이 작성했다. 그리고 실행해 본 결과, 다음과 같은 에러가 발생했다.
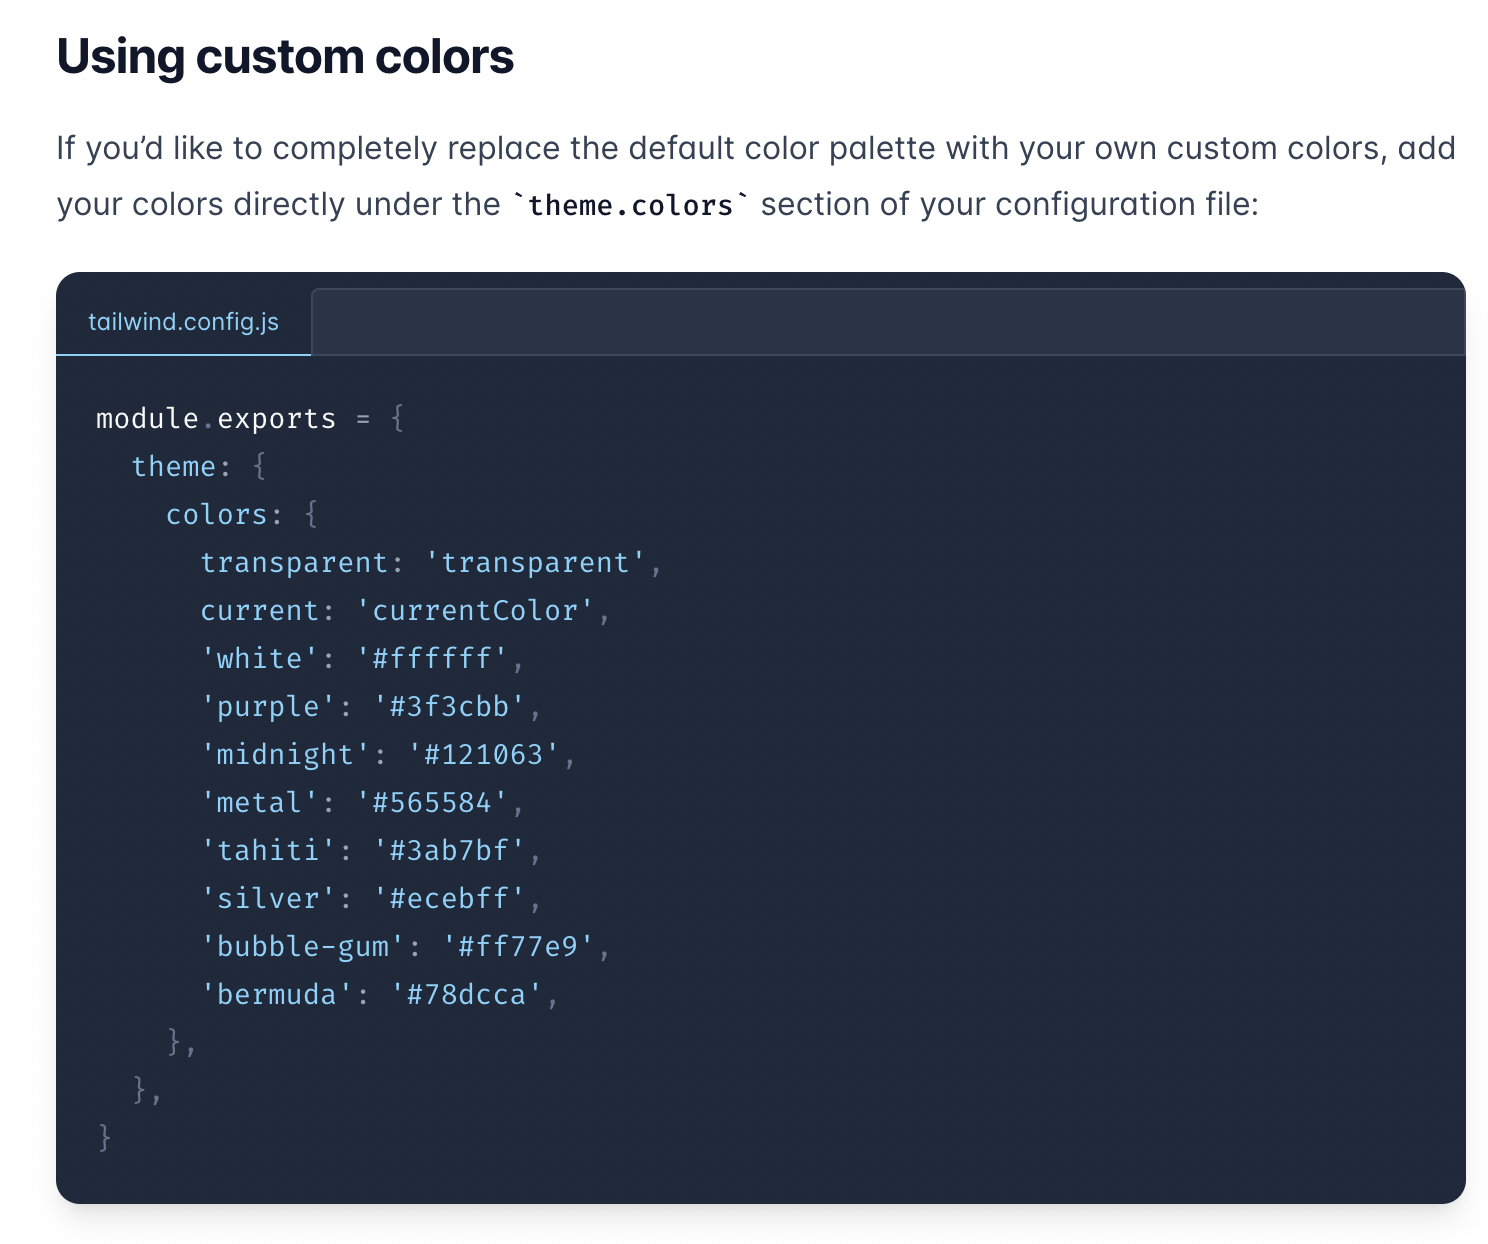
The `border-transparent` class does not exist. If `border-transparent` is a custom class, make sure it is defined within a `@layer` directive.다른 컴포넌트에서 사용중인 transparent 설정을 찾을 수 없어서 에러가 발생했다. 그러고보니 위의 tailwind 공식 문서 예시를 보면 transparent, current, white 등등의 색들도 작성되어있다. 그것을 그대로 적용해보면 다음과 같다.
// tailwind.config.js

const colors = require('tailwindcss/colors');

module.exports = {
  content: ['./src/**/*.{js,jsx,ts,tsx}'],
  theme: {
    colors: {
      transparent: 'transparent',
      current: 'currentColor',
      'white': '#ffffff',
      'purple': '#3f3cbb',
      'midnight': '#121063',
      'metal': '#565584',
      'tahiti': '#3ab7bf',
      'silver': '#ecebff',
      'bubble-gum': '#ff77e9',
      'bermuda': '#78dcca',
      'my-color': '#00FF7F',
    },
  },
  plugins: [],
};
참고로 다른 방식으로는, tailwindcss/colors 모듈에서 기본 색상 설정들을 불러와서 사용할 수 있다. 이 경우는 색별로 헥사 코드를 작성하지 않아도 돼서 편리하다.
// tailwind.config.js

const colors = require('tailwindcss/colors');

module.exports = {
  content: ['./src/**/*.{js,jsx,ts,tsx}'],
  theme: {
    colors: {
      'my-color': '#00FF7F',
      transparent: colors.transparent
      white: colors.white,
      red: colors.red,
      blue: colors.blue,
      // ...
    },
  },
  plugins: [],
};
그러나 이런 방식으로 해도 다음과 같이 커스텀 컬러가 적용안되거나 기본 컬러들에 대해 에러가 발생하는 경우가 있다. 또한, 성공했다고해도 좀 더 쉬운 방법은 없을까?

최종해결법
// tailwind.config.js

const colors = require('tailwindcss/colors');

module.exports = {
  content: ['./src/**/*.{js,jsx,ts,tsx}'],
  theme: {
    extend: {
      colors: {
        'my-color': '#00FF7F',
      },
    },
  },
  plugins: [],
};
위와 같이 tailwind.config.js 파일에서 theme 객체 -> extend 객체 -> colors 객체를 계층적으로 설정한다.
그리고 colors 객체 내에 추가하고자하는 색상을 적는다.
이렇게하면 tailwind의 기본 색상들에 커스텀 컬러가 추가된다.
<div>
  <h1 className="text-my-color">링클립</h1>
</div>
이제 위와 같이 컴포넌트를 작성해서 렌더링 해보자

그 결과, 커스텀 색상으로 렌더링한 것을 확인 가능하다.
색상 앞에 text-, bg- 등의 키워드를 붙여도 잘 작동된다.
이상으로 테일윈드에서 사용자 지정 색상을 설정하는 방법을 알아보았습니다.