Todolist 기능의 핵심인 todo item에 대한 생성, 조회, 수정, 삭제를 firebase의 기능을 이용하여 구현해보도록 하자.
Firestore 구조
우리 프로젝트가 사용하는 firestore는 다음과 같이 이루어져 있다.
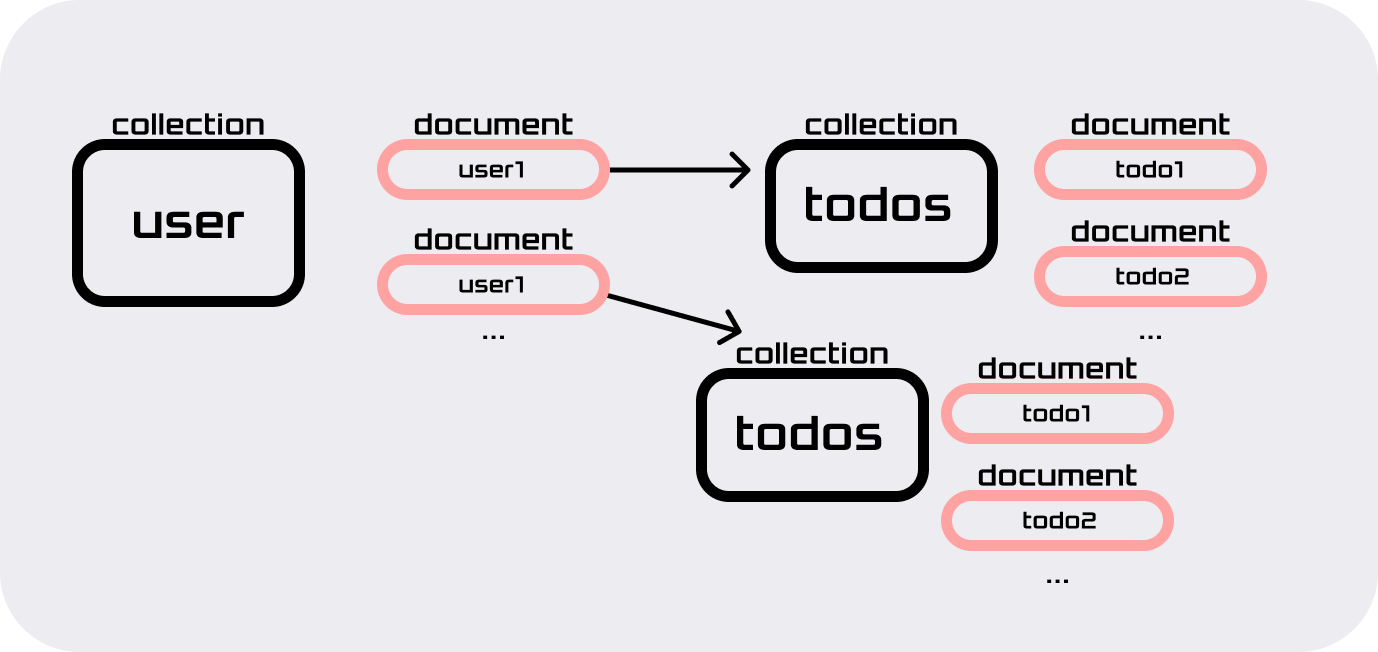
firebase의 firestore데이터베이스틑 위와 같이 collection-document 구조를 가진다. collection은 table, document는 tuple이라고 생각하면 쉽다.
각 document 또한 collection을 가질 수 있다. 우리가 만든 firestore는 위 그림처럼 user라는 하나의 컬렉션이 있고, 그 안에 실제 유저들이 user collection의 document들로 등록되며, 각 user마다 todos라는 collection을 가진다. 유저의 아이디, 이메일, 닉네임은 document의 field로 존재한다.
처음에 todos또한 field로 관리할까 했지만, 그렇게 되면 정보들이 과하게 nesting되어 접근하기 까다로워질 것으로 판단하여 subcollection을 만들어 관리하기로 하였다.
Create
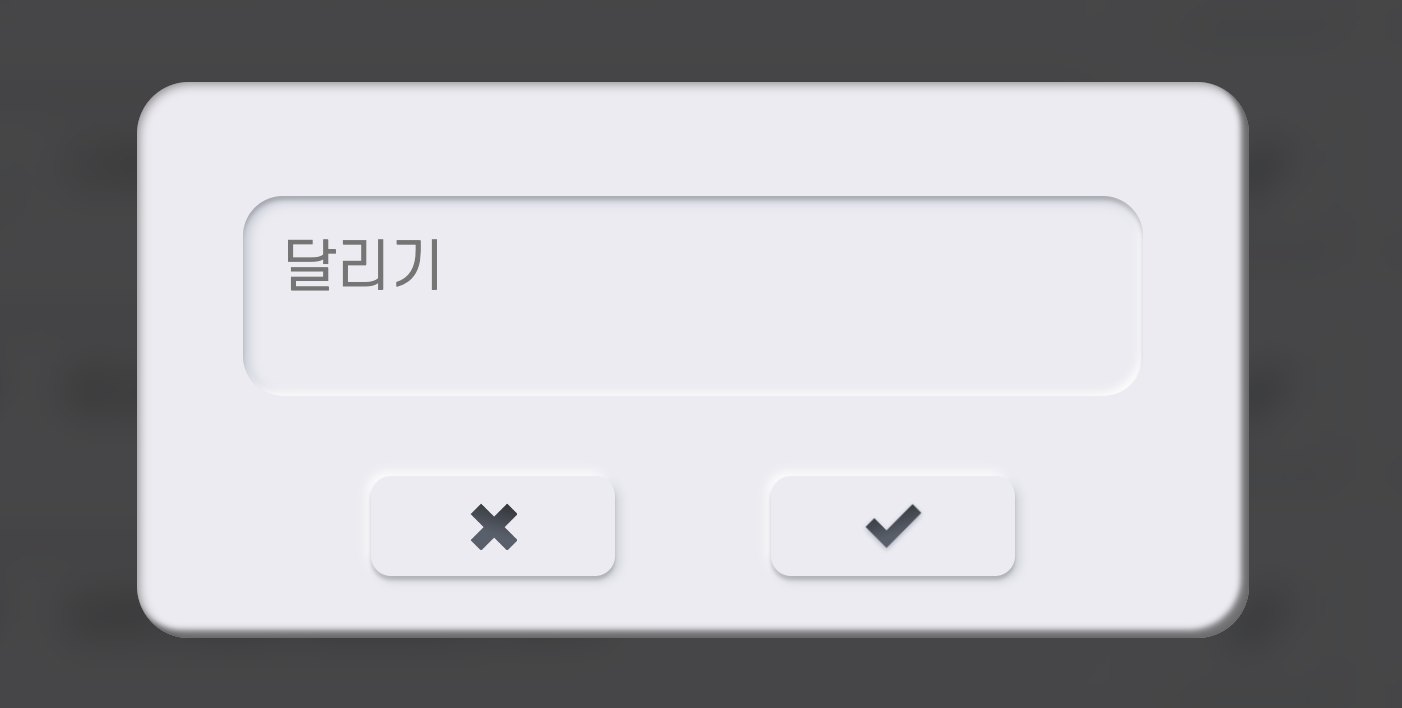
할일 생성 모듈에 대해 알아보자. 먼저 할 일을 생성하는 버튼을 누르면, 모달창이 뜨고 할 일 제목을 입력한 뒤 확인을 누르면 생성되는 로직이다.

관련 구현 코드는 다음과 같다.
// Modal.jsx
...
const addItem = async () => {
  // 추가 용도로 사용하는 경우 submit 함수
  await addDoc(collection(firestore, `users/${userInfo.uid}/todos`), {
    title,
    isComplete: false,
    id: new Date().getTime(),
  });
};
...
모달의 확인 버튼을 누르면 addItem 핸들러 함수가 호출된다. 위 코드에서 보듯이 firestore의 addDoc메서드에 현재 user의 todos collection을 특정해주고, 두 번째 인자로 생성할 할 일 객체를 넘겨주면 된다.
firestore 콘솔에서 다음과 같이 잘 추가된 것을 볼 수 있다.

Read
기본적인 조회 로직을 살펴보자.
// HomePage.jsx
...
import { useCollectionData } from "react-firebase-hooks/firestore";
...

const HomePage = ({ userInfo, isLoggedIn }) => {
  const [todoItems, setTodoItems] = useState([]);
  const queryPath = `/users/${userInfo?.uid}/todos`;
  const _query = collection(firestore, queryPath);
  const [todos, loading, error] = useCollectionData(_query);
  ...
  useEffect(() => {
    setTodoItems(todos);
  }, [todos]);
  ...
  return (
    ...
     <ul className={styles.todolistContainer}>
       {todoItems &&
         todoItems.map((item) => (
           <li key={item.id}>
             <TodoListItem
               {...item}
               onClickCheckBox={handleClickCheckBox}
               onClickEdit={handleClickOpenModal}
               onClickDelete={handleDeleteItem}
             />
           </li>
         ))}
     </ul>
);firestore의 useCollectionData라는 훅을 사용하면, 인자로 넘겨준 우리가 특정한 collection을 찾아 배열로 리턴한다. 우리의 경우 todos라는 이름으로 해당 데이터를 받았고, 로컬 상태로 todoItems를 만들어 todos가 준비되면 setTodoItems로 로컬 상태를 세팅해준다. 그 후 todoItems를 순회하며 li태그로 감싸고 필요한 정보를 담아 렌더링하고 있다.
Update
사용자가 할 일 아이템을 하나 골라 제목을 수정하거나, 상태를 완료상태로 업데이트 하는 등 특정 행위를 가하면 update가 진행된다.
update도 create와 마찬가지로 수정 모달을 띄워 확인 버튼을 누르면 수정 핸들러가 호출되는 방식을 취하고 있다. 다음은 editItem이라는 핸들러 함수의 코드이다.
// Modal.jsx
const editItem = async () => {
  // 수정 용도로 사용하는 경우 submit 함수
  const q = query(
    collection(firestore, queryPath),
    where("id", "==", todoItem.id)
  );
  const querySnapshot = await getDocs(q);

  querySnapshot.forEach(async (doc) => {
    await updateDoc(doc.ref, {
      title,
    });
  });
};
create의 경우와 달리 아이템 수정은 getDocs메서드를 이용한다. 먼저 수정할 타겟 아이템의 id와 firestore의 컬렉션에 있는 id를 비교해서 같은 데이터만 가져와 querySnapshot이라는 변수에 담는다. querySnapshot은 우리가 보낸 쿼리에 맞는 정보를 모두 담고 있기 때문에 배열로 존재한다. 우리의 경우 todoItem의 id는 항상 고유하기 때문에 querySnapshot에 담긴 배열의 길이는 항상 1이다.
querySnapshot을 순회하면서 (길이가 1이라 사실상 한 번만 돈다)모든 데이터를 firestore의 updateDoc메서드를 적용시켜준다. updateDoc에는 해당 document에 대한 reference를 넘겨주고, 업데이트할 부분만 두 번째 인자로 넘겨주면 된다.
Delete
삭제 또한 수정과 마찬가지로 querySnapshot을 이용한다.
const handleDeleteItem = async (id) => {
  const q = query(collection(firestore, queryPath), where("id", "==", id));
  const querySnapshot = await getDocs(q);

  querySnapshot.forEach(async (doc) => {
    await deleteDoc(doc.ref);
  });
};
코드에서 확인할 수 있듯이 삭제할 아이템의 id와 매치되는 document들만 찾아서 순회하며 deleteDoc메서드를 호출하게 했다.