문제 배경
이건 사실 버그(?)에 대한 이야기다. 배경은 이렇다.
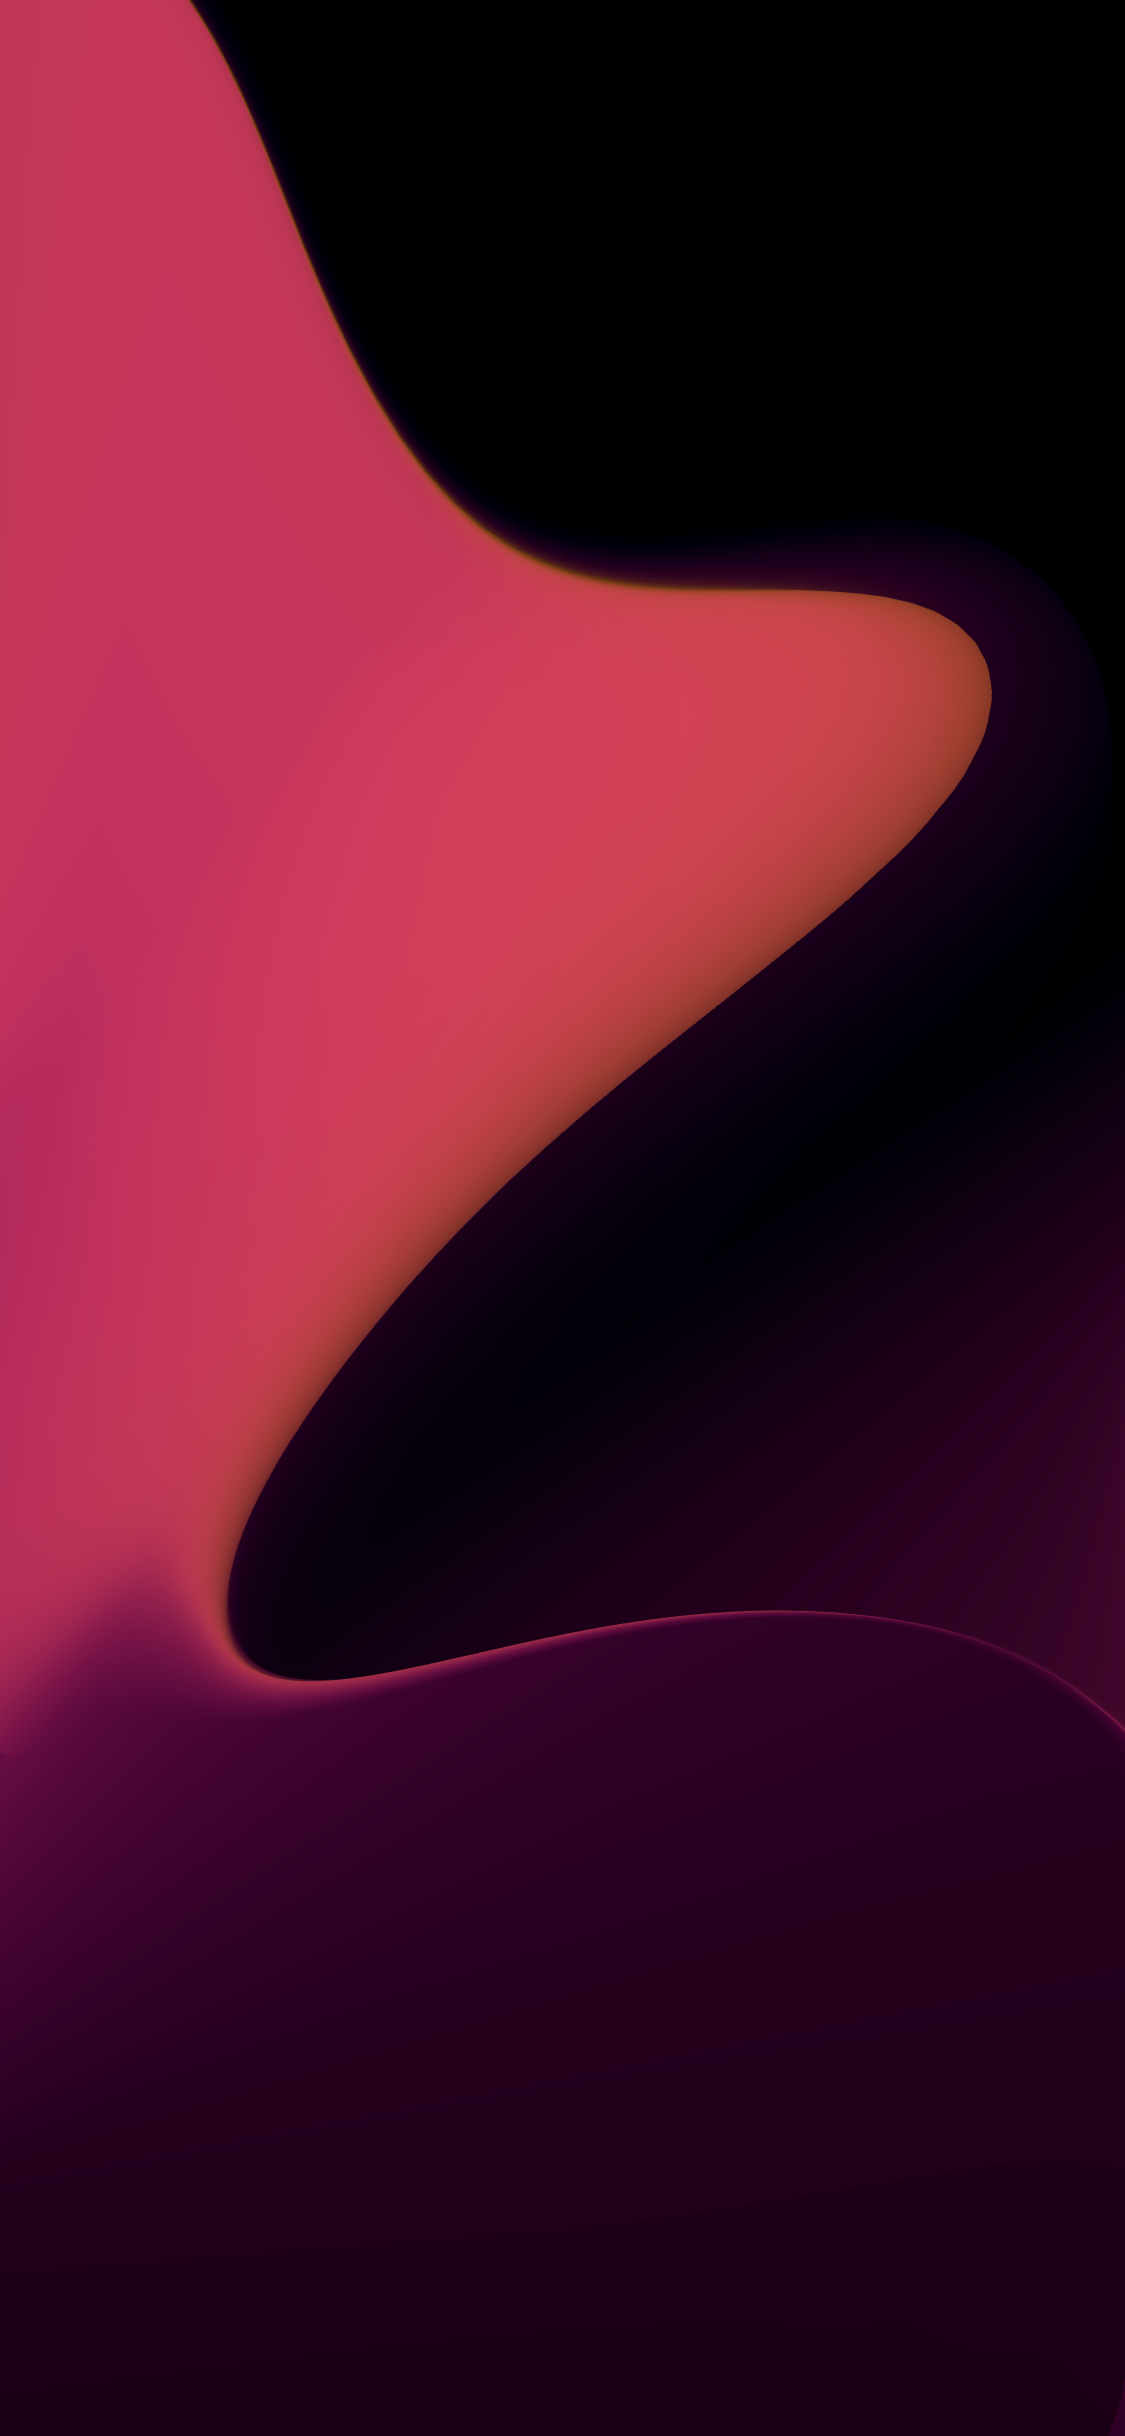
위 그림과 같이 이미지 상단에 그라데이션을 넣고자 했다. 이를 위해, react-native-linear-gradient 라이브러리를 설치하고 아래와 같이 코드를 작성했다.
const screenWidth = Dimensions.get('window').width

const GradientImage = (): JSX.Element => {
  const insets = useSafeAreaInsets()

  return (
    <SafeAreaView
      style={{
        flex: 1,
        backgroundColor: '#eff3fb',
      }}
    >
      <ScrollView style={{ flex: 1 }}>
        <LinearGradient
          colors={['black', 'rgba(255,255,255,0)']}
          style={{ zIndex: 101, height: 100 }}
        />
        <Image
          source={require('./pic.jpg')}
          style={{
            width: screenWidth,
            height: screenWidth,
            position: 'absolute',
            top: 0,
            zIndex: 100,
          }}
        />
      </ScrollView>
    </SafeAreaView>
  )
}
일단 LinearGradient 컴포넌트는 높이 100으로 하고, zIndex 값을 Image 보다 높게 하여 Image 컴포넌트 위에 겹치도록 한다. 그리고 Image 컴포넌트는 position 을 absolute 로 한다. 그 결과가 위의 스크린샷이다.
잘 되는군.
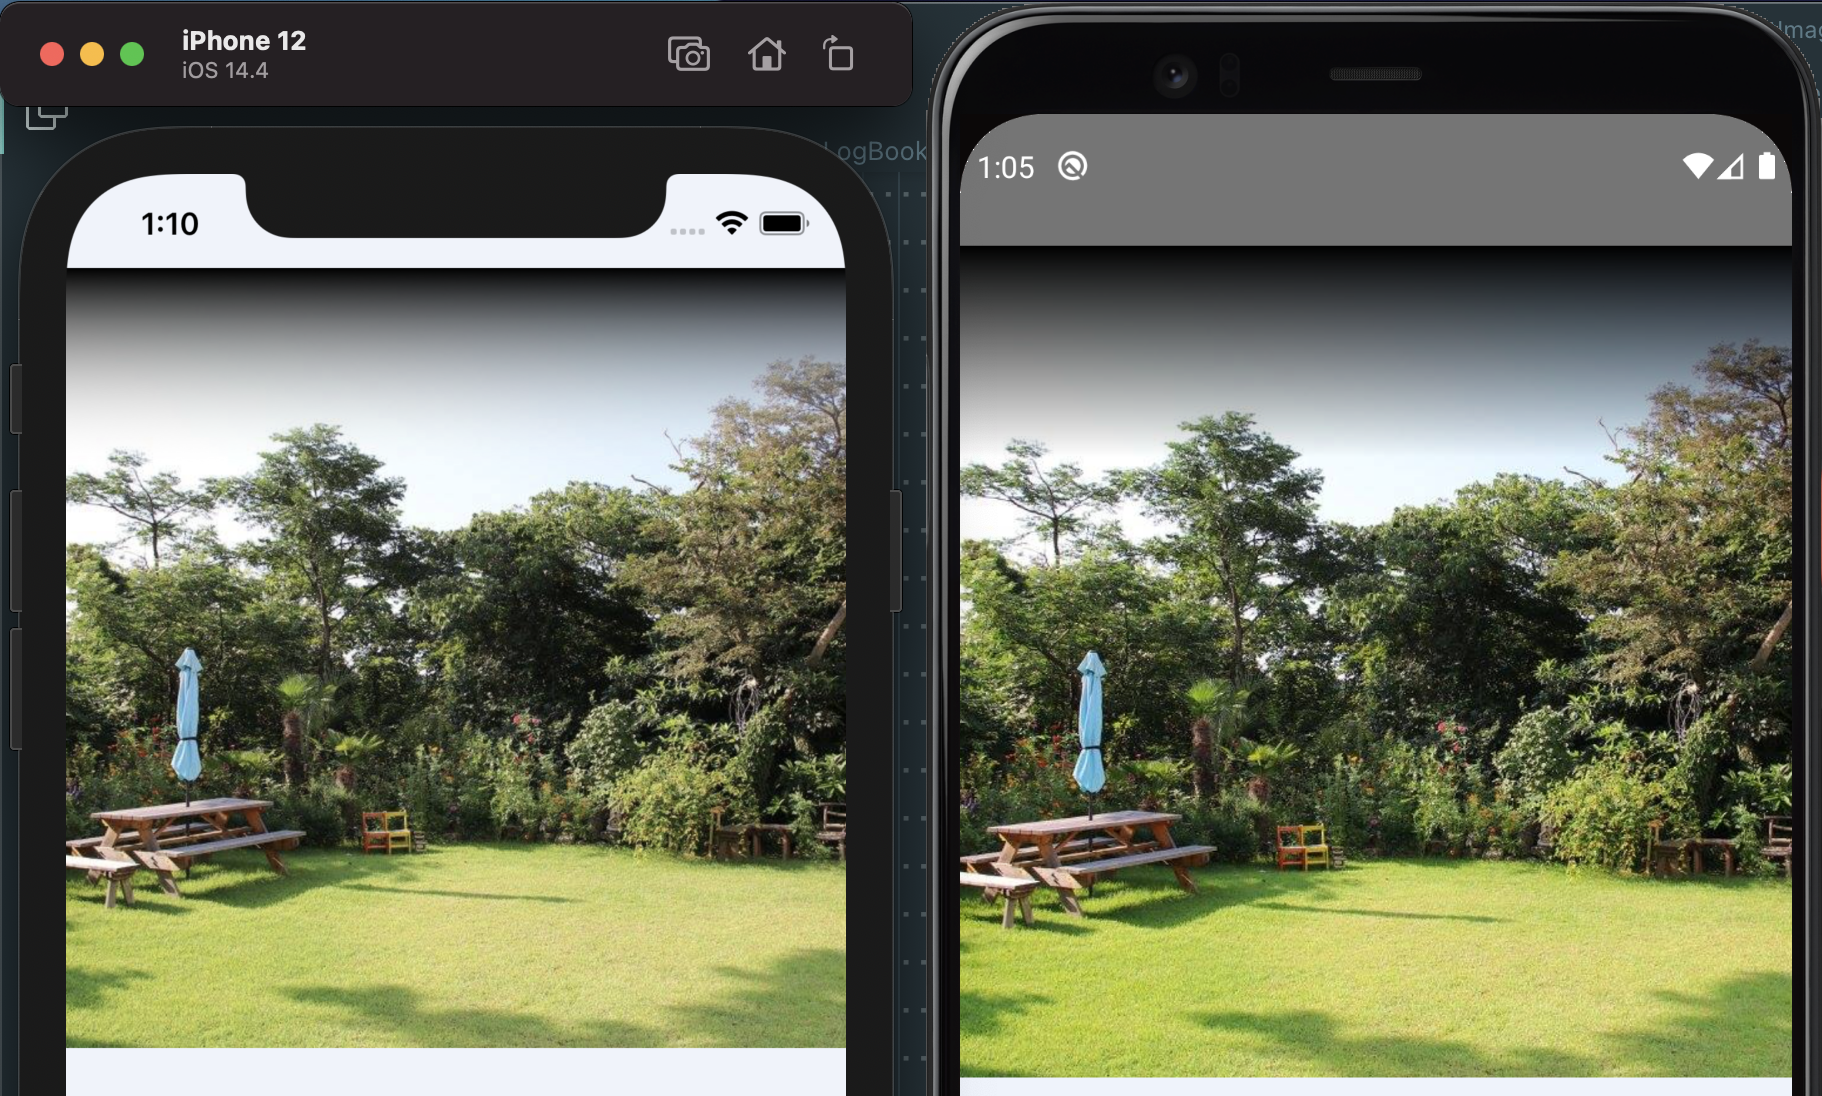
하지만 안드로이드의 결과는 달랐다.
LinearGraident 컴포넌트로 Image 컴포넌트를 감싼 것도 아니었는데, 이렇게 잘리는 것이 아니겠는가. StackOverflow 에서도 React Native 안드로이드에서 absolute 포지션값과 zIndex가 의도대로 동작하지 않는 다는 말이 있었는데, 이 때문인가 싶다가도, ScrollView로 감싸지 않으면 또 안드로이드도 문제가 없다.
즉, ScrollView 의 자식 컴포넌트들 중 zIndex와 absolute 포지션값이 사용되면, 안드로이드에서 의도대로 동작하지 않는다.
해결책
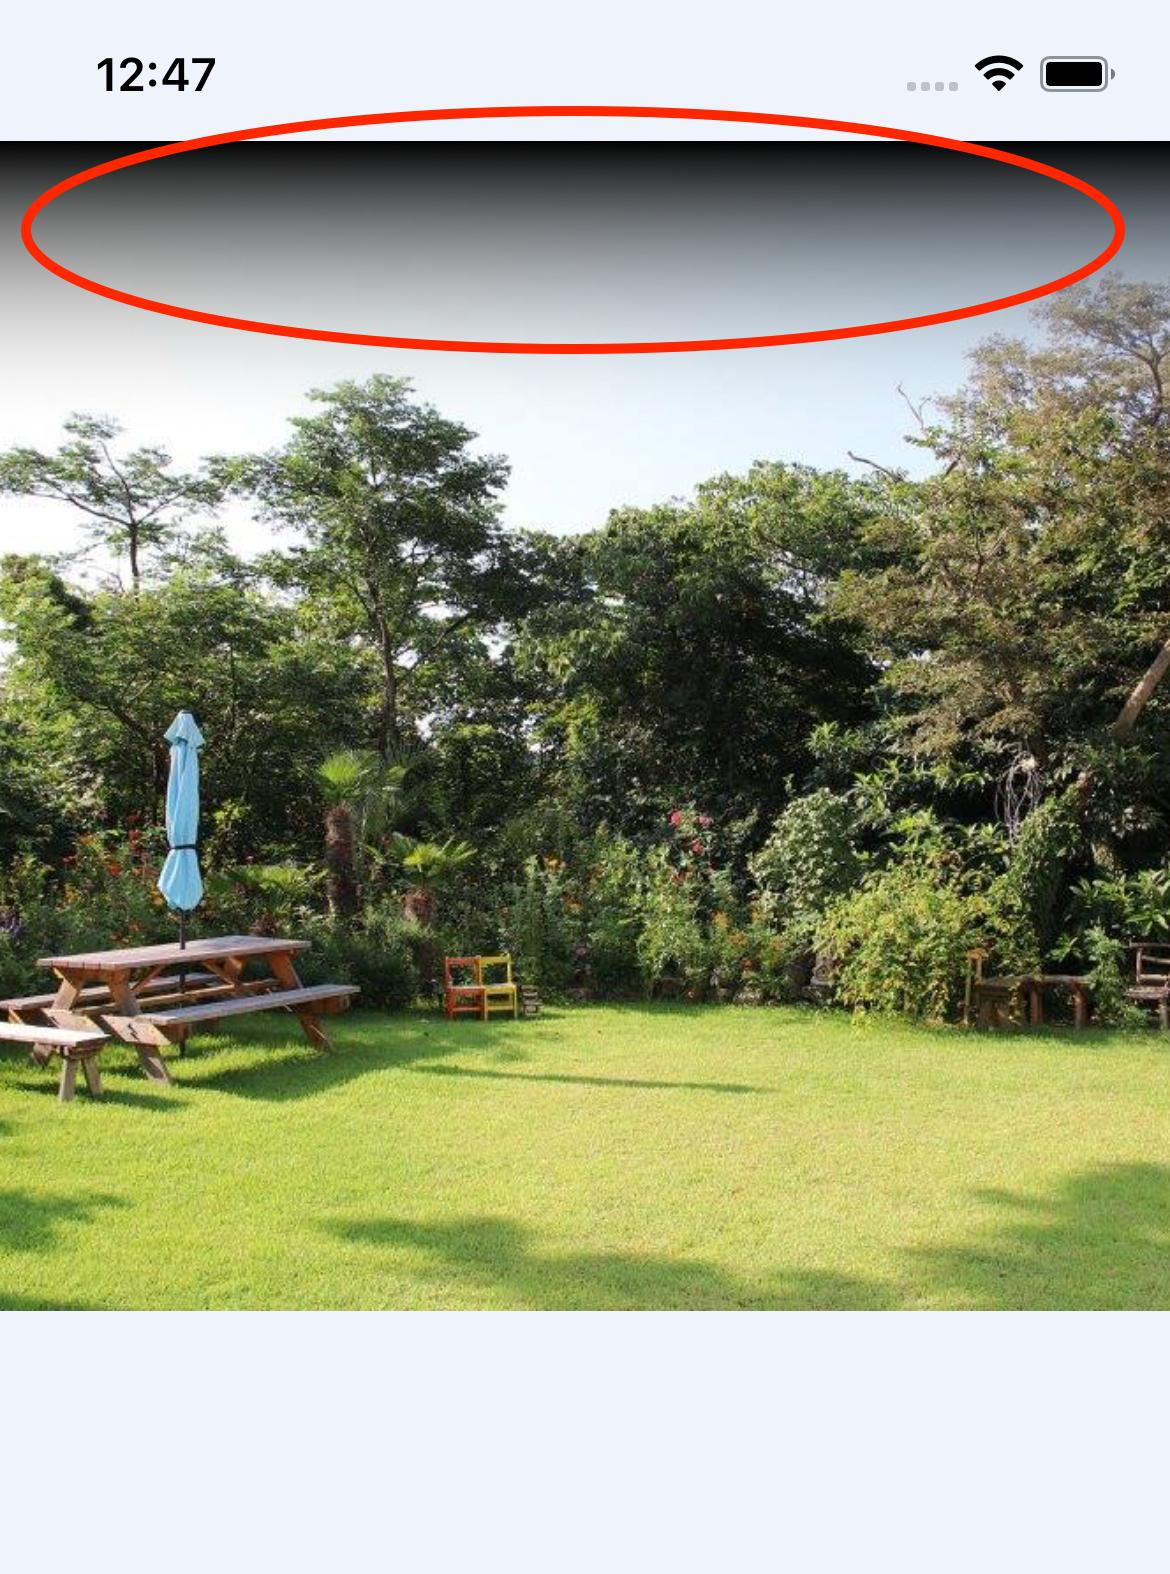
여튼 현재 안드로이드에서는 LinearGradient 컴포넌트의 height 값에 Image 컴포넌트가 포함되어 버리는 문제가 있다. 이를 해결해보자.
일단, 문제가 된 LinearGradient 컴포넌트의 height를 Image 컴포넌트와 동일하게 설정해보자.
const screenWidth = Dimensions.get('window').width

const GradientImage = (): JSX.Element => {
  const insets = useSafeAreaInsets()

  return (
    <SafeAreaView
      style={{
        flex: 1,
        backgroundColor: '#eff3fb',
      }}
    >
      <ScrollView style={{ flex: 1 }}>
        <LinearGradient
          colors={['black', 'rgba(255,255,255,0)']}
          style={{ zIndex: 101, height: screenWidth }} // <- Image 컴포넌트의 height와 동일하게 설정
        />
        <Image
          source={require('./pic.jpg')}
          style={{
            width: screenWidth,
            height: screenWidth,
            position: 'absolute',
            top: 0,
            zIndex: 100,
          }}
        />
      </ScrollView>
    </SafeAreaView>
  )
}
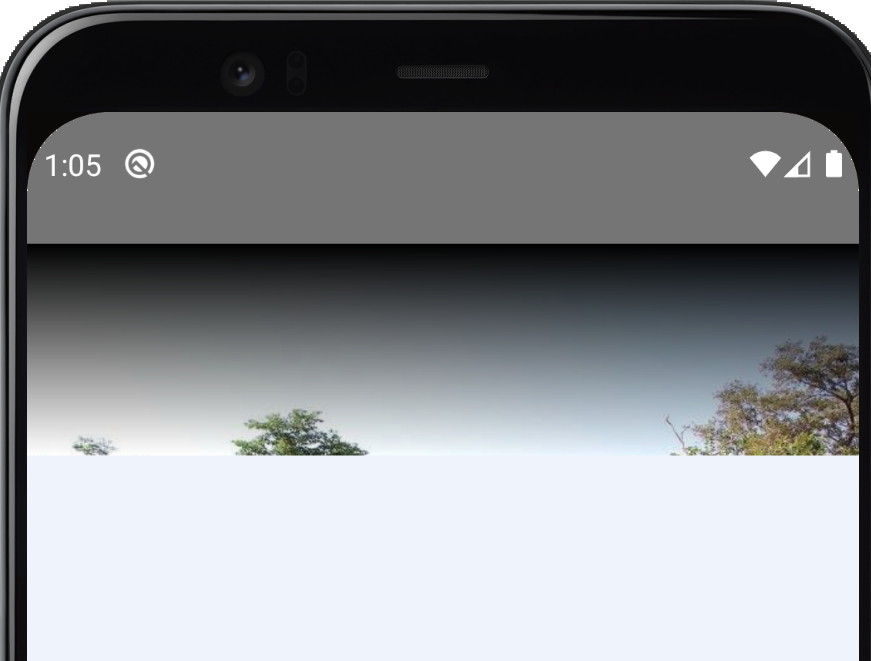
일단 이미지는 살아났지만, 내가 원했던 그라데이션은 최상단부터 높이 100까지만 그라데이션이 그려지는 것이었지, 이것처럼 이미지 사이즈 끝까지 그라데이션이 그려지는 건 아니었다. 그렇다면 그라데이션이 그려지는 시작점과 끝점을 설정해보자.
이를 위해, LinearGradient 에는 start, end 라는 Props가 있다. 이를 다음과 같이 설정해보자.
<LinearGradient
  colors={['black', 'rgba(255,255,255,0)']}
  style={{ zIndex: 101, height: screenWidth }}
  start={{ x: 0, y: 0 }}
  end={{ x: 0, y: 100 / screenWidth }}
/>start와 end 값은 비율이다. 즉, 다음 공식 문서 설명을 보자.
Coordinates declare the position that the gradient starts at, as a fraction of the overall size of the gradient, starting from the top left corner. Example: { x: 0.1, y: 0.1 } means that the gradient will start 10% from the top and 10% from the left.
즉, height 값 100 에서 종료되게 하려면, end Prop의 y 값에 100을 전체 높이로 나눈 값(100 / screenWidth)이 할당되어야 한다.
자 이제 순조롭게 iOS, 안드로이드 모두 의도대로 그라데이션이 잘 입혀지는 것을 확인할 수 있다.