⚡ History API
📌history api
🔷 브라우저에서 페이지 로딩을 했을 때, 세션 히스토리를 갖게 하는 api
-
세션 히스토리는 페이지를 이동할 때마다 쌓이게 되며, 이를 통해 뒤로가기 시 이전 페이지로 가거나 뒤로 간 이후 다시 앞으로 가는 등의 이동이 가능하다.
-
🌟🌟🌟 pushState, replaceState 두 개의 함수로 화면 이동 없이 현재 url을 업데이트 할 수 있다.🌟🌟🌟
- pushState
- 세션 히스토리에 새 url 상태를 쌓는다.history.pushState(state, title, url) - replaceState
- 세션 히스토리에 새 url 상태를 쌓지 않고, 현재 url을 대체한다.
- 게시물 등을 작성하고 작성된 페이지로 이동한 다음에 다시 작성 페이지로 넘어가지 않게 하는 용도로 쓰인다.history.replaceState(state, title, url)state
- history.state에서 꺼내쓸 수 있는 값
title
- 변경될 페이지의 title을 가리키는 값인 것 같지만 이 파라미터를 넣어도 거의 대부분의 브라우저에서 지원하지 않는다.
- 빈 string을 넣는다.
url
- 세션 히스토리에 새로 넣을 url
💡 보통은 state와 title에 null을 넣는다.
- pushState
-
일반 url 형식을 따르기 때문에 queryString도 자유롭게 붙일 수 있다.
💡 페이지 이동을 하지 않고 화면을 다시 그릴 수 있다!
📌 history api 사용하기
🔷 url routing 처리하기
- url path별 화면을 각 페이지 컴포넌트로 정의
- route 함수 정의
1) path에 따라 페이지 컴포넌트 렌더링
2) loacation.pathname으로 현재 path 얻어오기 - url이 변경되는 경우, route 함수 호출
🖥 index.html
<!DOCTYPE html>
<html lang="ko">
<head>
<meta charset="UTF-8">
<meta http-equiv="X-UA-Compatible" content="IE=edge">
<meta name="viewport" content="width=device-width, initial-scale=1.0">
<title>history</title>
</head>
<body>
<div id="container"></div>
<a class="LinkItem" href="/product-list">product list</a>
<a class="LinkItem" href="/article-list">article list</a>
<script>
function route() {
const {pathname} = location
const $container = document.querySelector('#container')
if(pathname === '/') {
$container.innerHTML = '<h1>Home</h1>'
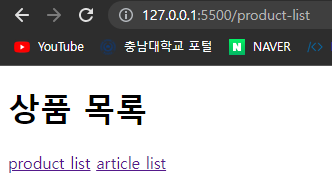
} else if(pathname ==='/product-list') {
$container.innerHTML = '<h1>상품 목록</h1>'
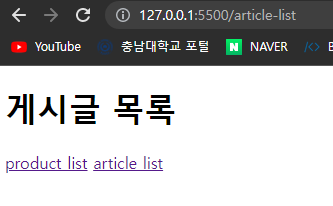
} else if(pathname === '/article-list') {
$container.innerHTML = '<h1>게시글 목록</h1>'
}
}
route() // 현재 path를 보고 url 처리
window.addEventListener('click', e => {
if(e.target.className ==='LinkItem') {
e.preventDefault();
const {href} = e.target
const path = href.replace(window.location.origin, '') // location 중 origin 제거
history.pushState(null, null, path)
route() // 이벤트 발생 시 url 처리
}
})
// ❗❗ 뒤로 가기나 앞으로 가기는 클릭이 아니기 때문에 route()가 출력 되지 않는다.
window.addEventListener('popstate', () => route())
// 그래서 이런 식으로 popstate(뒤로가기)를 이용한 이벤트리스너를 따로 지정해줘야한다.
</script>
</body>
</html>🖨 출력 결과
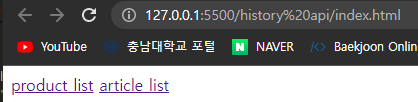
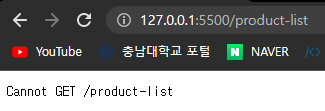
❗❗❗ history api로 url을 변경한 후 새로고침을 하면 변경된 url의 실제 파일을 찾으려고 하기 때문에 404 error가 발생한다.
그래서 root의 index.html로 요청을 돌려주는 처리를 반드시 해야한다.
오늘은 history api에 대해 알아보았다.

Hodie mihi, Cras tibi