
⚡ Spring Web MVC
📌 MVC(Model-View-Controller) 요청 흐름
이전에 공부했던 Web-Backend(Servlet - FrontController) 흐름이다.
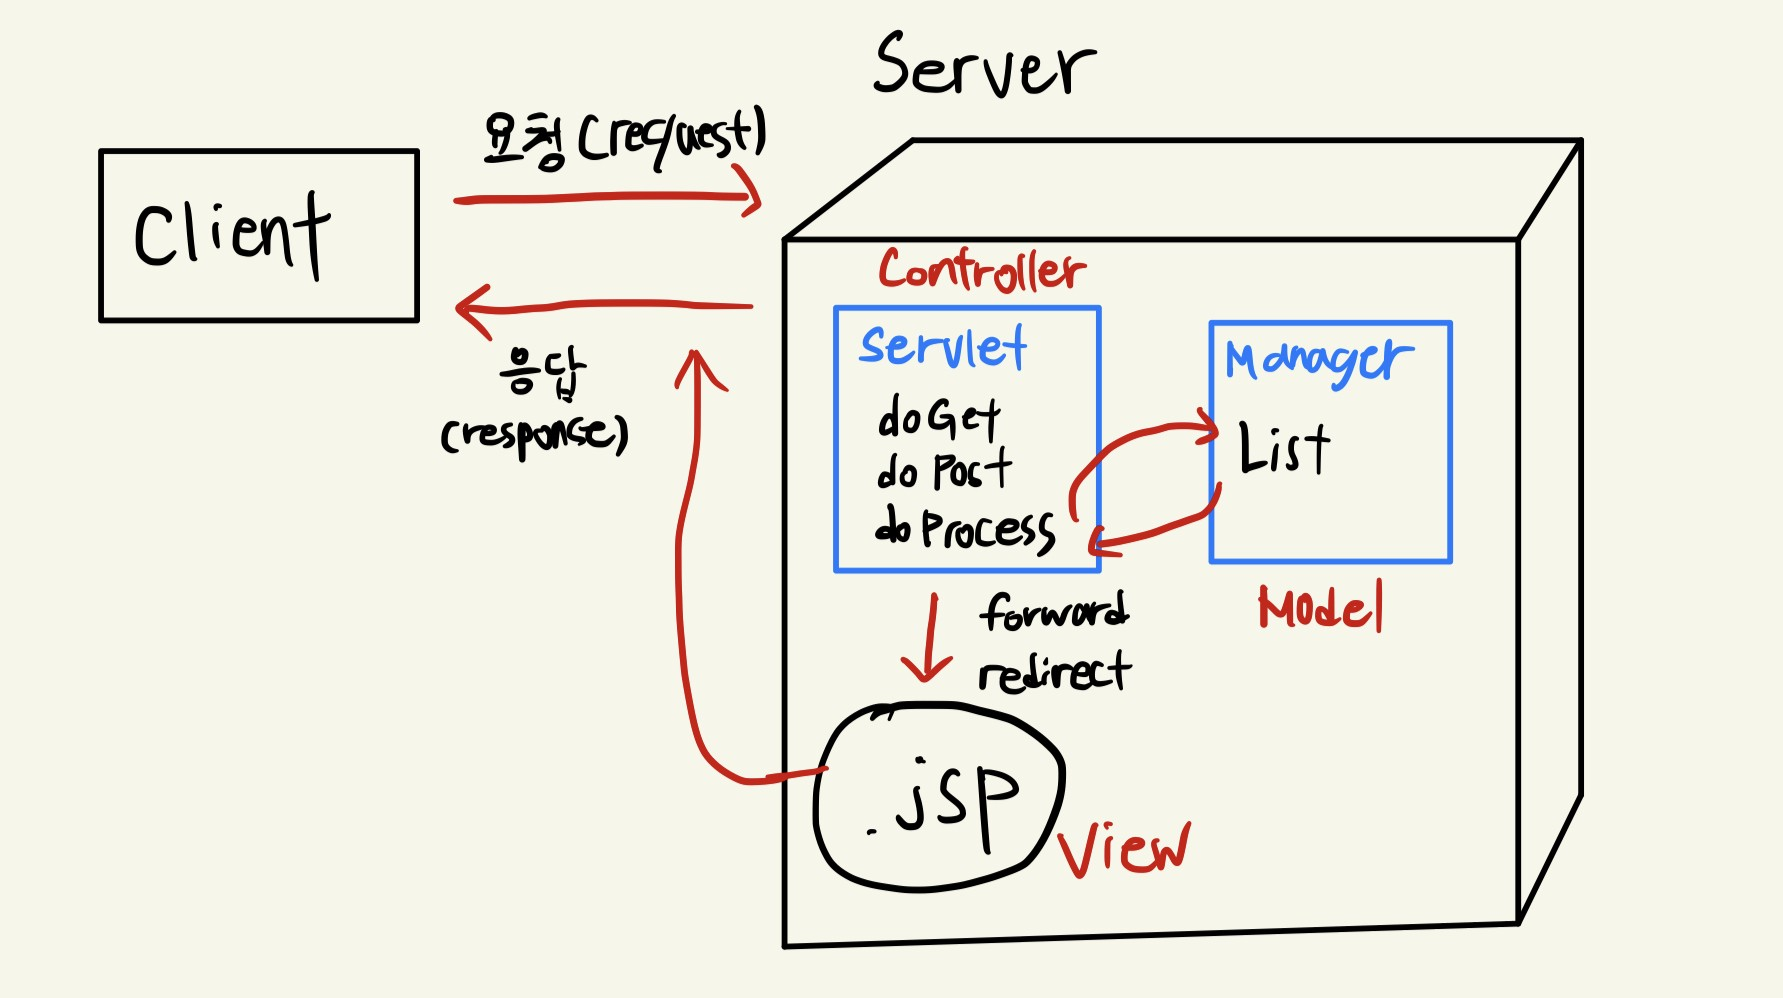
🔷 Model
- 동작을 수행하는 코드
- 사용자 View에 어떻게 보일지에 대해서 신경쓰지 않는다.
- 데이터 질의에 대한 정보를 제공하는 기능 및 데이터에 대한 수정을 담당
🔷 View
- 사용자가 화면에 무엇을 어떻게 볼 것인지를 결정
- 사용자 화면에 보이는 부분
- 모델의 정보를 받아와 사용자에게 보여주는 역할 수행
- 자체적으로 모델의 정보를 보관하지 않는다.
🔷 Controller
- 모델과 뷰를 연결하는 역할을 수행
- 사용자에게 데이터를 가져오고 수정하고 제공한다.
💡 Spring Web MVC에서의 흐름 예시
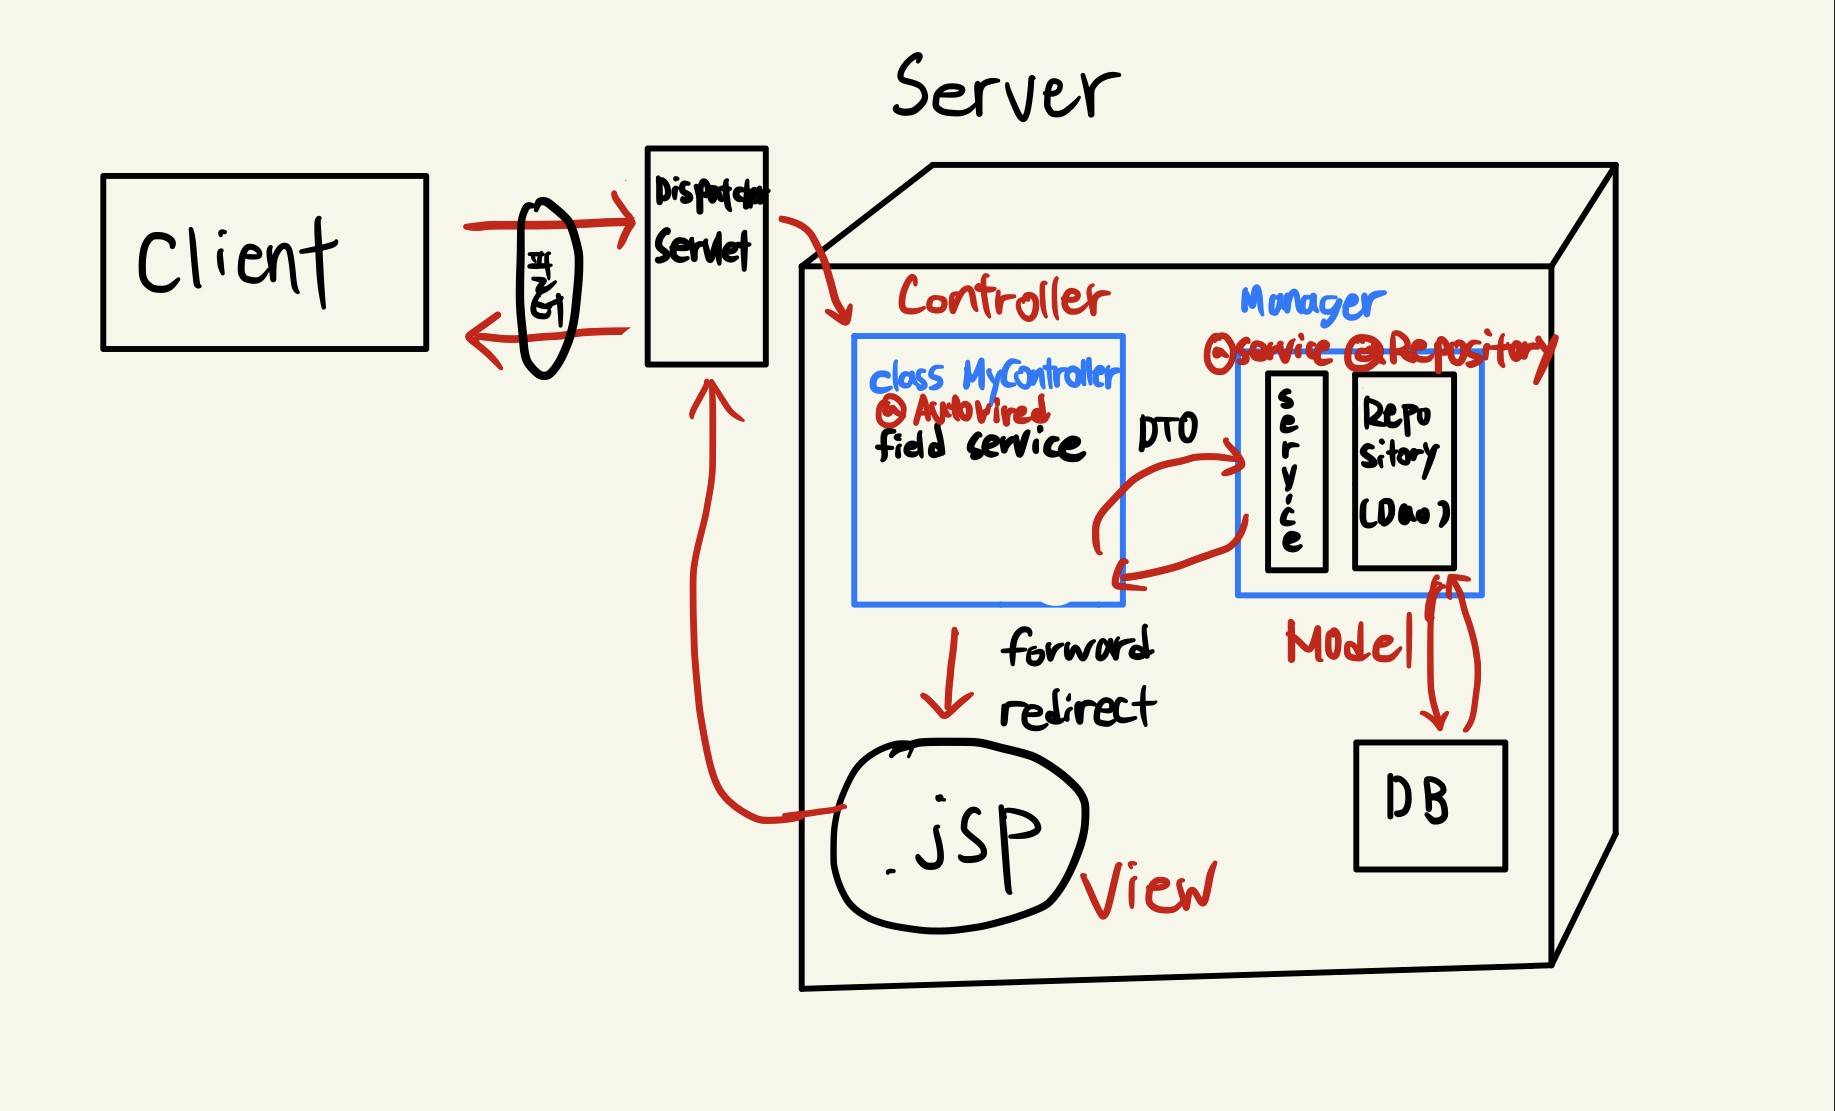
📌 Spring Web MVC
🔷 Servlet API를 기반으로 구축된 웹 프레임워크
- 정식 명칭은
Spring Web MVC이지만,Spring MVC로 주로 알려져 있다. - Spring Framework가 제공하는 DI, AOP 뿐 아니라, WEB 개발을 위한 기능을 제공
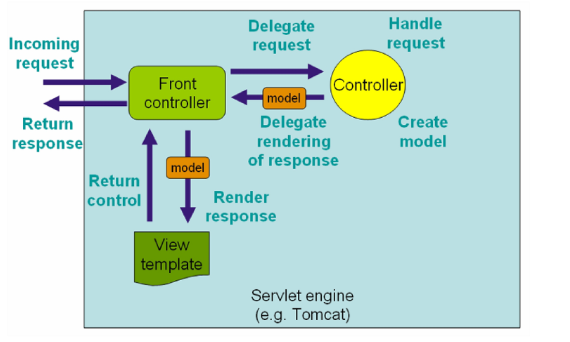
DispatcherServlet(FrontController)를 중심으로 디자인 되었으며,View Resolver,HandlerMapping,Controller와 같은 객체와 함께 요청을 처리하도록 구성되어 있다.- 다른 프레임워크와 마찬가지로
front controller pattern으로 구성됨 - 중심이 되는
DispatcherServlet(front controller)은 요청처리를 위한 기능을 제공
⭐ 컨테이너 구성

🔷 Servlet WebApplicationContext
- Web과 직접 관련
🔷 Root WebApplicationContext
- 그 외 나머지 것을 등록
🔷 구성 요소
1) DispatherServlet
- 클라이언트 요청처리(요청 및 처리 결과 전달)
2) HandlerMapping
- 요청을 어떤 Controller가 처리할 지 결정
3) Controller
- 요청에 따라 수행할 메서드를 선언하고, 요청처리를 위한 로직 수행(비즈니스 로직 호출)
4) ModelAndView
- 요청처리를 하기 위해서 필요한 혹은 그 결과를 저장하기 위한 객체
5) ViewResolver
- Controller에 선언된 view 이름을 기반으로 결과를 반환할 view를 결정
6) View
- 응답화면 생성
⭐ 요청 처리 흐름
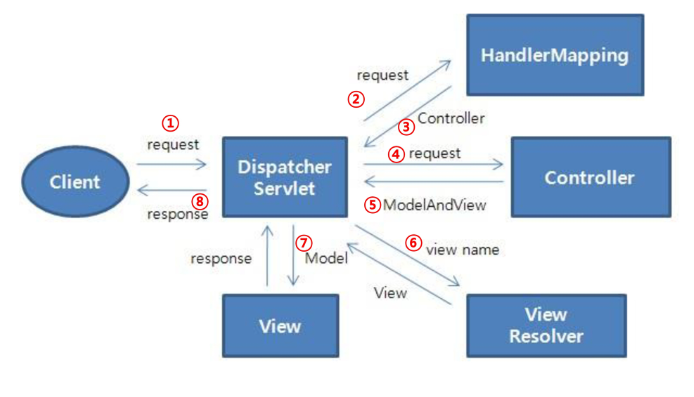
- 클라이언트 요청이 들어오면 DispatcherServlet이 받는다.
- HandlerMapping이 어떤 Controller가 요청을 처리할지 결정한다.
- DispatcherServlet은 Controller에 요청을 전달
- Controller는 요청을 처리한다.
- 결과(요청처리를 위한 data, 결과를 보여줄 View의 이름)를 ModelAndView에 담아 반환
- ViewResolver에 의해서 실제 결과를 처리할 View를 결정하고 반환
- 결과를 처리할 View에 ModelAndView를 전달
- DispatcherServlet은 View가 만들어낸 결과를 응답
⭐ Spring MVC 구성하기
- DispatcherServlet 생성
- web.xml
🤷♂️ Annotation으로는 안되나요?
디스패처 서블릿은 라이브러리 안에 이미 만들어져 있다. 코드 수정이 불가능하다는 뜻이므로 애너테이션으로 지정이 불가능하다.
🖥 web.xml
<?xml version="1.0" encoding="UTF-8"?>
<web-app xmlns:xsi="http://www.w3.org/2001/XMLSchema-instance" xmlns="http://xmlns.jcp.org/xml/ns/javaee" xsi:schemaLocation="http://xmlns.jcp.org/xml/ns/javaee http://xmlns.jcp.org/xml/ns/javaee/web-app_4_0.xsd" id="WebApp_ID" version="4.0">
  <display-name>Spring_Day03_WebMVC_1</display-name>
  <welcome-file-list>
    <welcome-file>index.html</welcome-file>
    <welcome-file>index.htm</welcome-file>
    <welcome-file>index.jsp</welcome-file>
    <welcome-file>default.html</welcome-file>
    <welcome-file>default.htm</welcome-file>
    <welcome-file>default.jsp</welcome-file>
  </welcome-file-list>
	<servlet>
		<servlet-name>springDispatcherServlet</servlet-name>
		<servlet-class>org.springframework.web.servlet.DispatcherServlet</servlet-class>
		<init-param>
			<param-name>contextConfigLocation</param-name>
			<param-value>/WEB-INF/servlet-context.xml</param-value>
		</init-param>
	</servlet>

	<servlet-mapping>
		<servlet-name>springDispatcherServlet</servlet-name>
		<url-pattern>/</url-pattern>
	</servlet-mapping>

	<context-param>
		<param-name>contextConfigLocation</param-name>
		<param-value>/WEB-INF/root-context.xml</param-value>
	</context-param>

	<listener>
		<listener-class>org.springframework.web.context.ContextLoaderListener</listener-class>
	</listener>
</web-app>- root WebApplicationContext
- 여러 Servlet에서 공유해야 하는 DAO, Service 등의 bean을 포함한다.
🖥 root-context.xml
<?xml version="1.0" encoding="UTF-8"?>
<beans xmlns="http://www.springframework.org/schema/beans"
	xmlns:xsi="http://www.w3.org/2001/XMLSchema-instance"
	xmlns:context="http://www.springframework.org/schema/context"
	xsi:schemaLocation="http://www.springframework.org/schema/beans http://www.springframework.org/schema/beans/spring-beans.xsd
		http://www.springframework.org/schema/context http://www.springframework.org/schema/context/spring-context-4.3.xsd">
	<!-- 그 외 -->
	<context:component-scan base-package="com.bzeromo.mvc.model.service"></context:component-scan>
</beans>
- servlet-context.xml
- MVC 구성요소 bean 등록
🤷♂️ 굳이 root와 servlet context를 나누는 이유가 무엇인가요?
1) 나누지 않으면 역할의 의미가 모호해진다.
2) 굳이 bean이 되지 않아도 될 것들까지 bean으로 취급되는 것을 막을 수 있다.
3) bean 여부 확인이 편해진다.
🖥 root-context.xml
<?xml version="1.0" encoding="UTF-8"?>
<beans xmlns="http://www.springframework.org/schema/beans"
	xmlns:xsi="http://www.w3.org/2001/XMLSchema-instance"
	xmlns:context="http://www.springframework.org/schema/context"
	xsi:schemaLocation="http://www.springframework.org/schema/beans http://www.springframework.org/schema/beans/spring-beans.xsd
		http://www.springframework.org/schema/context http://www.springframework.org/schema/context/spring-context-4.3.xsd">
	<!-- Web과 관련되어 있는 설정 파일 -->

	<!-- view name 앞에 prefix, 뒤에 suffix를 붙여 경로를 생성한다 -->
	<bean class="org.springframework.web.servlet.view.InternalResourceViewResolver">
		<property name="prefix" value="/WEB-INF/view/"></property>
		<property name="suffix" value=".jsp"></property>
	</bean>

	<context:component-scan base-package="com.bzeromo.mvc.controller"></context:component-scan>

</beans>- Controller class
controller 파트에서 확인한다
- View
<%@ page language="java" contentType="text/html; charset=UTF-8"
    pageEncoding="UTF-8"%>
<!DOCTYPE html>
<html>
<head>
<meta charset="UTF-8">
<title>하이요</title>
</head>
<body>
	<h1>Home sweet home!</h1>
	${msg}

	<form action="test4" method="POST">
		ID: <input type="text" name="id">
		Password: <input type="password" name="pw">
		Age: <input type="number" name="age">
		<button>등록</button>
	</form>
</body>
</html>
⭐ Controller
🔷 @RequestMapping
- URL을 클래스 또는 특정 핸들러(메서드)에 매핑
- 일반적으로 클래스에 작성하는 @RequestMapping은 요청 경로, 혹은 요청 패턴에 매칭
- 메서드 Annotation은 요청 방식(GET, POST) 등으로 범위를 좁혀 준다.
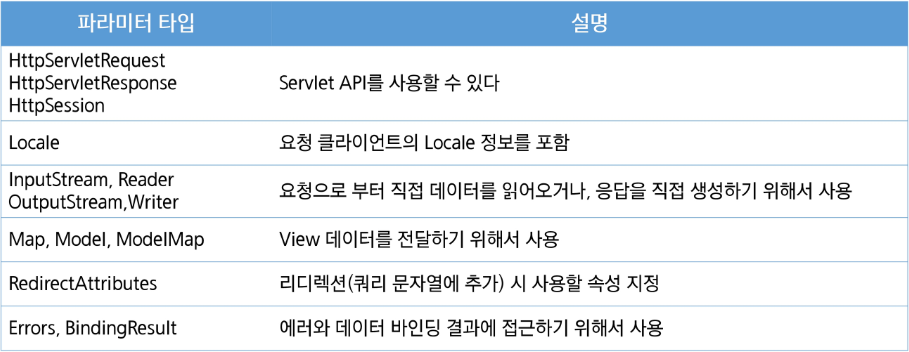
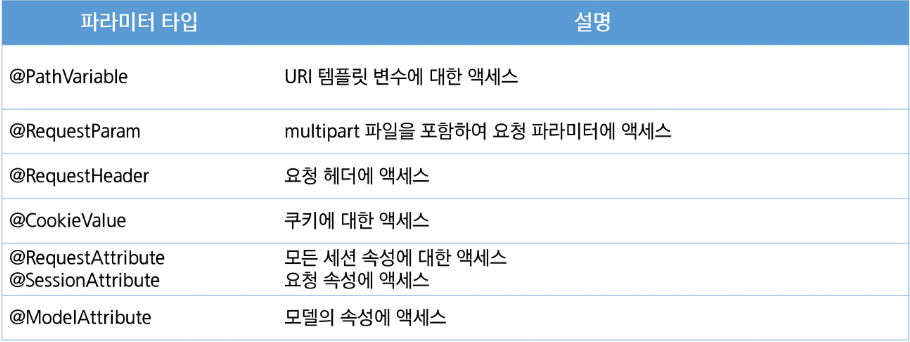
🔷 Controller Handler Method argument
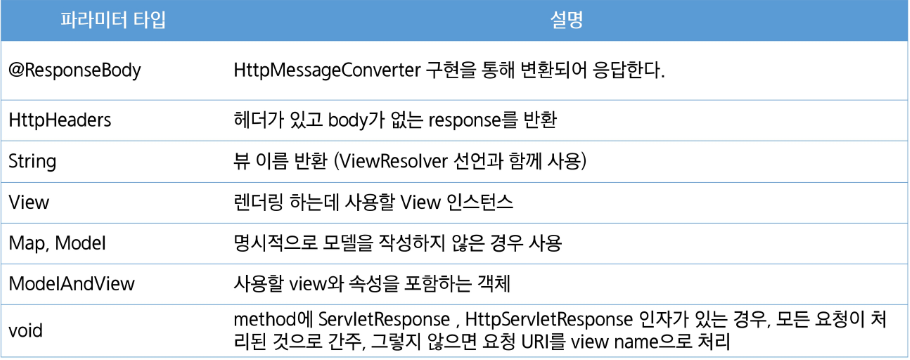
🔷 Controller Handler return value
🖥 myController
package com.bzeromo.mvc.controller;
import org.springframework.beans.factory.annotation.Autowired;
import org.springframework.stereotype.Controller;
import org.springframework.ui.Model;
import org.springframework.web.bind.annotation.GetMapping;
import org.springframework.web.bind.annotation.PostMapping;
import org.springframework.web.bind.annotation.RequestMapping;
import org.springframework.web.bind.annotation.RequestMethod;
import org.springframework.web.bind.annotation.RequestParam;
import org.springframework.web.servlet.ModelAndView;
import com.bzeromo.mvc.model.dto.User;
import com.bzeromo.mvc.model.service.MyService;
@Controller
public class MyController {
private MyService myService;
@Autowired
public void setMyService(MyService myService) {
this.myService = myService;
}
@RequestMapping(value="home", method=RequestMethod.GET)
public ModelAndView homeHandle() {
ModelAndView mav = new ModelAndView();
System.out.println("home sweet home!");
myService.doSomething();
//model and view에 데이터 심어서 보내기
//key, value
mav.addObject("msg", "Welcome to Spring MVC");
//View 이름을 지정하고 넘기기
//forwarding과 같다
mav.setViewName("home");
return mav;
}
//Get요청만을 위한 것
@GetMapping("test1")
public String test1() {
//반환타입이 String이라면 반환값이 viewname이 된다.
return "test1"; // /WEB-INF/view/test1.jsp
}
//반환타입을 문자열로 쓰고 데이터도 넘길 때
//view이름에 "redirect:"를 붙이면 redirect 된다.
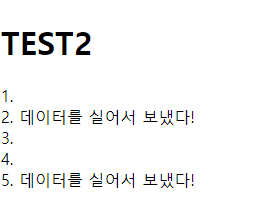
@GetMapping("test2")
public String test2(Model model) {
model.addAttribute("msg", "데이터를 실어서 보냈다!");
return "redirect:test2";
}
//parameter로 값을 받기
//사용자가 넘긴 파라미터의 키값이 내가 메서드로 작성한 값과 다르다면 @RequestParam(value="")
//기본값으로 Null이 들어간다. 기본 자료형에는 null이 들어갈 수 없기 때문에 defaultValue를 설정해주자.
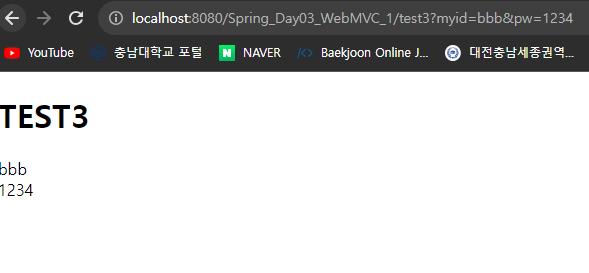
@GetMapping("test3")
public String test3(Model model, @RequestParam(value="myid")String id, String pw, @RequestParam(defaultValue="1")int age) {
model.addAttribute("id", id);
model.addAttribute("pw", pw);
System.out.println(age);
return "test3";
}
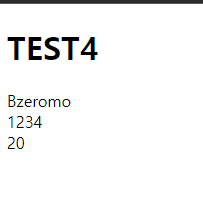
//DTO 객체 활용
@PostMapping("test4")
public String test4(Model model, User user) {
model.addAttribute("user", user);
return "test4";
}
}home (form 입력시 테스트 4로 넘어감)

테스트4
테스트1
테스트2
테스트3

Hodie mihi, Cras tibi