
⚡ Axios
복습의 시간이다.
📌 AJAX (Asynchronous JavaScript and XML)
- 비 동기식 JavaScript와 XML
- 서버와 통신을 하기 위해서
XMLHttpRequest객체를 활용 - JSON, XML, HTML 그리고 일반 텍스트 형식 등을 포함한 다양한 포맷을 주고 받을 수 있음.
- 페이지 전체를 ‘새로고침’ 하지 않고서도 수행 되는 “비동기성” (일부분만 업데이트 가능)
🔷 XMLHttpRequest 객체
- JavaScript Object
- 서버와 상호작용하기 위해 사용
- 전체 페이지의 새로고침 없이도 URL로 부터 데이터를 받아 올 수 있음.
- 사용자의 작업을 방해하지 않고 페이지의 일부를 업데이트 할 수 있음.
- AJAX 프로그래밍에 주로 사용
- XML이라는 이름과는 달리 모든 종류의 데이터를 받아 오는데 사용 가능
- http 이외의 프로토콜도 지원 (file, ftp 포함)
- 대부분의 브라우저에서 지원
🔷 AJAX 프로그래밍 순서
- 클라이언트 이벤트 발생
- XMLHttpRequest 객체 생성
- XMLHttpRequest 객체 콜백함수 설정
- XMLHttpRequest 객체를 통한 비동기화 요청
- 서버 응답결과를 생성하여 클라이언트로 전송
- XMLHttpRequest 객체는 서버 결과를 처리할 콜백함수 호출
- 결과를 클라이언트 화면에 반영
🔷 순차적인 비동기 처리하기
- Web API로 들어오는 순서는 중요하지 않고, 어떤 이벤트가 먼저 처리되느냐가 중요. (실행 순서 불명확)
1. Async Callbacks
- 백그라운드에서 실행을 시작할 함수를 호출할 때 인자로 지정
ex)addEventListener()의 두 번째 인자
2. Promise-Style
- Modern Web APIs에서의 새로운 코드 스타일
- XMLHttpRequest 객체를 사용하는 구조보다 조금 더 현대적인 버전
🔷 Promise Object
- 비동기 작업을 마치 동기 작업처럼 값을 반환해서 사용 형태
- 미래의 완료 또는 실패와 그 결과 값을 나타냄.
- 미래의 어떤 상황에 대한 약속
new Promise(function (resolve, reject) { })- resolve (성공 시 사용)
- reject (실패 시 사용)
🔷 Promise Methods
.then(callback)- Promise 객체를 리턴하고 두 개의 콜백 함수를 인수로 받는다. (이행 했을 때, 거부 했을 때 )
- 콜백 함수는 이전 작업의 성공 결과를 인자로 전달 받음.
.catch(callback)- .then 이 하나라도 실패하면(거부 되면) 동작 (예외 처리 구문 유사)
- 이전 작업의 실패로 인해 생성된 error 객체는 catch 블록 안에서 사용 가능
.finally(callback)- Promise 객체 반환
- 결과 상관없이 무조건 실행
💡 체이닝이 가능하다.
🔷 fetch API
- XMLHttpRequest보다 강력하고 유연한 조작이 가능
- Promise를 지원하므로 콜백 패턴에서 자유로움
- ES6문법은 아니고,
BOM (Browser Object Model)객체 중의 하나. fetch()메서드를 사용함fetch()메서드는 HTTP 응답을 나타내는 Response 객체를 래핑한 Promise 객체를 반환
🔷 async & await
- Promise를 더욱 편하게 사용할 수 있는 문법
- then 체이닝을 제거하고 비동기 코드를 동기 코드처럼 표현 하는 방법
🔷 async
- function 앞에 위치
- 항상 Promise 반환
🔷 await
- await 키워드를 만나면 Promise가 처리될 때까지 기다린다
async function f() {
  let promise = new Promise((resolve, reject) => {
  	setTimeout(() => resolve("완료!"), 1000)
  });
  let result = await promise;
  alert(result);
}
f();
📌 Axios
🔷 브라우저와 node.js에서 사용할 수 있는 Promise 기반 HTTP 클라이언트 라이브러리
- Vue에서 권고하는 HTTP 통신 라이브러리
🔷 특징
- 브라우저를 위해
XMLHttpRequests생성 - node.js를 위해 http 요청 생성
- Promise API를 지원
- 요청 및 응답 인터셉트
- 요청 및 응답 데이터 변환
- 요청 취소
- JSON 데이터 자동 변환
- XSRF를 막기위한 클라이언트 사이드 지원
🔷 axios 설치
- CDN
<script src="https://unpkg.com/axios/dist/axios.min.js"></script>- NPM 방식
npm install axios🔷 axios API
- axios( config )
- axios( url, [, config] )
- axios.get( url [, config] )
- axios.delete( url [, config] )
- axios.post( url [, data[, config]] )
- axios.put( url [, data[, config]] )
🔷 Vanilla JS에서 XMLHttpRequest vs Fetch vs Axios
<!DOCTYPE html>
<html lang="ko">

<head>
    <meta charset="UTF-8" />
    <title>Dog API</title>
    <script src="https://cdn.jsdelivr.net/npm/axios/dist/axios.min.js"></script>
</head>

<body>
    <h1>Dog API</h1>
    <button id="btn1">가져오기(XMLHttpRequest)</button>
    <button id="btn2">가져오기(Fetch)</button>
    <button id="btn3">가져오기(Axios)</button>
    <img src="" alt="" id="dog-img" />
    <script>
        const URL = "https://dog.ceo/api/breeds/image/random";

        function getDog1() {
            const xhr = new XMLHttpRequest();

            xhr.onreadystatechange = () => {
                //완벽하게 통신이 끝이 났을 때
                if (xhr.readyState == xhr.DONE) {
                    if (xhr.status == 200) {
                        const imgSrc = JSON.parse(xhr.response).message;

                        const imgTag = document.querySelector("#dog-img");
                        imgTag.src = imgSrc;
                        //만약 존재하지 않는 속성을 넣고 싶다면
                        //imgTag.setAttribute("src", imgSrc);
                    }
                }
            }

            xhr.open("GET", URL);
            xhr.send();
        }

        const btn1 = document.querySelector('#btn1');
        btn1.addEventListener('click', getDog1);

        function getDog2() {
            fetch(URL)
                .then((response) => {
                    return response.json()
                })
                .then((imgData) => {
                    const imgSrc = imgData.message;
                    document.querySelector("#dog-img").setAttribute("src", imgSrc);
                })
        }

        const btn2 = document.querySelector('#btn2');
        btn2.addEventListener('click', getDog2);

        function getDog3() {
            axios.get(URL)
                .then((response) => {
                    const imgSrc = response.data.message;
                    document.querySelector("#dog-img").setAttribute("src", imgSrc);
                })
        }

        const btn3 = document.querySelector('#btn3');
        btn3.addEventListener('click', getDog3);
    </script>
</body>

</html>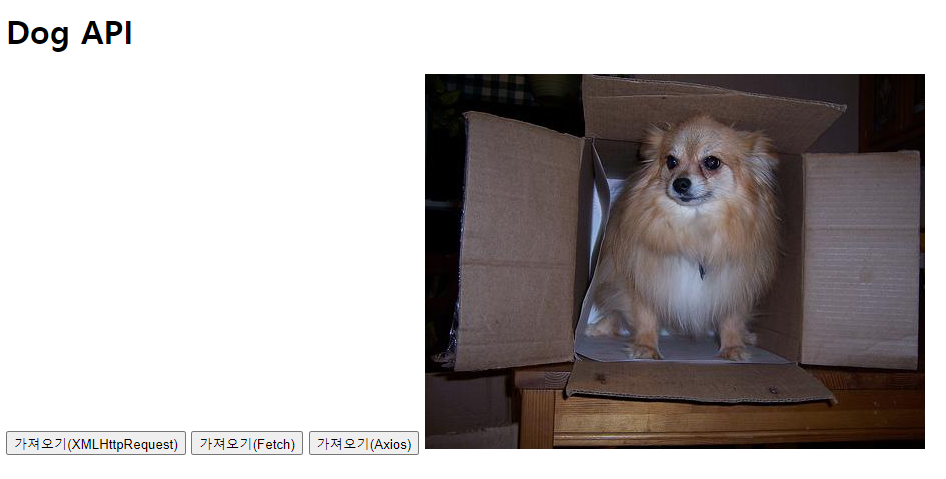
시간은 좀 걸려도 사진은 잘 불러온다.
🔷 Vue에서 Fetch vs Axios
<!DOCTYPE html>
<html lang="ko">

<head>
    <meta charset="UTF-8" />
    <title>Vue</title>
    <script src="https://unpkg.com/vue@3/dist/vue.global.js"></script>
    <script src="https://cdn.jsdelivr.net/npm/axios/dist/axios.min.js"></script>
</head>

<body>
    <div id="app">
        <button @click="getCat">냥냥펀치1(Fetch)</button>
        <button @click="getCat2">냥냥펀치2(Axios)</button>
        <hr>
        <img :src="catImageSrc" />
    </div>

    <script>
        const { createApp, ref, onMounted } = Vue
        const URL = 'https://api.thecatapi.com/v1/images/search'

        const app = createApp({
            setup() {
                const catImageSrc = ref('')

                const getCat = function () {
                    fetch(URL)
                        .then((response) => response.json())
                        .then((imgData) => {
                            catImageSrc.value = imgData[0].url
                        })
                        .catch((error) => {
                            console.log("실패했다")
                        })
                }

                const getCat2 = function () {
                    axios({
                        url: URL,
                        method: 'GET'
                    })
                        .then((response) => {
                            catImageSrc.value = response.data[0].url
                        })
                        .catch((error) => {
                            console.log("실패했다")
                        })
                }

                onMounted(() => {
                    getCat2()
                })

                return { catImageSrc, getCat, getCat2 }
            }
        })

        app.mount('#app')

    </script>
</body>

</html>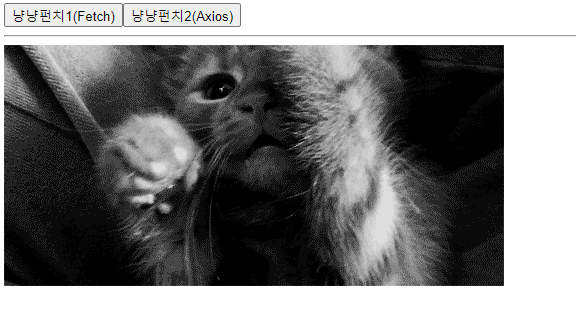
고양이가 좀 더 귀엽다...
axios가 더 간결한 코드로 같은 출력을 띄우는 것을 확인 가능하다.
📌 Axios 실습
🔷 YouTube API 를 활용한 실습
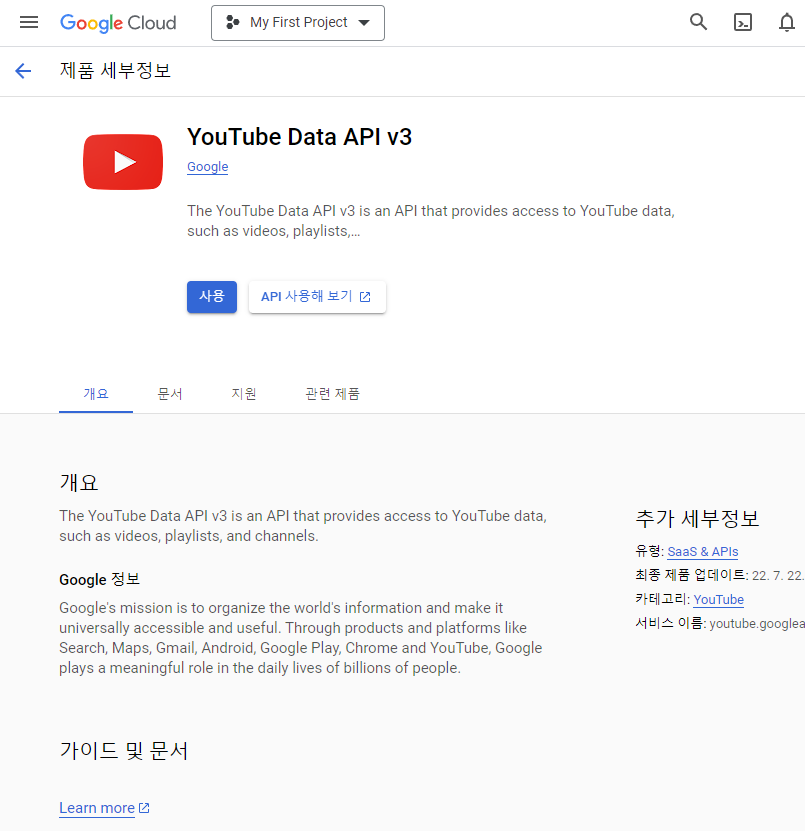
Google에서 Youtube Data API를 검색하여 사용한다.
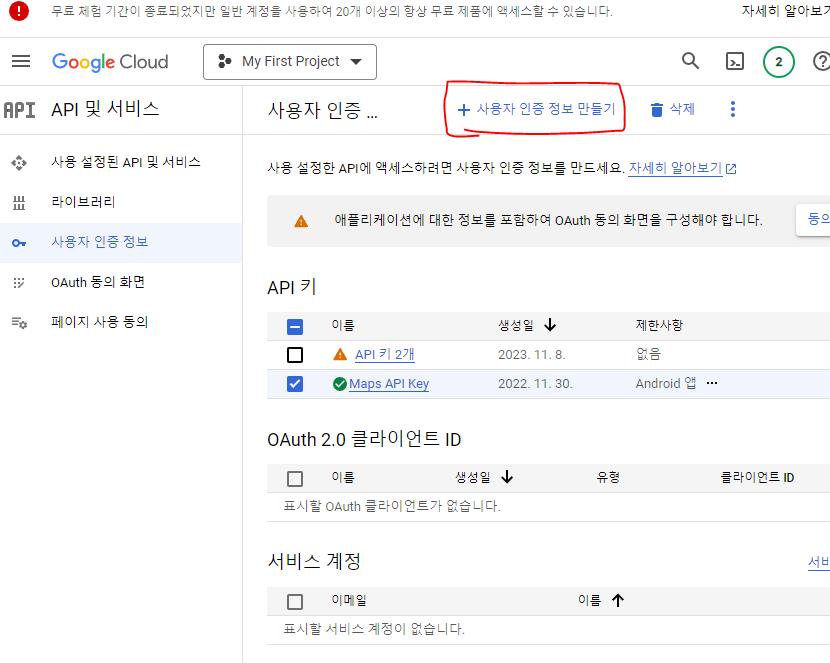
사용자 인증 정보를 만들어 API 키를 발급받고 저장한다.
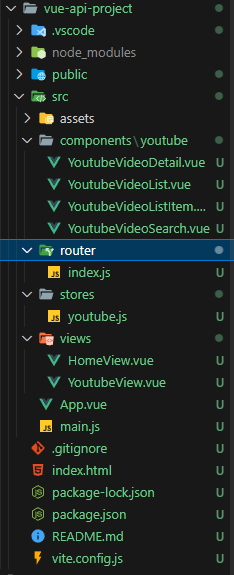
⚙ 프로젝트 구조
🖥 App.vue
<template>
  <div>
    <header>
      <nav>
        <RouterLink to="/">Home</RouterLink>
        <RouterLink to="/youtube">Youtube</RouterLink>
      </nav>
    </header>

    <router-view></router-view>
  </div>
</template>

<script setup>

</script>

<style scoped>

</style>
🖥 YoutubeView.vue
<template>
    <div>
        <h2>YoutubeView</h2>
        <YoutubeVideoSearch />
        <hr>
        <YoutubeVideoDetail />
        <hr>
        <YoutubeVideoList />
    </div>
</template>

<script setup>
import YoutubeVideoDetail from '../components/youtube/YoutubeVideoDetail.vue';
import YoutubeVideoList from '../components/youtube/YoutubeVideoList.vue';
import YoutubeVideoSearch from '../components/youtube/YoutubeVideoSearch.vue';


</script>

<style scoped>

</style>
🖥 HomeView.vue
<template>
    <div>
        <h2>HomeView</h2>
    </div>
</template>

<script setup>

</script>

<style scoped>

</style>
🖥 router/index.js
import { createRouter, createWebHistory } from 'vue-router'
import HomeView from '../views/HomeView.vue'
import YoutubeView from '../views/YoutubeView.vue'

const router = createRouter({
  history: createWebHistory(import.meta.env.BASE_URL),
  routes: [
    {
      path: '/',
      name: 'home',
      component: HomeView
    },
    {
      path: '/youtube',
      name: 'youtube',
      component: YoutubeView
    },
  ]
})

export default router
여기까진 이전의 내용과 별 다름이 없다.
🖥 stores/youtube.js
import { ref, computed } from 'vue'
import { defineStore } from 'pinia'
import axios from 'axios'

export const useYoutubeStore = defineStore('youtube', () => {
  const videos = ref([]);
  const selectedVideo = ref(null);

  const youtubeSearch = (keyword) => {
    const URL = 'https://www.googleapis.com/youtube/v3/search';
    const API_KEY = '발급받은 API Key';

    axios({
      url: URL,
      method: "GET",
      params: {
        key: API_KEY,
        part: "snippet", //part: youtube data api를 받을 때 매개변수 필수 속성
        q: keyword,
        type: 'video',
        maxResults: 10,
      }
    })
      .then((response) => {
        videos.value = response.data.items;
      })
      .catch(() => {})
  }

  const clickVideo = (video) => {
    selectedVideo.value = video;
  }

  return { youtubeSearch, videos, clickVideo, selectedVideo}
})
youtubeSearch: axios를 이용해 Youtube search api를 받는다. keyword 입력을 받으면 해당 keyword를 쿼리스트링 안에 넣어 영상을 꺼내온다. params에서 part는 필수이며 나머진 선택적 요소이다.
💡 이번엔 안했지만 catch를 통해 예외 처리를 해주는 것이 좋다.
🖥 YoutubeVideoList.vue
<template>
    <div>
        <h4>검색 결과</h4>
        <ul>
            <YoutubeVideoListItem
                v-for="video in store.videos"
                :key="video.id.videoId"
                :video="video"
            />
        </ul>
    </div>
</template>

<script setup>
import { useYoutubeStore } from '@/stores/youtube'
import YoutubeVideoListItem from './YoutubeVideoListItem.vue';

const store = useYoutubeStore();
</script>

<style scoped>

</style>
💡 api를 불러오는데 성공하면 가져온 video의 속성을 확인해볼 수 있다. 확인해보면 video의 id 객체에 videoId 속성이 들어있다. 이를 key로 이용한다.
🖥 YoutubeVideoListItem.vue
<template>
    <li @click="clickVideo()">
        <img :src="video.snippet.thumbnails.default.url">
        <span>{{video.snippet.title}}</span>
    </li>
</template>

<script setup>
import { useYoutubeStore } from '@/stores/youtube'

const store = useYoutubeStore();

const props = defineProps({
    video: {
        type: Object,
        required: true,
    }
});

const clickVideo = () => {
    store.clickVideo(props.video);
}
</script>

<style scoped>

</style>
비디오를 클릭하면 해당 비디오를 불러온다.
💡 video의 snippet 객체 안에 필요한 대다수의 정보가 들어있다.
🖥 YoutubeVideoSearch.vue
<template>
    <div>
        <h4>검색 컴포넌트</h4>
        <input type="text" v-model="keyword">
        <Button @click="search">검색</Button>
    </div>
</template>

<script setup>
import { ref } from 'vue';
import {useYoutubeStore} from '@/stores/youtube'

const keyword = ref('')

const store = useYoutubeStore();

const search = () => {
    store.youtubeSearch(keyword.value);
}

</script>

<style scoped>

</style>
keyword를 받아 store로 넘겨 맞는 영상을 불러온다.
🖥 YoutubeVideoDetail.vue
<template>
    <div v-if="store.selectedVideo">
        <h4>영상 상세보기</h4>
        <iframe
        width="560"
        height="315"
        :src="videoURL"
        title="YouTube video player"
        frameborder="0"
        allow="accelerometer; autoplay; clipboard-write; encrypted-media; gyroscope; picture-in-picture; web-share"
        allowfullscreen
        ></iframe>
    </div>
</template>

<script setup>
import { useYoutubeStore } from '@/stores/youtube'
import { computed } from 'vue';

const store = useYoutubeStore();
const videoURL = computed(() => {
    const videoID = store.selectedVideo.id.videoId;

    return `https://www.youtube.com/embed/${videoID}`
});

</script>

<style scoped>

</style>
검색한 video가 있을 시 해당 영상의 Id를 바탕으로 url을 불러온다.
💡 iframe 양식은 유튜브 영상에서
공유 -> 퍼가기시에 얻을 수 있다.
🖨 결과
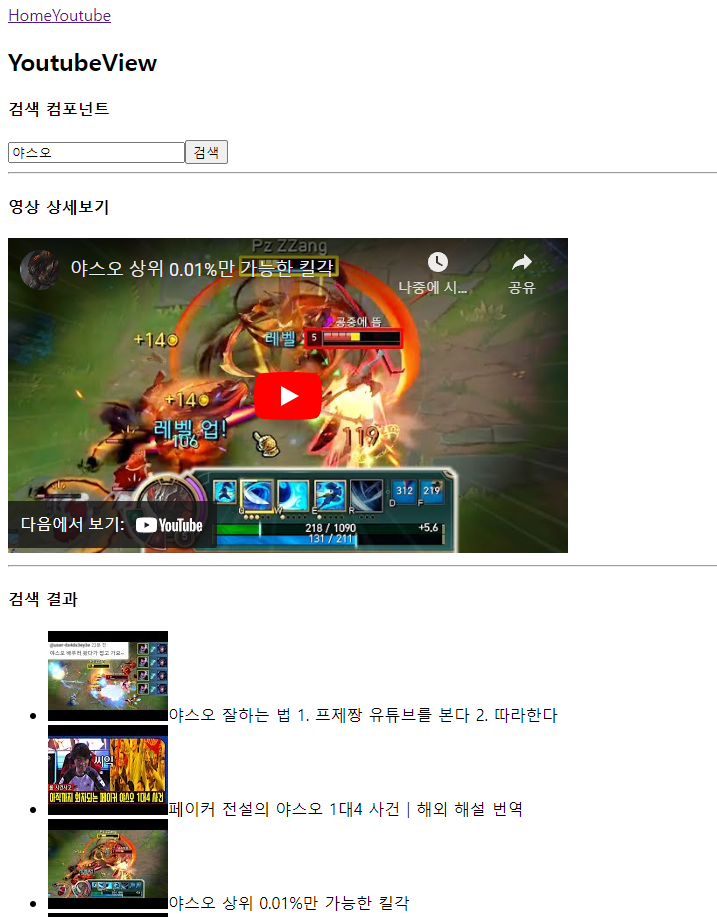
검색 결과의 max를 10개까지 설정했으므로 결과는 10개까지 뜬다. 5개가 minimum이다.
이제 야스오 장인 axios 장인이 되어보자.
다시 보면 어려운 것이 없다.
인생이 그러한 것이 아닐까...?