DOM
html element들을 javascript로 조작하는 것을 일컷는다.
<!doctype html>
<html>
    <head>
        <script>
            window.onload=function(){
                var getTitle = document.getElementById('title')
                console.log(getTitle)
            }
        </script>
    </head>
    <body>
        <div>
                <thead>
                    <tr>
                        <th id="title">제목</th>
                        <th>이름</th>
                       </tr>
                </thead>
                <tbody>
                    <tr>
                       <tb>안녕</tb>
                       <tb>임형준</tb>
                    </tr>
                </tbody>
            </table>
        </div>
    </body>
</html>
script tag 안에
window.onload를 빼주면 console이 출력되지 않는다. html은 순서대로 코드를 읽기 때문이다.window.onload= event, 전체 문서가 load가 될 때 function을 실행해라.
window.addEventListener & load & DOMContentLoaded
  window.addEventListener('load',function(){
                var getTitle = document.getElementById("title")
                console.log(getTitle)
            })
onload는 잘 안쓰고, 요즘은 이런식으로 사용한다.
  window.addEventListener('DOMContentLoaded',function(){
                var getTitle = document.getElementById("title")
                console.log(getTitle)
            })
load 와 DOMContentLoaded 차이
- load : 모든 페이지가 upload 될 때까지 대기한다. 만약에 100G 짜리 동영상이 있다면, 동영상이 모두 업로드 될때까지 기다린다.
- DOMContentLoaded : DOM 객체들 ( head, body... 등 ) 만 upload가 되면 실행을 시켜준다.예를 들면 img src="image/ersu.jpg" 가 있다고 쳤을 때, img만 인식을 하면 사진이 모두 업로드 되지 않았다고 치더라도 업로드가 된다.
그런데 head 부분에 script를 쓰지 않고, DOM 아래에 sciprt를 쓴다. 그 이유는 html은 순서대로 코드를 읽어서 head부분에 JS code를 적었을 경우 JS code를 다 읽고 나서 페이지가 load 되는데, 이는 사용자 입장에서 화면적으로 아무것도 보이지 않는 상황이 있을 수 있다. 그래서 요즘에는 script를 아래에 쓴다. 물론 JS로 화면을 그려내는 SPA는 해당되는 이야기가 아니다.
<!doctype html>
<html>
    <head>

    </head>
    <body>
        <div id="title">
                <thead>
                    <tr>
                        <th>제목</th>
                        <th>이름</th>
                       </tr>
                </thead>
                <tbody>
                    <tr>
                       <tb>안녕</tb>
                       <tb>임형준</tb>
                    </tr>
                </tbody>
            </table>
        </div>
        <script>
            var getTitle = document.getElementById("title")
            console.log(getTitle)
    </script>
    </body>
</html>
document.getElement
<!doctype html>
<html>
    <head>

    </head>
    <body>
        <div id="title">
            <span>
                hello
            </span>
            <span>
                hello
            </span>
            <thead>
                    <tr>
                        <th>제목</th>
                        <th>이름</th>
                       </tr>
                </thead>
                <tbody>
                    <tr>
                       <tb>안녕</tb>
                       <tb>임형준</tb>
                    </tr>
                </tbody>
            </table>
        </div>
        <script>
            var getTitle = document.getElementById("title")
            var getSpan = document.getElementsByTagName('span')
            console.log(getSpan[1])
    </script>
    </body>
</html>
Tag를 가져온다
그러나 위 두개 다 잘 안씀. 더 좋은게 있어서
QuerySelector
<!doctype html>
<html>
    <head>
    </head>
    <body>
        <h1 id="main">
            hello
            <small>small</small>
        </h1>
        <script>
            var getId = document.querySelector('#main small')
            console.log(getId)
        </script>
    </body>
</html>
css 선택자처럼 속성을 가져올 수 있다. main의 small을 갖고오고 싶으면 그냥
#main small을 작성하면 된다. jQuery와 비슷하다.
#= id, . = class
<!doctype html>
<html>
    <head>
    </head>
    <body>
        <h1 id="main">
            hello
            <small>small</small>
        </h1>
      <ul>
          <li class="test"><img src="img/test.png"></li>
          <li class="test"><img src="img/a.jpg"></li>
      </ul>
        <script>
            var getId = document.querySelectorAll('.test')
            console.log(getId)
        </script>
    </body>
</html>
document.querySelector는 이름이 같을 경우 가장 위의 tag만 가져오는데, 같은 이름 전부를 갖고 오고 싶으면 All을 뒤에 붙이면 된다.
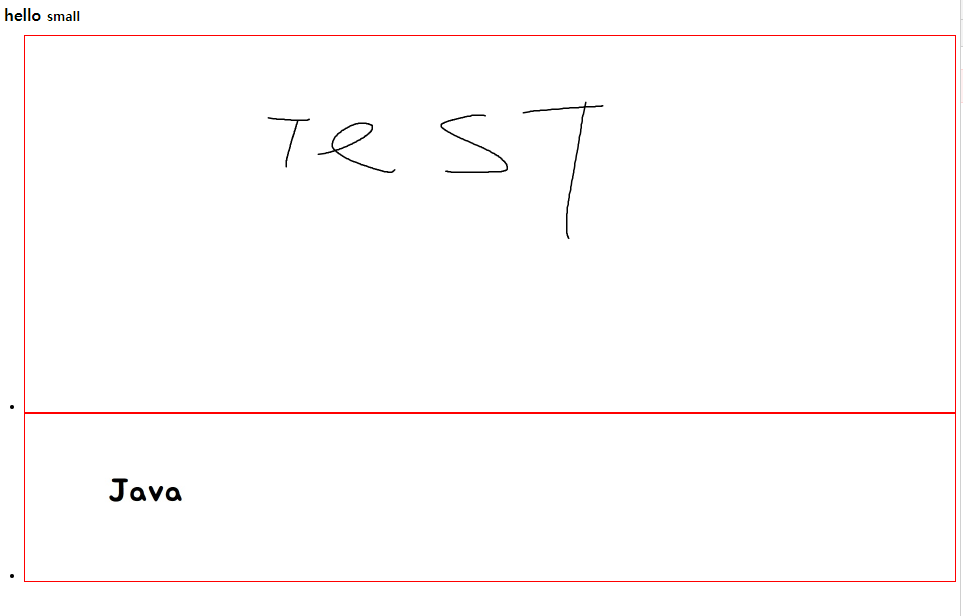
img class 가져와서 style 설정하기
<!doctype html>
<html>
    <head>
    </head>
    <body>
        <h1 id="main">
            hello
            <small>small</small>
        </h1>
      <ul>
          <li class="test"><img src="img/test.png"></li>
          <li class="test"><img src="img/a.jpg"></li>
      </ul>
        <script>
            var getId = document.querySelectorAll('.test')
            console.log(getId)

            for(i in getId){
                getId[i].style.border = '1px solid red'
            }
        </script>
    </body>
</html>
a href 안에 주소 가져오기
<!doctype html>
<html>
    <head>
    </head>
    <body>
        <h1 id="main">
            hello
            <small>small</small>
        </h1>
      <ul>
          <li class="test">
              <img src="img/test.png">
              <a href="https://google.com">Google</a>
            </li>
          <li class="test"><img src="img/a.jpg"></li>
      </ul>
        <script>
            var getId = document.querySelector('.test a')
            console.log(getId.getAttribute('href'))
        </script>
    </body>
</html>
다음
<!doctype html>
<html>
    <head>
    </head>
    <body>
        <h1 id="main">
            hello
            <small>small</small>
        </h1>
      <ul>
          <li class="test">
              <img src="img/test.png">
              <a class="ersu" href="https://google.com">Google</a>
            </li>
          <li class="test"><img src="img/a.jpg"></li>
      </ul>
        <script>
            var getId = document.querySelector('.test a')
            console.log(getId.getAttribute('href'))
            console.log(getId.getAttribute('class'))
            getId.setAttribute('href',"https://naver.com")
            console.log(getId.getAttribute('href'))
        </script>
    </body>
</html>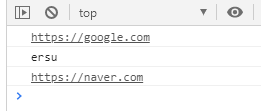
JSON에서 정보를 가져와서 html정보들을 setting할 때 많이 쓴다.
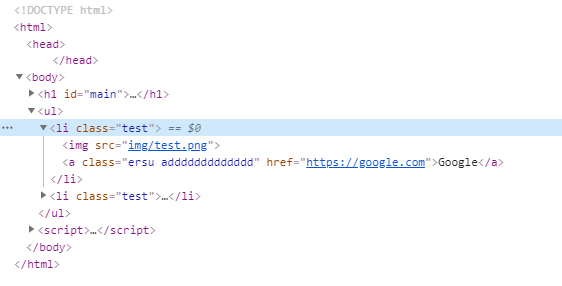
class 속성 추가하기
<!doctype html>
<html>
    <head>
    </head>
    <body>
        <h1 id="main">
            hello
            <small>small</small>
        </h1>
      <ul>
          <li class="test">
              <img src="img/test.png">
              <a class="ersu" href="https://google.com">Google</a>
            </li>
          <li class="test"><img src="img/a.jpg"></li>
      </ul>
        <script>
            var getId = document.querySelector('.test a')
            getId.classList.add('addddddddddddd')
        </script>
    </body>
</html>
classList.contains
<!doctype html>
<html>
    <head>
    </head>
    <body>
        <h1 id="main">
            hello
            <small>small</small>
        </h1>
      <ul>
          <li class="test">
              <img src="img/test.png">
              <a class="ersu" href="https://google.com">Google</a>
            </li>
          <li class="test"><img src="img/a.jpg"></li>
      </ul>
        <script>
            var getId = document.querySelector('.test a')
            getId.classList.add('addddddddddddd')
            console.log(getId.classList.contains('ersu'))
        </script>
    </body>
</html>
동적으로 Html 추가하기
<!doctype html>
<html>
    <head>
    </head>
    <body>
        <h1 class="main">
            hello
            <small>small</small>
        </h1>
      <ul>
          <li class="test">
              <img src="img/test.png">
              <a class="ersu" href="https://google.com">Google</a>
            </li>
          <li class="test"><img src="img/a.jpg"></li>
      </ul>
        <script>
            var getId = document.querySelector('.main')
            var listAdd = document.createElement('li')
            listAdd.innerHTML = '<span>임얼쑤</span>'
            getId.appendChild(listAdd)
        </script>
    </body>
</html>