Event
<!Doctype html>
<html>
    <head>
        <style>
            body {font-size: 3rem;}
            .btn {
                font-size: 10rem;
            }
            #title {
                color: #fff000;
            }
        </style>
    </head>
    <body>
        <div id='title'>임얼쑤</div>
        <button class='btn'>클릭하세요!</button>
        <script>
            var btn = document.querySelector('.btn');
            var mainTitle = document.querySelector('#title')

            function btnClickHandler(){
                mainTitle.style.color = 'dodgerblue';
            }

            btn.addEventListener('click',btnClickHandler)
        </script>
    </body>
</html>
이름을 handler라고 붙이는 이유: event가 발생했을 때 실행되는 함수를 event listener 또는 event handler라고 이름을 붙인다.
함수 이름 앞에 on이 붙어있거나 뒤에 handler가 붙어있으면 eventListener이다.

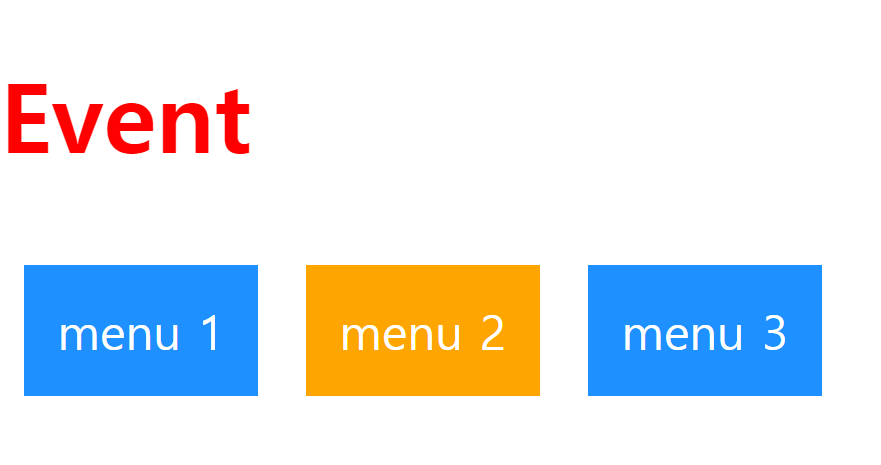
눌렀을 때 한 menu만 주황색으로 바뀌게
<!Doctype html>
<html>
    <head>
        <style>
            body {font-size: 3rem;}
            .btn {
                font-size: 10rem;
            }
            #title {
                color: #fff000;
            }
            .menu {
                display: flex;
            }
            .menu-link{
                margin: .5em;
                color: #fff;
                text-decoration: none;
                padding: .7em;
                 background: dodgerblue;
                 list-style: none;
            }
            .menu-active {
                background: orange;
            }
            #eventId{
                size: 5;
                color: red;
            }
        </style>
    </head>
    <body>

        <h1 id="eventId">
            Event
        </h1>
        <nav class="menu">
            <a href="#" class="menu-link" data-menu="1">menu 1</a>
            <a href="#" class="menu-link" data-menu="2">menu 2</a>
            <a href="#" class="menu-link" data-menu="3">menu 3</a>
        </nav>

        <script>

            function clickMenuHandler(){
                this.classList.add('menu-active')
            }

            var menuLinks = document.querySelectorAll('.menu-link');
            for(i in menuLinks){
                menuLinks[i].addEventListener('click',clickMenuHandler)
            }
        </script>
    </body>
</html>
function에 this를 사용함으로서 가능하게 한다.
누른 부분만 주황색이 뜨게 하고 싶다
<!Doctype html>
<html>
    <head>
        <style>
            body {font-size: 3rem;}
            .btn {
                font-size: 10rem;
            }
            #title {
                color: #fff000;
            }
            .menu {
                display: flex;
            }
            .menu-link{
                margin: .5em;
                color: #fff;
                text-decoration: none;
                padding: .7em;
                 background: dodgerblue;
                 list-style: none;
            }
            .menu-active {
                background: orange;
            }
            #eventId{
                size: 5;
                color: red;
            }
        </style>
    </head>
    <body>

        <h1 id="eventId">
            Event
        </h1>
        <nav class="menu">
            <a href="#" class="menu-link" data-menu="1">menu 1</a>
            <a href="#" class="menu-link" data-menu="2">menu 2</a>
            <a href="#" class="menu-link" data-menu="3">menu 3</a>
        </nav>

        <script>
            var menuLinks = document.querySelectorAll('.menu-link');

            function clickMenuHandler(){
                // for(i in menuLinks){
                    for(var i=0;i<menuLinks.length;i++){
                        menuLinks[i].classList.remove('menu-active')
                    }
                // }
                this.classList.add('menu-active')
            }

            for(i in menuLinks){
                menuLinks[i].addEventListener('click',clickMenuHandler)
            }
        </script>
    </body>
</html>
for문 돌려서 class이름 지워주는 방식이 전형적으로 jQuery에서 하던 방식
만약 1000 X 1000 의 격자가 있는 button이 있다면 한번의 클릭 때문에 백만번 돌아야한다. 상당히 비효율적일 수 있는 방식
주석처리부분으로 하면 오류가 나는데 왜 생기는지 모르겠다
---> for( i in menuLinks) 일 때는 null check를 해주어야 한다.
  function clickMenuHandler(){
                for(i in menuLinks){
                        var menuActive = document.querySelector('.menu-active')
                        if(menuActive){
                            menuLinks[i].classList.remove('menu-active')
                        }
                }
                this.classList.add('menu-active')
            }
querySelector는 모든 DOM을 수색해야 하는 함수. 이 방법도 비효율적이다.
전역변수 활용
        <script>
            var currentMenu;
            var menuLinks = document.querySelectorAll('.menu-link');

            function clickMenuHandler(){
                    if(currentMenu){
                        currentMenu.classList.remove('menu-active')
                    }
                     this.classList.add('menu-active')
                     currentMenu = this
                }

                for(i in menuLinks){
                    menuLinks[i].addEventListener('click',clickMenuHandler)
                }
        </script>
DOM 의존적이지 않게 코드를 짜는 것이 중요
eventListenr 수정
위의 코드에서
 <script>
            var currentMenu;
            var menuLinks = document.querySelectorAll('.menu-link');

            function clickMenuHandler(){
                    if(currentMenu){
                        currentMenu.classList.remove('menu-active')
                    }
                     this.classList.add('menu-active')
                     currentMenu = this
                }

                for(i in menuLinks){
                    menuLinks[i].addEventListener('click',clickMenuHandler)
                }
</script> for(i in menuLinks){
menuLinks[i].addEventListener('click',clickMenuHandler)
}이 부분 역시 고쳐주어야 한다. menuLink가 100만개면 100만개에 대해서 모두 eventListener를 달아주고, for문이 100만번이 돌기 때문에. ( eventListener는 많아질수록 사이트의 효율이 떨어진다 )
<!Doctype html>
<html>
    <head>
        <style>
            body {font-size: 3rem;
            background-color: rgb(30, 28, 25); // dark reader 색상
            }
            .btn {
                font-size: 10rem;
            }
            #title {
                color: #fff000;
            }
            .menu {
                display: flex;
            }
            .menu-link{
                margin: .5em;
                color: #fff;
                text-decoration: none;
                padding: .7em;
                 background: dodgerblue;
                 list-style: none;
            }
            .menu-active {
                background: orange;
            }
            #eventId{
                size: 5;
                color: red;
            }
            .menu {
                background: yellowgreen;
            }
        </style>
    </head>
    <body>

        <h1 id="eventId">
            Event
        </h1>
        <nav class="menu">
            <a href="#" class="menu-link" data-menu="1">menu 1</a>
            <a href="#" class="menu-link" data-menu="2">menu 2</a>
            <a href="#" class="menu-link" data-menu="3">menu 3</a>
        </nav>

        <script>
            var menu = document.querySelector('.menu')

            function ClickHandler(){
                console.log(this)
            }

            menu.addEventListener('click',ClickHandler)
        </script>
    </body>
</html>
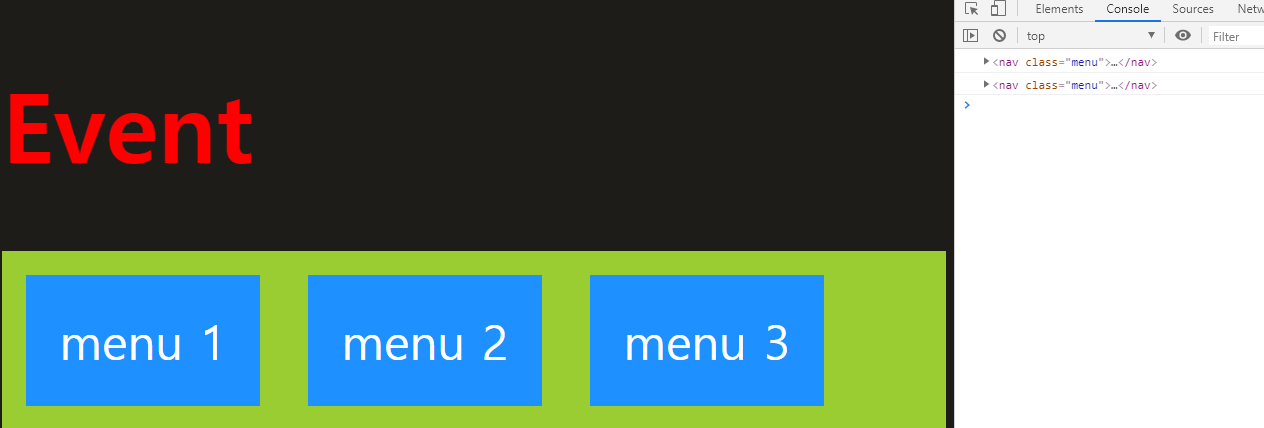
어떤 메뉴를 누르던지 menu가 출력 . this는 메소드를 호출한 객체.
menu.addEventListener('click',ClickHandler)여기서는 menu가 this다.
e.target

        <script>
            var menu = document.querySelector('.menu')

            function ClickHandler(e){
                console.log(e.currentTarget)
                console.log(e.target)
            }

            menu.addEventListener('click',ClickHandler)
        </script>
e.currentTarget
e = event가 발생할 때 함수에 넘겨주는 인자.
e.currentTarget= thise.target현재 클릭하는 타겟.
event 위임
        <script>
            var currentMenu;
            var menu = document.querySelector('.menu')

            function ClickHandler(e){
                if(currentMenu){
                    currentMenu.classList.remove('menu-active')
                }
                e.target.classList.add('menu-active')
                currentMenu = e.target
            }

            menu.addEventListener('click',ClickHandler)
        </script>
더 좋게 수정된 코드

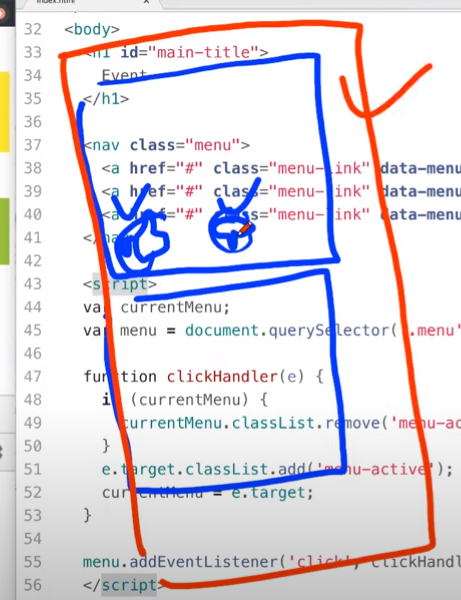
facebook 을 보면 각 페이지에 event가 있는데, e.target을 이용하면 하나 하나에 eventListener를 걸어주지 않아도 container에 eventListner를 위임해놨으면 target만 조사하면 된다.
리팩토링
        <script>
            var currentMenu;
            var menu = document.querySelector('.menu')

            function activate(item){
                item.classList.add('menu-active')
                currentMenu = item
            }
            function inActivate(item){
                item.classList.remove('menu-active')
            }

            function ClickHandler(e){
                if(currentMenu){
                    inActivate(currentMenu)
                }
                activate(e.target)
            }

            menu.addEventListener('click',ClickHandler)
        </script>
event안에 있는 코드를 최대한 깔끔하게 해주기 위해 객체화 시켜준다.
JS #1,#2는 1분코딩님의 강좌를 참고했습니다.
https://www.youtube.com/watch?v=Y3_2BLb3hz8&list=PLe9WXHRkq9p0k7eF0TrIHgL5Cy9khHWnX&index=4&t=2140s
