이번에는 이전 글에서 사용했던 IMPORTXML 대신 GAS를 활용하여 웹 스크래핑을 해보겠다. apps script가 javascript 기반이기 때문에 마찬가지로 cheerio 라이브러리를 사용할 수 있다.
1. cheerio 라이브러리 추가
링크에 있는 README에서 script ID를 복사해서 오자. 그리고 왼쪽 코드 목록 아래에 위치한 라이브러리 추가를 클릭하자.
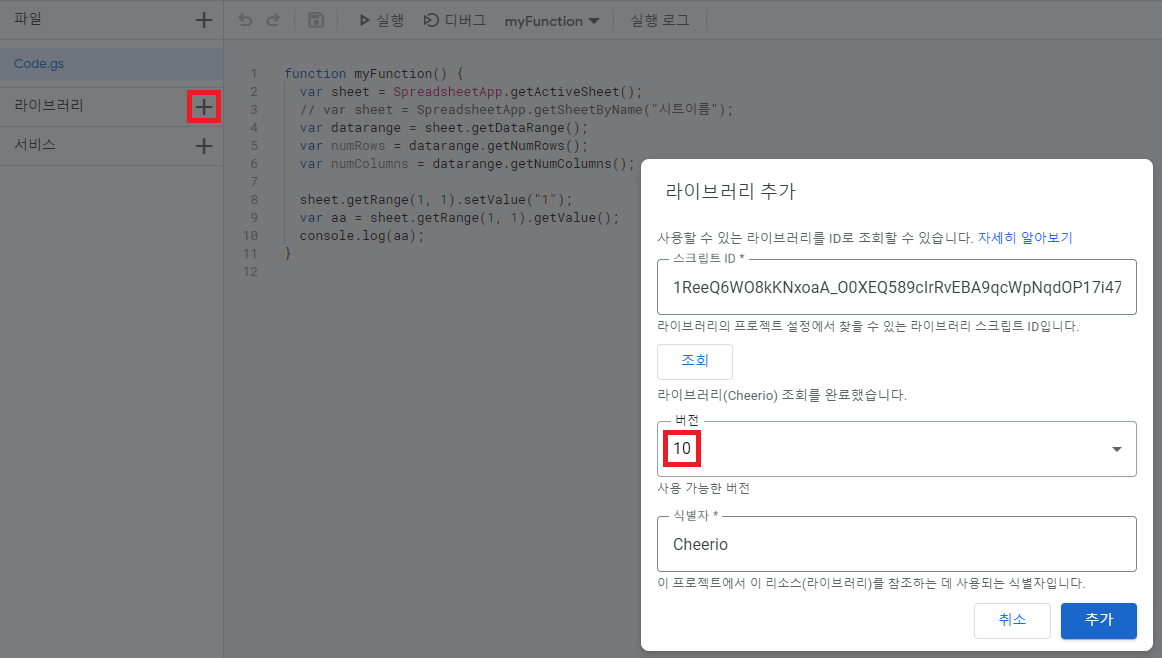
스크립트 ID 칸에 복사한 script ID를 붙여넣고 조회를 누르면 버전과 식별자가 뜬다. 여기서는 10버전을 사용하겠다. 식별자는 건드리지 말고 그대로 추가를 눌러주자.
그러면 라이브러리 목록에 Cheerio가 추가된 것을 볼 수 있다.
2. 웹 스크래핑 해보기
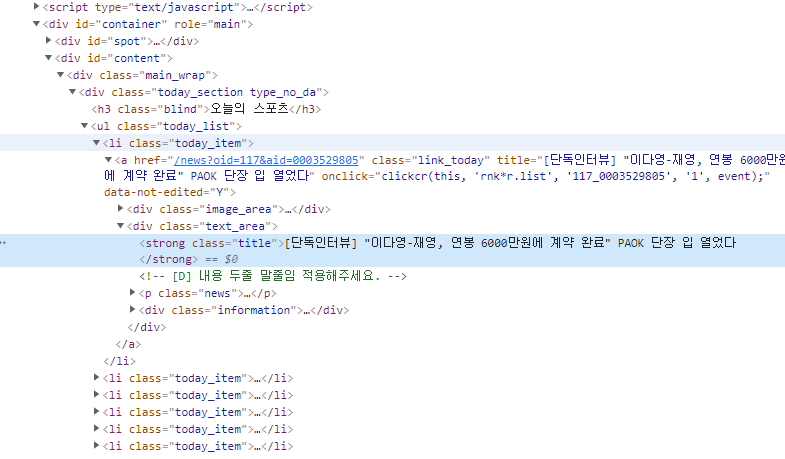
이번에도 네이버 스포츠 기사의 제목을 스크래핑 해보겠다. 이번에는 스크래핑할때 xpath가 아닌 css selector를 사용하였다. 웹 구조는 다음과 같다.
이제 GAS로 스크래핑을 해보자.
function getContent_(url) {
    return UrlFetchApp.fetch(url).getContentText()
}

function scraper() {
    const content = getContent_("https://sports.news.naver.com/index");
    const $ = Cheerio.load(content);
    const sports_news = $('#content > div > div.today_section.type_no_da > ul > li').toArray();
    sports_news.forEach((li) => {
      const title = $(li).find("strong").text();
      Logger.log(title);
});UrlFetchApp.fetch(url).getContentText(): 해당 url의 html을 리턴한다.const $ = Cheerio.load(content): Cheerio를 사용하여 html에서 원하는 내용만 뽑게한다.toArray(): 추출할 제목이 있는 li 클래스의 내용들을 반복문으로 뽑아내도록 배열로 만든다.forEach {}: 배열의 반복문이다. 배열에서 각 li 클래스에 담긴 내용(태그)에서 제목이 담긴 strong 클래스를 찾아 text화 시켜 화면에 출력하도록한다.
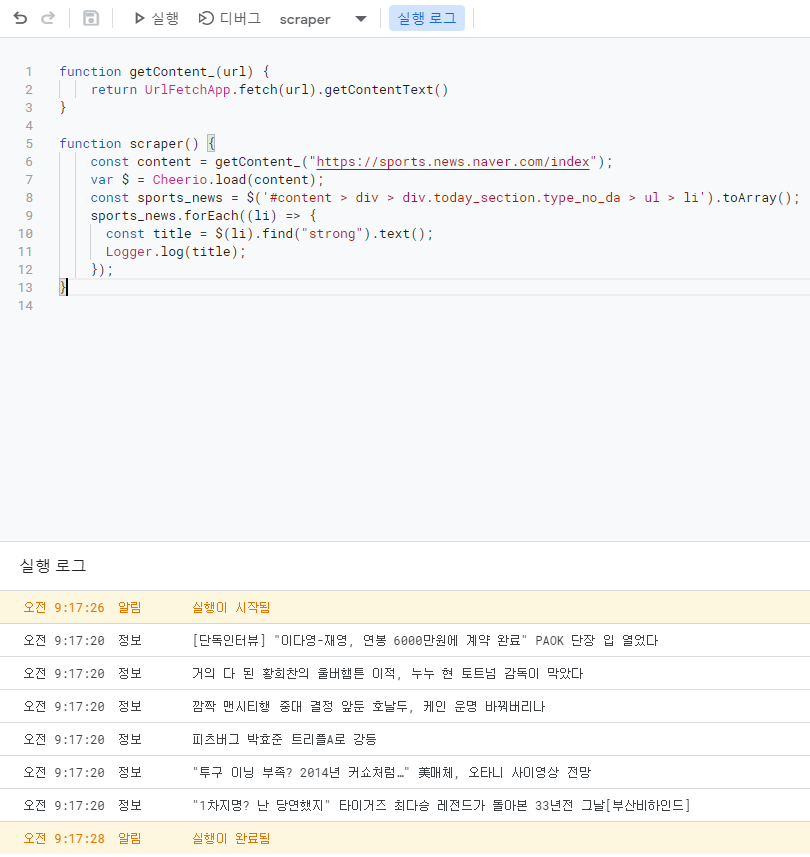
실행결과는 다음과 같다.
3. 스크래핑한 결과를 시트에 쓰기
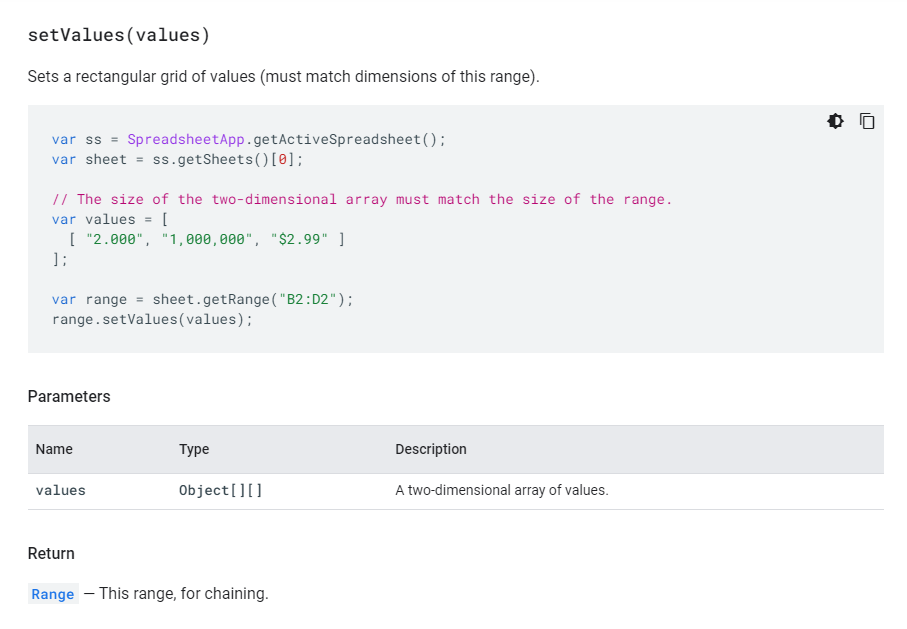
이제 스크래핑이 되는 것을 확인했으니 결과를 시트에 써보자. 여러 값을 한번에 쓰기 때문에 setValue()가 아닌 setValues()를 사용한다.
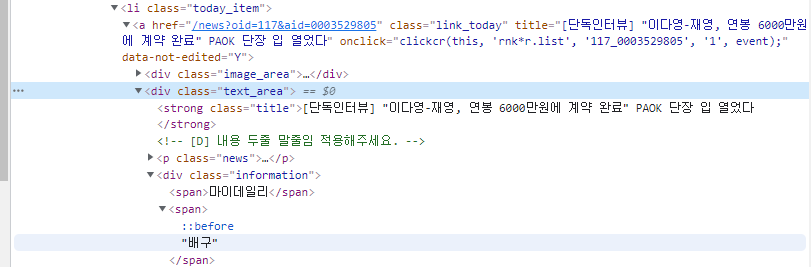
이번엔 스포츠 종목 스크래핑도 포함하는 코드를 작성해보자. 종목이 담긴 위치는 다음 사진과 같다.
function getContent_(url) {
    return UrlFetchApp.fetch(url).getContentText()
}

function scraper() {
    const sheet = SpreadsheetApp.getActiveSheet(); // 추가된 시트 열기
    const content = getContent_("https://sports.news.naver.com/index");
    const $ = Cheerio.load(content);
    const titles = [];
    const sports_news = $('#content > div > div.today_section.type_no_da > ul > li').toArray();
    sports_news.forEach((li) => {
      const title = $(li).find("strong").text();
      const category = $(li).find("div").last().find("span").last().text(); // 추가된 종목 스크래핑
      // Logger.log(title);
      titles.push([title, category]);
    });
    setSheetData(sheet, titles); // 추가된 함수 호출
}

// 추가된 함수
function setSheetData(sheet, data){
  var row = 1;
  const num_rows = 1;
  const col = 1;
  const num_cols = 2;

  for (var datum of data) {
    var input = [];
    input.push(datum);
    sheet.getRange(row, col, num_rows, num_cols).setValues(input);
    row++;
  }
}$(li).find("div").last().find("span").last().text(): 종목이 있는 위치인 div 클래스 마지막 안의 span 태그 마지막 텍스트를 추출한다.titles.push([title, category]): setValues의 파라미터 형식인 Object[][]에 맞게 추출한 데이터를 넣어준다.setSheetData(): 스프레드 시트에 추출한 데이터를 작성한다.for (var datum of data): iterable의 반복문이다. 파라미터로 받은 데이터를 받아 한줄씩 시트에 입력하는 반복문이다.sheet.getRange(row, col, num_rows, num_cols).setValues(input): 데이터를 입력하는 부분이다. 한 row에 2개의 데이터를 입력해야 하므로 num_cols가 2이다.
실행결과는 다음과 같다.

4. 오류 처리 하기
스크래핑을 할때는 가끔 연결 오류 등이 발생할 수 있으니 이를 처리해주자.
function getContent_(url) {
    try {
      const response = UrlFetchApp.fetch(url)
      if (response.getResponseCode() == 200) {
        return response.getContentText();
      }
      else {
        return null;
      }
    }
    catch (error) {
      console.log(error);
      return null;
    }
}

function scraper() {
    const sheet = SpreadsheetApp.getActiveSheet();
    const content = getContent_("https://sports.news.naver.com/index");
    if (content == null){
      return;
    }

...
간단하게 연결 오류를 잡아낼 try-catch문을 사용하였다. 실행 로그를 확인하여 에러 발생 원인을 찾아 수정해주자.
5. 마무리
이번에는 GAS로 cheerio를 이용하여 간단하게 스크래핑을 하는 방법을 알아봤다. 다음에는 트리거를 이용하여 자동으로 GAS를 작동시키는 방법을 알아보겠다.
5. Reference
GAS Cheerio 라이브러리 - https://github.com/tani/cheeriogs
네이버 뉴스 크롤링 따라하기 - https://codingbroker.tistory.com/124
apps script method setValues - https://developers.google.com/apps-script/reference/spreadsheet/range#setvaluesvalues
