
1. /public/index.html
index에서 body안에서 볼 수 있는 태그는 다음과 같다.
<!DOCTYPE html>
<html lang="en">
  <head>
    <meta charset="utf-8" />
    <link rel="icon" href="%PUBLIC_URL%/favicon.ico" />
    <meta name="viewport" content="width=device-width, initial-scale=1" />
    <meta name="theme-color" content="#000000" />
    <meta
      name="description"
      content="Web site created using create-react-app"
    />
    <link rel="apple-touch-icon" href="%PUBLIC_URL%/logo192.png" />
    <!--
      manifest.json provides metadata used when your web app is installed on a
      user's mobile device or desktop. See https://developers.google.com/web/fundamentals/web-app-manifest/
    -->
    <link rel="manifest" href="%PUBLIC_URL%/manifest.json" />
    <!--
      Notice the use of %PUBLIC_URL% in the tags above.
      It will be replaced with the URL of the `public` folder during the build.
      Only files inside the `public` folder can be referenced from the HTML.

      Unlike "/favicon.ico" or "favicon.ico", "%PUBLIC_URL%/favicon.ico" will
      work correctly both with client-side routing and a non-root public URL.
      Learn how to configure a non-root public URL by running `npm run build`.
    -->
    <title>TITLE</title>
  </head>
  <body>
    <noscript>You need to enable JavaScript to run this app.</noscript>
    <div id="root"></div>
    <!--
      This HTML file is a template.
      If you open it directly in the browser, you will see an empty page.

      You can add webfonts, meta tags, or analytics to this file.
      The build step will place the bundled scripts into the <body> tag.

      To begin the development, run `npm start` or `yarn start`.
      To create a production bundle, use `npm run build` or `yarn build`.
    -->
  </body>
</html><div id = "root"></div>이 코드를 보고 우리는 무언가가
에 태그를 넣어주고 있다는 것을 유추할 수 있다.
이제 우리가 살펴볼 것은 root 태그에 무언가가 넣어지고 있는지 알아볼 것이다.
파일 하나하나 파헤쳐가보며!
2. /src/index.js
import React from 'react';
import ReactDOM from 'react-dom';
import './index.css';
import App from './App';
import reportWebVitals from './reportWebVitals';

ReactDOM.render(
  <React.StrictMode>
    <App />
  </React.StrictMode>,
  document.getElementById('root')
);

// If you want to start measuring performance in your app, pass a function
// to log results (for example: reportWebVitals(console.log))
// or send to an analytics endpoint. Learn more: https://bit.ly/CRA-vitals
reportWebVitals();
ReactDom.render() 안에 2개의 값이 들어간다.
첫 번째 값인
두 번째 값인 document.getElementById('root')
을 보자.
render는 화면에 출력할 때 사용하며, App은 컴포넌트이다.
document.getElementById('root')은 id 속성값이 root인 태그 선택자이다.
즉 App 컴포넌트의 내용을 id 속성값이 root인 태그에 뿌리는 것이다.
index.js 파일 상단을 보면 다음 코드가 있다. 'App 파일에 있는 App 컴포넌트를 가져온다' 이다.
import App from './App';여기서 App은 같은 경로에 있는 App.js 를 의미한다.
3. App.js
드디어 우리가 띄운 화면에 보이는 요소들을 찾을 수 있다.
한 번 비교해보며 감을 잡아보자.
import React from 'react';
import logo from './logo.svg';
import './App.css';

function App() {
  return (
    <div className="App">
      <header className="App-header">
        <img src={logo} className="App-logo" alt="logo" />
        <p>
          Edit <code>src/App.js</code> and save to reload.
        </p>
        <a
          className="App-link"
          href="https://reactjs.org"
          target="_blank"
          rel="noopener noreferrer"
        >
          Learn React
        </a>
      </header>
    </div>
  );
}

export default App;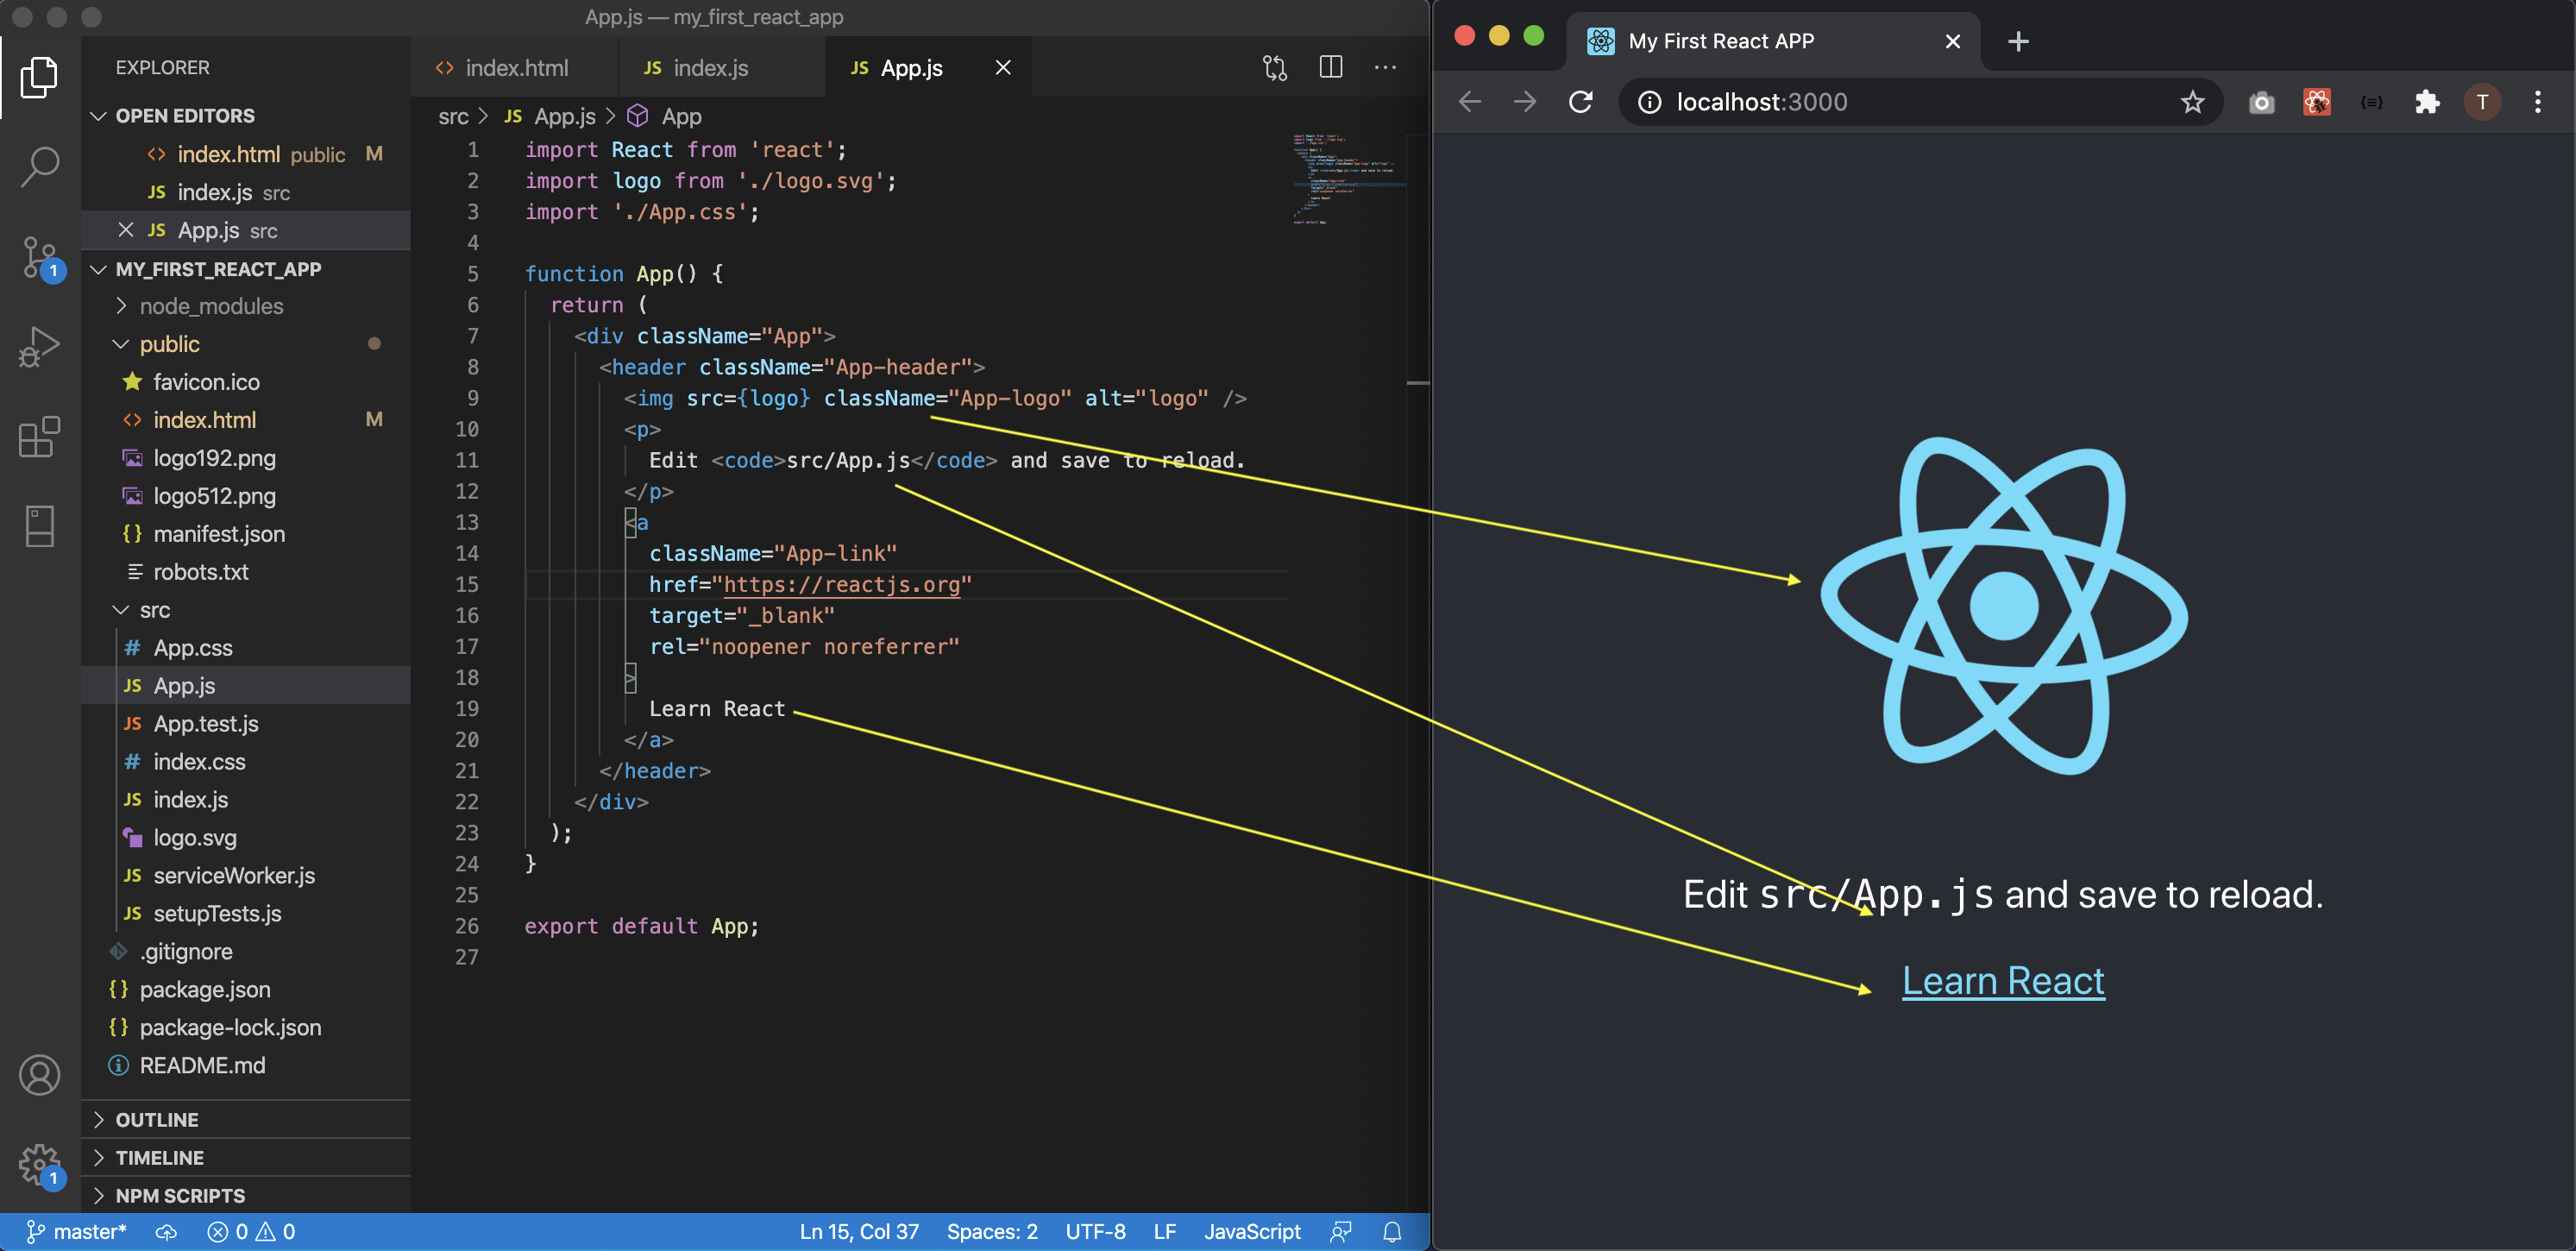
App이라는 컴포넌트가 존재하며, index.js에 import되고
index.js에서 app 컴포넌트를 index.html 파일에 있는 id="root"에 뿌린다는 것을
확인할 수 있었다.

가치를 개발하는 💎