log 관리하기
로그 관리가 필요한 이유
1. 콘솔로만 찍으면 기록이 어렵다.
2. error, log, exception을 따로 모아서 확인할수 있다.

먼저 config 폴더를 만들고 안에 logger.js 라는 파일을 하나 만들어 줍니다.
그리고 외부 Node.js 폴더에 logs 라는 폴더를 만들어 줍니다.
const winston = require('winston');
const winstonDaily = require('winston-daily-rotate-file'); // 로그파일 일자별로 생성
const appRoot = require('app-root-path'); // app root 경로를 가져오는 lib
const process = require('process'); // 무슨 프로세스에서 진행이 되었는지
위의 4가지 모듈을 설치하기 위해서
npm i winston
npm i winston-daily-rotate-file
npm i app-root-path
npm i process
을 터미널 창에 입력해준다.
const logDir = `${appRoot}/logs`; // logs 디렉토리 하위에 로그 파일 저장 ${appRoot} : app의 루트 폴더를 알려줌
//const logDir = 'logs'; => '가 아니라 `(backtick)으로 써야 ${} 가 가능해 진다;;
log를 저장할 위치를 지정해준다. backtick 대신 따옴표 썼다가 오류났다;;
const {
    combine,
    timestamp,
    label,
    printf
} = winston.format; // 파일을 기록할 때 어떤 형식으로 기록 할 것 인지
파일을 기록할 형식을 지정하고
const logFormat = printf(({
    level,
    message,
    label,
    timestamp
}) => {
    return `${timestamp} [${label}] ${level}: ${message}`; // log 출력 포맷 정의
});
log 출력 포맷을 정의하여 준다
/*
 * Log Level
 * error: 0, warn: 1, info: 2, http: 3, verbose: 4, debug: 5, silly: 6 info 레벨에 info 이상의 레벨이 저장되어 버린다
 */
로그 레벨에는 0부터 6까지가 있으며 낮은레벨의 로그는 높은 레벨의 로그에 포함된다 ex) info 안에는 error가 포함되어 있다.
const logger = winston.createLogger({
    format: combine(
        label({
            label: 'LogTestSystem'
        }),
        timestamp({
            format: 'YYYY-MM-DD HH:mm:ss',
        }),
        logFormat // log 출력 포맷
    ),
    transports: [
        // info 레벨 로그를 저장할 파일 설정
        new winstonDaily({
            level: 'info',
            datePattern: 'YYYY-MM-DD',
            dirname: logDir,
            filename: '%DATE%.log',
            maxFiles: 30, // 30일치 로그 파일 저장
            zippedArchive: true,
        }),
        // error 레벨 로그를 저장할 파일 설정
        new winstonDaily({
            level: 'error',
            datePattern: 'YYYY-MM-DD',
            dirname: logDir,
            filename:'%DATE%.error.log',
            maxFiles: 30,
            zippedArchive: true,
        })
    ],
    exceptionHandlers: [ // uncaughtException 발생시
        new winstonDaily({
            level: 'error',
            datePattern: 'YYYY-MM-DD',
            dirname: logDir,
            filename: '%DATE%.exception.log',
            maxFiles: 30,
            zippedArchive: true,
        })
    ]
});
winston으로 저장할 파일의 형식과 포맷을 지정하여 줬으니 winstonDaily로 저장할 파일의 이름, 위치, 최대갯수, 레벨을 지정하여 준다.
그리고 예외 처리(uncaughtException)도 잡아준다.
// Production 환경이 아닌경우(dev 등) 화면에도 log를 찍겠다.
if (process.env.NODE_ENV !== 'production') {
    logger.add(new winston.transports.Console({
        format: winston.format.combine(
            winston.format.colorize(), // 색깔 넣어서 출력
            winston.format.simple(), // '${info.level}: ${info.message} JSON.stringify({ ...rest })' 포맷으로
        )
    }));
}

module.exports = logger;
마지막으로 개발환경에서는 콘솔창에서도 로그를 볼 수 있게 설정하여 준다.
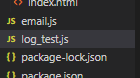
이제 log_test.js라는 파일을 node.js 폴더에 생성한뒤
const log = require('./config/logger');


log.info("this is info message");
log.error("this is error message");
이렇게 저장후 실행하여 주면
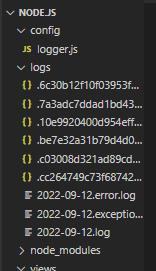
이런식으로 로그가 일자별 레벨별로 저장이 된다.
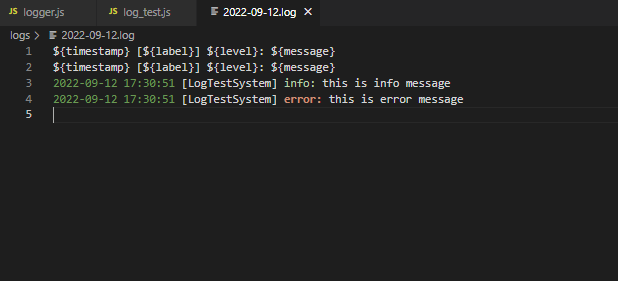
파일을 클릭하면 이런식으로 나온다.
winston에 관한 자세한 내용은
https://github.com/winstonjs/winston
여기를 참고하자

스마트팜 개발