
개요
레이아웃은 유저의 경험에 직접적으로 영향을 주는 중요한 부분입니다. 만약 레이아웃 코드를 지저분하게 짠다면 UI가 느려지고 메모리가 부족한 앱이 됩니다. 안드로이드 SDK에는 레이아웃 성능의 문제를 식별할 수 있는 도구가 있는데, 이 글에서는 레이아웃은 재사용하는 방법을 알아보겠습니다.
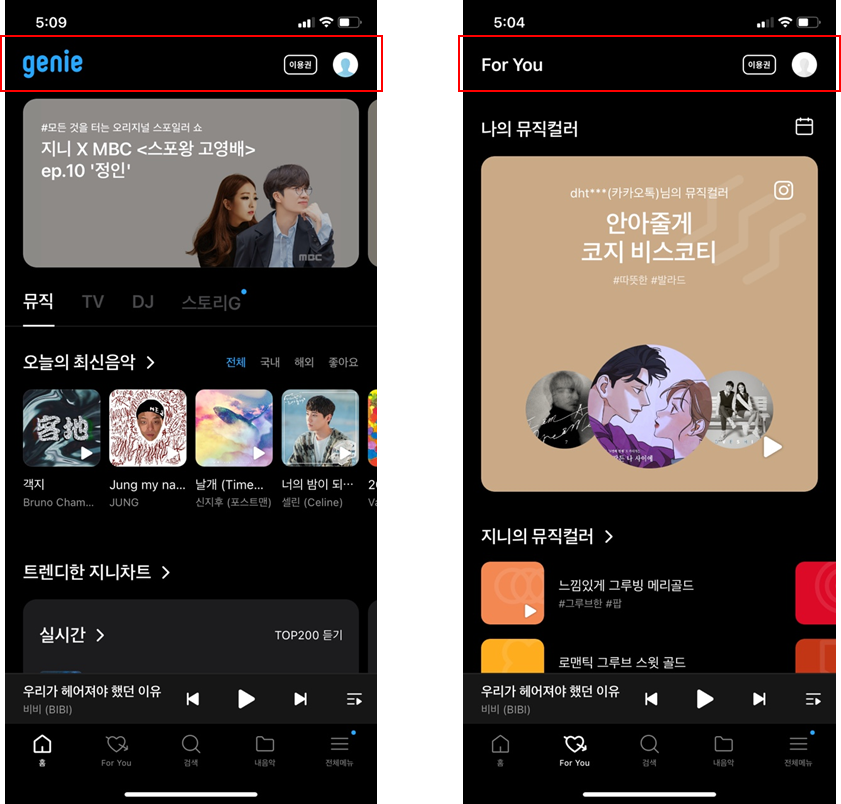
지니뮤직 앱의 화면입니다. 빨간색으로 칠한 부분을 보면 비슷한 레이아웃으로 구성되어 있습니다. 이를 직접 각 액티비티 레이아웃 파일에 따로 작성하는 것은 비효율적입니다. 따라서 안드로이드에서는 이러한 레이아웃을 하나의 파일로 만들고 그 레이아웃 파일을 다른 레이아웃 파일에서 포함시킬 수 있는 기능을 제공합니다. 레이아웃 파일에서 <include/> 또는 <merge/> 태그를 사용하면 됩니다.
재사용할 수 있는 레이아웃은 특히 복잡한 레이아웃을 작성할 때 강력해집니다.
이제 예시를 확인해보겠습니다.
재사용할 수 있는 레이아웃 파일 만들기
레이아웃 선언(titlebar.xml)
<FrameLayout xmlns:android="http://schemas.android.com/apk/res/android"
    xmlns:tools="http://schemas.android.com/tools"
    android:layout_width="match_parent"
    android:layout_height="wrap_content"
    android:background="@color/titlebar_bg"
    tools:showIn="@layout/activity_main" >

    <ImageView android:layout_width="wrap_content"
               android:layout_height="wrap_content"
               android:src="@drawable/gafricalogo" />
</FrameLayout>
<include> 태그 사용
<LinearLayout xmlns:android="http://schemas.android.com/apk/res/android"
    android:orientation="vertical"
    android:layout_width="match_parent"
    android:layout_height="match_parent"
    android:background="@color/app_bg"
    android:gravity="center_horizontal">

    <include layout="@layout/titlebar"/>

    <TextView android:layout_width="match_parent"
              android:layout_height="wrap_content"
              android:text="@string/hello"
              android:padding="10dp" />

    ...

</LinearLayout>
재사용할 레이아웃(titlebar.xml)을 선언하고 그 레이아웃을 포함하는 곳에서는 <include/> 태그를 사용하면 됩니다. 위의 예제는 titlebar라는 xml을 만들고 그 레이아웃을 포함하는 파일에서 <include/> 태그를 사용하여 포함하는 코드입니다.<include/> 태그 내에 layout 이라는 속성은 포함하는 xml 파일을 지정하기 위해서 사용합니다.
<include/> 태그 내에 layout 속성 외에도 android:layout_* 으로 시작하는 모든 속성을 사용해도 됩니다. 다만, 이러한 속성을 사용하기 위해서 android:layout_height 와 android:layout_width 속성은 꼭 정의해야 합니다.
<include android:id="@+id/news_title"
         android:layout_width="match_parent"
         android:layout_height="match_parent"
         layout="@layout/title"/>
<merge> 태그 사용
<merge/> 태그는 한 레이아웃을 다른 레이아웃에 포함할 때 뷰 계층에서 중복 뷰 그룹을 제거할 수 있습니다.
위에서 나온 <include/> 태그를 사용하면 반드시 레이아웃을 감싸줄 뷰 그룹이 존재해야만 합니다. 이것이 한편으로는 뷰 계층을 더 깊게 만들어 부하를 가중시킬 수도 있습니다. 이러한 문제를 해결하기 위해 나온 것이 <merge/> 태그입니다.
titlebar.xml
<merge xmlns:android="http://schemas.android.com/apk/res/android">

    <Button
        android:layout_width="fill_parent"
        android:layout_height="wrap_content"
        android:text="@string/add"/>

    <Button
        android:layout_width="fill_parent"
        android:layout_height="wrap_content"
        android:text="@string/delete"/>

</merge>
위의 코드와 같이 LinearLayout(ViewGroup에 해당) 대신, <merge/> 태그로 감싸면 됩니다.
이제 이를 <include/> 태그의 layout 속성값으로 titlebar를 지정해주면 시스템은 <merge>를 무시하고 태그 내의 버튼 두 개를 직접 레이아웃에 위치시킵니다.
참조
안드로이드 developer - Improving Layout Performance
안드로이드 merge와 include 레이아웃 기법
안드로이드 layout 재사용하기
틀린 부분은 댓글로 남겨주시면 수정하겠습니다..!!
