
puppeteer 실습
- 이 수업의 최종 목적은 지도에 Marking하기 !
VS code 줄바꿈 설정
Ctrl + , 눌러서, 자동으로 줄바꿈 되게 설정한다.
맥은 Command + ,
VS code의 실행 정책(권한) 변경
- 윈도우 Powershell을 관리자 권한으로 실행
- get-ExecutionPolicy 명령어로 권한을 확인
'Restricted' 상태일 가능성이 높음- Set-ExecutionPolicy RemoteSigned 명령어 실행
- 권한 상태 종류
- Restricted : default 값, 스크립트 파일을 실행할 수 없다.
- AllSinged : 신뢰 가능한(서명된) 스크립트 파일만 실행할 수 있다.
- RemoteSigned(추천) : 로컬 생성 스크립트, 서명된 스크립트 파일을 실행할 수 있다.
- Unrestricted : 모든 스크립트를 실행할 수 있다.
- ByPass : 경고/차단 없이 모든 것을 실행할 수 있다.
- Undefined : 권한 설정을 하지 않는다.
- Y 를 입력하여 실행 정책을 변경
동기와 비동기
1. 동기(synchronous)
- 동기는 말 그대로 동시에 일어나는 것을 말한다.
요청과 그 결과가 동시에 일어나는 것이다. 그래서 시간이 오래걸리는 작업도 결과는 동시에 나온다.
Request : a, b, c, d, e
Response : a, b, c, d, e
2. 비동기(Asynchronous)
- 비동기는 동시에 일어나지 않는 것을 말한다.
요청한 자리에서 결과가 나오지 않는다.
응답하느 노드간의 작업 처리 단위를 맞출 필요가 없다.
Request : a, b, c, d, e
Response : a
b
c
d
e
3. 동기와 비동기의 장, 단점
- 동기방식은 설계가 매우 간단, 직관적이고 비동기 방식은 자원을 효율적으로 사용할 수 있는 장점이 있다.
- 동기방식은 결과가 주어질 때까지 다른 task를 하지 못한다는 단점이 있고, 비동기 방식은 동기보다는 복잡하다는 단점이 있다.
4. Javascript code로 동기적, 비동기적 코딩
- 동기적 방식
// 동기적 방식
function task(title){
    setTimeout(function(){
        console.log('a')
    },3000)
    setTimeout(function(){
        console.log('b')
    },1000)
}
task('a')
task('b')
task('c')
task('d')
- 비동기적 방식
// 비동기적 방식
// promise, async, callback
//1000 >> 10초(밀리초 단위라서...)
// 보통 async function() 이런 방식으로 비동기적 함수 실행을 위해 많이 사용된다.
function coffeMachine (type, callback) {   //callback 함수 : 2 >> callback 지우개라고 하는데 늘어날수록 지연된다.(a끝나고 b,~c,d~ 실행하는 동작)
    setTimeout(function(){
        console.log(type,':done')
        callback()
    },2000)   // 함수 coffeeMachine이 도는데 걸리는 시간은 ~ 밀리초 이다.
}

coffeMachine('A', function(){
    coffeMachine('B',function(){
        coffeMachine('C',function(){

        })
    })
})

// 이걸 보완하기 위해서 나온 것이 Promise() 함수
// 비동기적 함수 만들기
function asyncTask(arg){
    const promise = new Promise(function(resolve,reject){  //promise의 매개인자 resolve, reject
        setTimeout(function(){
            console.log(arg)
            resolve()
        }, 1000)
    })    //promise에 Promise 함수를 넣자.
    return promise      //promise를 return시키자 !
}

asyncTask('task a')
asyncTask('task b')
asyncTask('task c')
asyncTask('task d')


asyncTask('task 1')
.then(function(){
    return asyncTask('task 2')
})
.then(function(){
    return asyncTask('task 3')
})
.then(function(){
    return asyncTask('task 4')
})


// async await 함수(then을 붙인 것과 같이 실행이 된다. 즉,순차적으로 다음 task를 진행시키고 싶을 때 사용하면 된다.)
await asyncTask('Task A')
await asyncTask('Task B')
await asyncTask('Task C')
await asyncTask('Task D')

// async 와 await를 쓰는 조건이 있다.
// (example) async가 promise()함수를 반환시키는 함수
async function test(){
    await asyncTask('task 1')  //원래 async의 함수 내에서 await는 실행이 됐어야 했는데
}
 await asyncTask() // 이거 처럼 그냥 함수 밖에서 await를 쓸 수 있게 되었다.
evaluate()
- 이 함수는 html의 콘솔에 들어갈 것을 적어주는 함수라고 보면 된다.
매개 인자를 넣는 위치 이런 것은 puppeteer의 syntax이기 때문에 외우는 수 밖에 없다....
crawler.js
import  puppeteer  from "puppeteer-core";
//puppeteer 다운 받은 것을 임포트 시킨다.
import os from 'os'
import fs from 'fs'

const macUrl = '/Applications/Google Chrome.app/Contents/MacOS/Google Chrome'
// Chrome browser로 실행시킬 것이기에 chrome.exe가 있는 경로를 입력
const whidowsUrl = 'C:/Program Files (x86)/Google/Chrome/Application/Chrome.exe'
const currentOs = os.type()
const launchConfig = {
  headless: false,
  defaultViewport: null,
  ignoreDefaultArgs: ['--disable-extensions'],
  args: [ '--no-sandbox', '--disable-setuid-sandbox', '--disable-notifications', '--disable-extensions'],
  executablePath: currentOs == 'Darwin' ? macUrl : whidowsUrl
}

//강의 자료 중 여기까지 똑같이 가져온다.

// const first = function(){
//     console.log('first')
// }
// // first라는 상수 함수를 하나 만든다.
// const apple= 'apple'
// export {
//     first,
//     apple
// }
// //first라는 함수를 내보낸다.apple이라는 문자도 내보낼 수 있다.
index.js
import { apple, first } from './modules/crawler.js'
//crawlling 할 js 파일을 import 시켜준다.
//mac 은 자동완성이 command + i 이다.


function main () {
  // console.log('main start')
  // console.log(apple)
  // first()
  // console.log('main exit')
}
main()- 주석 처리된 부분을 실행시키면,
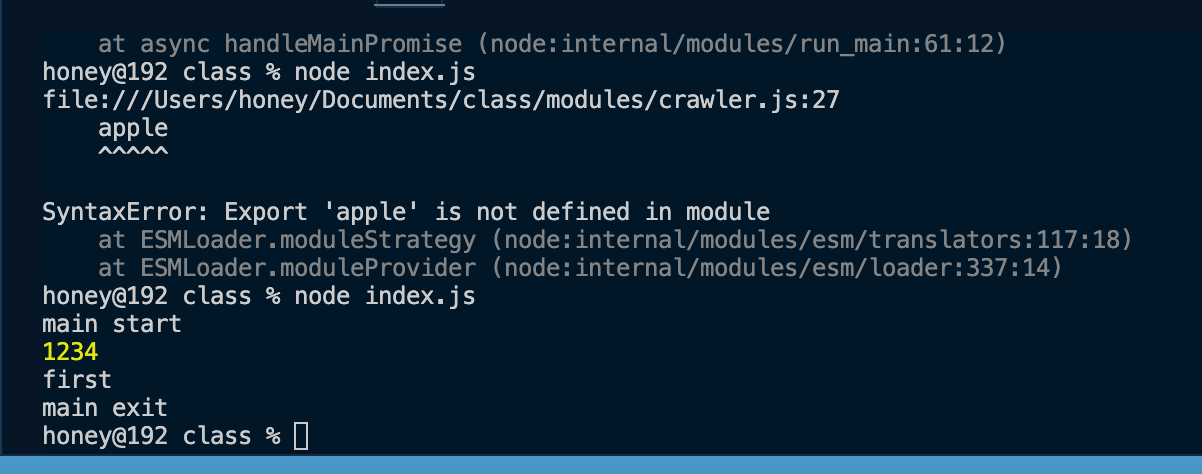
이렇게 결과가 나온다.
본격적으로 크롤링 코드를 짜보자 !!
crawler.js - 본 코드
import puppeteer from "puppeteer-core";
//puppeteer 다운 받은 것을 임포트 시킨다.
import os from 'os'
import fs from 'fs'

const macUrl = '/Applications/Google Chrome.app/Contents/MacOS/Google Chrome'
// Chrome browser로 실행시킬 것이기에 chrome.exe가 있는 경로를 입력
const whidowsUrl = 'C:/Program Files (x86)/Google/Chrome/Application/Chrome.exe'
const currentOs = os.type()
const launchConfig = {
  headless: false,
  defaultViewport: null,
  ignoreDefaultArgs: ['--disable-extensions'],
  args: ['--no-sandbox', '--disable-setuid-sandbox', '--disable-notifications', '--disable-extensions'],
  executablePath: currentOs == 'Darwin' ? macUrl : whidowsUrl
}

//강의 자료 중 여기까지 똑같이 가져온다.
// 전역변수 global
let browser = null
let page = null
let pageLength = 0
let finalData = []
let sido = null
let sigungu = null
const pageSelector = `body > table:nth-child(2) > tbody > tr > td:nth-child(1) > table > tbody > tr > td:nth-child(2) > table > tbody > tr:nth-child(5) > td > table:nth-child(5) > tbody > tr:nth-child(4) > td > table > tbody > tr > td:nth-child(3)`


//실행, init, sido,sigungu는 카테고리작업
const launch = async function ( arg1, arg2) {  //비동기 처리
  //카테고리작업
  sido = arg1
  sigungu = arg2
  //카테고리작업
  browser = await puppeteer.launch(launchConfig); //실행할 때, 설정한 launchConfig를 넣는다. 그럼 chrome 브라우저가 실행이 된다.
  // 지역변수
  const pages = await browser.pages(); // 새로운 브라우저가 열린다.
  console.log(pages.length)
  page = pages[0]
  // 페이지 이동
  // 크롤링 할 페이지를 기입한다. 우리는 휴일지킴이약국을 기입힌다.

}
// url 찾차가기
const goto = async function (url) {
  return await page.goto(url)
}
// 팝업 닫기
const checkPopup = async function () {
  const pages = await browser.pages()
  //최신 문법 !  arr.at(-1)하면 맨 마지막 배열의 값을 가져올 수 있다.
  await pages.at(-1).close()
  //pages의 array 길이 찍어보기
  // console.log(pages.length)
}

// name이라고 class 네임을 만듦, name드간 곳에 다 넣어주면 name 함수에서 받을 수 있음
const evalCode = async function () {
  // console.log('')
  // console.log(`#continents > li.${name} > a`)
  await page.evaluate(function (sido) {
    document.querySelector(`#continents > li.${sido} > a`).click()
  }, sido)
  // ${}하면 문자를 합칠 수 있다.
}
// 시군구 클릭
const evalCity = async function () {
  // 해당 엘리먼트를 찾을때까지 기다림
  await page.waitForSelector(`#container #continents > li.songpa_gu > a`)
  await page.evaluate(function (sigungu) {
    document.querySelector(`#container #continents > li.songpa_gu > a`).click()
    // 두번 째 엘리먼트를 사용할 것이다.
  }, sigungu)
}

const getData = async function () {
  //페이지의 수 만큼 반복 ! 반복시켜서 클릭시킨다. 그리고 필요한 데이터를 뽑을 것이다.
  //현재 페이지가 1이니까 i는 1부터 시작해서 1씩 늘어나고 페이지수 만큼 반복
  for (let i = 1; i <= pageLength; i++) {
    // console.log('i:', i)
    await page.waitForSelector(pageSelector)
    // getPageLength의 부모와 같은 js path
    // 인자로 i가 들어가고 i를 return
    const infoArr = await page.evaluate(function (i, sido, sigungu) {
      // document.querySelector(pageSelector).children[i].click() //1~7페이지까지 클릭이 일어나면서 페이지가 바뀐다.
      // element를 잘 찾는 것이 관건, 부모 element를 잘 찾아서 뽑아와야 한다. class 이름은 ./ , id는 #을 붙인다.

      var trArr = document.querySelectorAll("#printZone > table:nth-child(2) > tbody tr")
      var returnData = []

      for (var i = 0; i < trArr.length; i++) {

        var currentTr = trArr[i]

        var name = currentTr.querySelector('td')?.innerText.replaceAll('\n','').replaceAll('\t','')
        var address = currentTr.querySelectorAll('td')[2]?.innerText.replaceAll('\n','').replaceAll('\t','')
        var tel = currentTr.querySelectorAll('td')[3]?.innerText.replaceAll('\n','').replaceAll('\t','')
        var open = currentTr.querySelectorAll('td')[4]?.innerText.replaceAll('\n','').replaceAll('\t','')

        var jsonData = {
          'name': name,
          'address': address,
          'tel': tel,
          'open': open,
          'sido' : sido,
          'sigungu' : sigungu
        }
        // 만약 key 이름과 value 이름이 같을 거면은 value만 입력해주면 그 value값의 이름으로 key값이 설정 된다.
        if (jsonData.address != undefined) {
          returnData.push(jsonData)
          //push 함수는 배열에 데이터를 넣을 때 쓰는 함수
        }
      }       // end for
      return returnData


      // ? 표를 붙여주는 것은 있으면 잡고 없으면 indifined를 출력해서 스킵시킨다. 그래서 오류를 피할 수 있다.
      //for 문으로 이름, 주소, 전화번호, 오픈 시간을 가져왔다.

      //json 파일로 만들거다.

    }, i,sido,sigungu)     // end eval
    finalData = finalData.concat(infoArr)
    // concat() 은 merge 시켜주는 함수, 배열1.concat(배열2) >> 배열1,배열2를 merge시킨다.(하나의 배열로)
    // console.log('finalData:', finalData)


    if (pageLength != i) {
      // 다음 페이지 클릭해서 이동
      await page.evaluate(function (i, pageSelector) {
        document.querySelector(pageSelector).children[i].click()
      }, i, pageSelector) //evaluate 끝
    }
    await page.waitForSelector(pageSelector)

    console.log('finalData길이:', finalData.length)
  }   // end for

  browser.close()     // crawling이 끝났으니 브라우져 닫기
}       // end getData

// alert창 닫기
const alertClose = async function () {
  //page.on은 dialog라는게 뜨게 되면 반환하겠다라는 말
  await page.on('dialog', async function (dialog) {
    await dialog.accept()
  })
}

// page 갯수를 먼저 구해보자
const getPageLength = async function () {
  // 해당 샐렉터 기다림
  await page.waitForSelector(pageSelector) // 페이지를 나타내는 path의 부모

  pageLength = await page.evaluate(function (pageSelector) {
    const result = document.querySelector(pageSelector).children.length       //7
    return result
    // result에 7이 담기니까 7이 반환된다.
  }, pageSelector)
  console.log('length:', pageLength)
  // 콘솔에 pageLength를 출력 !
}


const writeFile = async function () {
  const stringData = JSON.stringify(finalData)     //finalData는 자료유형이 object니까 string으로 바꿔줄거야 !
  const filePath = './json/temp.json'       // 이것도 크롤링할 때 마다 이름 + 날짜로 만들 수 있다.
  await fs.writeFileSync(filePath, stringData)// import 한 fs를 써보자,,fs.writeFileSync(저장 될 경로, 내가 쓸 데이터), node.js의 라이브러리
}


// 여기서 변수에 함수 다 넣어서 export시키고 index.js에서 호출해서 사용 하는 구조 !
export {
  launch,
  goto,
  alertClose,
  checkPopup,
  evalCode,
  evalCity,
  getPageLength,
  getData,
  writeFile
}

// document.querySelector("#printZone > table:nth-child(2) > tbody")
// document.querySelector("#printZone > table:nth-child(2) > tbody tr")
// // 부등호 > 근접한 테이블을 하나 찾겠다. 엘리멘탈 찾기
index.js - 본 코드
import { launch, alertClose, goto, checkPopup, evalCode, evalCity, getPageLength, getData, writeFile } from './modules/crawler.js'
//crawlling 할 js 파일을 import 시켜준다.
//mac 은 자동완성이 command + i 이다.

async function main() {
  // 브라우저 실행 ,
  await launch('seoul', 'songpa_gu')
  // 페이지 이동
  await goto('https://www.pharm114.or.kr/main.asp')
  // 팝업 닫기
  await checkPopup()
  // await alertClose()
  // url로 바로 가도되고
  // await goto('https://www.pharm114.or.kr/common_files/sub2_page2.asp?addr1=%BC%AD%BF%EF%C6%AF%BA%B0%BD%C3')
  // 시 클릭
  await evalCode()
  // 구 클릭
  await evalCity()
  // 경고창 닫기
  await alertClose()
  // 페이지 길이 구하기
  await getPageLength()
  // 페이지 수만큼 반복
  await getData()
  // 크롤링 한 데이터를 json 파일로 저장
  await writeFile()

  process.exit(1)
}
main()
결과
- 구현
참고자료
https://private.tistory.com/24 [오토봇팩토리:티스토리]

자습서 같은 공부 블로그 만들기!