[Spring Security] Spring Security + Google OAuth2 로그인 구현(3)

Spring Security + Google OAuth2 로그인 구현(3)
본 프로젝트는 최주호 님의 「스프링부트 시큐리티 & JWT」 강의를 참고하여 진행하였습니다.
최주호 님의 「스프링부트 시큐리티 & JWT」 강의 git 주소
https://github.com/codingspecialist/-Springboot-Security-OAuth2.0-V3
버전 업데이트 이후 수정본으로 진행하는 git 주소
https://github.com/Solkot/Security_Oauth
-> branch마다 저장하면서 진행하고 있습니다. OAuth 전의 과정의 경우 Profile branch에 저장되어 있습니다.
1. 의존성 추가
spring-boot-starter-oauth2-client 의존성을 pom.xml 또는 build.gradle에 추가합니다.
<dependency>
    <groupId>org.springframework.boot</groupId>
    <artifactId>spring-boot-starter-oauth2-client</artifactId>
</dependency>
이 라이브러리가 있어야 Spring Security가 OAuth2 인증 플로우를 자동으로 처리할 수 있습니다.
2. Google API Console에서 OAuth 프로젝트 생성
-
1.1. 콘솔로 접속
-
새 프로젝트 생성
-
OAuth 동의 화면 구성 → 사용자 유형 선택 (외부/내부)
-
OAuth 클라이언트 ID 생성
- 애플리케이션 유형: 웹 애플리케이션
- 승인된 리디렉션 URI에 다음 추가


http://localhost:8080/login/oauth2/code/google4.1. 고정된 기본 리디렉션 URI 패턴(/login/oauth2/code/{registrationId})
Spring Security는 OAuth2 로그인 플로우를 처리하기 위해
리디렉션 URI를 내부적으로 고정된 규칙으로 관리합니다.
{baseUrl}/login/oauth2/code/{registrationId}- 클라이언트 ID / 클라이언트 비밀번호 복사
baseUrl: 우리 애플리케이션의 루트 주소 (예: http://localhost:8080
)
registrationId: application.yml에 정의한 OAuth2 클라이언트 이름(google, naver 등), 이후 3에서 설정합니다.
4.2. 고정된 기본 리디렉션 URI 패턴(변경)
spring:
 security:
   oauth2:
     client:
       registration:
         google:
           redirect-uri: "{baseUrl}/oauth2/callback/{registrationId}"
로 바꿀 순 있다.
3. application.yml 설정
client-id, client-secret은 GitHub에 업로드되지 않도록 .gitignore 관리 주의, 아니면 직접 들어가서 지우기
spring:
  security:
    oauth2:
      client:
        registration:
          google:
            client-id: your-client-id
            client-secret: your-client-secret
            scope:
              - email
              - profile
이 설정으로 Spring Security가 구글 OAuth2 클라이언트로 동작할 수 있게 됩니다.
client-id와 client-secret은 Google cloud API에서 생성된 프로젝트를 보고 채워주면 된다.
4. 로그인 폼에 OAuth 로그인 버튼 추가
loginForm.mustache (또는 HTML)에서 다음과 같이 Google 로그인 링크를 추가합니다.
<a href="/oauth2/authorization/google">Google로 로그인</a>하지만!
아직 .oauth2Login() 설정이 Security 필터 체인에 없기 때문에
/oauth2/authorization/google로 접근 시 404 에러가 발생합니다.
5. Security 필터 체인 설정
이제 OAuth2 인증 요청을 처리할 수 있도록 필터를 등록해야 합니다.
 @Bean
    public SecurityFilterChain filterChain(HttpSecurity http) throws Exception {
        http.csrf(AbstractHttpConfigurer::disable)
                .authorizeHttpRequests(authorize -> authorize
                        .requestMatchers("/user/**").authenticated()
                        .requestMatchers("/manager/**").hasAnyRole("ADMIN", "MANAGER") //ROLE_ADMIN에서 이제 ROLE_ 같은 접두사는 자동으로 붙기 때문에 사용 X
                        .requestMatchers("/admin/**").hasRole("ADMIN")
                        .anyRequest().permitAll()
                )
                .formLogin(form -> form
                        .loginPage("/loginForm")
                        .loginProcessingUrl("/login")// /login 주소가 호출이 되면 시큐리티가 낚아채서 대신 로그인을 진행해줍니다.
                        .defaultSuccessUrl("/") //로그인 성공 후 이동할 기본 URL 지정
                        .permitAll() // 로그인 페이지와 로그인 요청 URL은 누구나 접근 가능하도록 허용
                ).oauth2Login(oauth2 -> oauth2
                        .loginPage("/loginForm") // OAuth2 로그인도 같은 커스텀 로그인 페이지 사용
                        //구글 로그인이 완료된 후에 후처리가 필요, Tip 코드 X(액세스 토큰 + 사용자 프로필 정보)
                        .userInfoEndpoint(userInfo -> userInfo
                                .userService(principalOauth2UserService)
                        )
                        .defaultSuccessUrl("/")
                );

        return http.build();
    }
이제 /oauth2/authorization/google 요청이 정상적으로 동작하며,
Spring Security가 구글 → 인증 코드(code) → 액세스 토큰 → 사용자 정보(OAuth2User) 로 이어지는 과정을 자동으로 처리합니다.
6. Spring Security의 OAuth2 기본 동작
- 사용자가
/oauth2/authorization/google클릭 - Google 로그인 페이지로 리디렉션
- 로그인 성공 후 Google이 인가 코드(code) 를 리디렉션 URI로 전달
- Spring Security가 인가 코드를 받고 → Google로 액세스 토큰 요청
- Google로부터 사용자 정보(userinfo) 를 받아와
OAuth2User객체 생성 OAuth2User를SecurityContext에 저장 → 인증 완료
하지만 이건 “최소한의 인증 처리”만 해줍니다.
DB 저장, 권한 매핑, 기존 회원 연동은 개발자가 직접 구현해야 합니다.
7. PrincipalOauth2UserService 추가
OAuth2 로그인 시 받은 사용자 정보를 우리 서비스의 회원 시스템(DB)에 연동하려면
PrincipalOauth2UserService를 구현해야 합니다.
UserDetailsService라고 생각하시면 됩니다. 과정은 유사합니다.
@Service
public class PrincipalOauth2UserService extends DefaultOAuth2UserService {
@Autowired
private BCryptPasswordEncoder bCryptPasswordEncoder;
@Autowired
private UserRepository userRepository; //해당 아이디로 로그인이 되어있는지 확인
//구글로부터 받은 userRequest 데이터에 대한 후처리 되는 함수
@Override
public OAuth2User loadUser(OAuth2UserRequest userRequest) throws OAuth2AuthenticationException {
System.out.println("userRequest : " + userRequest);
System.out.println("getClientRegistration: "+ userRequest.getClientRegistration()); // registrationId로 어떤 OAuth로 로그인했는지 확인 가능
System.out.println("getAccessToken: "+userRequest.getAccessToken().getTokenValue());
//System.out.println("getAttributes: "+super.loadUser(userRequest).getAttributes());
OAuth2User oauth2User = super.loadUser(userRequest);
// 구글 로그인 버튼 클릭 -> 구글로그인창 -> 로그인 완료 -> code를 리턴(OAuth-Client라이브러리) -> AccessToken 요청
//UserRequest 정보 -> 회원프로필 받아야함(loadUser함수 호출) ->구글로 부터 회원프로필 받아준다.
System.out.println("getAttributes: "+oauth2User.getAttributes());
String provider = userRequest.getClientRegistration().getClientId(); //google
String providerId = oauth2User.getAttribute("sub");
String username = provider + "_" + providerId; //google_...(sub)
String password = bCryptPasswordEncoder.encode("비밀번호"); //의미 없음, 인증 받는 곳에서 인증 후 준 코드를 사용하기 때문
String email = oauth2User.getAttribute("email");
String role = "ROLE_USER";
User userEntity = userRepository.findByUsername(username);
if(userEntity == null){
System.out.println("구글 로그인이 최초입니다.");
userEntity = User.builder()
.username(username)
.password(password)
.email(email)
.role(role)
.provider(provider)
.providerId(providerId)
.build();
userRepository.save(userEntity);
}//User가 없을 경우만 생성, 이후는 중복적인 생성을 못하게 차단
else{
System.out.println("구글 로그인을 이미 한 적이 있습니다. 당신은 자동회원가입이 되어 있습니다.");
}
//return super.loadUser(userRequest);
return new PrincipalDetails(userEntity, oauth2User.getAttributes()); //이 정보가 대신해서 Authetication 객체 안으로 들어간다.
//UserDetails와 OAuth2User을 implements한 PrincipalDetails를 대신 Authentication에 넣음
}
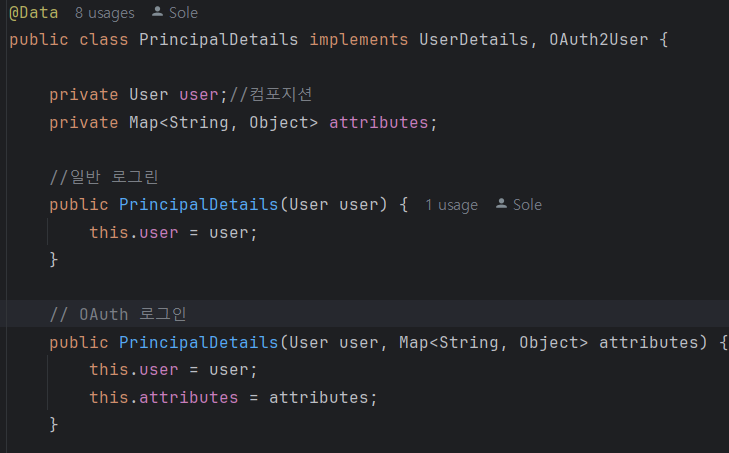
}8. PrincipalDetails 확장 (UserDetails + OAuth2User)
기존에는 UserDetails만 구현했지만,
이제 OAuth2User까지 통합해야 하므로 두 인터페이스를 모두 구현합니다.
public class PrincipalDetails implements UserDetails, OAuth2User {

    private User user;
    private Map<String, Object> attributes; // OAuth2 정보

    // 일반 로그인용 생성자
    public PrincipalDetails(User user) {
        this.user = user;
    }

    // OAuth2 로그인용 생성자
    public PrincipalDetails(User user, Map<String, Object> attributes) {
        this.user = user;
        this.attributes = attributes;
    }

    @Override
    public Map<String, Object> getAttributes() {
        return attributes;
    }

    @Override
    public String getName() {
        return user.getUsername();
    }

    // UserDetails의 메서드들도 그대로 구현 (getPassword, getAuthorities 등)
}
이제 OAuth2 로그인 시에도 동일한 PrincipalDetails 객체를 사용하여
인증 정보를 Authentication에 담을 수 있습니다.
8.1. UserDetails와 OAuth2User를 오버라이딩 한 이유
- OAuth와 UserDetails를 Principal details 타입으로 묶기 위해서
- OAuth로 로그인 했을떄 회원가입을 강제로 진행시키기 위해서
9. 인증 정보 확인 (Controller)
로그인 성공 후, 현재 인증 객체를 확인해봅니다.
@GetMapping("/")
public String index(Authentication authentication,
                    @AuthenticationPrincipal PrincipalDetails principalDetails) {

    System.out.println("Authentication: " + authentication.getPrincipal());
    System.out.println("UserDetails: " + principalDetails.getUsername());
    return "index";
}
10. 전체 흐름 정리
| 단계 | 내용 |
|---|---|
| 1 | OAuth2 의존성 추가 |
| 2 | Google API Console에서 OAuth2 클라이언트 생성 |
| 3 | application.yml에 설정 추가 |
| 4 | 로그인 폼에 구글 로그인 버튼 추가 |
| 5 | .oauth2Login() 설정으로 필터 체인 등록 |
| 6 | 구글 → 인가 코드 → 액세스 토큰 → 사용자 정보 흐름 처리 |
| 7 | CustomOAuth2UserService로 사용자 DB 저장/연동 |
| 8 | PrincipalDetails: UserDetails + OAuth2User 통합 |
| 9 | Authentication / PrincipalDetails로 인증 정보 확인 |
마무리
Spring Security의 OAuth2 로그인은 “기본 인증 흐름”은 자동,
“회원 정보 연동”은 직접 커스터마이징하는 구조입니다.
Spring Security의 기본 OAuth2 로그인은 사용자의 정보를 받아와 OAuth2User 객체를 생성해서 SecurityContext에 저장해서 로그인을 유지하는 것까지는 됩니다.
하지만 아직 사용자 정보(DB)와 연결되지 않았기에 우리 서비스 입장에서는 "이 사용자가 우리 회원인지", "권한이 뭔지"를 모릅니다.
그렇기에
1. OAuth2UserService에서 사용자 정보 받아와 DB에서 해당 이메일로 회원 조회
2. 아이디가 없으면 새로 가입시켜주고 DB에서 조회된 User 엔티티를 기반으로 PrincipalDetails 생성
3. Authentication 객체에 PrincipalDetails를 직접 넣어서
SecurityContextHolder에 저장
하는 PrincipalDetails의 일관성을 유지시키는 작업이 필요하다.
pring Security의 인증 체계 안으로 OAuth2 사용자를 완전히 편입시키는 과정으로 일반 로그인과 OAuth2 로그인이 같은 PrincipalDetails 기반으로 동작할 수 있다.
