
📒 오늘의 공부
1. Toss payments Paypal 연동
구현해야 하는 기능
- 토스페이먼츠 paypal 연동 후 결제 정보 db에 추가
토스페이먼츠 결제창 SDK 설치
npm install @tosspayments/payment-sdk --save
예약 버튼 눌렀을 때 결제창 띄우기
- 공식문서의 html이 아닌 npm code 참고
- 'PAY NOW' 버튼에 함수 연결
import { loadTossPayments } from '@tosspayments/payment-sdk';
.
.
.

// PAY NOW 버튼 클릭 시 결제창으로 이동
  const handleSubmit = (e: React.FormEvent<HTMLFormElement>) => {
    e.preventDefault();

const orderId = nanoid();
    loadTossPayments(clientKey).then((tossPayments) => {
      tossPayments
        .requestPayment('해외간편결제', {
          // 결제 정보 파라미터
          amount: totalPrice,
          orderId,
          customerName: name,
          orderName: serviceId.toString(),
          successUrl: `${window.location.origin}/successPayments`,
          failUrl: `${window.location.origin}/failPayments`,
          provider: 'PAYPAL',
          currency: 'USD',
          country: 'US',
        })
        .then(() => {
          setResvStorage({
            orderId,
            serviceId,
            headcount,
            tourDate,
            tourTime,
            name,
            email,
            phone,
            sns,
            snsId,
            detailRequest: request,
            totalPrice,
            paymentMethod: 'paypal',
          });
        })
        .catch(function (error) {
          // 결제 고객이 결제창을 닫았을 때 에러 처리
          if (
            error.code === 'USER_CANCEL' ||
            error.code === 'PAY_PROCESS_CANCELED'
          ) {
            alert('Payment has been canceled by the customer.');
            console.log('error', error);

            // 그 외의 경우 에러 처리
          } else {
            console.log('error:', error);
          }
        })
        .finally(() => {
          setPaymentRequested(false); // 결제 요청 상태 초기화
        });

      setPaymentRequested(true); // 결제 요청 상태 업데이트
    });
};- 예약 정보를 작성 후 'PAY NOW' 버튼을 클릭하면 paypal결제창으로 이동
성공 페이지 구현
- 결제 성공 시 이동하는 page
successUrl: `${window.location.origin}/successPayments`-
window.location.origin- 현재 웹 페이지의 기본 URL을 동적으로 가져오기
- local에서 실행, 배포한 domain에서 실행하는 경우가 있기 때문에 URL을 동적으로 가져오는 방법 사용
-
결제 신청 금액과 URL로 받은 amount가 같은지 확인하기
- 결제 성공 페이지의 URL에는 paymentKey, orderId, amount 세 가지 쿼리 파라미터가 있음
  useEffect(() => {
    // 결제 금액과 successUrl로 받은 금액 일치하지 않으면 실패 페이지로 이동
    if (amountNum !== resvStorage.totalPrice) {
      router.push('/failPayments');
    } else {
      confirmPayments();
    }
    // eslint-disable-next-line
}, []);- 결제 승인하기
  // 토스 결제 승인 함수
  const confirmPayments = async () => {
    let options = {
      method: 'POST',
      url: 'https://api.tosspayments.com/v1/payments/confirm',
      headers: {
        Authorization:
          '인코딩 된 인증 header 입력',
        'Content-Type': 'application/json',
      },
      data: { paymentKey, amount, orderId },
    };

    axios
      .request(options)
      .then(function (response: any) {
        console.log(response.data);
        postReservation();
      })
      .catch(function (error: any) {
        console.error(error);
        router.push('/failPayments'); // 승인 실패 시 실패 페이지로 이동
      });
};-
Authorization에는 toss에서 발급받은secretKey로 인증 헤더 값을 만들어 입력하기echo -n '발급받은secretKey:' | base64터미널에 명령어 입력 후 인코딩 된 값을 입력
-
postReservation()- 결제 승인 시 db에 결제 내용 post하는 함수
  // 결제 승인 시 db에 결제 내용 post
  const postReservation = async () => {
    try {
      const response = await axios.post('/api/reservation', {
        serviceId: resvStorage.serviceId,
        orderId: resvStorage.orderId,
        headcount: resvStorage.headcount,
        tourDate: resvStorage.tourDate,
        tourTime: resvStorage.tourTime,
        name: resvStorage.name,
        email: resvStorage.email,
        phone: resvStorage.phone,
        sns: resvStorage.sns,
        snsId: resvStorage.snsId,
        detailRequest: resvStorage.detailRequest,
        totalPrice: resvStorage.totalPrice,
        paymentMethod: resvStorage.paymentMethod,
      });
      console.log('DB post 완료 => ', response);

      // 결제 승인 및 DB 추가 완료했을 시 spinner 사라짐
      setIsApproved(true);

      resetScheduleTime(); // 시간 선택 초기화
      resetHeadcount(); // headcount 초기화
      resetSns(); // sns 초기화
      resetSnsId(); // snsId 초기화
      resetRequest(); // request 초기화
      resetSessionStorage(); // sessionStorage 초기화
    } catch (error) {
      console.error(error);
    }
  };
실패 페이지 구현
- 결제 실패 시 이동하는 page
failUrl: `${window.location.origin}/failPayments`- errorCode를 가져와서 실패 페이지 내용 구성
const FailPayments = () => {
.
.
.
 const searchParams = useSearchParams();
 const errorCode = searchParams.get('code');

 const errorMessage: { [key: string]: string } = {
    PAY_PROCESS_CANCELED: 'Payment has been canceled by the customer.',
    PAY_PROCESS_ABORTED: 'Payment has been canceled or has not been processed.',
    REJECT_CARD_COMPANY: 'Payment was rejected.',
    COMMON_ERROR: 'An unexpected error has occurred.',
  };
.
.
.
  return (
        <h1>
          {errorCode
            ? errorMessage[errorCode]
            : 'The payment was not successful.'}
        </h1>
  );
};
고객 정보 제공 동의 받기
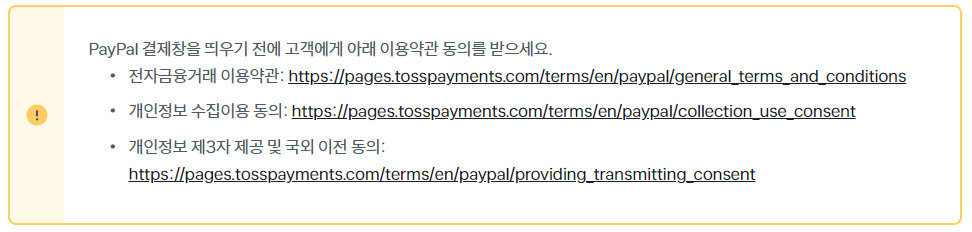
Agreements컴포넌트 생성- 정보 제공 동의 상세 내용은 새 창에서 열리도록 구현
import Link from 'next/link';

const Agreements = () => {
  const termsList = [
    {
      title:
        'General Terms and Conditions for Electronic Financial Transactions.',
      href: 'https://pages.tosspayments.com/terms/en/paypal/general_terms_and_conditions',
    },
    {
      title: 'Consent to Collection and Use of Personal Information.',
      href: 'https://pages.tosspayments.com/terms/en/paypal/collection_use_consent',
    },
    {
      title:
        'Consent to Providing Personal Information and Transmitting Personal Information Overseas.',
      href: 'https://pages.tosspayments.com/terms/en/paypal/providing_transmitting_consent',
    },
  ];

  return (
    <div className="flex flex-col items-center text-[1.4rem] pb-[3rem]">
      {termsList.map((term, i) => (
        <div className="flex max-md:flex-col" key={i}>
          <div className="pr-[1.5rem] max-md:pr-0">{term.title}</div>
          <Link
            legacyBehavior // Link 태그 안에 a 태그를 사용하기 위해 추가
            href={term.href}
          >
            <a
              target="_blank"
              className="underline max-md:text-right max-md:mb-[1rem] max-md:mt-[-0.7rem]"
            >
              View More
            </a>
          </Link>
        </div>
      ))}

      {/* Agreements checkbox */}
      <div className="flex justify-center gap-5 pt-[1.5rem]">
        <input
          required
          type="checkbox"
          id="termsCheckbox"
          className="checkboxColor"
        />
        <label
          htmlFor="termsCheckbox"
          className="text-[1.8rem] font-semibold max-md:text-[1.5rem]"
        >
          I agree to the terms and conditions.
        </label>
      </div>
    </div>
  );
};
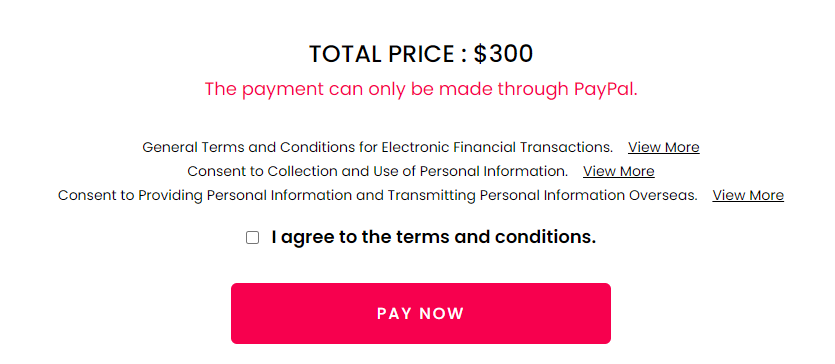
export default Agreements;-
완성
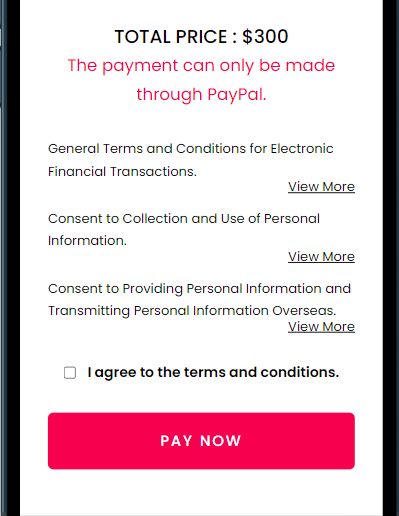
-
반응형
client key, secret key 확인하기
- 로그인 후 '내 개발정보 - API키'에서 확인 가능
참고자료

프론트엔드 개발자