
🖥️ Quick Start
Batch
- Batch 크기는 모델 학습 중 모델 매개변수(parameter) 를 업데이트할 때 사용할 데이터 개수
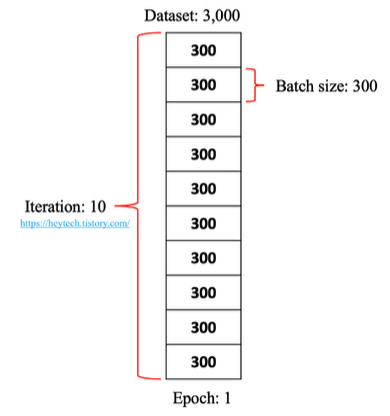
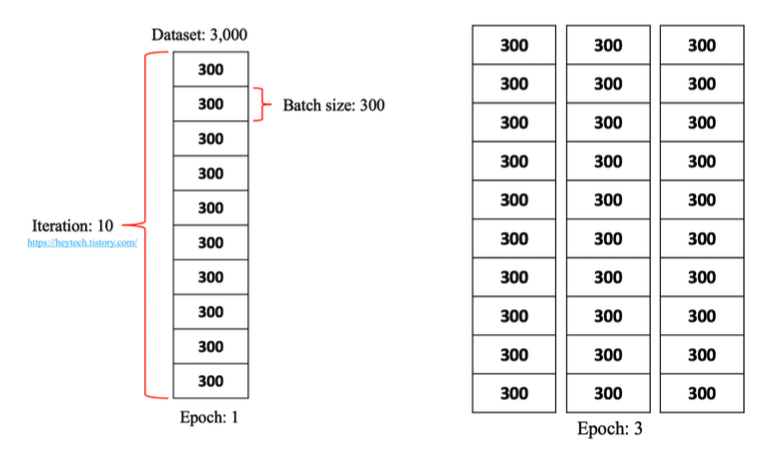
Epoch
- 전체 데이터셋을 학습한 횟수
import torch
from torch import nn
from torch.utils.data import DataLoader
from torchvision import datasets
from torchvision.transforms import ToTensor
Working with data
Dataset : 샘플과 정답(label)을 저장
# Download training data from open datasets.
training_data = datasets.FashionMNIST(
    root="data",
    train=True,
    download=True,
    transform=ToTensor(),
)

# Download test data from open datasets.
test_data = datasets.FashionMNIST(
    root="data",
    train=False,
    download=True,
    transform=ToTensor(),
)
root: 데이터 저장 경로
train: 학습 / 테스트 설정
download: 인터넷에서 데이터 다운 여부 (root에 데이터가 없는 경우 인터넷에서 다운로드)
transform: 데이터 변환 설정
DataLoader : Dataset 을 순회 가능한 객체(iterable)로 감싸는 것
batch_size = 64

# Create data loaders.
train_dataloader = DataLoader(training_data, batch_size=batch_size)
test_dataloader = DataLoader(test_data, batch_size=batch_size)

for X, y in test_dataloader:
    print(f"Shape of X [N, C, H, W]: {X.shape}")
    print(f"Shape of y: {y.shape} {y.dtype}")
    break
- Dataset을 순회 가능한 (iterable) 객체로 감쌈
- 자동화된 배치 (batch)
- 샘플링 (sampling)
- 섞기 (shuffle)
- Multiprocessing data loading 지원
Creating Models
# Get cpu, gpu or mps device for training.
device = (
    "cuda"
    if torch.cuda.is_available()
    else "mps"
    if torch.backends.mps.is_available()
    else "cpu"
)
print(f"Using {device} device")
GPU 사용 가능하면 cuda 사용하고, 아니면 CPU 사용
# Define model
class NeuralNetwork(nn.Module):
def __init__(self):
super().__init__()
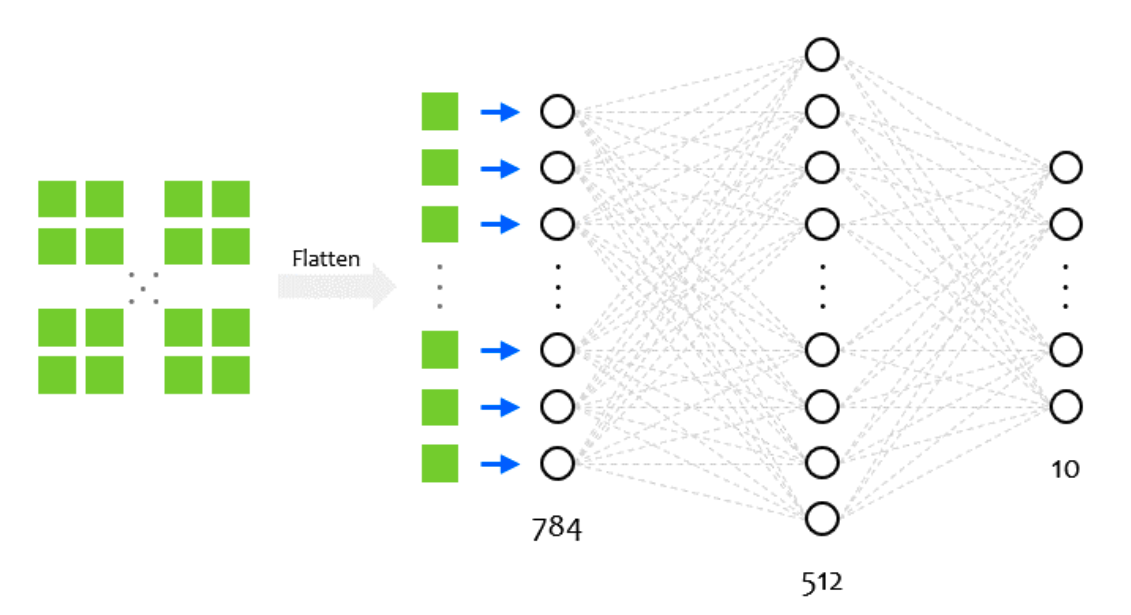
self.flatten = nn.Flatten()
self.linear_relu_stack = nn.Sequential(
nn.Linear(28*28, 512),
nn.ReLU(),
nn.Linear(512, 512),
nn.ReLU(),
nn.Linear(512, 10)
)
def forward(self, x):
x = self.flatten(x)
logits = self.linear_relu_stack(x)
return logits
model = NeuralNetwork().to(device)
print(model)
__init__: 신경망의 계층(layer)들을 정의
forward: 신경망에 데이터를 어떻게 전달할지 지정
flatten:
Optimizing the Model Parameters
loss_fn = nn.CrossEntropyLoss()
optimizer = torch.optim.SGD(model.parameters(), lr=1e-3)
loss function and optimizer
def train(dataloader, model, loss_fn, optimizer):
    size = len(dataloader.dataset)
    model.train()
    for batch, (X, y) in enumerate(dataloader):
        X, y = X.to(device), y.to(device)

        # Compute prediction error
        pred = model(X)
        loss = loss_fn(pred, y)

        # Backpropagation
        loss.backward()
        optimizer.step()
        optimizer.zero_grad()

        if batch % 100 == 0:
            loss, current = loss.item(), (batch + 1) * len(X)
            print(f"loss: {loss:>7f}  [{current:>5d}/{size:>5d}]")
각 학습 단계(training loop)에서 모델(batch로 제공됨)은 학습 데이터셋에 대한 예측을 수행하고, 예측 오류를 역전파(backpropagation)하여 모델의 매개변수를 조정함
def test(dataloader, model, loss_fn):
    size = len(dataloader.dataset)
    num_batches = len(dataloader)
    model.eval()
    test_loss, correct = 0, 0
    with torch.no_grad():
        for X, y in dataloader:
            X, y = X.to(device), y.to(device)
            pred = model(X)
            test_loss += loss_fn(pred, y).item()
            correct += (pred.argmax(1) == y).type(torch.float).sum().item()
    test_loss /= num_batches
    correct /= size
    print(f"Test Error: \n Accuracy: {(100*correct):>0.1f}%, Avg loss: {test_loss:>8f} \n")
모델이 학습하고 있는지를 확인하기 위해 테스트 데이터셋으로 모델의 성능을 확인
epochs = 5
for t in range(epochs):
    print(f"Epoch {t+1}\n-------------------------------")
    train(train_dataloader, model, loss_fn, optimizer)
    test(test_dataloader, model, loss_fn)
print("Done!")
- 학습 단계는 여러번의 반복 단계 (에폭(epochs)) 를 거쳐서 수행됨
- 각 에폭에서는 모델은 더 나은 예측을 하기 위해 매개변수를 학습함
- 각 에폭마다 모델의 정확도(accuracy)와 손실(loss)을 출력함
-> 에폭마다 정확도가 증가하고 손실이 감소하는 것을 보려고 하기 위함
Saving Models
torch.save(model.state_dict(), "model.pth")
print("Saved PyTorch Model State to model.pth")
모델 매개변수를 포함하여 내부 상태 사전(internal state dictionary)을 직렬화하는 방법
Loading Models
model = NeuralNetwork().to(device)
model.load_state_dict(torch.load("model.pth"))
모델 구조를 다시 만들고, 상태 사전을 모델에 불러오기
🖥️ Tensor
Initializing a Tensor
1. 데이터로부터 직접 생성
data = [[1, 2],[3, 4]]
x_data = torch.tensor(data)
데이터로부터 직접 텐서를 생성 가능 데이터의 자료형(data type)은 자동으로 유추
2. Numpy 배열로부터 생성
np_array = np.array(data)
x_np = torch.from_numpy(np_array)
3. 다른 텐서로부터 생성
x_ones = torch.ones_like(x_data) # ones_like : 1로 초기화
print(f"Ones Tensor: \n {x_ones} \n")

x_rand = torch.rand_like(x_data, dtype=torch.float) # rand_like : 0~1 랜덤값으로 초기화
print(f"Random Tensor: \n {x_rand} \n")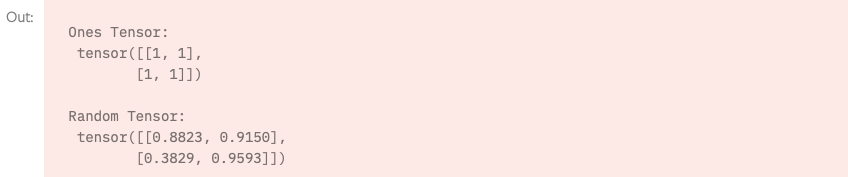
torch.ones_like: x_data와 동일한 모양(shape)과 데이터 타입을 가진 텐서를 생성
-> 생성된 텐서의 모든 요소는 1로 초기화
torch.rand_like: x_data와 동일한 모양(shape)과 데이터 타입을 가진 텐서를 생성
-> 생성된 텐서의 요소는 0과 1 사이의 무작위한 값
-> 위 예시에는 데이터 타입을 float로 재정의 (overrides) 함
4. 무작위 또는 상수 값을 사용
shape = (2,3,)
rand_tensor = torch.rand(shape)
ones_tensor = torch.ones(shape)
zeros_tensor = torch.zeros(shape)

print(f"Random Tensor: \n {rand_tensor} \n")
print(f"Ones Tensor: \n {ones_tensor} \n")
print(f"Zeros Tensor: \n {zeros_tensor}")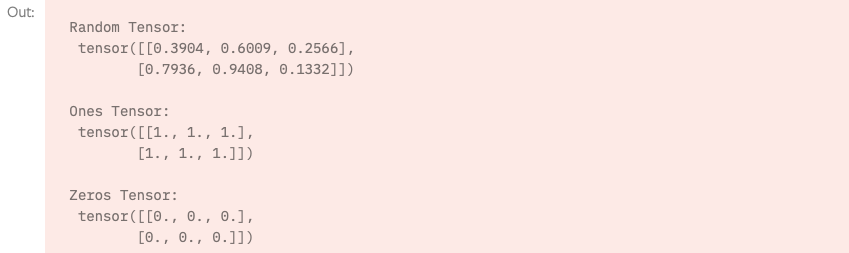
shape 은 텐서의 차원(dimension)을 나타내는 튜플(tuple)
Attributes of a Tensor
tensor = torch.rand(3,4)

print(f"Shape of tensor: {tensor.shape}")
print(f"Datatype of tensor: {tensor.dtype}")
print(f"Device tensor is stored on: {tensor.device}")
- 텐서의 모양 (shape)
- 자료형 (datatype)
- 어느 장치에 저장 되는지
Operations on Tensors
# We move our tensor to the GPU if available
if torch.cuda.is_available():
    tensor = tensor.to("cuda")
GPU가 존재하면 텐서를 이동시킴
1. Standard numpy-like indexing and slicing
tensor = torch.ones(4, 4)
print(f"First row: {tensor[0]}")
print(f"First column: {tensor[:, 0]}")
print(f"Last column: {tensor[..., -1]}")
tensor[:,1] = 0
print(tensor)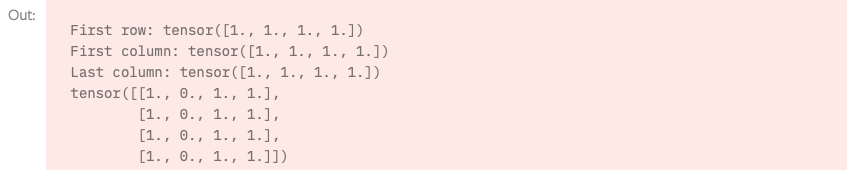
2. Joining tensors
t1 = torch.cat([tensor, tensor, tensor], dim=1)
print(t1)
torch.cat: 주어진 차원에 따라 일련의 텐서를 연결
3. Arithmetic operations
# This computes the element-wise product.
z1 = tensor * tensor
z2 = tensor.mul(tensor)
tensor.mul(tensor)
tensor * tensor
# This computes the matrix multiplication between two tensors.
y1 = tensor @ tensor.T
y2 = tensor.matmul(tensor.T)
tensor.matmul(tensor.T)
tensor @ tensor.T
4. In-place(바꿔치기) operations
print(f"{tensor} \n")
tensor.add_(5)
print(tensor)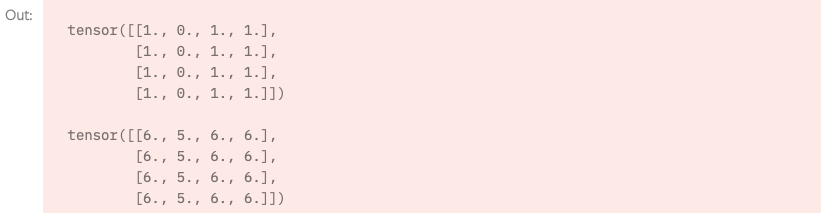
_ 접미사를 갖는 연산 : in-place 연산
Bridge with NumPy
Tensor to NumPy array
t = torch.ones(5)
print(f"t: {t}")
n = t.numpy()
print(f"n: {n}")
t.add_(1)
print(f"t: {t}")
print(f"n: {n}")
CPU 상의 텐서와 NumPy 배열은 메모리 공간을 공유하기 때문에, 하나를 변경하면 다른 하나도 변경
Shallow Copy
NumPy array to Tensor
n = np.ones(5)
t = torch.from_numpy(n)

np.add(n, 1, out=n)
print(f"t: {t}")
print(f"n: {n}")
Shallow Copy too
출처 : PyTorch Tutorials https://tutorials.pytorch.kr/beginner/basics/intro.html
https://tutorials.pytorch.kr/beginner/basics/quickstart_tutorial.html
https://tutorials.pytorch.kr/beginner/basics/tensorqs_tutorial.html