Vue도 Props는 수정할 수 없습니다.
앞에 글에서 ref가 제대로 동작하지 않는 경우가 하나 있습니다. 바로 Props로 내려진 상태는 수정을 할 수 없습니다. React와 마찬가지로 데이터를 단방향으로 흐르게 하기위해서죠.
ref를 선언해서 넘긴다거나, props를 toRef로 변경을 한다고해도 자식 컴포넌트가 props를 수정할 수는 없습니다.
<script setup lang="ts">
import Child from "./Child.vue"
import { ref } from 'vue'
const msg = ref("hello")
</script>
<template>
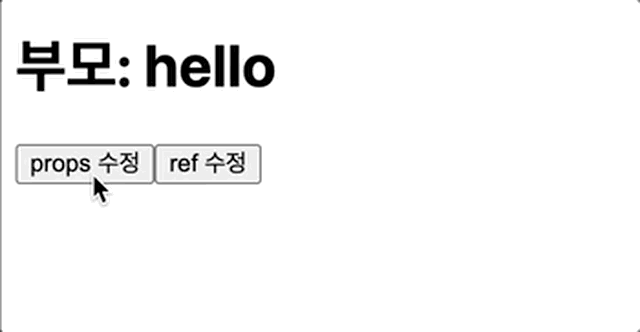
<h1> 부모: {{ msg }} </h1>
<Child :msg="msg"></Child>
</template><script setup lang="ts">
import { toRef } from 'vue'
interface props {
msg: string
}
const props = defineProps<props>()
const msgRef = toRef(props,'msg')
const changeProps = () => props.msg = "change"
const changeMsgRef = () => msgRef.value = "change"
</script>
<template>
<button type="button" @click="changeProps">
props 수정
</button>
<button type="button" @click="changeMsgRef">
ref 수정
</button>
</template>Proxy가 readonly라고 Vue에서 경고를 해주고 실제로 값도 바뀌지 않는 모습입니다.

여담이지만, 사실 reactive를 object로 감싸서 넘겨주면 props의 수정이 반영됩니다. Vue에서 일일히 이런 접근을 막는 것이 무거운 연산이라 막지는 않았다고 하네요.
하지만, 자식 컴포넌트에서의 상태 수정은 디버깅이 어려워지고 데이터 흐름을 복잡하게 만듭니다.
<script setup lang="ts">
import Child from "./Child.vue"
import { ref } from 'vue'

const words = ref({a:"hello"})
</script>

<template>
  <h1> 부모: {{ words.a }} </h1>
  <Child :words="words"></Child>
</template><script setup lang="ts">
import { toRef } from 'vue'
interface props {
words:{ a: string }
}
const props = defineProps<props>()
const ref = toRef(props.words,'a')
const changeProps = () => props.words.a = "prop"
const changeRef = () => ref.value = "ref"
</script>
<template>
<button type="button" @click="changeProps">
props 수정
</button>
<button type="button" @click="changeRef">
ref 수정
</button>
</template>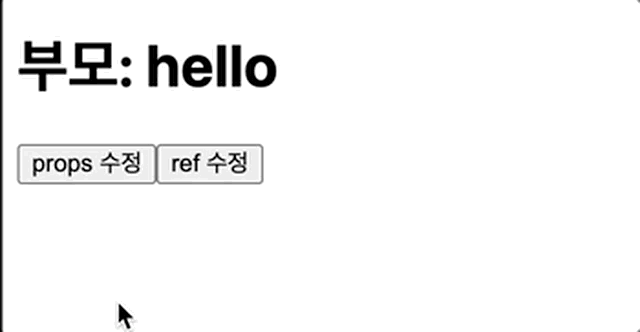
부모 자식 컴포넌트간의 통신
그래서 React에서는 자식에서 상태를 변경시키기 위해 scope를 이용해서 이벤트 핸들러를 부모에서 만들어서 전달을 해줬었습니다.
msg를 상위 컴포넌트에서 가지고 있다면, 이를 변경하는 핸들러도 만들어서 props로 넘겨줍니다 결국 렌더링은 상위 컴포넌트에서 다시 일어납니다.
import Child from "./Child";
import { useState } from "react";

export default function App() {
  const [msg, setMsg] = useState("hello");

  const changeMsg = (newMsg) => setMsg(newMsg);

  return (
    <div className="App">
      <h1> 부모: {msg} </h1>
      <Child changeMsg={changeMsg}></Child>
    </div>
  );
}
export default function Child(props) {
const onClick = () => props.changeMsg("change");
return (
<div className="App">
<button type="button" onClick={onClick}>
props 수정
</button>
</div>
);
}Vue에서는 조금다르게, 이벤트 emit을 통해 부모 자식간에 단방향으로 데이터를 내리도록 권장하고 있습니다. custom event를 통해 자식에서 일어나는 이벤트를 위로 전달해 핸들링하는 것이죠. 결국 React와 Vue 모두 무조건 상위 컴포넌트의 상태변경을 통해 렌더링이 일어납니다.

부모에서는 click 이벤트를 감지하면 msg를 바꾸는 핸들러를 달아주었습니다.
<script setup lang="ts">
import Child from "./Child.vue"
import { ref } from 'vue'

const msg = ref("hello")
const onClick = () => msg.value = "change"
</script>

<template>
  <h1> 부모: {{ msg }} </h1>
  <Child :msg="msg" @click="onClick"></Child>
</template>
자식에서는 click 이벤트가 발생하면 emit을 통해 상위 컴포넌트로 전달합니다. 이로써 이벤트가 발생했음을 알리고 상위 컴포넌트에서 이에 대응해 상태를 변경시킬 수 있게 되죠.
<script setup lang="ts">

interface props {
  msg: string
}

const props = defineProps<props>()
const emit = defineEmits(['click'])

const onClick = () => emit('click')
</script>

<template>
  <button type="button" @click="onClick">
    수정
  </button>
</template>
v-model
이 과정을 단축시켜주는 유용한 친구를 Vue에서는 제공합니다. 바로 v-model입니다.
v-model이 해주는 일은 다음과 같습니다. 이벤트 값을 반영하는 핸들러를 알아서 달아준다고 생각하면 됩니다.

이렇게 되면 일종의 양방향 바인딩처럼 양쪽에서 데이터를 수정할 수 있는 것 같은 모양이 되는데요. 방금 전 코드를 v-model을 사용해보겠습니다.
<script setup lang="ts">
import Child from "./Child.vue"
import { ref } from 'vue'

const msg = ref("hello")
</script>

<template>
  <h1> 부모: {{ msg }} </h1>
  <Child v-model="msg"></Child>
</template>
v-model의 default props 이름은 modelValue입니다. 이를 업데이트 하는 이벤트는 update:modelValue이구요. 이 이벤트를 발생시키면서 뒤에 인자로 변경시킬 값을 넣어주면 바로 상위 컴포넌트에 반영이됩니다. (마치 자식에서 변경한 것 같은 모양이죠)
만약 다른 변수명이나, 복수의 v-model을 사용하고 싶다면 v-model:ohterName=""처럼 앞에 "v-model"을 붙여 props로 내려주고, 자식에서도 update:otherName 이벤트를 발생시키면 됩니다.
<script setup lang="ts">
import { toRef } from 'vue'

interface props {
  modelValue: string
}

const props = defineProps<props>()
const emit = defineEmits(['update:modelValue'])

const onClick = () => emit('update:modelValue',"change value")
</script>

<template>
  <button type="button" @click="onClick">
    수정
  </button>
</template>
자식의 자식까지 v-model로 연결하기
이 부분은 심화 부분입니다. props는 변경시킬 수 없기 때문에 v-model에 인자로 사용할 수가 없습니다. 하지만 분명히 자식의 자식까지 v-model로 전달을 해주고 싶을때가 있을텐데요. 이럴 때는 computed를 응용할 수 있습니다.
computed는 사용된 ref의 의존성을 가져서, 해당 ref가 업데이트 되면 이어서 업데이트 되는 computed ref를 반환합니다. 이 때 getter와 setter를 따로 사용할 수가 있는데요.
즉, getter는 전달받은 props의 값을 사용하고, setter에서는 emit을 하도록 선언을 하면, 새로운 computed ref로 자식의 v-model에 전달을 하면서, 부모로부터 받은 props를 그대로 사용할 수 있습니다.
<script setup lang="ts">
import Child from "./Child.vue"
import { ref } from 'vue'

const msg = ref("hello")
</script>

<template>
  <h1> 부모: {{ msg }} </h1>
  <Child v-model="msg"></Child>
</template><script setup lang="ts">
import { computed } from 'vue'
interface props {
modelValue: string
}
const props = defineProps<props>()
const emit = defineEmits(['update:modelValue'])
const computedRef = computed({
get : () => props.modelValue,
set : (newValue) =>
emit("update:modelValue", newValue),
});
</script>
<template>
<input v-model="computedRef">
</template>
정리
Vue도 React와 마찬가지로 단방향 데이터 흐름을 권장하고 있지만, 이벤트 emit이라는 조금 다른 모습입니다.
reactive로 된 상태를 전달한다고, 자식에서 수정을 시킬 수는 없지만, v-model을 사용한다면 마치 양방향 바인딩처럼 조금 더 쉽게 상태를 변경할 수 있습니다.
