
이번 포스팅에서는 Spring Boot에서 File upload를 하는 방법에 대해 설명하려 합니다.
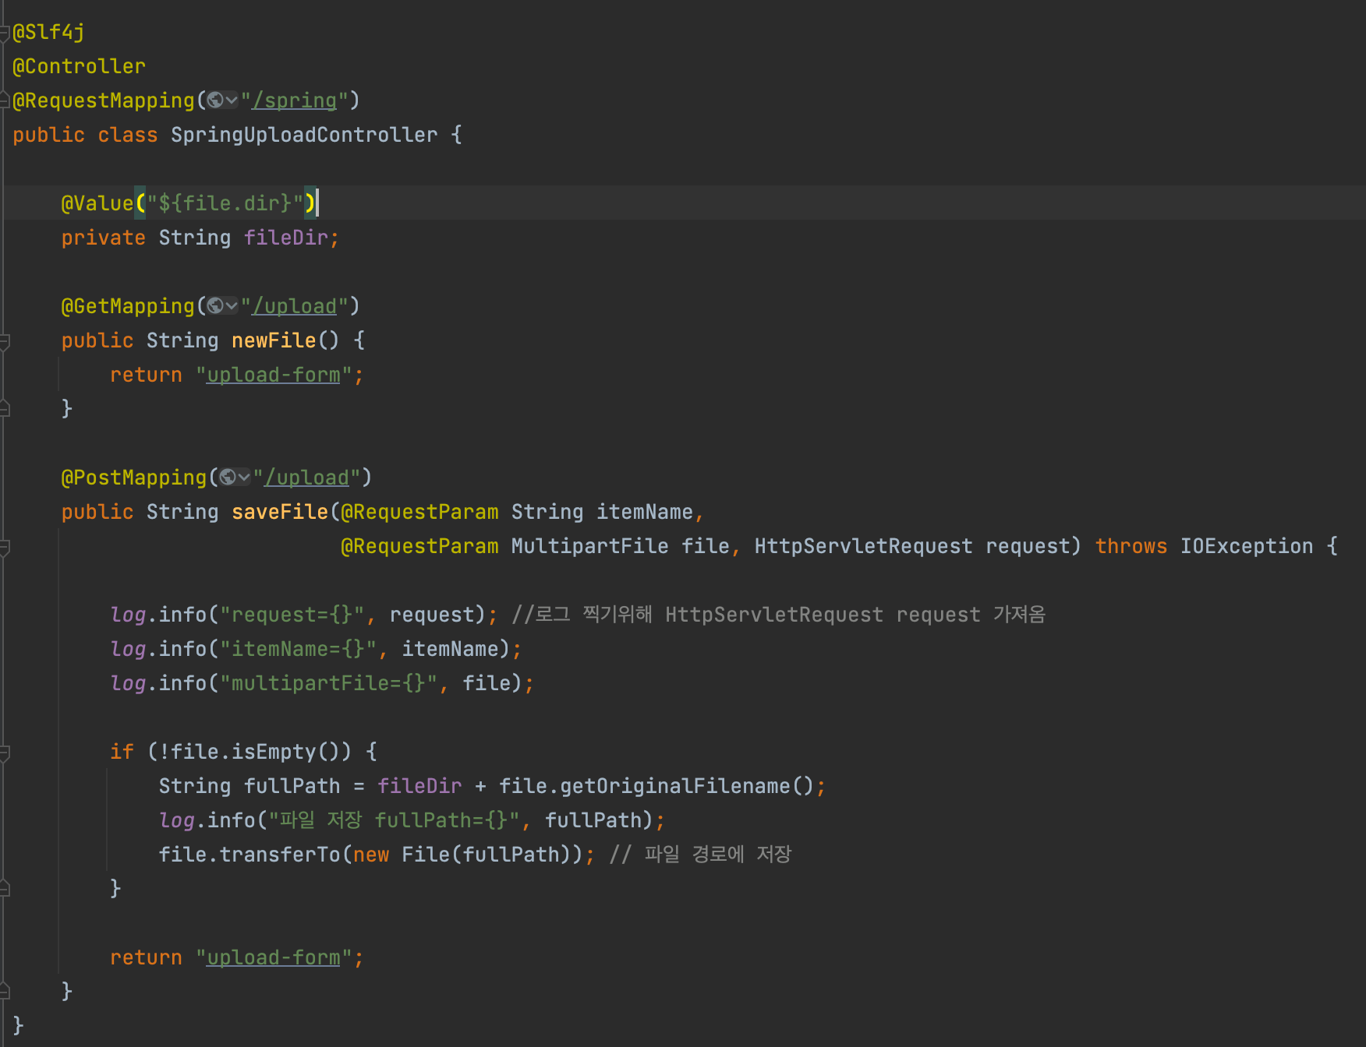
- MultipartFile 인터페이스를 제공하여 멀티파트 파일을 매우 편리하게 다룰 수 있다.
- @RequestParam 혹은 @ModelAttribute 어노테이션을 통해 MutlipartFile을 불러온다.
- getOriginalFilename(): 업로드된 파일명을 조회하는 메서드
- transferTo(...): 파일을 저장하는 메서드
< 업로드 컨트롤러 >
- 도메인 생성
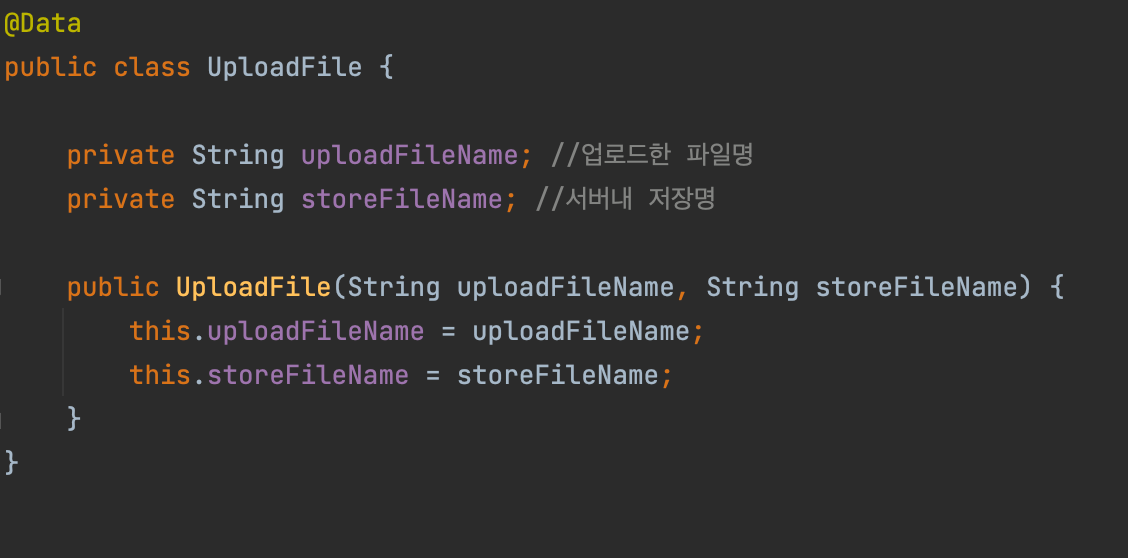
- 업로드된 파일의 이름을 저장할 수 있도록 UploadFile 클래스를 만든다.
** 물론 업로드 할 아이템의 클래스와 리포지토리도 만들어줘야한다.
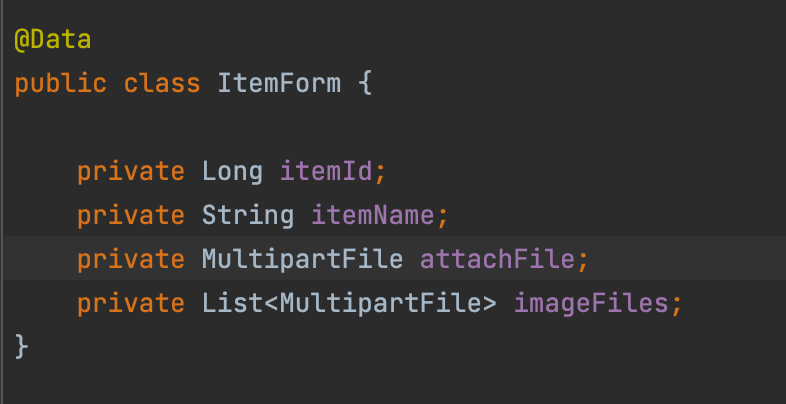
- @ModelAttribute 방식으로 정보를 전달하는 ItemForm 객체를 만들고, 정보를 입력할 수 있는 입력 폼을 작성한다.
< 폼 객체 >
< 컨트롤러 >
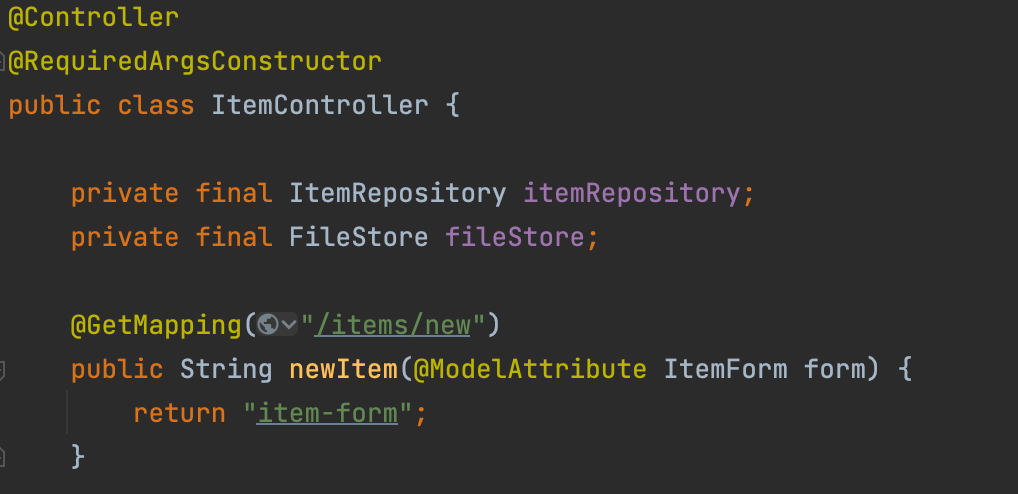
- 업로드한 파일을 "제출" 했을 때, 실제로 그 내용들을 출력하는 컨트롤러와 화면을 만든다.
컨트롤러 코드에서 정의된 fileStore를 이용하여 클라이언트에서 받아오는 @ModelAttribute의 form 데이터 값을 MultipartFile로 실제 서버 내에 저장한다. 그리고 데이터 베이스 상에 해당 파일의 이름을 저장한다.
즉, 이미지 파일을 저장할 때, 실제 파일은 서버에 저장하지만 데이터베이스에는 파일명 등 텍스트 파일만 저장!
@PostMapping("/items/new")
public String saveItem(@ModelAttribute ItemForm form, RedirectAttributes redirectAttributes) throws IOException {
    UploadFile attachFile = fileStore.storeFile(form.getAttachFile()); //1개
    List<UploadFile> storeImageFiles = fileStore.storeFiles(form.getImageFiles()); //여러개

    //데이터베이스에 저장
    Item item = new Item();
    item.setItemName(form.getItemName());
    item.setAttachFile(attachFile);
    item.setImageFiles(storeImageFiles);
    itemRepository.save(item);

    redirectAttributes.addAttribute("itemId", item.getId());

    return "redirect:/items/{itemId}";
}

@GetMapping("/items/{id}")
public String items(@PathVariable Long id, Model model) {
    Item item = itemRepository.findById(id);
    model.addAttribute("item", item);
    return "item-view";
}

//이미지 보이기
@ResponseBody
@GetMapping("/images/{filename}")
public Resource downloadImage(@PathVariable String filename) throws MalformedURLException {
    return new UrlResource("file:" + fileStore.getFullPath(filename));
}

SW developer