시작하기에 앞서서...
본 게시글은 https://www.udemy.com/course/microservices-with-node-js-and-react/ 강의를 듣고 정리한 내용입니다.
🚀 목표
- 마이크로서비스 아키텍처 맛보기(나중에 더 큰 프로젝트를 진행할 예정)
- 최대한 모든 서비스, 이벤트 브로커를 직접 만들어서 이해해본다. 그렇기 때문에 나중에 이 프로젝트를 미래의 마이크로서비스 프로젝트를 위한 템플릿으로 사용하는 것을 추천하지 않는다.
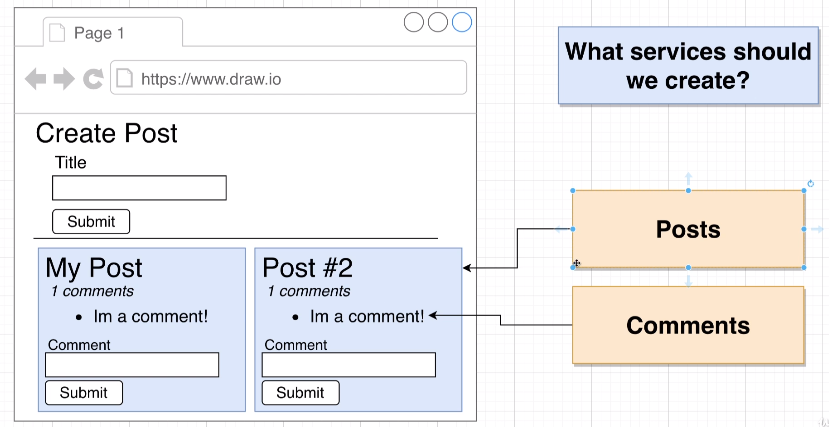
- 간단히 게시글을 쓰고 게시글 목록을 보여주고 커멘트를 달 수 있는 사이트를 만들 것이다.
🪁 프로젝트 구조와 초기세팅
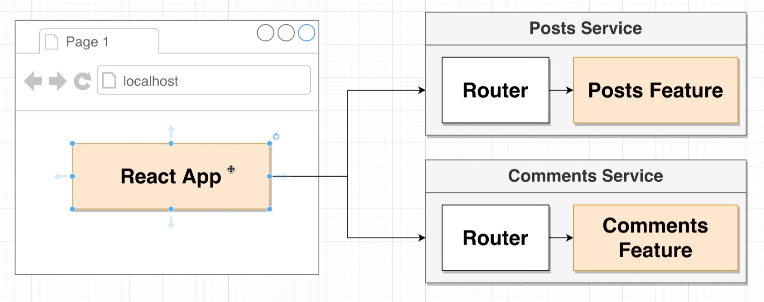
프론트엔드는 React, 백엔드는 Nodejs에서 Express를 쓸 것입니다.
$ create-react-app client (blog 폴더)
$ npm install express cors axios nodemon (posts, comments 폴더)
$ npm i -D @babel/core @babel/cli @babel/preset-env @babel/node (posts, comments 폴더)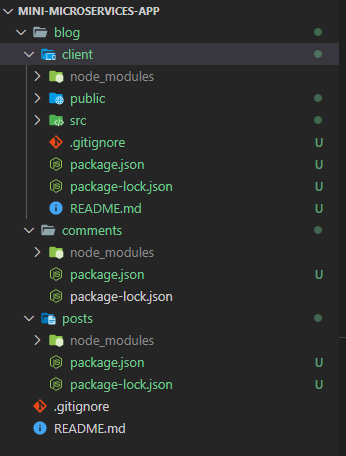
client는 react 프론트엔드이고 posts, comments는 nodejs 백엔드입니다.
🌹 백엔드 - Posts service
RESTful API 구조
- /posts(POST), {title: string} -> Create a new post
- /posts(GET) -> Retrieve all posts
// index.js
import express from "express";
import bodyParser from "body-parser";
import { randomBytes } from "crypto";

const app = express();
app.use(bodyParser.json());

const posts = {};

app.get("/posts", (req, res) => {
  res.send(posts);
});

app.post("/posts", (req, res) => {
  const id = randomBytes(4).toString("hex");
  const { title } = req.body;

  posts[id] = {
    id,
    title,
  };

  res.status(201).send(posts[id]);
});

app.listen(4000, () => {
  console.log("Listening on 4000");
});
지금은 DB를 이용하지 않고 진행해보도록 하겠습니다. 일단 아래 보시는 것처럼 실행은 잘 되었습니다.
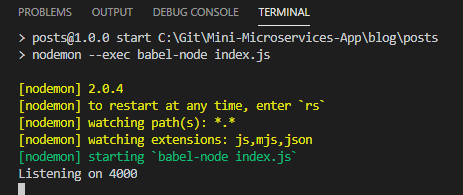
실행되었다고 끝나는 것이 아니라 API가 제대로 작동하는지 테스트를 해봐야 합니다. 테스트를 하기 위해 아주 유명한 도구가 있죠. 바로 postman입니다. (모르고 있었다면 알아두는게 좋습니다)
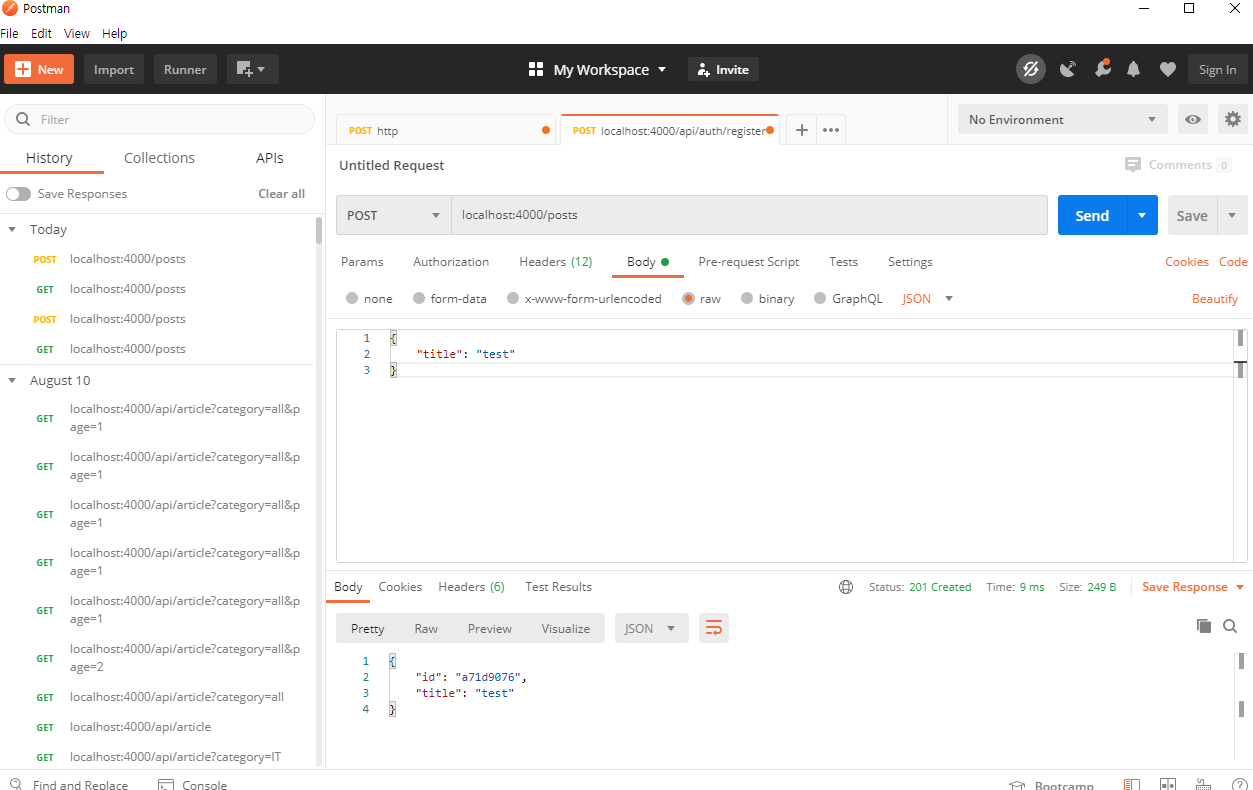
아래는 localhost:4000/posts 로 POST 방식으로 해서 Body에는 JSON형태로 {"title" : "test"}를 넘겨준 결과입니다. 잘 안된다면 Headers에서 Content-Type이 application/json; charset=utf-8 인지 확인해보시길 바랍니다.
잘 저장되었는지 확인하기 위해서 이번에는 GET 방식으로 호출해보겠습니다. 첫번째는 잘못 넣은거고, 두번째는 제대로 저장된 것을 확인할 수 있죠?
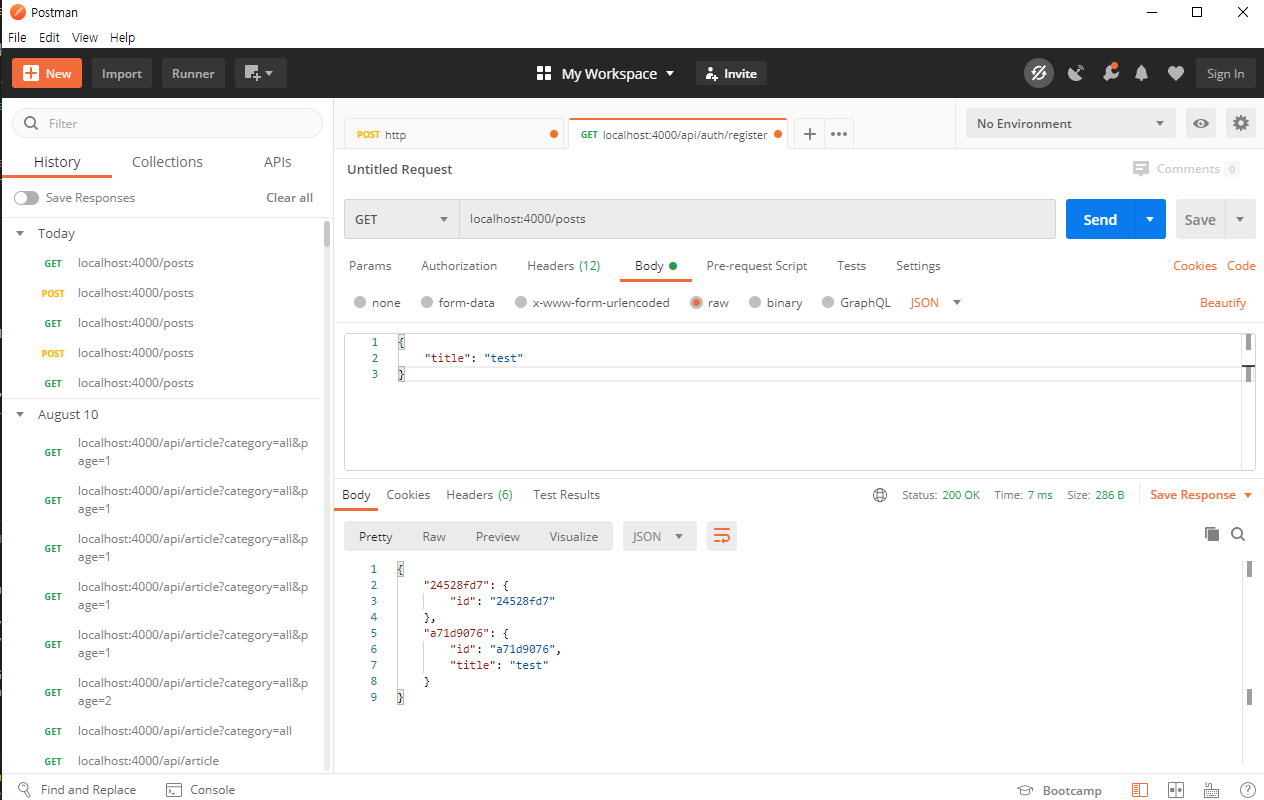
이런식으로 postman은 서버가 제대로 처리를 하는지 확인하기 위해서 많이 쓰입니다.
🌍 백엔드 - Comments Service
RESTful API 구조
- /posts/:id/comments(POST), {content: string} -> Post ID와 연관된 커멘드 작성
- /posts/:id/comments(GET) -> Post ID와 연관된 모든 커멘트 반환
// index.js
import express from "express";
import bodyParser from "body-parser";
import { randomBytes } from "crypto";

const app = express();
app.use(bodyParser.json());

const commentsByPostId = {};

app.get("/posts/:id/comments", (req, res) => {
  res.send(commentsByPostId[req.params.id] || []);
});

app.post("/posts/:id/comments", (req, res) => {
  const commentId = randomBytes(4).toString("hex");
  const { content } = req.body;

  const comments = commentsByPostId[req.params.id] || [];

  comments.push({ id: commentId, content });
  commentsByPostId[req.params.id] = comments;

  res.status(201).send(comments);
});

app.listen(4001, () => {
  console.log("Listening on 4001");
});
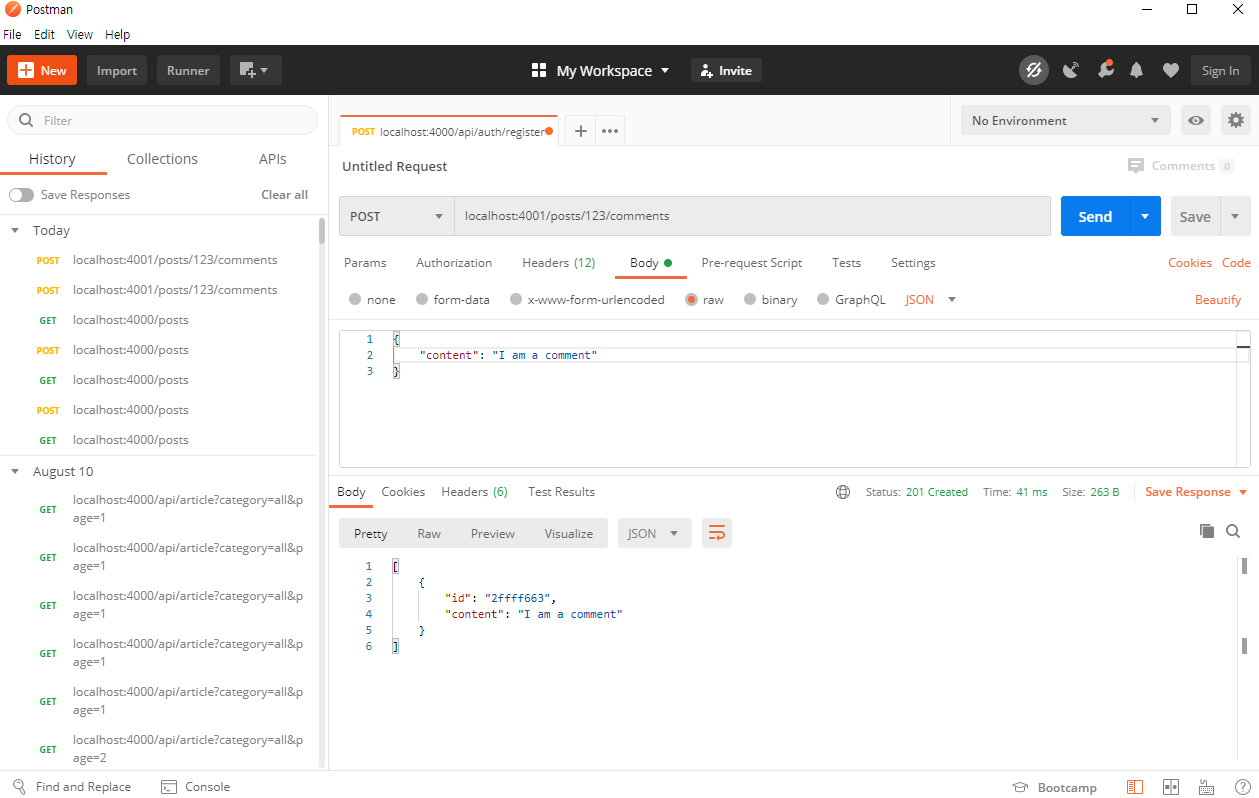
commentsByPostId를 보면 아래와 같이 저장될 것입니다. 즉, 포스트 ID가 키가 되고 comments내용이 값이 되어 저장되게됩니다.
{ '123': [ { id: '68a77f9e', content: 'I am a comment' } ] }마침
여기까지는 다 알고 있는 내용이어서 그런지 재미가... 음.. 그저 그렇네요;;
