시작하기에 앞서서...
본 게시글은 https://www.udemy.com/course/microservices-with-node-js-and-react/ 강의를 듣고 정리한 내용입니다.
이번시간에는 프론트엔드를 구성해보겠습니다.
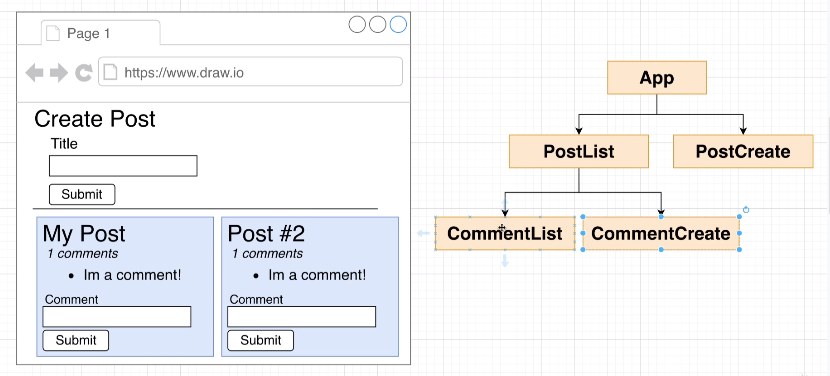
이 시리즈는 마이크로서비스를 실습하기 위해서 작성하는 것이므로 그냥 이렇게 작성했구나 하고 넘어가도록 합니다.
Creating Posts
Post를 생성하는 부분
import React, { useState } from "react";
import axios from "axios";

const PostCreate = () => {
  const [title, setTitle] = useState("");

  const onSubmit = async (event) => {
    event.preventDefault();

    await axios.post("http://localhost:4000/posts", {
      title,
    });

    setTitle("");
  };

  return (
    <div>
      <form onSubmit={onSubmit}>
        <div className="form-group">
          <label>Title</label>
          <input
            value={title}
            onChange={(e) => setTitle(e.target.value)}
            className="form-control"
          />
        </div>
        <button className="btn btn-primary">Submit</button>
      </form>
    </div>
  );
};

export default PostCreate;
App.js에다가 추가시켜줘야 정상적으로 나옵니다.
import React from "react";
import PostCreate from "./PostCreate";

function App() {
  return (
    <div className="container">
      <h1>Create Post</h1>
      <PostCreate />
    </div>
  );
}

export default App;

전송에러가 났습니다. 이유는 CORS라고 해서 보안 상의 이유로, 브라우저는 스크립트에서 시작한 교차 출처 HTTP 요청을 제한합니다. 즉, 프론트엔드는 localhost:3000이고 백엔드는 localhost:4000 이기 때문에 에러가 난다는 뜻입니다.
해결방법으로는? backend에서 npm install cors를 해줍니다. 그런다음 코드에다가도 추가해줍니다.
import cors from "cors";

const app = express();
app.use(cors());

(...생략...)
하지만 이렇게 되면 모든 요청에 대해 허가를 하게 되어 보안적으로 취약해질 수 있다고 합니다. 따라서 옵션을 주는것도 가능합니다.
const corsOptions = {
    origin: 'http://localhost:3000', // 허락하고자 하는 요청 주소
    credentials: true, // true로 하면 설정한 내용을 response 헤더에 추가 해줍니다.
};

app.use(cors(corsOptions)); // config 추가

// 출처 : https://velog.io/@wlsdud2194/cors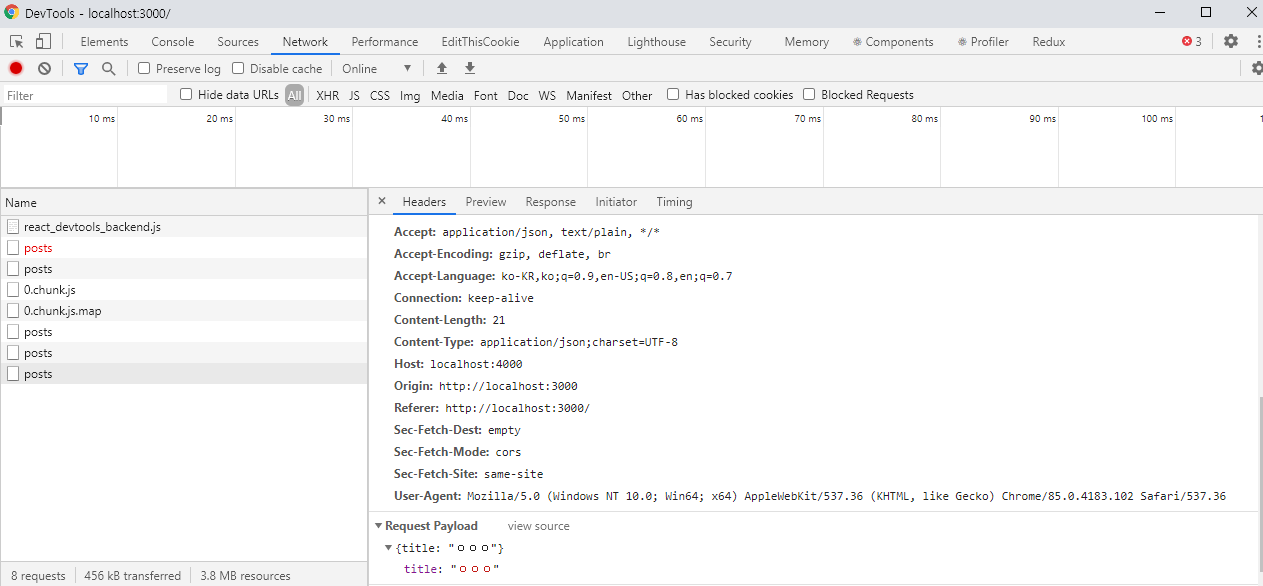
에러가 해결되었습니다. 이렇게 해서 전송까지 마쳤습니다.
Fetching and Rendering Posts
PostCreate를 했으니까 이번에는 PostList를 통해 Post를 보여주도록 하자.
// PostList.js
import React, { useState, useEffect } from "react";
import axios from "axios";

const PostList = () => {
  const [posts, setPosts] = useState({});

  const fetchPosts = async () => {
    const res = await axios.get("http://localhost:4000/posts");

    // res.data에 서버가 응답해준 데이터가 들어있음
    setPosts(res.data);
  };

  // useEffect와 빈괄호는 딱 한번만 초기에 실행한다는 의미
  useEffect(() => {
    fetchPosts();
  }, []);

  // Object.values() 메소드는 전달된 파라미터 객체가 가지는
  // (열거 가능한) 속성의 값들로 이루어진 배열을 리턴
  const renderedPosts = Object.values(posts).map((post) => {
    return (
      <div
        className="card"
        style={{ width: "30%", marginBottom: "20px" }}
        key={post.id}
      >
        <div className="card-body">
          <h3>{post.title}</h3>
        </div>
      </div>
    );
  });

  return (
    <div className="d-flex flex-row flex-wrap justify-content-between">
      {renderedPosts}
    </div>
  );
};

export default PostList;
이렇게 작성하고 나서 App.js에서 불러주면 된다(생략)

작성한대로 잘 나타나는것을 볼 수 있다.
Creating Comments
이제 각 post에 해당하는 댓글을 작성하는 기능을 추가해보자.
// CommentCreate.js
import React, { useState } from "react";
import axios from "axios";

const CommentCreate = ({ postId }) => {
  const [content, setContent] = useState("");

  const onSubmit = async (event) => {
    event.preventDefault();

    await axios.post(`http://localhost:4001/posts/${postId}/comments`, {
      content,
    });

    setContent("");
  };

  return (
    <form onSubmit={onSubmit}>
      <div className="form-group">
        <label>New Comment</label>
        <input
          value={content}
          onChange={(e) => setContent(e.target.value)}
          className="form-control"
        />
      </div>
      <button className="btn btn-primary">Submit</button>
    </form>
  );
};

export default CommentCreate;
PostCreate.js와 거의 판박이이다. 추가적으로 PostList.js에서 CommentCreate를 불러준다. 그때 postId를 props으로 넘겨주도록 한다.
<div className="card-body">
    <h3>{post.title}</h3>
    <CommentCreate postId={post.id} />
</div>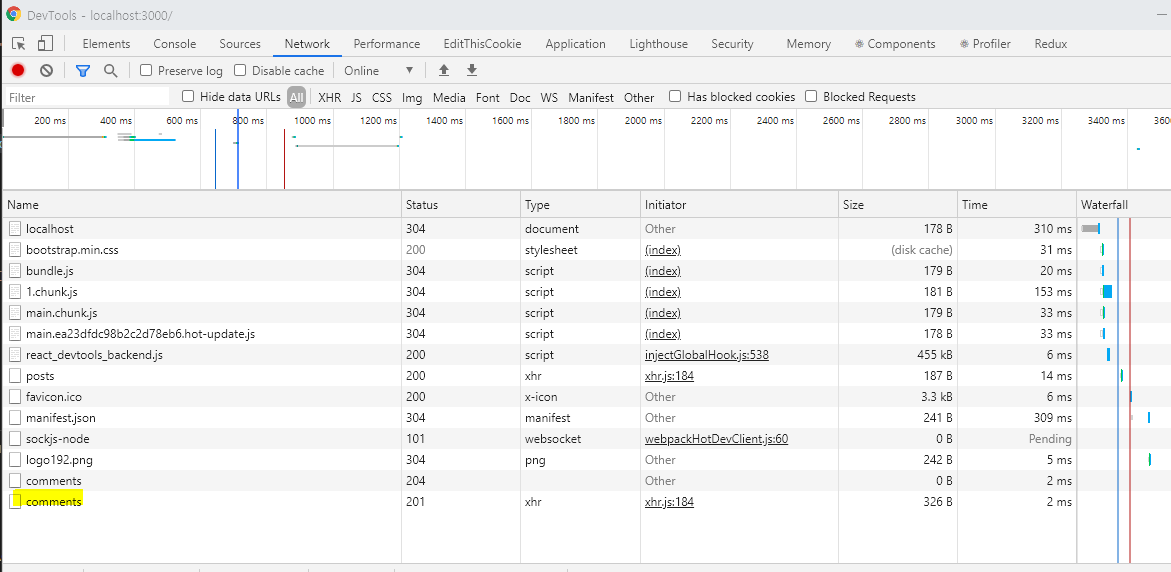
동작은 이상없이 잘 되는거 같다.
Displaying Comments
마지막으로 각 post에 comments를 입력한 리스트를 출력해주도록 하자.
// CommentList.js
import React, { useState, useEffect } from "react";
import axios from "axios";

const CommentList = ({ postId }) => {
  const [comments, setcomments] = useState([]);

  const fetchPosts = async () => {
    const res = await axios.get(
      `http://localhost:4001/posts/${postId}/comments`
    );

    setcomments(res.data);
  };

  useEffect(() => {
    fetchPosts();
  }, []);

  const renderedComments = comments.map((comments) => {
    return <li key={comments.id}>{comments.content}</li>;
  });

  return <ul>{renderedComments}</ul>;
};

export default CommentList;
이러고 나서 PostList.js에서 불러주기만 하면 끝이다.
<div className="card-body">
    <h3>{post.title}</h3>
    <CommentList postId={post.id} />
    <CommentCreate postId={post.id} />
</div>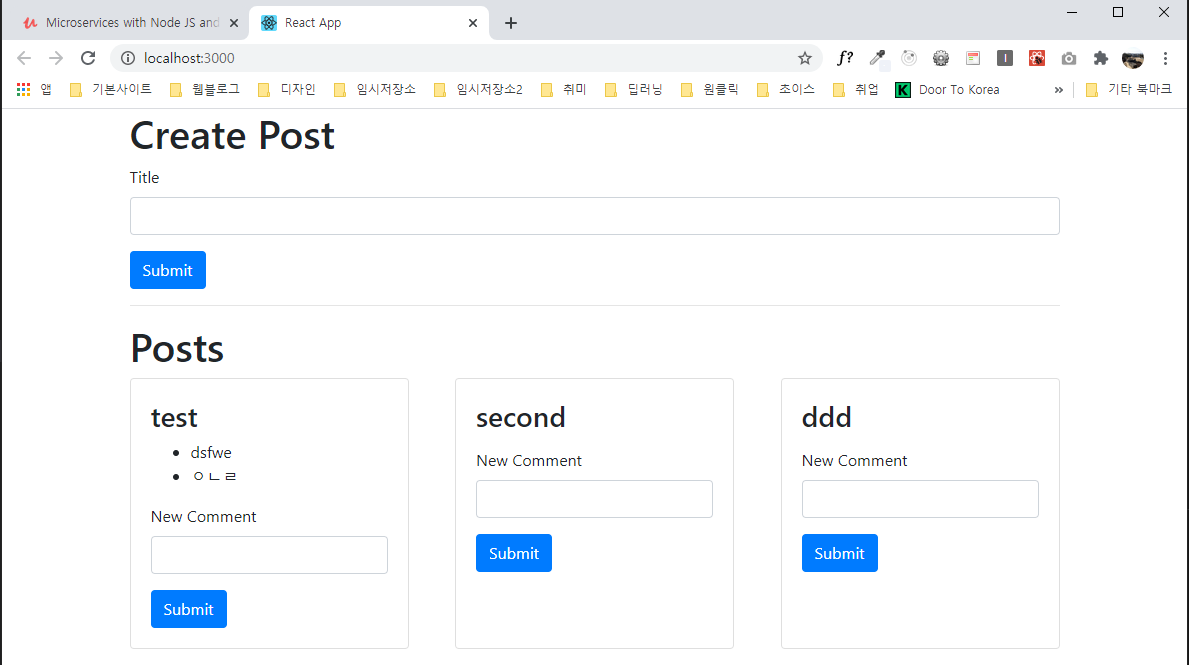
마침
드디어 기본적인 구성이 끝났네요. 다음시간부터는 본격적으로 마이크로서비스 전략에 대해 알아보도록 하겠습니다.
