사실 나는 useReducer를 잘 사용하지 않는다(?). 뭔가 손이 잘 가지 않는다고 해야하나.. 그 이유를 생각해보면 어떤 구조고 어떻게 활용하는지 잘 몰라서겠지ㅠ
이번 기회에 구현하면서 친해져보자!
useReducer는 뭘까?
useReducer는 useState와 마찬가지로 상태를 관리하거나 업데이트 할 수 있는 hook이다.
useState를 쓰다보면 이런 상황이 온다.
setCount(count + 1);
setCount(count - 1);
setCount(0);
특정 상태를 업데이트할 때 여기저기에 흩어지거나, 상태가 복잡해질수록 어디서 어떻게 바뀌는지 추적하기 어려워질 때가 있다. useReducer는 이럴 경우 state를 어떻게 바꿀지라는 로직을 reducer라는 함수 하나에 모아서 컴포넌트 밖으로 뺄 수 있다.
호출하는 쪽은 "무슨 일이 일어났는지"만 전달하고, 실제 계산은 reducer가 담당한다.
const [state, dispatch] = useReducer(reducer, initialArg, init?);useReducer의 형태를 보자면 다음과 같다.
- parameter
reducer:(state, action) => newState형태의 순수함수initialArg: 초기 state 값 (init이 있으면 init의 인자로 전달)init?: (optional) 초기화 함수. 전달하면 초기 state를 init(initialArg)로 계산
- return
state: 현재 statedispatch: action을 받아 reducer를 실행하는 함수
여기서 dispatch의 개념이 조금 헷갈렸는데, react 문서를 보면 다음과 같이 작성되어있다.
dispatch 함수
useReducer에 의해 반환되는dispatch함수는state를 새로운 값으로 업데이트하고 리렌더링을 일으킵니다.dispatch의 유일한 인수는 action입니다.
const [state, dispatch] = useReducer(reducer, { age: 42 });

function handleClick() {
  dispatch({ type: 'incremented_age' });
  // ...
새로운 값으로 업데이트하고 리렌더링을 일으킨다는 부분에서 setState와 다를 것이 있나? 라는 생각이 들었다.
그래서 비교를 해보면,
// setState — 새 값을 직접 받아서 저장하고 리렌더
setState(count + 1);

// dispatch — action을 받아서 reducer에게 넘기고, 그 결과를 저장하고 리렌더
dispatch({ type: "INCREMENT" });dispatch가 하는 일은 세 가지다.
1. reducer(currentState, action) 실행 -> 새 state 계산
2. 새 state 저장
3. 리렌더 트리거
결국 setState의 역할은 같지만 새 state를 어떻게 구하느냐만 다르다. setState는 직접 받고, dispatch는 reducer를 거친다.
useState와는 어떻게 다를까?
| 항목 | useState | useReducer |
|---|---|---|
| state 변경 방식 | 새 값을 직접 전달 | action을 dispatch, reducer가 계산 |
| 변경 로직 위치 | 컴포넌트 안 | 컴포넌트 밖 reducer 함수 |
| 적합한 상황 | 단순한 값 | 여러 action, 복잡한 분기 |
표로 비교해보았을때 제일 눈에 띄는 부분은 변경 로직 위치를 컴포넌트 바깥에 둘 수 있다는 점이었다.
구현 목표
useReducer(reducer, initialArg)를 호출하면[state, dispatch]반환dispatch(action)호출 시reducer(state, action)으로 새state계산 후 리렌더 트리거reducer는 컴포넌트 밖에 정의해state변경 로직 분리init이 있으면 초기 state를init(initialArg)로 계산
구현 과정
useState와 비슷한 부분이 많아서 구현 과정에 있어서 어려움은 많이 없었다.
1. 초기값 설정
useState와 동일하게 states[] 슬롯에 초기값을 저장한다. init이 있으면 초기 파라미터를 넣어 실행한 init인init(initialArg)로, 없으면 initialArg 그대로 사용한다.
if (states[currentIndex] === undefined) {
    const initialValue = init ? init(initialArg) : initialArg;
    states[currentIndex] = initialValue;
}
2. dispatch 구현
setState가 새 값을 직접 저장하는 것과 달리, dispatch는 reducer를 거쳐 새 state를 계산한다.
const dispatch = (action) => {
    const newState = reducer(states[currentIndex], action);
    states[currentIndex] = newState;
    scheduleRerender();
};
코드
전체적인 코드를 보면 다음과 같다!
import { getNextHookIndex, scheduleRerender } from "./hookCore";

let states = [];

export function useReducer(reducer, initialArg, init) {
	const currentIndex = getNextHookIndex();

	if (states[currentIndex] === undefined) {

		// init이 있으면 init(initialArg), 없으면 initialArg 그대로 사용
		const initialValue = init ? init(initialArg) : initialArg;
		states[currentIndex] = initialValue;
	}

	// action을 받아 reducer로 새 state 계산 후 저장하고 리렌더 트리거하기
	const dispatch = (action) => {
		const newState = reducer(states[currentIndex], action);
		states[currentIndex] = newState;

		scheduleRerender();
	};

	return [states[currentIndex], dispatch];
}
검증
역시 검증하면 counter 아니겠어요..? ㅎㅎ 또운터.. 이번에는 case별로 증가, 감소, 리셋 버튼을 둬서 dispatch에 reducer를 거쳐 state를 계산할 수 있도록 했다. 순수함수로 작성한 reducer는 하단과 같이 작성했다.
function counterReducer(state, action) {
    switch (action.type) {
        case "INCREMENT": return state + 1;
        case "DECREMENT": return state - 1;
        case "RESET": return 0;
    }
}

const [reducerState, dispatch] = useReducer(counterReducer, 0);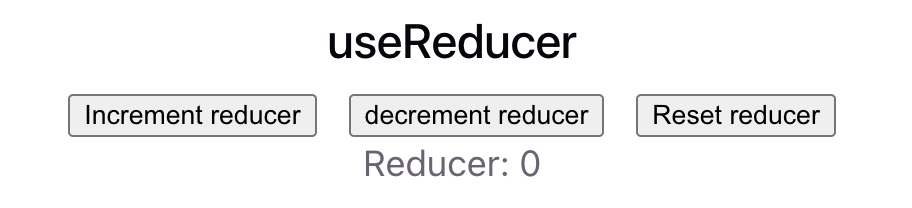
- INCREMENT 버튼: dispatch({ type: "INCREMENT" }) → state + 1 ✅
- DECREMENT 버튼: dispatch({ type: "DECREMENT" }) → state - 1 ✅
- RESET 버튼: dispatch({ type: "RESET" }) → state 0으로 초기화 ✅
리렌더와 함께 잘 작동되는 것을 확인!!
마무리
확실히 구현 자체는 useState와 많이 유사해서 구현해놨던 내용을 위주로 비슷하게 작성하다보니 헤맨 부분은 많이 없었던 것 같다.
핵심 차이는 state 변경 로직을 컴포넌트 밖 reducer에 위임한다는 것이다.
action 분기가 늘어난다면, 혹은 컴포넌트 외부에서 state 변경 로직이 필요할 때 이제는 useReducer를 자연스럽게 떠오르지 않을까..!! 라고 희망하며 ㅎㅎ
오늘도 완! ✅✅✅✅✅
참고