이전에 생성한 spring boot app의 Thymeleaf로 작성한 page에 spring security를 연결해보도록 한다.(이전에 작성한 app은 여기에서 확인할 수 있다.)
1. Security & View
실제로 서비스되는 어플리케이션들은 아래와 같은 security를 고려한 view가 제공된다.
로그인/비로그인 사용자 별로 show/hide할 content를 구분한다.
Role/Permission 별로 show/hide할 content를 구분한다.
로그인 한 유저의 이름/Permission과 같은 세부사항을 display한다.
2. Thymeleaf & Security
위에서 말한 security들은 Thymeleaf를 이용하면 쉽게 적용할 수 있다.
2-1) dependency 추가하기
build.gradle
implementation 'org.thymeleaf.extras:thymeleaf-extras-springsecurity5'2-2) add name space
다음으로 spring security를 integration할 Thymeleaf view에 아래와 같이 xml name space를 추가한다.
fragements.html
<html xmlns:th="http://www.thymeleaf.org"
      xmlns:sec="http://www.thymeleaf.org/extras/spring-security">
3. Login/Logout
3-1) setting
fragements.html
<form class="form-inline my-2 my-lg-0" form-method="post" th:action="@{/logout}">
    <button sec:authorize="isAuthenticated()" class="btn btn-outline-danger my-2 my-sm-0 btn-sm" type="submit">Logout</button>
    <button sec:authorize="isAnonymous()" th:href="@{/login}" class="btn btn-outline-info my-2 my-sm-0 btn-sm" type="submit">Login</button>
</form>
• Thymeleaf에서 Spring Security를 사용하기위해 "sec: " 함수를 사용한다.
• isAuthenticated( ) : 로그인한 사용자에게만 보인다.
• isAnonymous( ) : 로그인하지 않은 사용자에게만 보인다.
3-2) 실행 화면
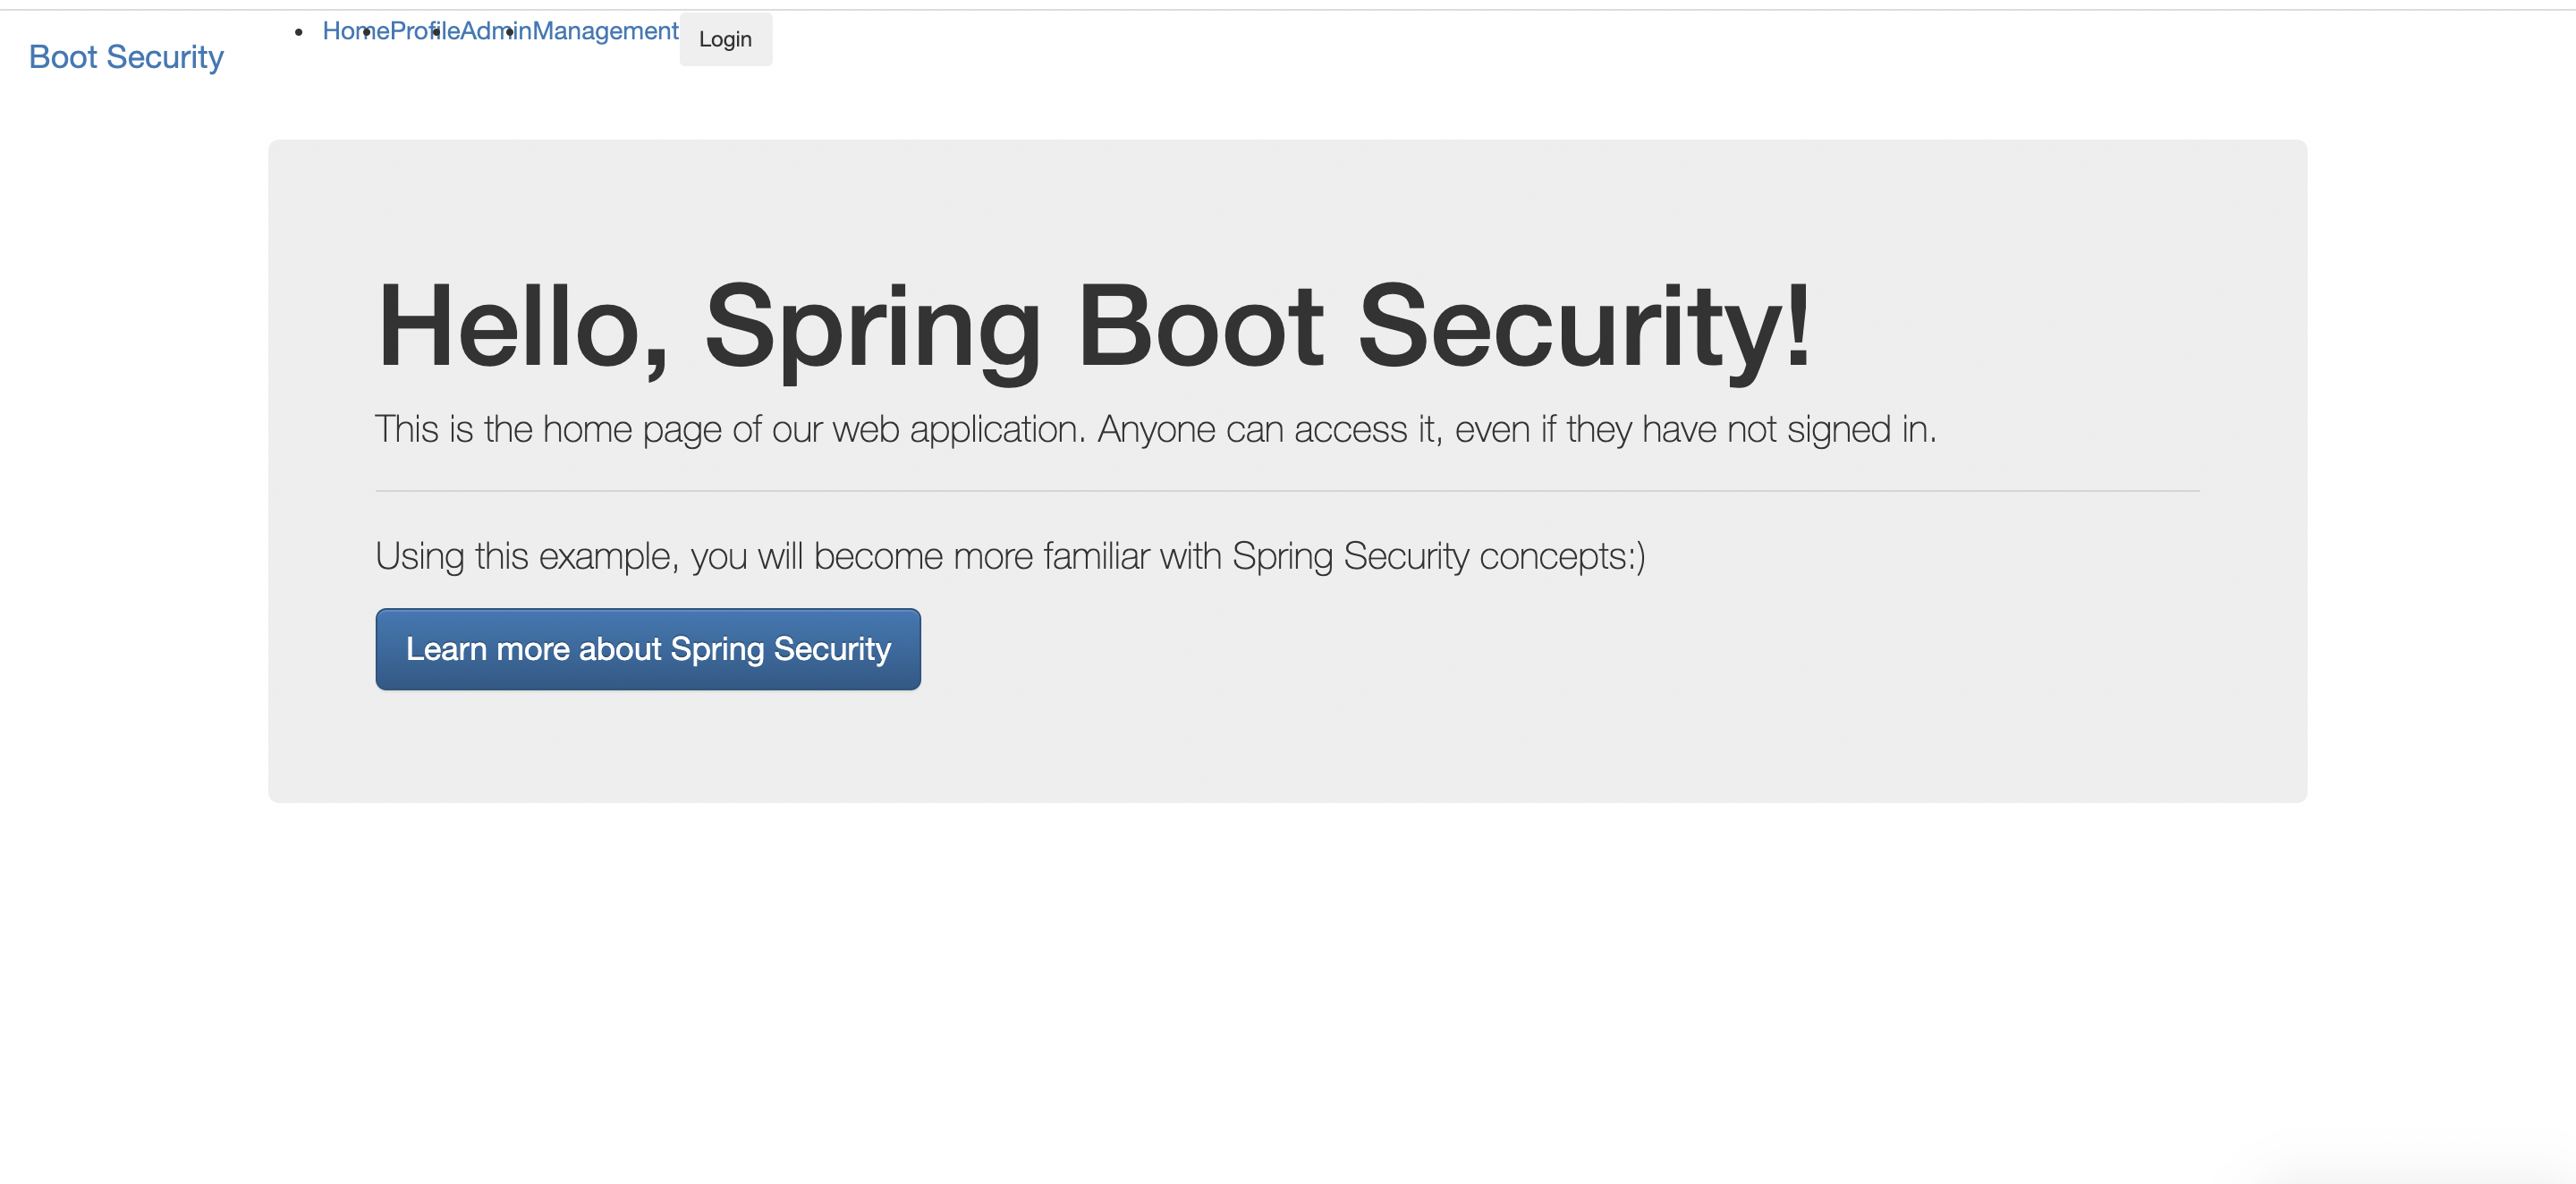
로그인 하지 않은 사용자는 login버튼이 보인다.
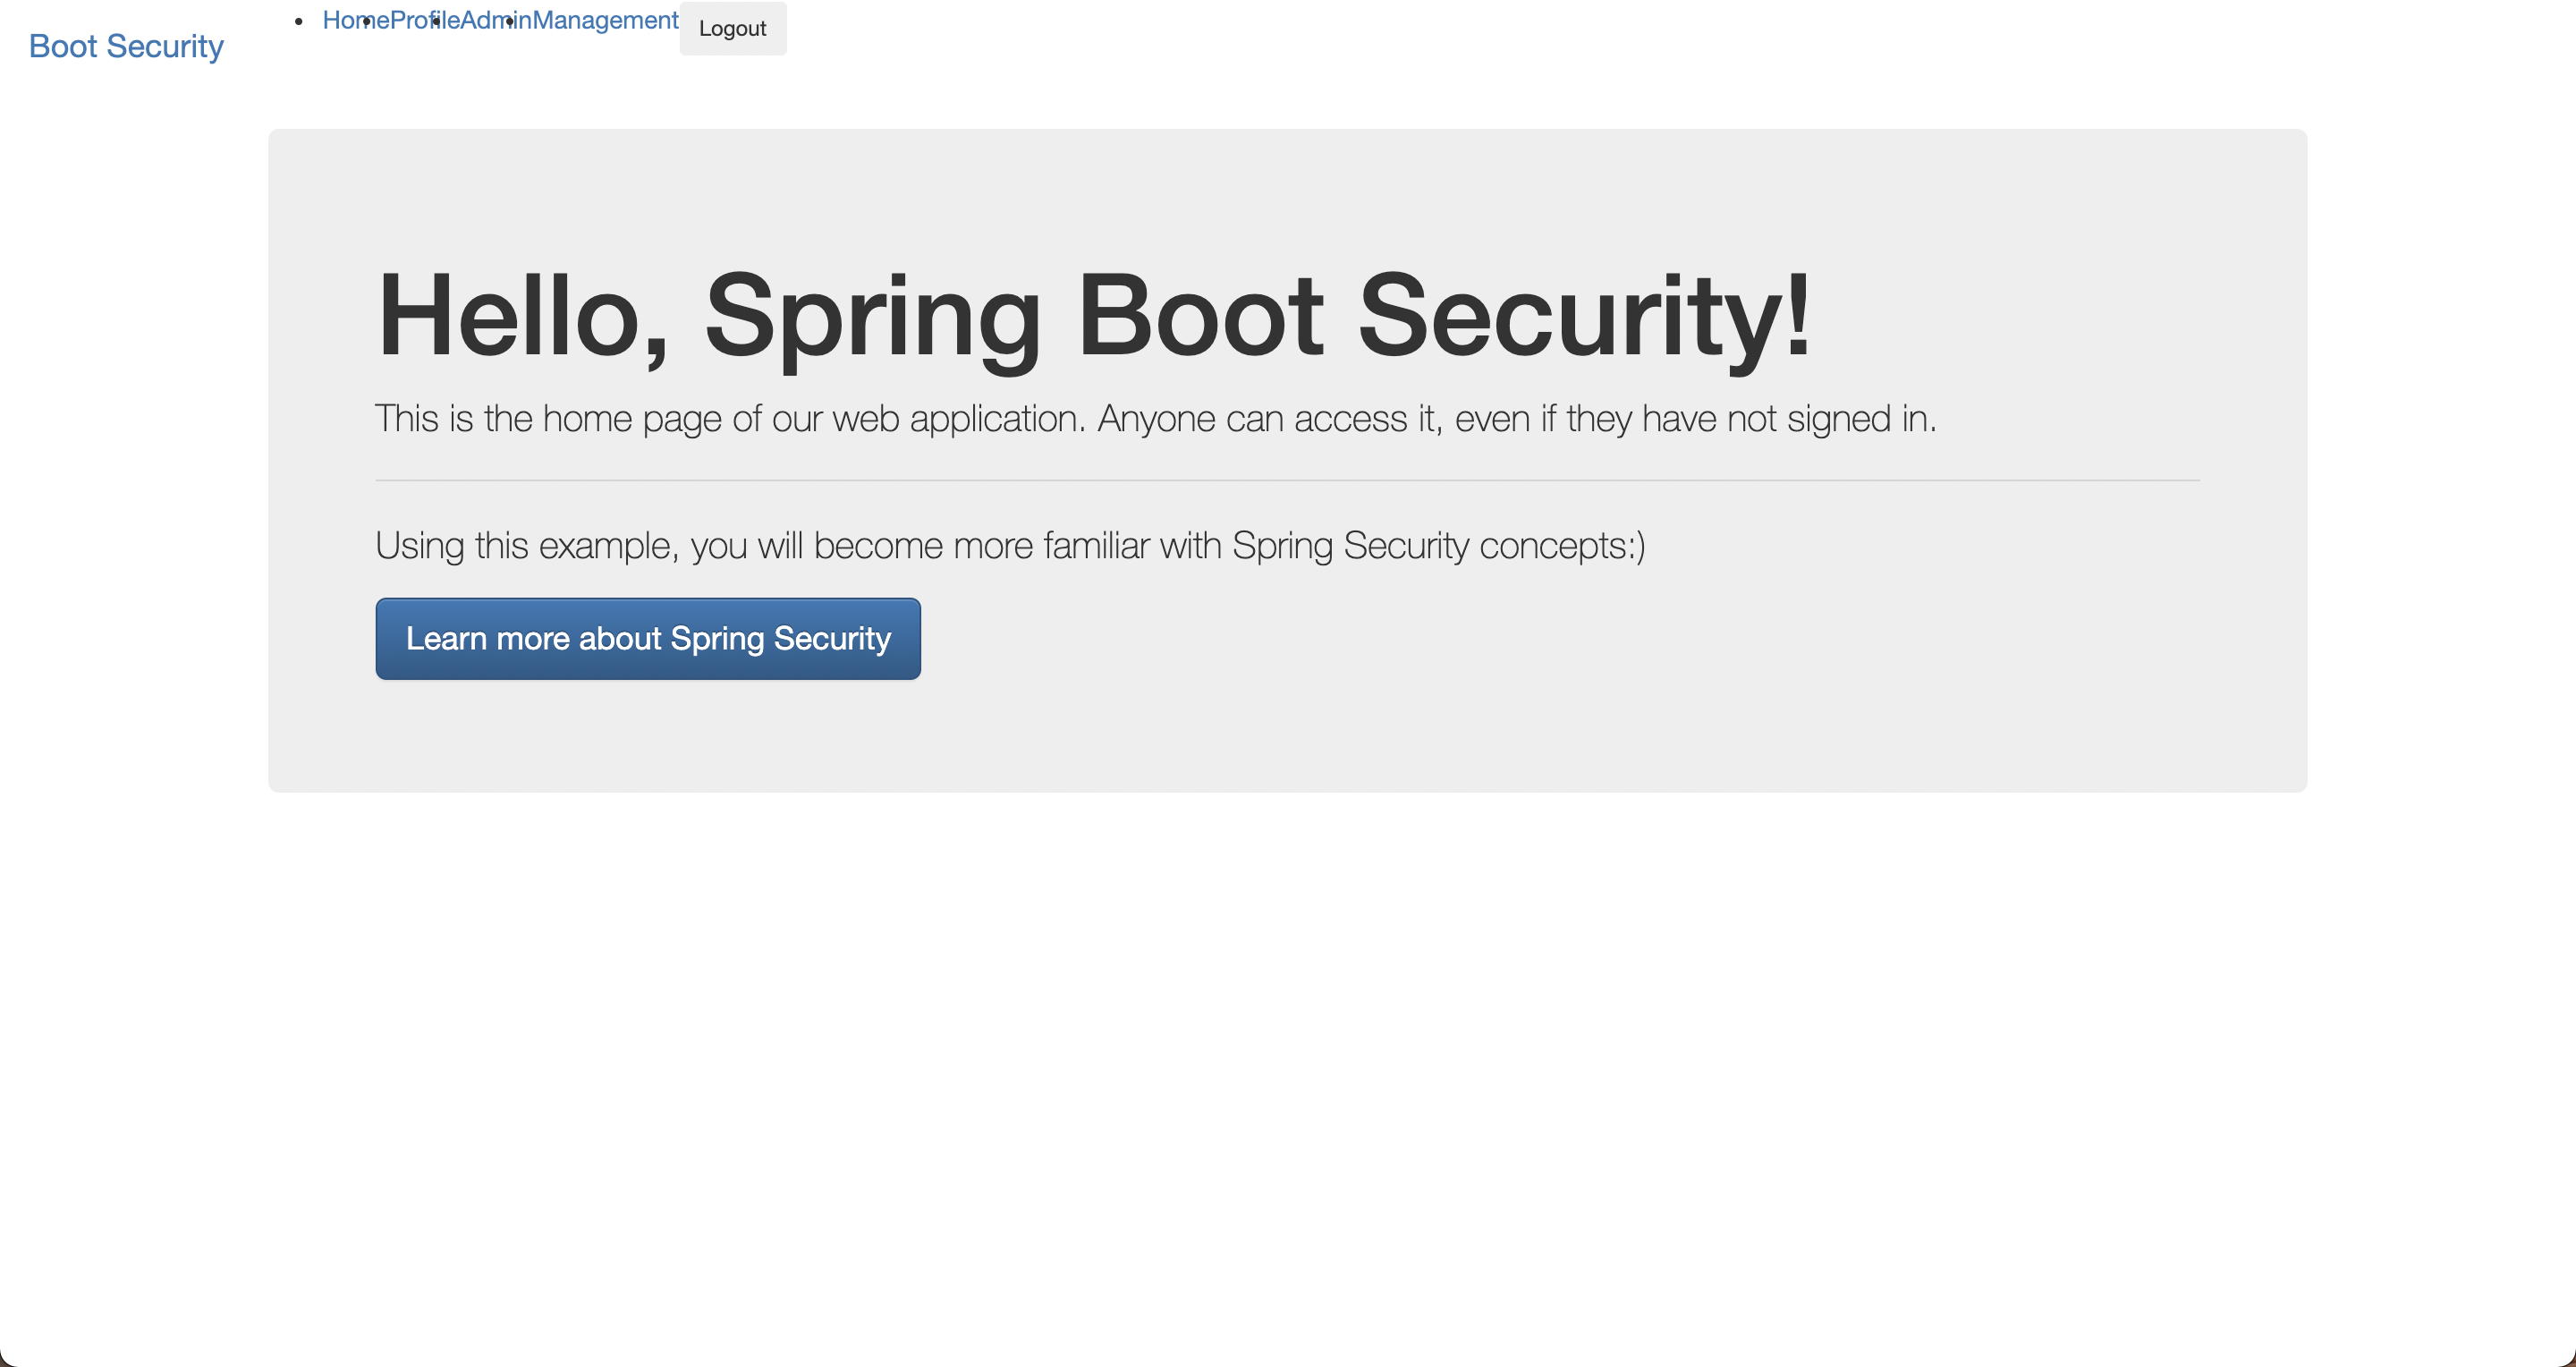
로그인한 사용자는 logout버튼이 보인다.
4. Menu Tab
4-1) setting
이번에는 사용자의 권한별로 Tab을 show/hide 해보도록 한다.
fragements.html
<li class="nav-item">
    <a class="nav-link" href="#" th:href="@{~/index}"><i class="fa fa-home"></i>Home</a>
</li>
<li sec:authorize="isAuthenticated()" class="nav-item">
    <a class="nav-link" href="#" th:href="@{~/profile/index}">Profile</a>
</li>
<li sec:authorize="hasRole('ROLE_ADMIN')" class="nav-item">
    <a class="nav-link" href="#" th:href="@{~/admin/index}">Admin</a>
</li>
<li sec:authorize="hasAnyRole('ROLE_ADMIN', 'ROLE_MANAGER')" class="nav-item">
    <a class="nav-link" href="#" th:href="@{~/management/index}">Management</a>
</li>
• index는 모든 사용자에게 show 한다.
• profile은 로그인한 사용자에게만 show 한다.
• hasRole('ROLE_ADMIN') : admin은 ADMIN 권한을 가진 사용자에게만 show 한다.
• hasAnyRole('ROLE_ADMIN','ROLE_MANAGER') : manager는 ADMIN이나 MANAGER 권한을 가진 사용자에게만 show 한다.
4-2) 실행 화면
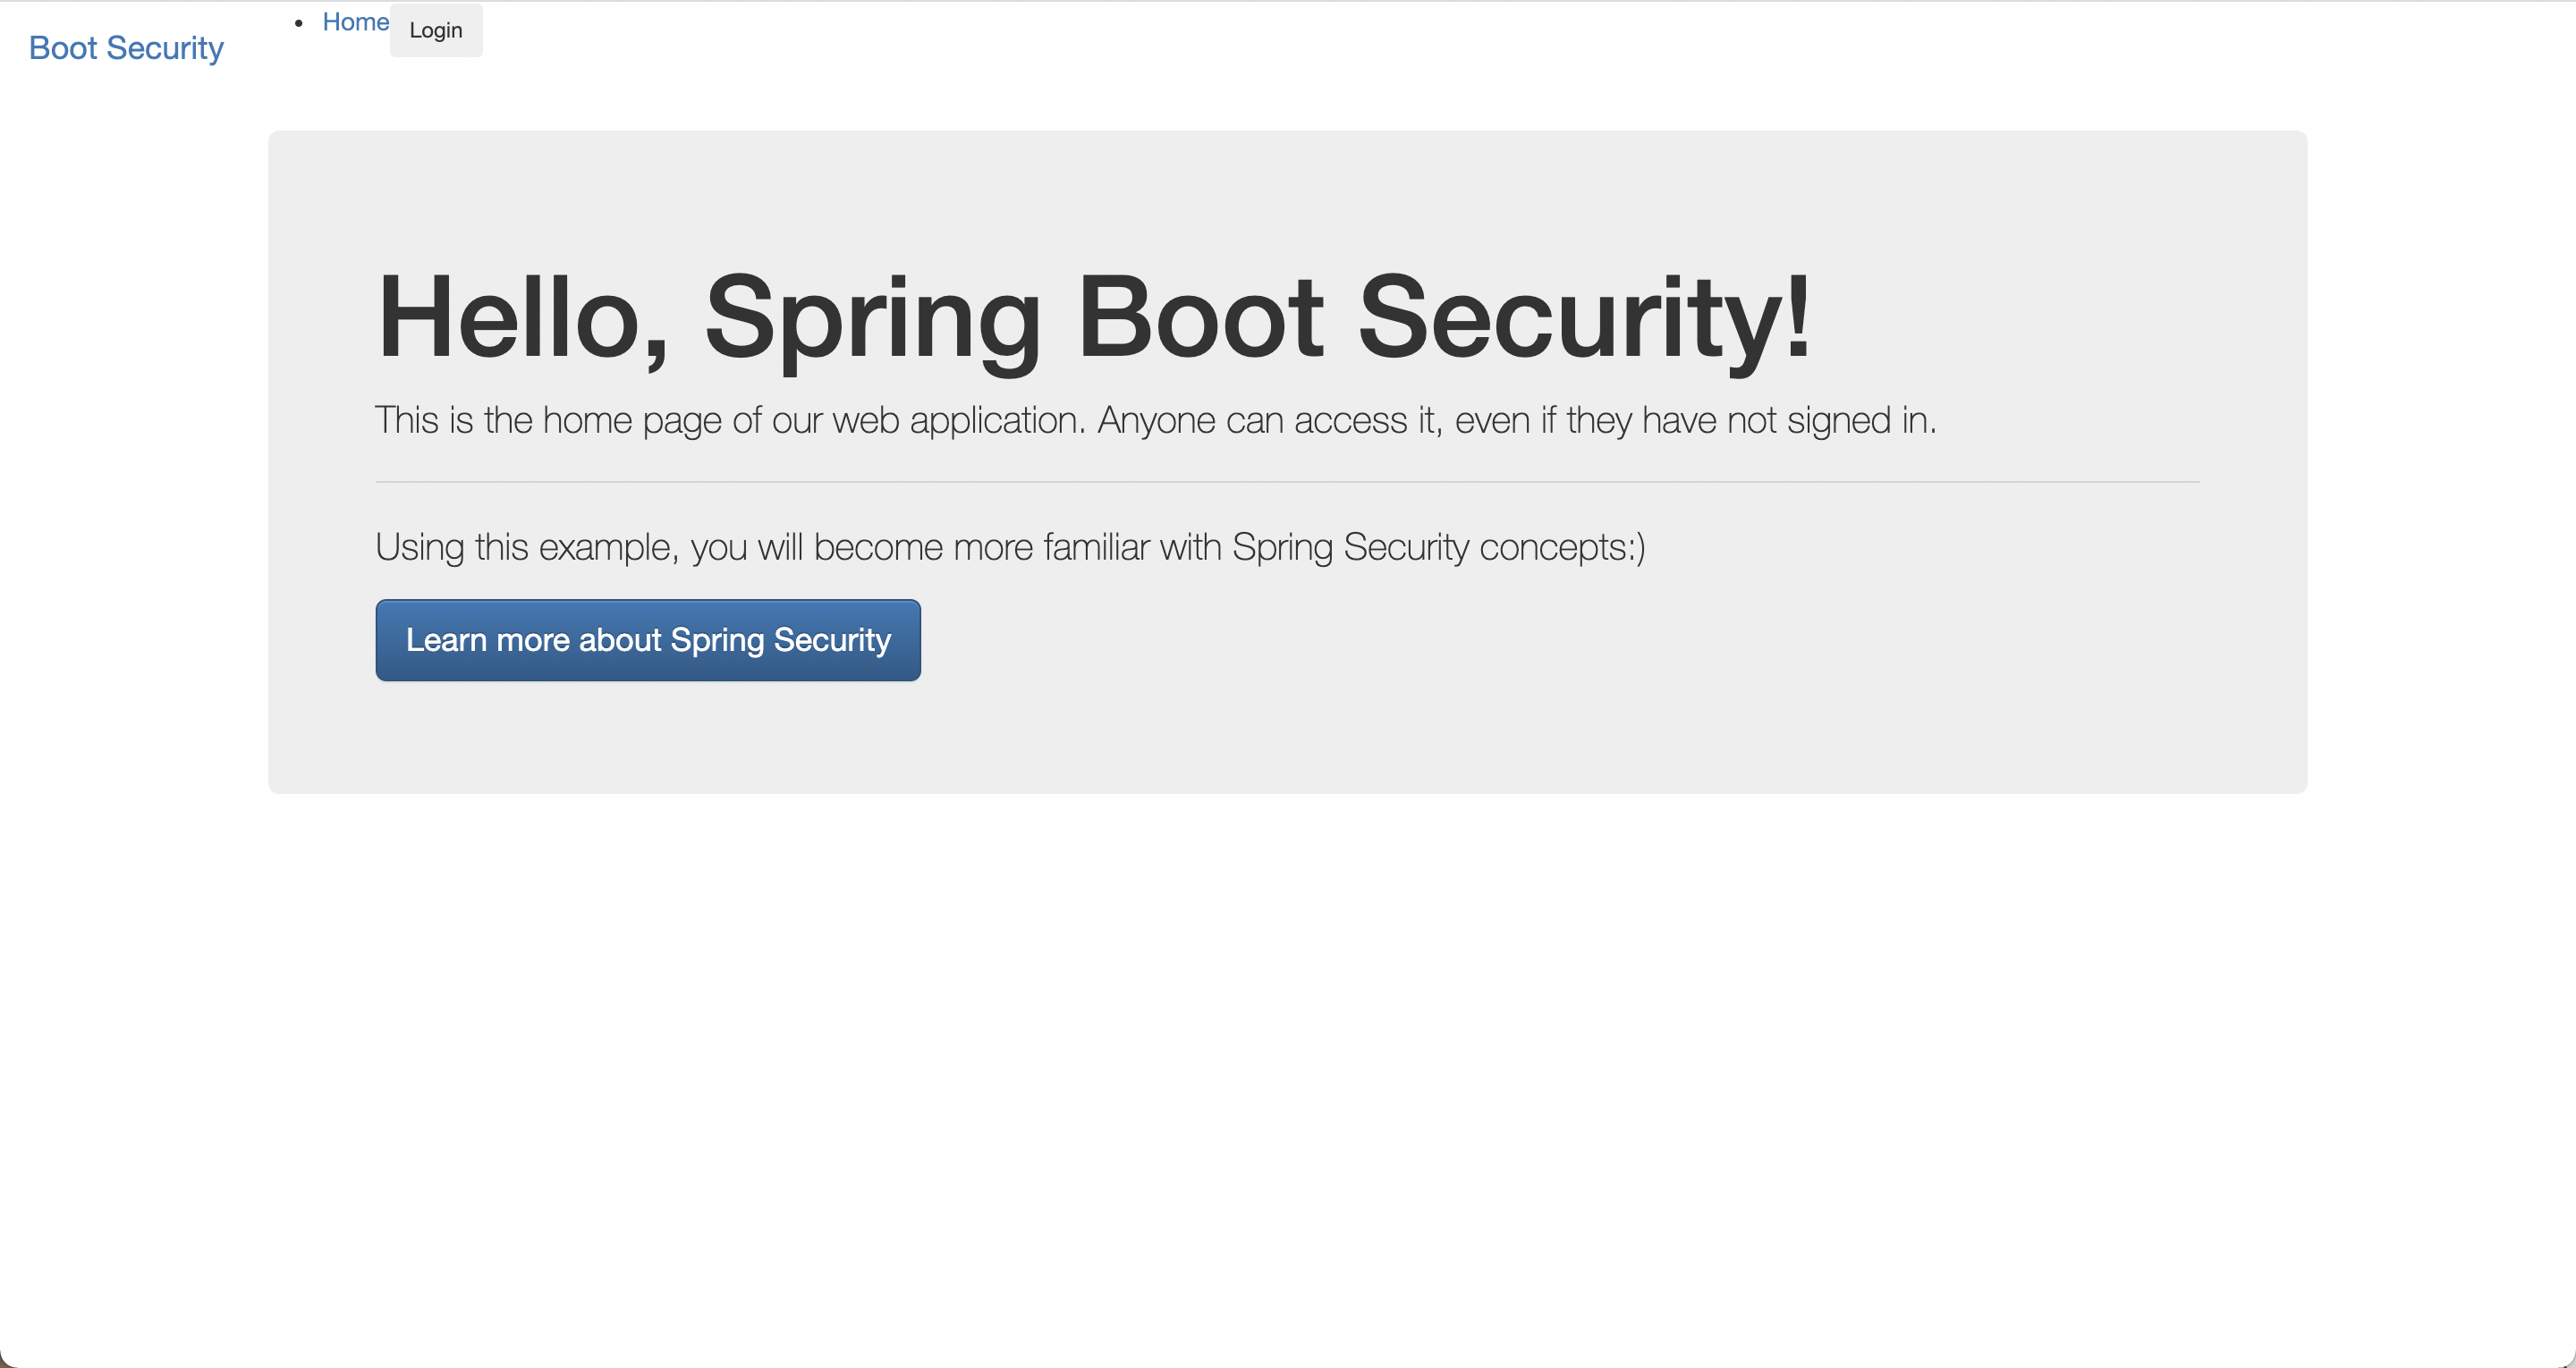
로그인하지 않은 사용자는 Home tab만 보인다.

admin으로 로그인하면 나머지 tab들도 확인할 수 있다.
5. User 정보 보이기
로그인할 경우 사용자의 정보에 따라 다른 화면이 출력되도록 해본다.
5-1) setting
profile.html
<table>
    <tr>
        <td>Username</td>
        <td><span sec:authentication="name"></span></td>
    </tr>
    <tr>
        <td>Authorities</td>
        <td><span sec:authentication="principal.authorities"></span></td>
    </tr>
</table>
• "sec:authentication"은 로그인한 사용자만 사용할 수 있다. "sec:authorize"와 달리 만약 로그인하지 않은 사용자가 접근할 경우 에러가 발생한다.
• name은 User의 username을 반환한다.
• principal.authorities는 User의 전체 authorities를 반환한다.
• principal 객체를 사용하면 authorities 이외의 다른 User 정보도 사용할 수 있다/
5-2) 실행 화면
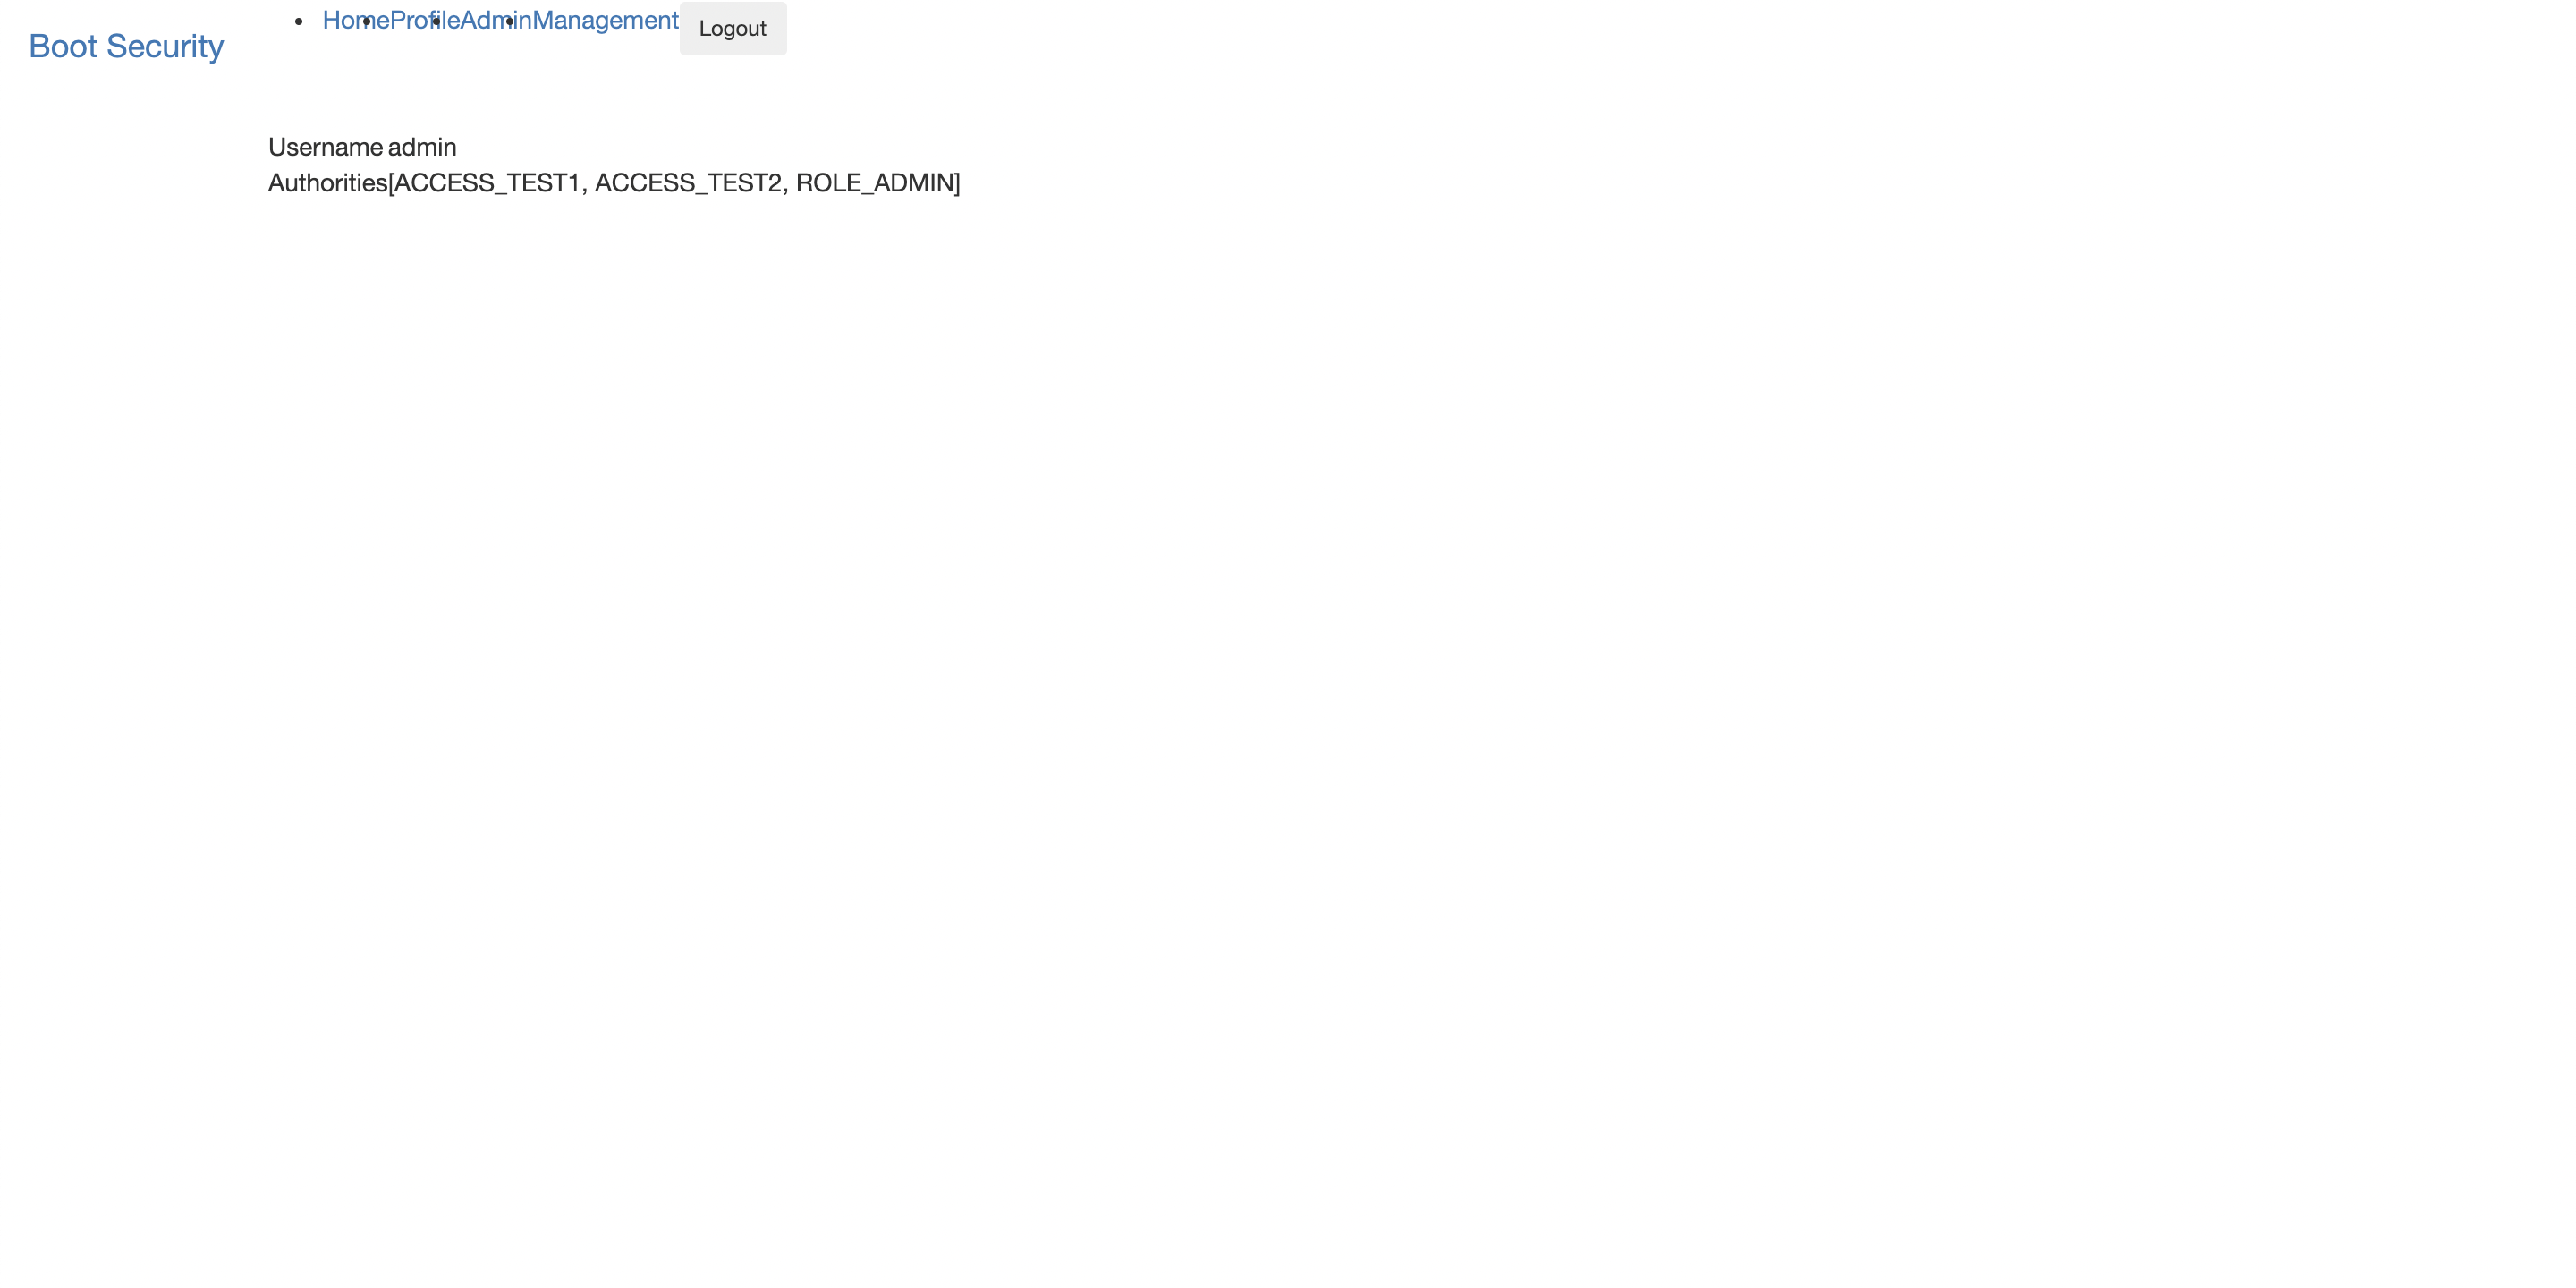
사용자의 이름과 권한이 profile 페이지에 출력된다.
Reference