소셜 로그인 기능을 추가해서 사용자의 입력을 받으려 한다.
JPA가 아니라 MyBatis를 사용하는 프로젝트이다.
구글에서 받은 clientId 와 clientSecret yml에 등록하기
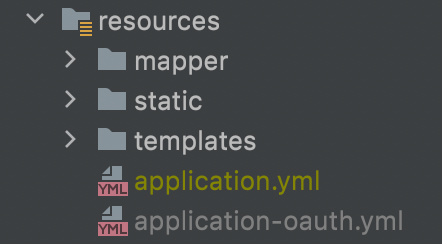
application.yml
spring:
 ...
  profiles:
    include: oauth
application.yml에 위의 코드를 추가한다.
application-oauth.yml
spring:
  security:
    oauth2:
      client:
        registration:
          google:
            client-id: [자신의 구글 클라이언트 아이디]
            client-secret: [자신의 구글 클라이언트 비밀번호]
            scope: profile,email
application.yml에 있는 위치에 application-oauth.yml을 생성하고 위의 코드를 추가한다.
scope는 자신이 구글 서비스에서 신청한 범위 목록을 작성하면 된다.
새로만든 application-oauth.yml도 잊지말고 꼭 .gitgnore에 등록해줘야 한다. 안 그럼 중요한 구글 클라이언트 아이디랑 비밀번호가 다 공개된다... (만약 공개됐다면 구글 서비스를 다시 신청하는 게 맘 편하다..!)
.gitgnore에 application-oauth.yml 을 적어주면 된다.
사용자 정보를 담당할 User 도메인 생성하기
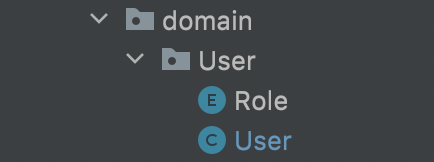
User
@Getter
@NoArgsConstructor
public class User{
    private String name;
    private String email;
    private Role role;

    @Builder
    public User(String name, String email,Role role) {
        this.name = name;
        this.email = email;
        this.role = role;
    }

    public User update(String name) {
        this.name = name;
        return this;
    }
    public String getRoleKey() {
        return this.role.getKey();
    }

}
각 사용자의 권한을 관리할 Role 클래스도 생성해준다.
Role
package com.Matchurkorea.Match.domain.User;

import lombok.Getter;
import lombok.RequiredArgsConstructor;

@Getter
@RequiredArgsConstructor
public enum Role {

    GUEST("ROLE_GUEST","손님"),
    USER("ROLE_USER","일반 사용자");

    private final String key;
    private final String title;
}
스프링 시큐리티 설정하기
build.gradle에 스프링 시큐리티 관련 의존성을 하나 추가한다.
implementation 'org.springframework.boot:spring-boot-starter-oauth2-client'스프링 시큐리티 관련 클래스 작성
이제 OAuth 라이브러리를 이용한 소셜 로그인 설정 코드를 작성한다.
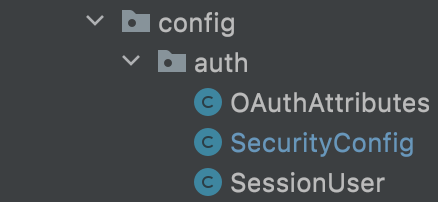
config.auth 패키지를 생성한다. 앞으로 시큐리티 관련 클래스들을 모두 이곳에 담아 관리한다.
OAuthAttributes
@Getter
public class OAuthAttributes {

    private Map<String,Object> attributes;
    private String nameAttributeKey, name, email;

    @Builder
    public OAuthAttributes(Map<String,Object> attributes,
                           String nameAttributeKey,
                           String name,String email){
        this.attributes=attributes;
        this.nameAttributeKey=nameAttributeKey;
        this.name=name;
        this.email=email;
    }
    public static OAuthAttributes of(String registrationId,
                                     String userNameAttributeName,
                                     Map<String, Object> attributes) {
        return ofGoogle(userNameAttributeName, attributes);
    }
    public static OAuthAttributes ofGoogle(String userNameAttributeName,
                                           Map<String, Object> attributes) {
        return OAuthAttributes.builder()
                .name((String) attributes.get("name"))
                .email((String) attributes.get("email"))
                .attributes(attributes)
                .nameAttributeKey(userNameAttributeName)
                .build();
    }
    public User toEntity() {
        return User.builder()
                .name(name)
                .email(email)
                .role(Role.GUEST)
                .build();
    }

}
SecurityConfig
@Configuration
@EnableWebSecurity
public class SecurityConfig extends WebSecurityConfigurerAdapter {
    private final CustomOAuth2UserService customOAuth2UserService;

    public SecurityConfig(CustomOAuth2UserService customOAuth2UserService) {
        this.customOAuth2UserService = customOAuth2UserService;
    }
    @Override
    protected void configure(HttpSecurity http) throws Exception {
        http
                //csrf 차단 해제
                .csrf().disable()
                .headers().frameOptions().disable()
                .and()
                .authorizeRequests()
                .antMatchers(
                        "/error",
                        "/favicon.ico",
                        "/**/*.png",
                        "/**/*.gif",
                        "/**/*.svg",
                        "/**/*.jpg",
                        "/**/*.html",
                        "/**/*.css",
                        "/**/*.js",
                        "/",
                        "/home/**",
                        "/test/**"
                        .permitAll()
                .antMatchers("/mytravel/**").hasRole(Role.GUEST.name())
                .anyRequest().authenticated()
                .and()
                .logout().logoutSuccessUrl("/")
                .and()
                .oauth2Login().userInfoEndpoint().userService(customOAuth2UserService);
    }

}
권한에 따라 자신의 웹서비스를 어디까지 공개할지 작성해준다.
.permitAll()은 회원가입하지 않은 유저도 확인할 수 있는 페이지이고 .hasRole(Role.GUEST.name())은 권한을 가진 유저만 접속할 수 있는 페이지를 설정해준 것이다.
SessionUser
package com.Matchurkorea.Match.config.auth;

import com.Matchurkorea.Match.domain.User.User;
import lombok.Getter;

import java.io.Serializable;

/*
 * 세션에 저장하려면 직렬화를 해야 하는데
 * User 엔티티는 추후 변경사항이 있을 수 있기 때문에
 * 직렬화를 하기 위한 별도의 SessionUser 클래스 생성
 */
@Getter
public class SessionUser implements Serializable {
    private String name, email, picture;

    public SessionUser(User user) {
        this.name = user.getName();
        this.email = user.getEmail();
    }
}
CustomOAuth2UserService
@RequiredArgsConstructor
@Service
public class CustomOAuth2UserService implements OAuth2UserService<OAuth2UserRequest, OAuth2User> {
    private final userMapper userMapper;
    private final HttpSession httpSession;
    @Override
    public OAuth2User loadUser(OAuth2UserRequest userRequest) throws OAuth2AuthenticationException {
        OAuth2UserService<OAuth2UserRequest, OAuth2User> delegate = new DefaultOAuth2UserService();
        OAuth2User oAuth2User = delegate.loadUser(userRequest);
        // 현재 로그인 진행 중인 서비스를 구분하는 코드
        String registrationId = userRequest
                .getClientRegistration()
                .getRegistrationId();
        // oauth2 로그인 진행 시 키가 되는 필드값
        String userNameAttributeName = userRequest.getClientRegistration()
                .getProviderDetails()
                .getUserInfoEndpoint()
                .getUserNameAttributeName();
        // OAuthAttributes: attribute를 담을 클래스 (개발자가 생성)
        OAuthAttributes attributes = OAuthAttributes
                .of(registrationId, userNameAttributeName, oAuth2User.getAttributes());
        User user = saveOrUpdate(attributes);
        // SessioUser: 세션에 사용자 정보를 저장하기 위한 DTO 클래스 (개발자가 생성)
        httpSession.setAttribute("user", new SessionUser(user));
        return new DefaultOAuth2User(
                Collections.singleton(new SimpleGrantedAuthority(user.getRoleKey())),
                attributes.getAttributes(),
                attributes.getNameAttributeKey()
        );
    }
    private User saveOrUpdate(OAuthAttributes attributes) {
        User user;
        if(userMapper.findByEmail(attributes.getEmail())!=null){
            user=userMapper.findByEmail(attributes.getEmail());
        }
        else {
            user=attributes.toEntity();
            userMapper.save(user);
            user=userMapper.findByEmail(attributes.getEmail());
        }

        return user;
    }
}
saveOrUpdate 메소드를 통해 findByEmail로 유저가 이미 존재하는지 확인하고 존재하지 않는다면 유저의 정보를 저장한 후 반환하고 유저가 존재한다면 db에서 유저의 정보를 가져와 반환한다.
userMapper 작성하기
userMapper
@Mapper
public interface userMapper {
    //로그인 & 회원가입
    User findByEmail(String email);
    void save(User user);
}
userMapper.xml
<?xml version="1.0" encoding="UTF-8"?>
<!DOCTYPE mapper PUBLIC "-//mybatis.org//DTD Mapper 3.0//EN" "http://mybatis.org/dtd/mybatis-3-mapper.dtd">
<mapper namespace="com.Matchurkorea.Match.mapper.userMapper">

    <insert id="save"  useGeneratedKeys="true" keyProperty="id">
        INSERT INTO user.user(name,email,role) VALUES(#{name}, #{email}, #{role})
    </insert>
    <select id="findByEmail" resultType="com.Matchurkorea.Match.domain.User.User">
        SELECT * FROM user.user WHERE email = #{email}
    </select>


</mapper>
안녕하세요! 다름이 아니라, application-oauth.yml 깃허브에 커밋 해버렸는데,, "구글 클라이언트 아이디랑 비밀번호가 다 공개된다... (만약 공개됐다면 구글 서비스를 다시 신청하는 게 맘 편하다..!)" -> 이렇게 말씀해주셨는데요!! 구글 서비스가 구글 클라우드에서 받는걸 말씀하시는거 맞으실까요? 아니면 제 구글 아이디를 말씀하시는걸까요 ㅎ... 비전공자라 좀 무섭네요 ㅎ...