기초 개념 및 기능 참조
Section 1. 상품 목록
1. Class-based View 생성
- ListView 상속 (from django.views.generic import ListView)
- context_object_name - template 으로 넘어가는 데이터의 이름 (default = object_list)
- ordering - 리스트의 순서를 지정
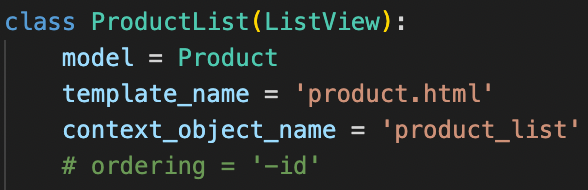
ordering = '-id' # 행의 id 속성을 기준으로 역순으로 출력
2. Template 생성
- humanize load (사람이 보기 편하게 출력 결과를 바꾸는 기능을 제공)
- template tags & filter 에서 템플릿 태그 및 필터를 참조
- {# ... #} - template 주석 표시
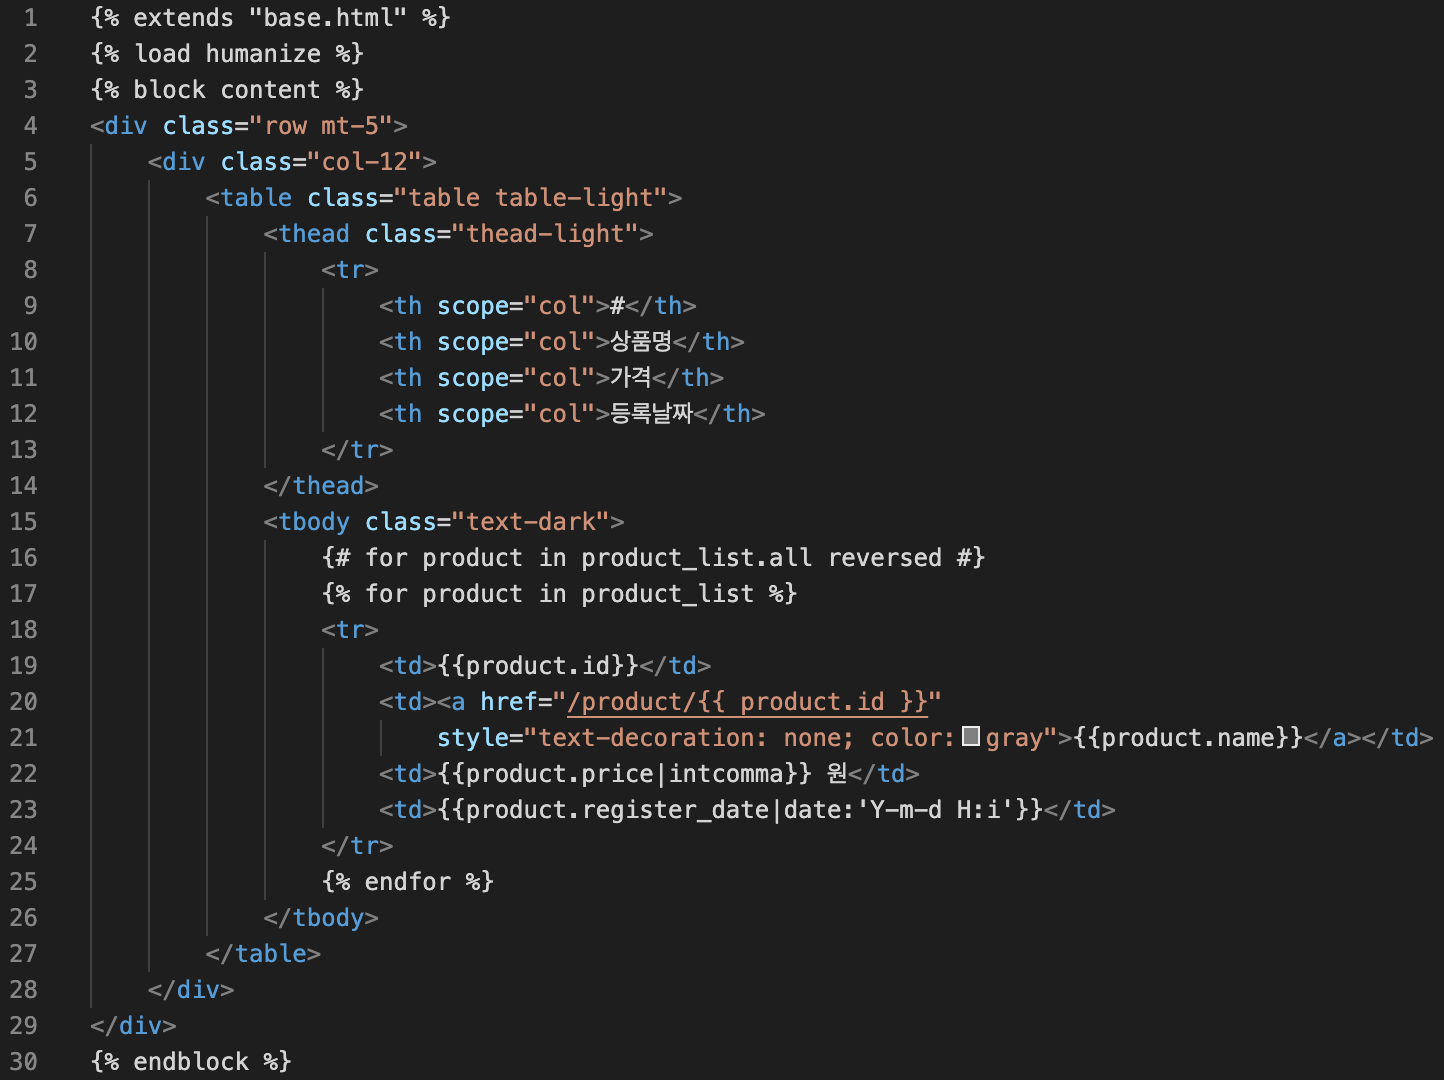
{% load humanize %}				# humanize 를 불러오겠다는 의미
{% for product in product_list.all reversed %} 	# 역순으로 재배열 (list = list.all)
{{product.price|intcomma}}			# 정수에 ',' 표시
{{product.register_date|date:'Y-m-d H:i'}}	# 년-월-일 시간:분 으로 표시
3. URL 파싱
- path('product/', ProductList.as_view()) 추가
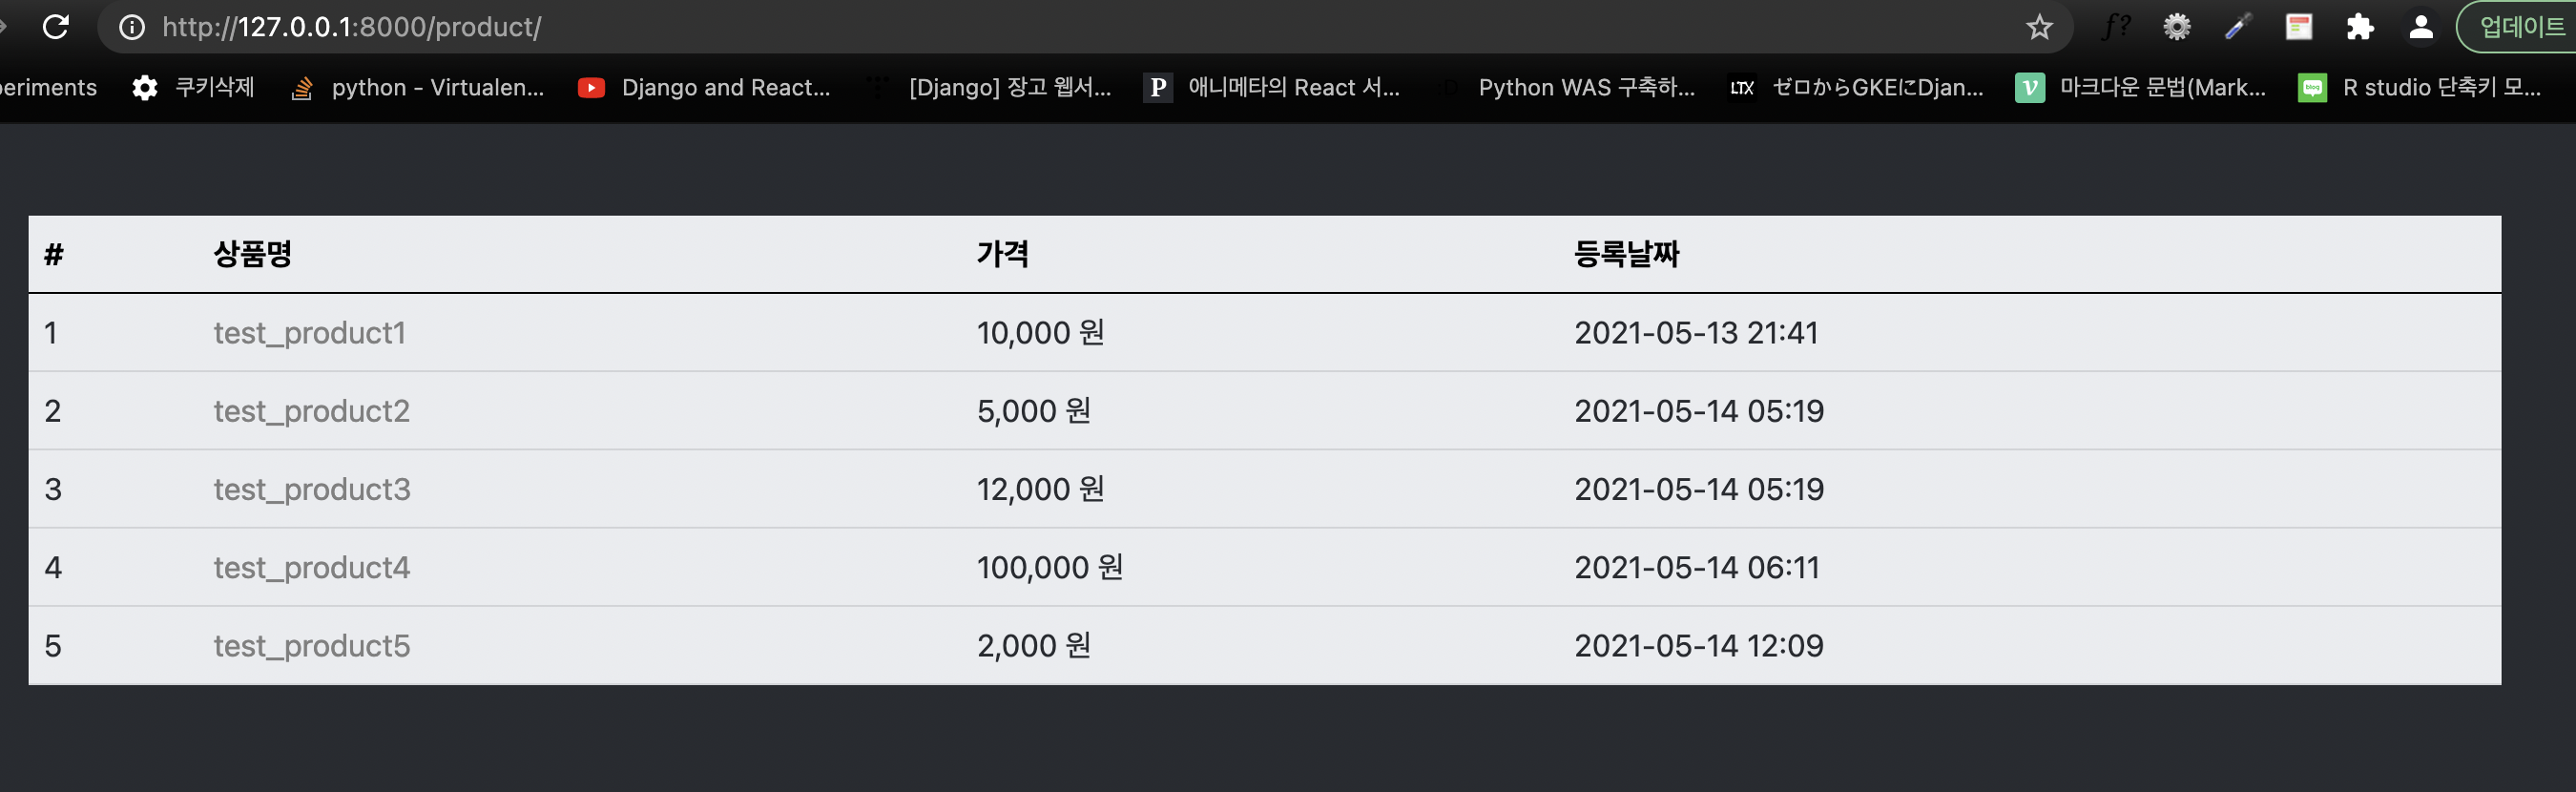
4. 상품 목록 화면
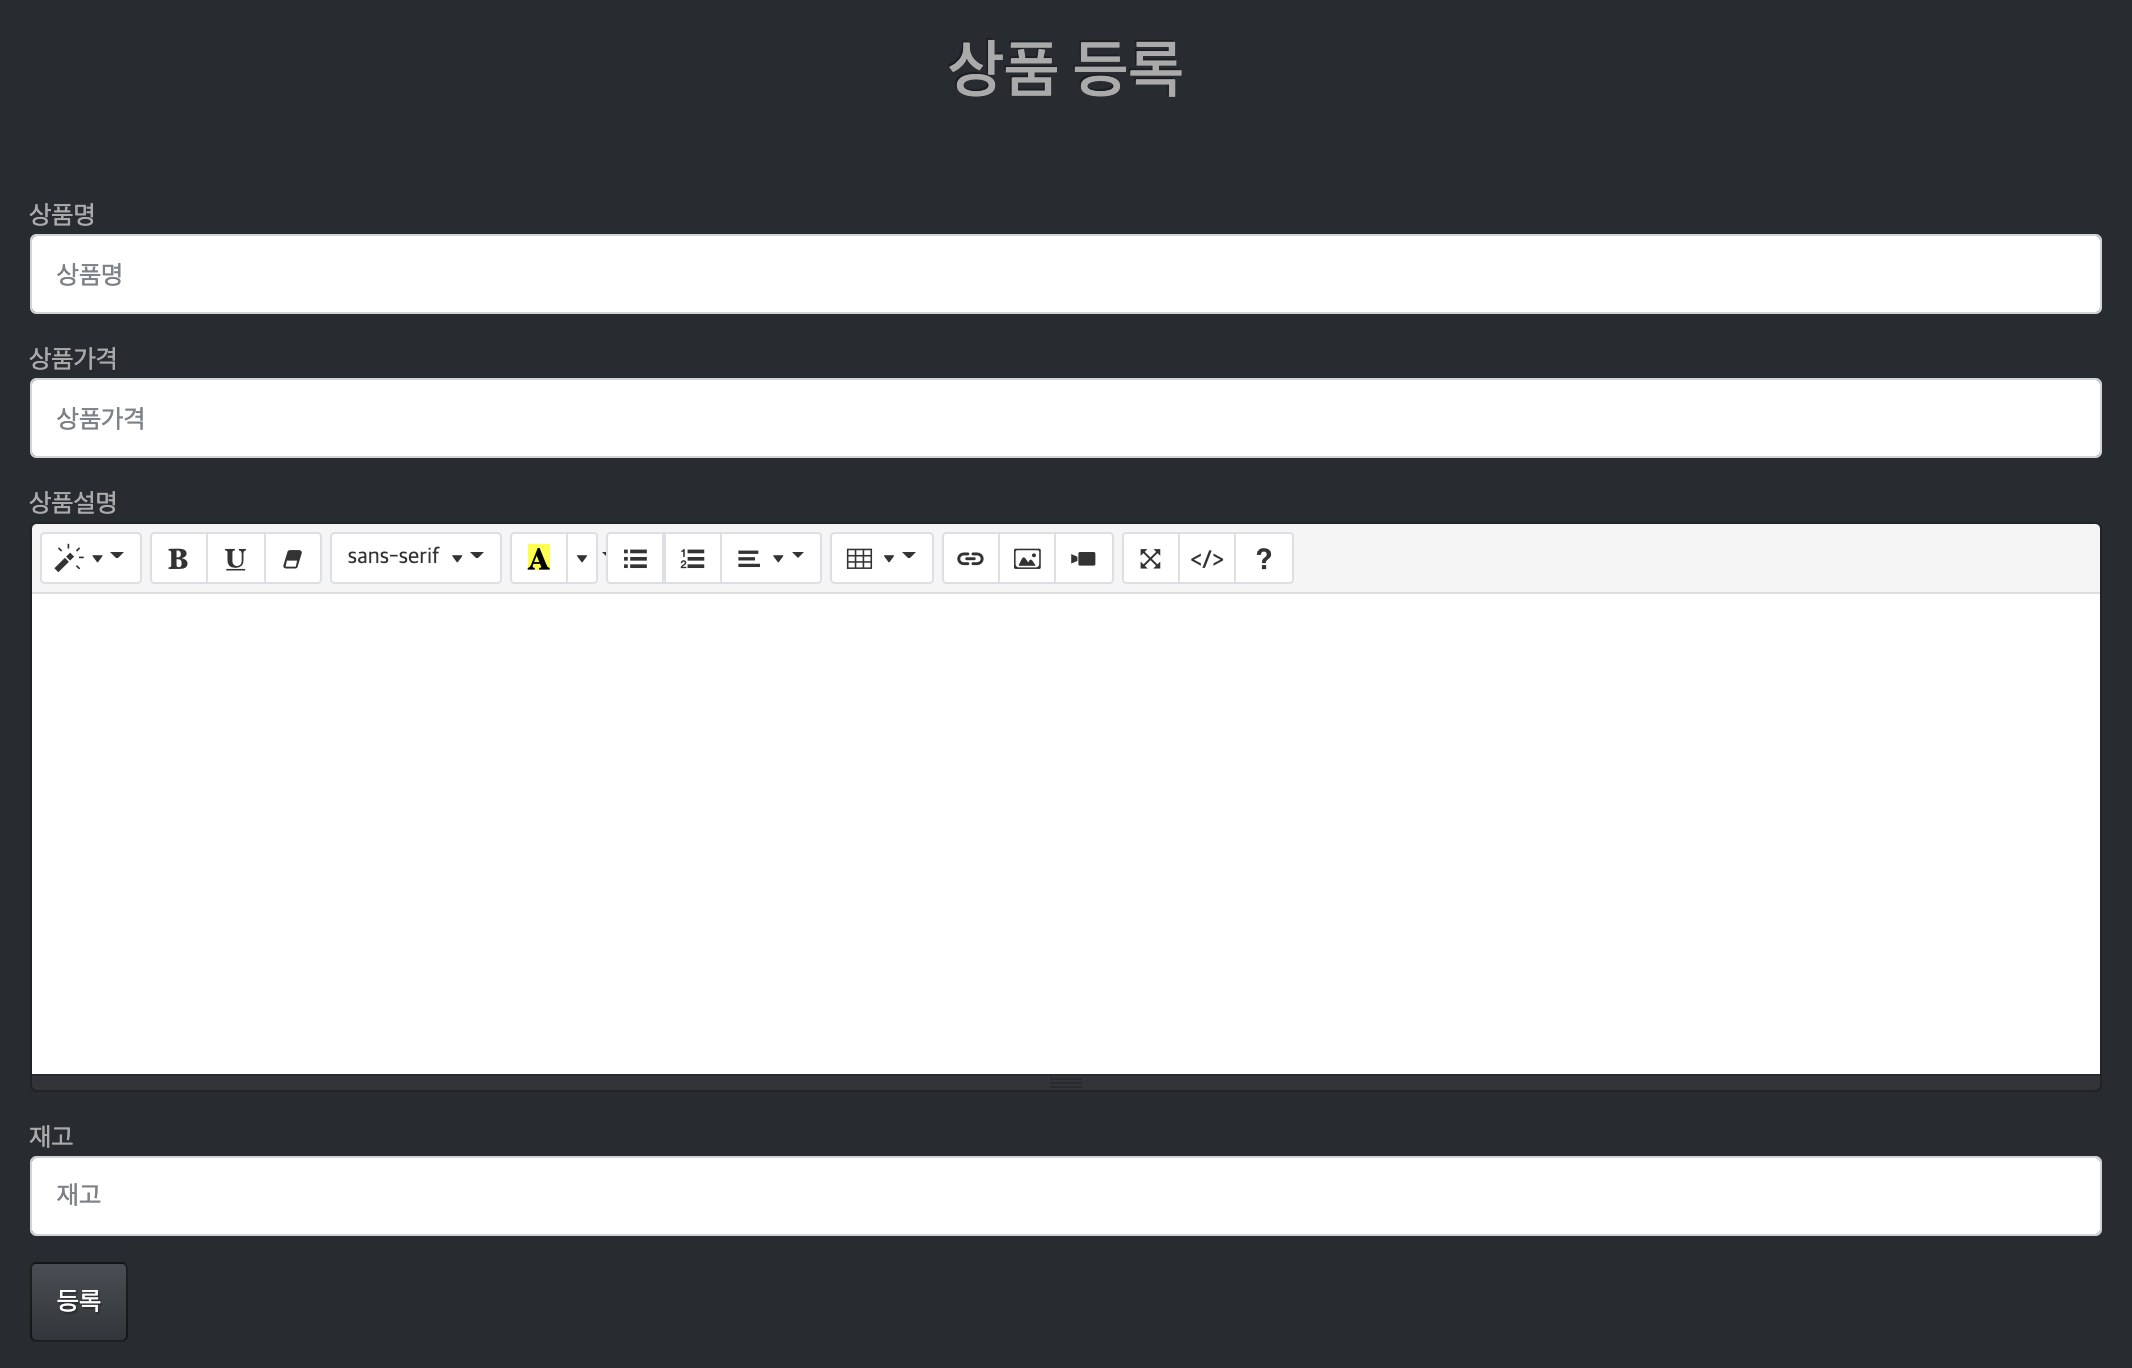
Section 2. 상품 등록
1. Form 생성
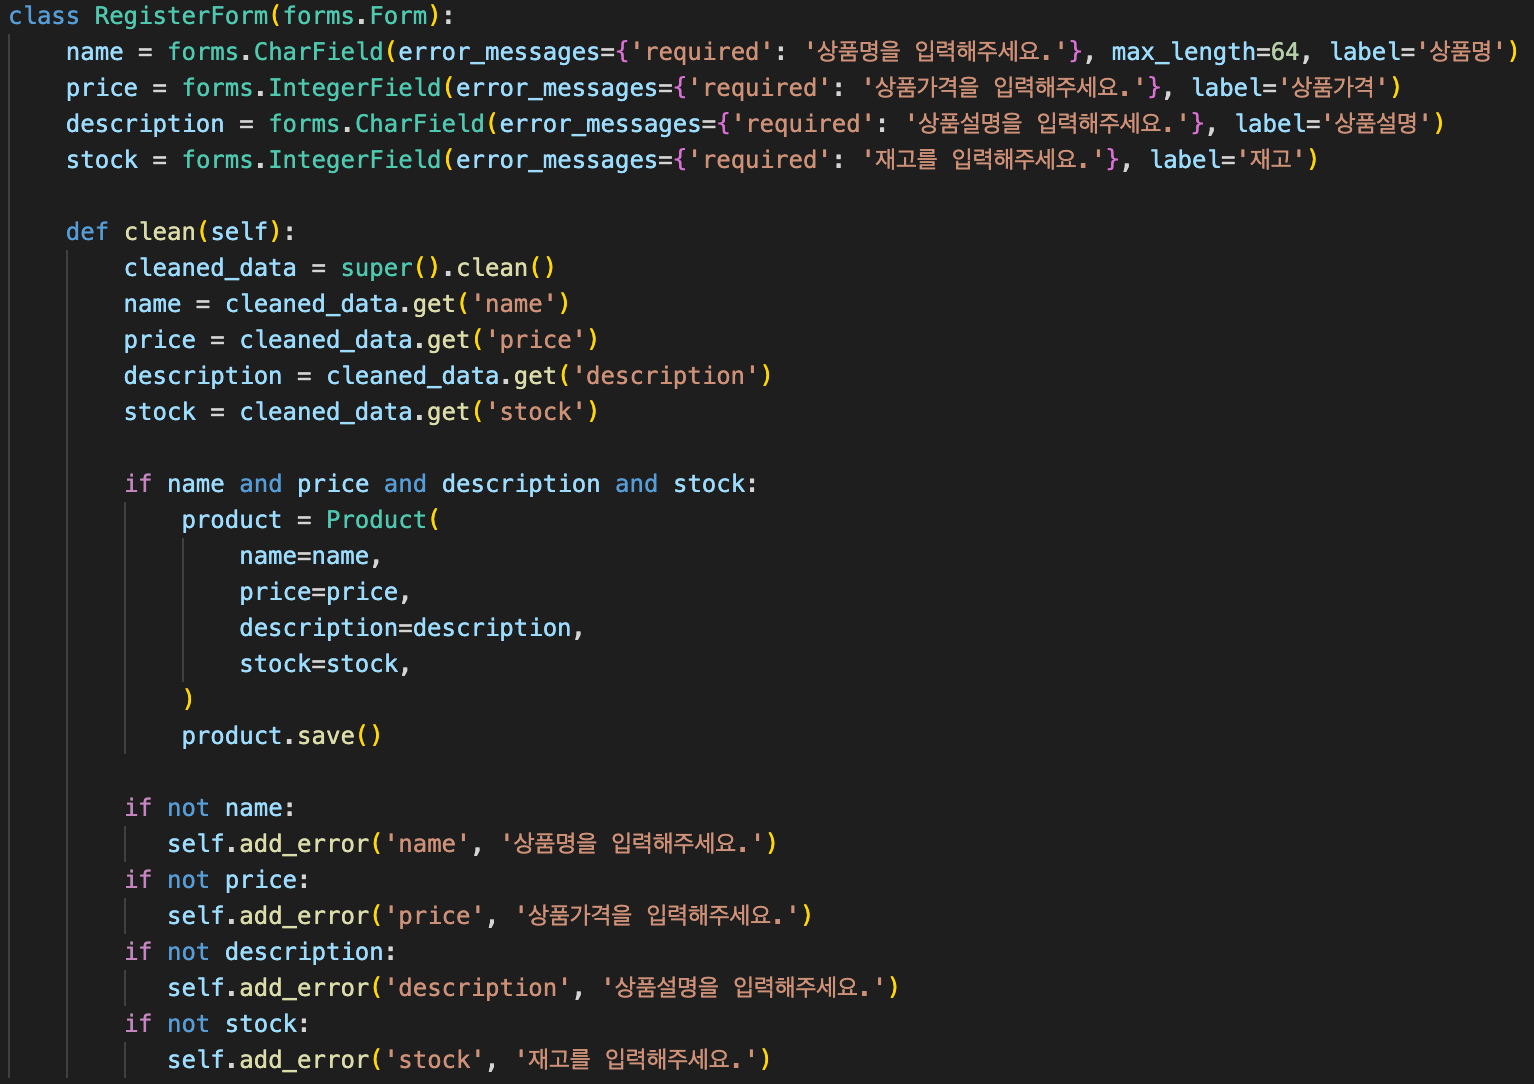
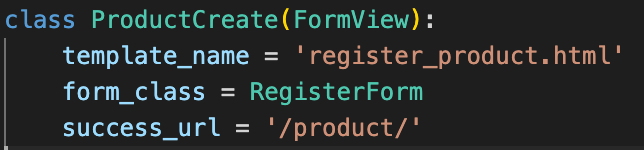
2. Class-based View 생성
3. WYSIWYG
문서 편집 과정에서 화면에 보이는 결과가 출력물과 동일하게 나오는 방식
- 문서 편집기의 일종으로 자동으로 태그를 생성하여 저장함
- Summernote - 오픈소스 WYSIWTG 에디터
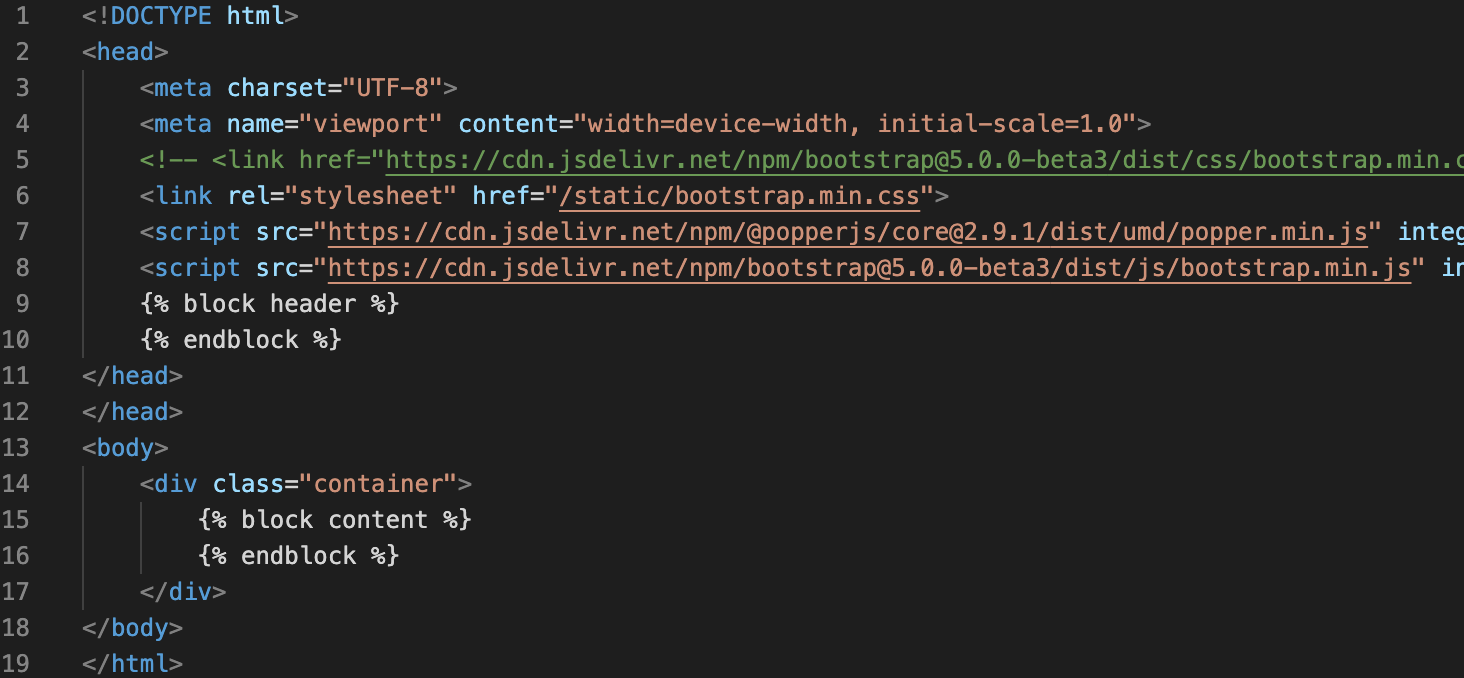
4. base.html 수정
- WYSIWYG 를 적용할 template 을 위해 {block header} 추가
5. Template 생성
- WYSIWYG Without Bootstrap cdn 사용
- WYSIWYG 배경색 변경 방법 -> github
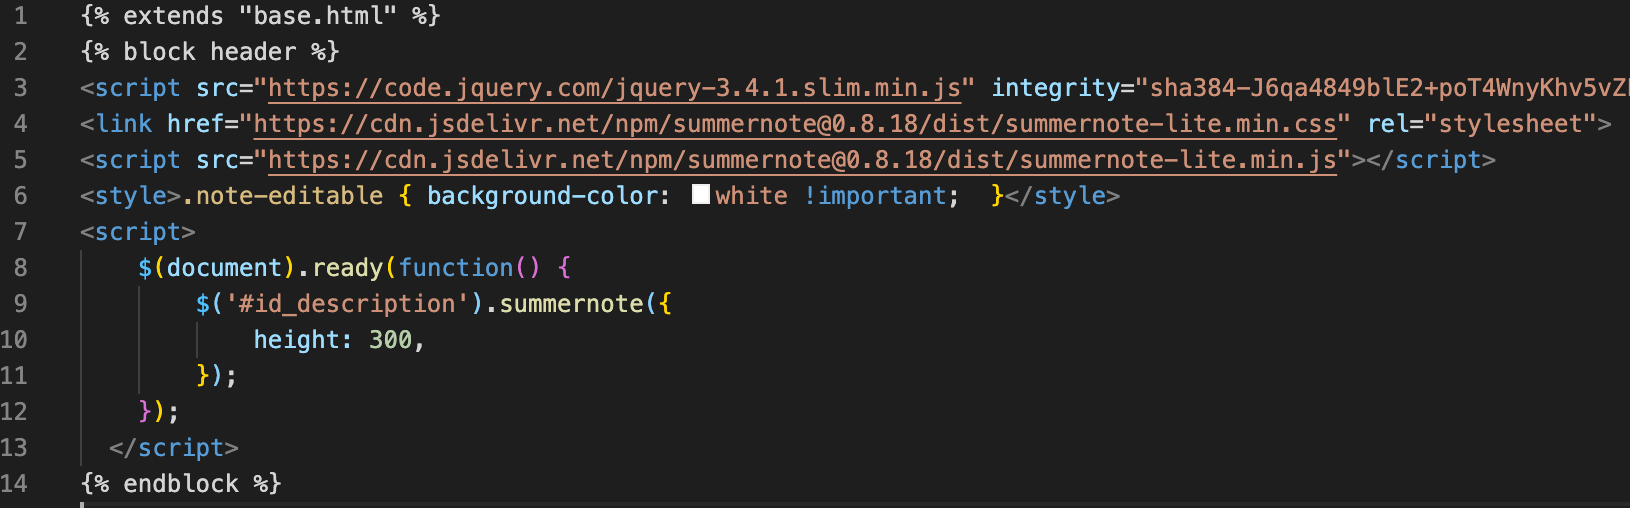
<style>.note-editable { background-color: white !important;  }</style>	# WYSIWYG 배경색 지정
<script>
    $(document).ready(function() {
        $('#id_description').summernote({	# WYSIWYG 적용할 폼 요소 id 값 지정 '#id_description'
            height: 300,			# 세로 크기 지정
        });
    });
  </script>
6. URL 파싱
- path('product/create/', ProductCreate.as_view()) 추가
7. 상품 등록 화면
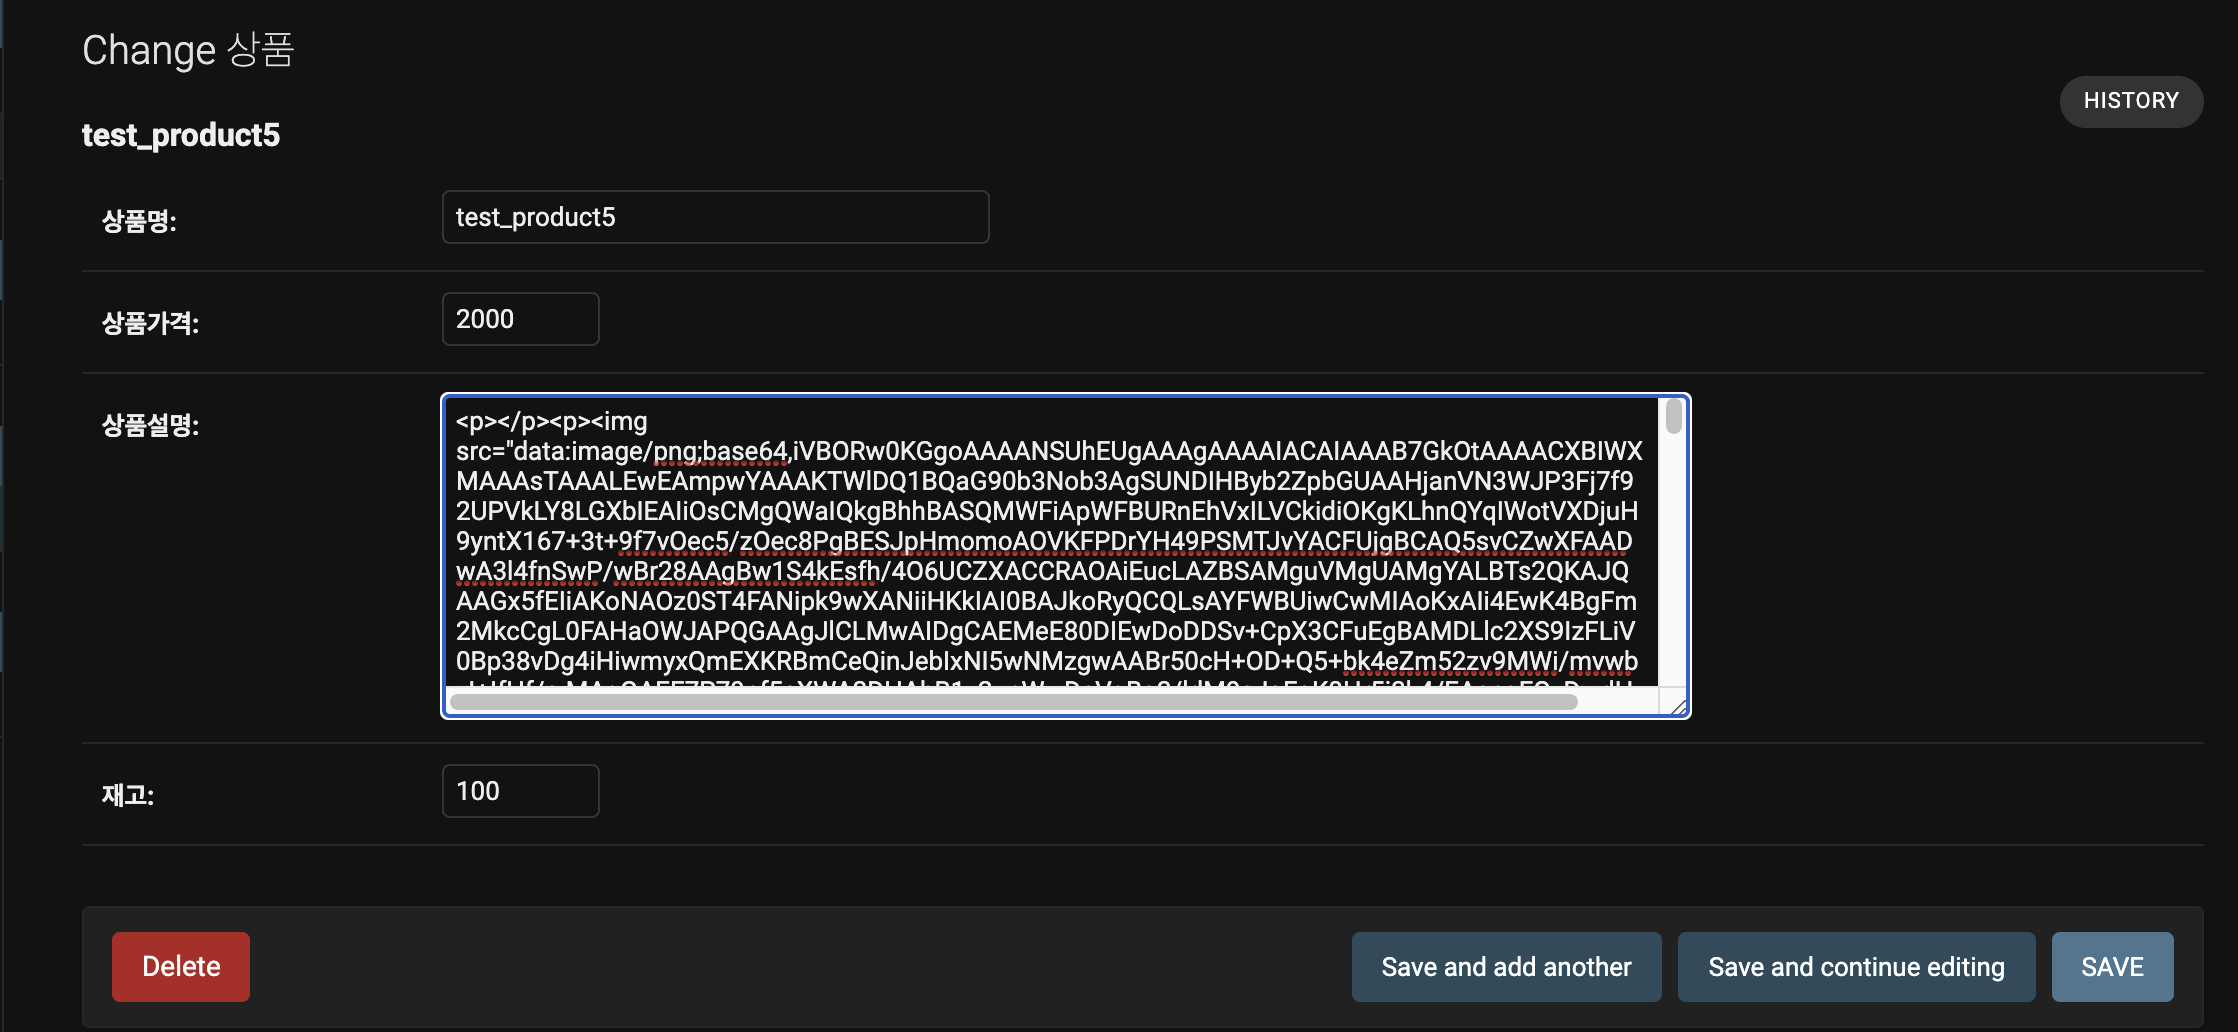
8. img 등록
- WYSIWYG 을 통해서 image 파일 등록
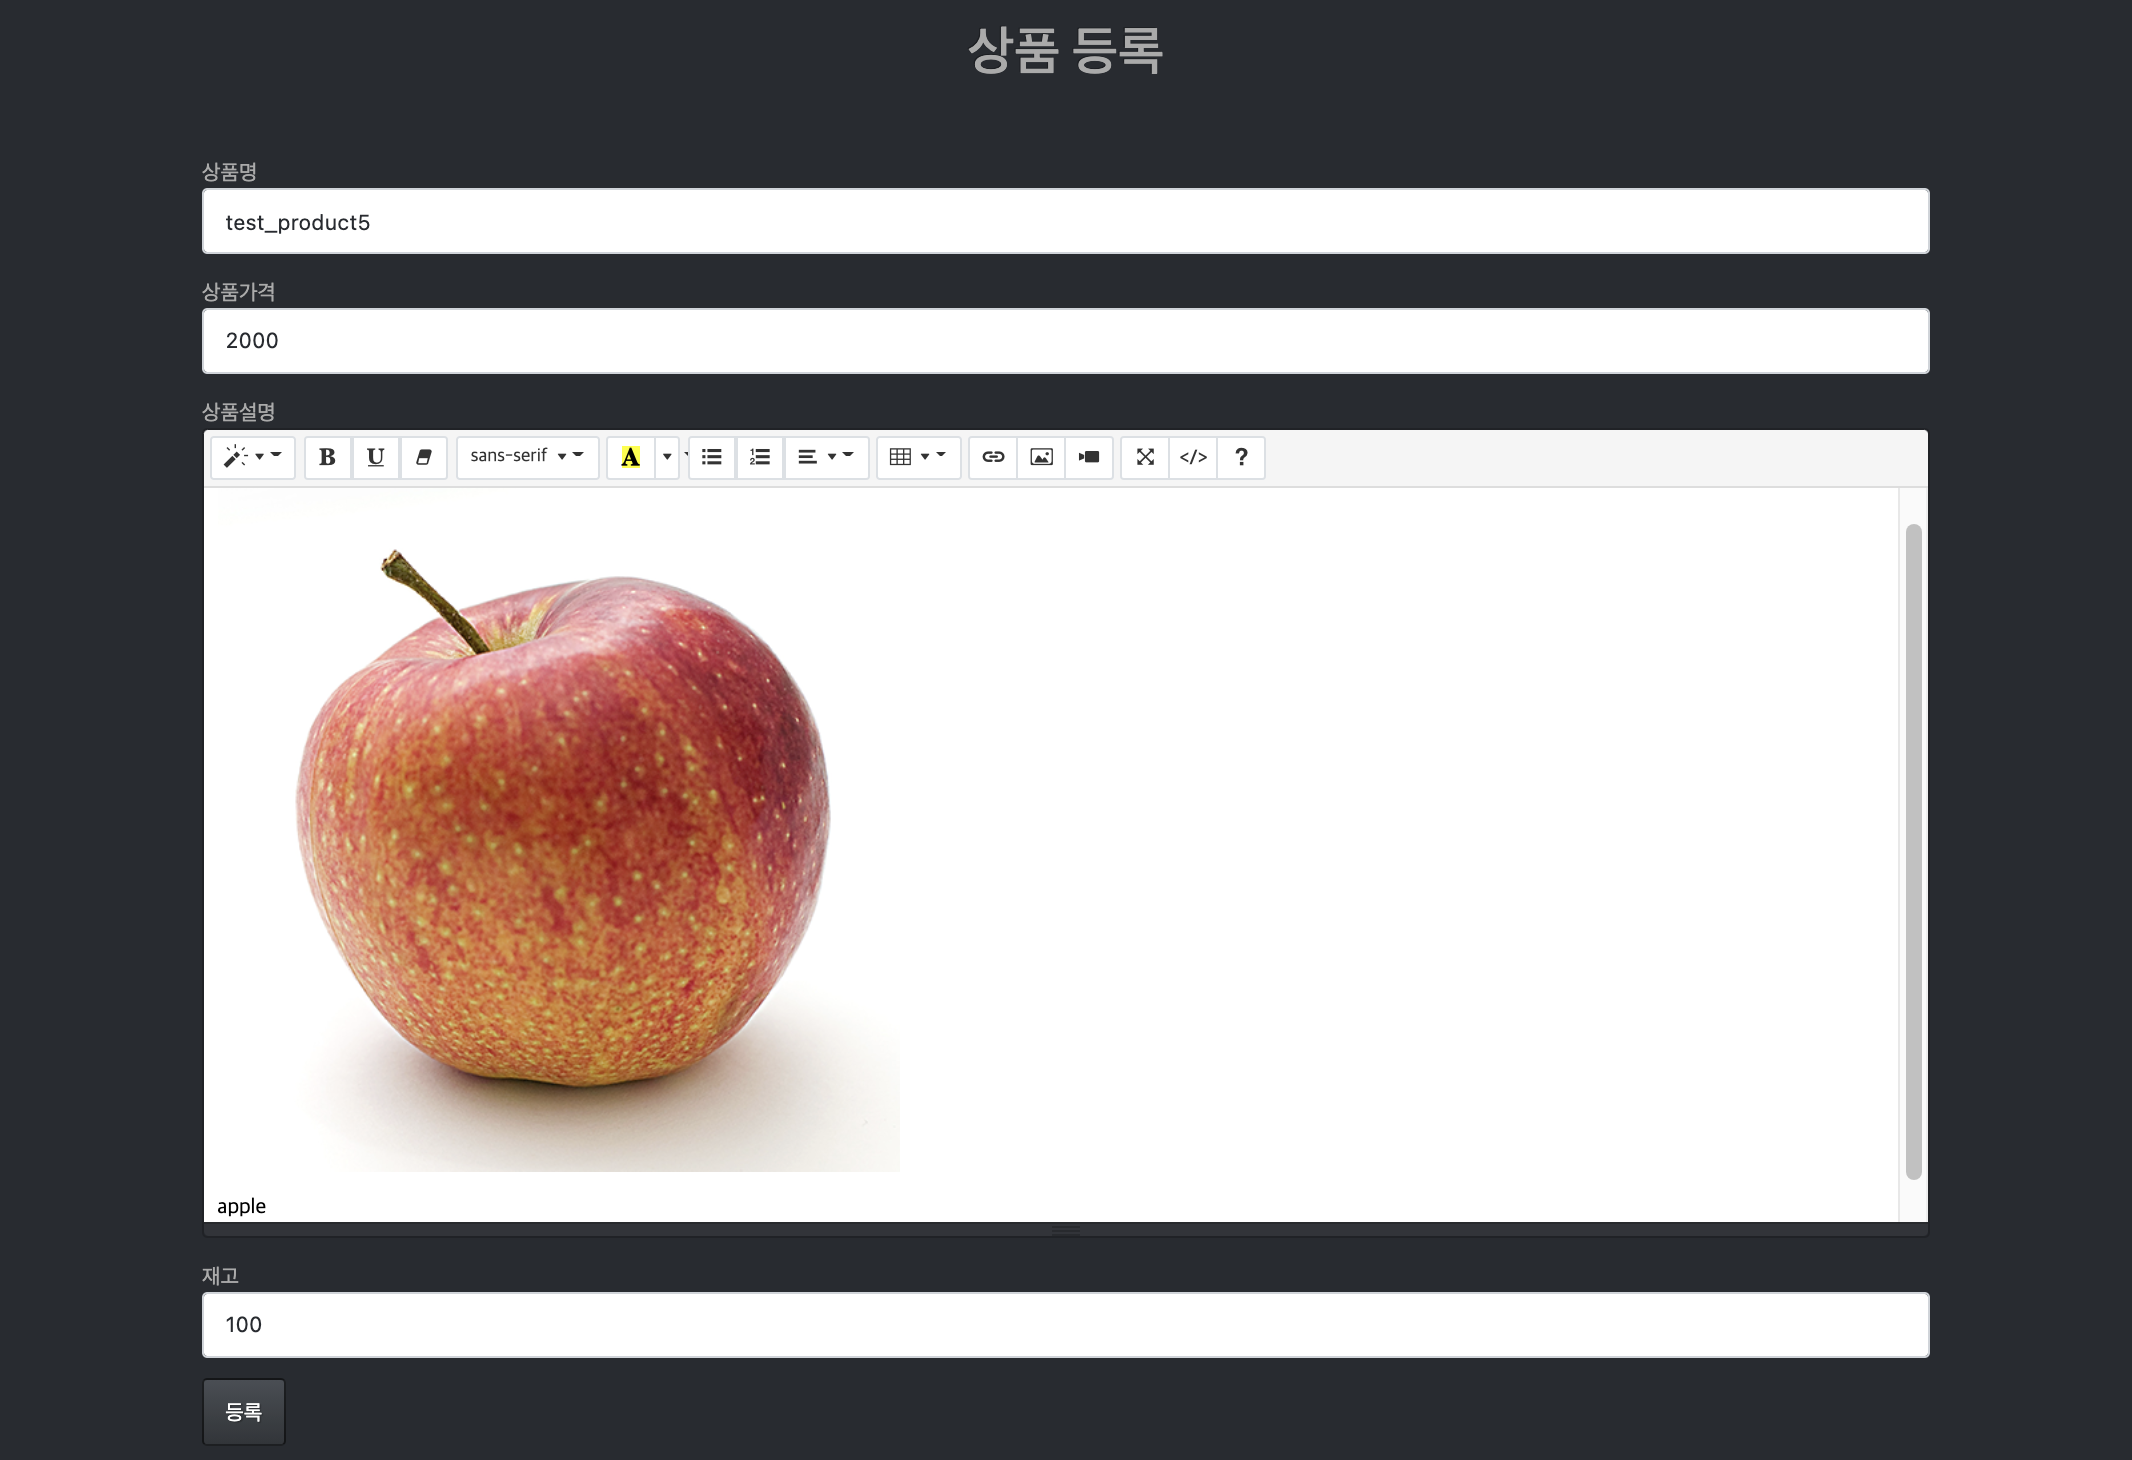
- base 64 형식으로 해쉬화되어 저장됨