스티커처럼 붙어있는 UI Component를 만들기 위해서 css postion 속성을 조사한 내용을 정리하였다.
CSS postion
문서에 요소를 배치하는 방법을 지정한다.
- static: default 속성으로 흐름에 따라 차례대로 요소를 위치하는 방식
- top, right, bottom, left, z-index 속성이 영향을 못 미친다. 아무래도 흐름에 따라 배치하는 속성이므로 흐름을 방해할 수 없는 것으로 보인다.
- relative: 해당 요소가 static으로 배치되었을 때를 기준으로 상대 위치를 지정
- top, right, bottom, left로 지정
- z-index가 auto가 아니면 새로운 stacking context가 생성된다.
- absolute: 일반적인 문서 흐름 외에서, 요소를 제일 가까운 parent 요소에 대해 상대적으로 배치
- parent 요소는 위치가 지정된 요소(relative, fixed, absoule)이거나, 없다면 body이다.
- 보통 parent 요소를 relative 속성으로 지정줄 것으로 보인다.
- top, right, bottom, left로 지정
- z-index가 auto가 아니면 새로운 stacking context가 생성된다.
- parent 요소는 위치가 지정된 요소(relative, fixed, absoule)이거나, 없다면 body이다.
-
fixed: 일반적인 문서 흐름 외에서, viewport 기준으로 배치
- 예예외로 parent 요소가 transform, perspective, filter 속성 중 none 값이 아닌 속성이 있으면 해당 요소를 기준으로 배치한다.
- top, right, bottom, left로 지정
- 항상 새로운 stacking context 생성
-
sticky: 일반적인 문서 흐름에서, 스크롤 되는 parent 요소와
- top, right, bottom, left로 지정
- 항상 새로운 stacking context 생성
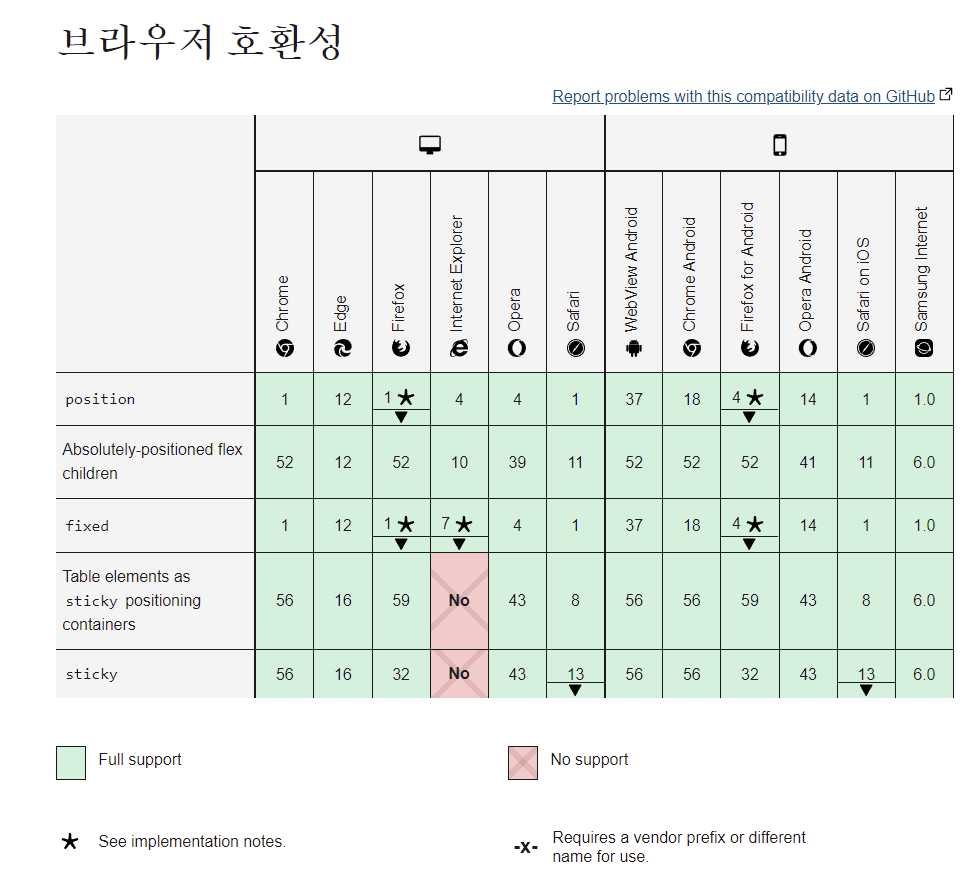
- 그런데 일부 브라우저에서 지원이 안 되는 것으로 보인다.

- 예시
코드 예시로 보면 다음과 같다.
<div id="parent">
  <div id="static">static</div>
  <div id="sticky">sticky</div>
  <div id="relative">relative</div>
  <div id="absolute">absolute</div>
  <div id="fixed">fixed</div>
  <div id="static">static</div>
  <div id="static">static</div>
  <div id="static">static</div>
</div>
#parent {
background: gray;
position: relative;
width: 500px;
height: 350px;
overflow: auto;
}
#static {
background: red;
height: 100px;
position: static;
}
#relative {
background: orange;
height: 100px;
position: relative;
left: 10px;
top: 10px;
}
#absolute {
background: yellow;
height: 100px;
position: absolute;
top: 10px;
right: 10px;
}
#fixed {
background: green;
height: 100px;
position: fixed;
right: 10px;
top: 10px;
}
#sticky {
background: blue;
height: 100px;
position: -webkit-sticky;
position: sticky;
top: 10px;
}

Stacking cotext
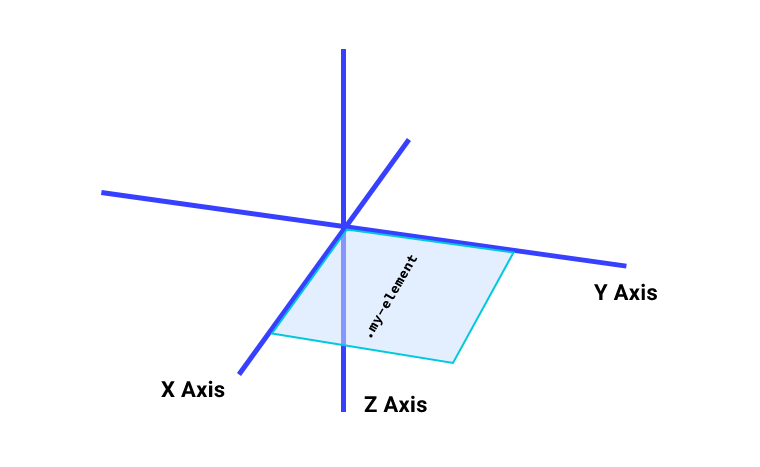
stacking context는 가상의 Z축을 사용한 HTML 요소의 3차원 개념화라고 한다.

-
z-index: 크기가 클수록 앞쪽에 배치되고 작을수록 뒤쪽에 배치된다.
- 다만 z-index로만 context 순서가 결정되지 않는다. stacking context가 계층으로 구성될 수 있어 context의 순서에 따라 다른 결과를 출력할 수 있다.
-
stacking context 생기는 조건
- 문서 root 요소 ()
- position이 absolute, relative이고 z-index auto 아닐 때
- 생각해보면 상대 위치로 배치하는 순간 겹치니까 어떤 요소를 상단으로 배치하냐에 따른 이야기이다.
- position이 fixed, sticky 일 때
- opacity가 1보다 작을 때
- 투명해지면 뒤 요소가 비치는 상황을 떠올리면 된다.
reference
https://developer.mozilla.org/ko/docs/Web/CSS/position
https://web.dev/learn/css/z-index/
Component 구현
relative로 배치할 경우 다른 요소에 따라 레이아웃을 다시 하는 reflow과정이 생길 수 있어 fixed 로 선택하여 구현하려고 한다.
- 주변 요소에 따른 배치를 하거나 겹치거나 하므로 연쇄적 레이아웃이 생긴다.
1. block 선언
styled component 형태로 div tag block을 선언하고 다른 곳에서 재사용을 고려하여 className을 받았다.
interface StickyProps {
  className?: string;
}

const StickyComponent = (props: React.PropsWithChildren<StickyProps>) => {
  return (
    <StickyBlock className={props.className}>
      {props.children}
    </StickyBlock>
  );
};

const StickyBlock = styled.div`
  position: fixed;
`;
2. prop 정의
- 그리고 prop은 top, left 위치를 설정할 수 있게 주었다. 내부에 children compoent를 배치할 수 있게 react prop with children으로 감싸서 받았다.
- right, bottom도 동시에 줄 수 있으면 width, height를 지정한 것처럼 보여서 component 역할을 유지하기 위해 left, top만 주었다.
ex) left:0; right:0;은 width: 100%와 같다고 한다.
interface StickyProps {
  top: number;
  left: number;
  backgroudColor?: string;
  className?: string;
}

const StickyComponent = (props: React.PropsWithChildren<StickyProps>) => {
  return (
    <StickyBlock className={props.className} top={props.top} left={props.left}>
      {props.children}
    </StickyBlock>
  );
};

const StickyBlock = styled.div`
  position: fixed;
  top: ${props => props.top}px;
  left: ${props => props.left}px;
  border: 1px solid rgb(241, 243, 245);
  border-radius: 2rem;
  align-items: center;
  -webkit-box-align: center;
  background-color: ${props => props.backgroudColor || 'rgb(248, 249, 250)'};
`; - Sticky component 상속하여 특정 button 생성
- post 공감을 보이는 좋아요 버튼과 공유 버튼을 나타내는 component에서 sticky를 상속하여 사용하였다. styled() syntax로 상속을 사용할 수 있다. 해당 스타일은 className prop으로 들어온다고 한다.
const PostLikeShareButton = () => {
  return (
    <PostLikeShareStickyBox top={433} left={30}>
      <CircleButton key={1} />
      <CircleButton key={2} />
    </PostLikeShareStickyBox>
  );
};

const PostLikeShareStickyBox = styled(StickyComponent)`
  padding: 0.5rem;
  flex-direction: column;
  @media (max-width: 1024px) {
    display: none;
  }
`;
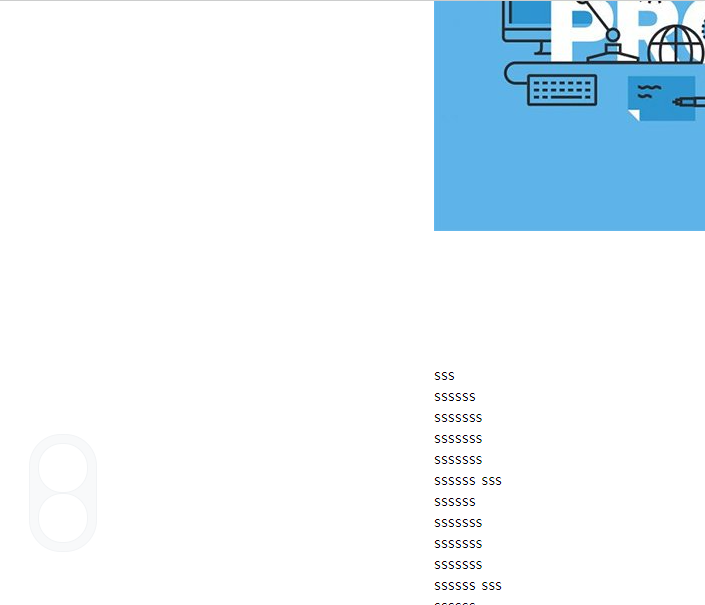
결과물은 아직 내부 버튼을 구현하지 않아 휑-한 기분이다. 구현을 목표로 하는 서비스의 sticky component는 relative로 되어있어 본문 옆에 예쁘게 위치해있다. 그에 비해 fixed는 뷰포트 기준이라 위치를 유동적으로 조정하기는 어려운거 같다.
- sticky 속성이면 일반적인 흐름을 탄다고 해서 좀 쉬울거 같은데... sticky를 사용하고 특정 브라우저에서 다르게 동작하는 방안을 찾아보는 것이 어떨까하는 의문이 들어 조사를 좀 더 해보려 한다.

TODO
- sticky 속성 호환 방법 조사
- 좋아요 rest API
- share link + 이메일 인증 로그인
